diy » Wonderland Kitchen
Browsing Tag

diy

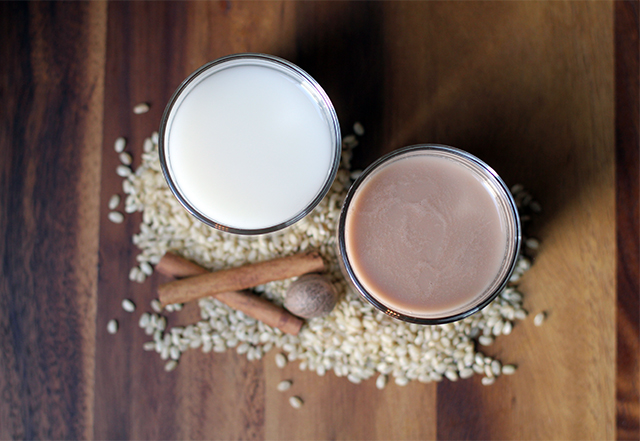
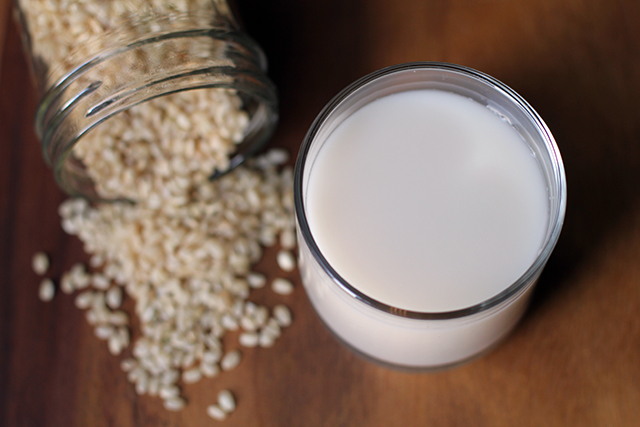
DIY Rice Milk

DIY Rice Milk

When my DIY column over at Serious Eats was still just an idea, my soon-to-be editor encouraged me to go exploring. Sure, homemade soups and baked goods are generally tastier than their store-bought cousins, but what about the stuff it might not occur to many home cooks to make from scratch? As a result, I now find myself wandering the aisles of my local grocery store and pausing to wonder: Hey, could I make that?

Obviously, I’m not alone in this instinct: the internet is filled with inventive cooks trying to hack all kinds of products. Some are motivated by health issues, others by political or environmental concerns. Generally it’s a mashup of all of the above. I enjoy the process, so I make what I can and still buy (without guilt) what I don’t have the time, energy, or ability to produce. And while I can’t walk things all the way back to growing my own soybeans or pasturing a cow on my city lot, it’s been excitingly educational to see how far I can get. Case in point: after the post on DIY-ing Greek yogurt, I had a reader request a non-dairy version of the same treat. I thought I’d get to work on that one this week, but once I started thinking about how I would approach it, I decided I might as well begin by making some non-dairy milks. (Also, I just got a real blender that needed to earn its counter space.)

Of all the many milk alternatives out there, I don’t think I’ll be using rice milk to make yogurt, but this does seem like the one with the most financial bang for the DIY effort. Here’s what I learned:

Soaked vs Leftover vs Over Cooked: If my internet research can be trusted, the most popular way to make rice milk at home seems to be to boil the grains into oblivion with many times the amount of water you would normally use. I’m the odd woman out here because I found this milk to have an unpleasant mouth feel, gummy and almost slimy, even when diluted to match the consistency of the commercial version. (I used a plain version of Rice Dream as my control.) I also tried cooking a 1/2-cup of rice traditionally and then blitzing that in the blender with cold water and straining. That was closer to what I was going for, but still not quite it.

However, uncooked grains soaked overnight and then blended and strained (as if I was making a batch of horchata) got things very close—much lighter and brighter on the tongue. There was something a bit “raw” about the taste that bothered me just slightly, and this version of the milk separated more easily (quickly corrected with a firm shake), but soaking seemed the best method for getting a thin, drinkable “milk” similar to what’s sold in the Tetra Pak at the store. The thicker versions might make for better baking applications (I’ll have to test that down the line), but I wouldn’t want to sip them or pour them on my cereal.

Brown vs White: I tried both kinds of rice and felt a strong preference for brown rice. There was something rounder and more complex about the flavor it brought to the milk.

DIY Rice Milk: Toasted?

Toasting: As I mentioned above, I didn’t like using the overcooked rice, but there was still something off about the raw rice to my palate. I found that a quick toasting (left, above) in a dry skillet hit the happiest medium.

Sweeteners and Flavorings: Commercial rice milk does include oil, which some have suggested adds a creamier mouth feel. I was not a fan, particularly due to the tendency of the homemade milk to easily separate. However, some sweetener and/or flavoring seems needed if it’s going to be used as a beverage. Honey is good, but I like a couple teaspoons of maple syrup even more. White sugar results in a sweetness that’s the closest to the commercial variety. And no matter which you choose, a half teaspoon of vanilla extract is a lovely addition as well.

Do you have a favorite method that I missed or a special flavoring combination? Any tips or tricks you’d recommend?

DIY Rice Milk: Flavorings

The Verdict

Brown rice at my local grocery is selling for 99¢ for one pound, which will make the equivalent of about two and a half 32-ounce boxes of commercial rice milk (retailing for $2.49 each), so—depending on what else you like to add—the economic savings seem obvious. The operation also takes very little active time or effort. When all is said and done, the real question is probably one of taste. While similar to the commercial options, this DIY recipe is not an exact replica of what’s on grocery store shelves. This homemade version tastes more like, well, rice. If you’re looking for a cost-saving option that you are free to flavor to suit your own preferences, however, this is a great way to go.

DIY Rice Milk

DIY Rice Milk
Makes two cups (easily multiplied to match volume needs)

1/2 cup brown rice
2 cups water
Honey, maple syrup, white sugar, or other sweetener to taste (optional)
1/4 teaspoon vanilla extract (optional)
pinch salt

In a dry skillet over medium heat, toast rice grains until fragrant and coloring, stirring regularly, about four minutes. Transfer to a bowl or jar and add 2 cups water. Set aside to soak ten hours.

When soaking in complete, pour rice and water into blender pitcher, add any additional sweeteners and flavorings, and blend at highest setting until rice grains are no longer visible, about 2 minutes.

Using a nut milk bag or similarly fine strainer, drip milk into a clean glass storage jar. Chill rice milk thoroughly before serving. Shake well before each use.

Variations: Add a bit of cocoa powder or cinnamon or nutmeg to the rice and water before blending.

*

This recipe and post were created for my “DIY vs. Buy” column on Serious Eats.

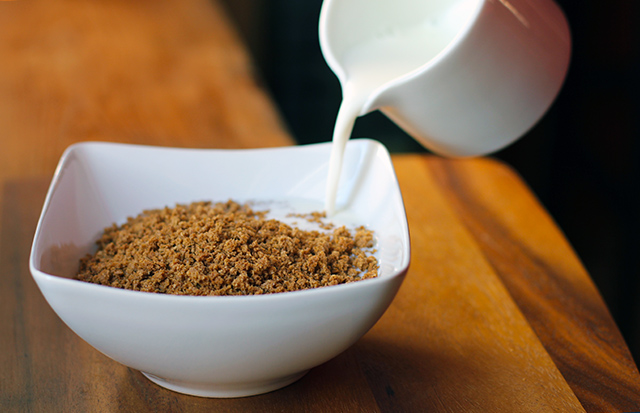
DIY Grape-Nuts Cereal

grape-milk

Born and educated in Ohio as I was, drives made through the beautiful farmlands of nearby Amish communities or miles clocked behind their buggies on nearly empty country roads are scenes I associate with almost all the family car trips of my childhood. I fully acknowledge that it’s a lifestyle I’ve romanticized as a result, but I don’t see the harm if it leads to me watching interesting documentaries on PBS or picking up the occasional cookbook.

My recent nosing around is how I came to own Cooking from Quilt Country by Marcia Adams. It’s a volume packed with simple and hearty Amish cooking, but the first thing I really wanted to try out of the book was the recipe for what Adams referred to as Graham Nuts but most of us know as Post Grape-Nuts. Conveniently, the recipe called for two cups of buttermilk, an ingredient I had in excess after my last post.

When all was said and done, these cereal bits were tasty and characteristically molar-cracking. They were also very, very sweet and flavorful, thanks to the brown sugar, vanilla, and cinnamon. My husband dubbed them “Grape-Nuts meet Cinnamon Toast Crunch” to give you a sense of where things fell. The recipe even suggested serving the cereal with more brown sugar on top! This is awesome on the one hand—and if you are a hardworking farmhand, possibly totally acceptable—but it hardly makes for the kind of super healthy breakfast cereal I equate with the name. So I took to the internet, but found only recipes along a similar theme, some even adding butter and other oils and sweeteners. Not the direction I was looking to go.

For my version, I decided to reel things in. According to the ingredients listed on the commercial Grape-Nuts box, the cereal contained only whole grain wheat flour, malted barley flour, salt, and dried yeast, plus added vitamins and minerals. The taste was only very slightly sweet, but attractive due to its rich nutty flavor. That’s what I wanted to capture. I researched the differences between true graham flour (used in the original Amish recipe) and the varieties of whole wheat flour available on the market, and finally got a firm grasp on where wheat germ and wheat bran fit in on this product span. (If any readers sprout and/or simply mill their own flour, I’d love to hear how this recipe works for you.) I also considered alternative sweeteners that would deliver a less forward flavor punch and more of the slightly sweet malty flavor of the boxed cereal.

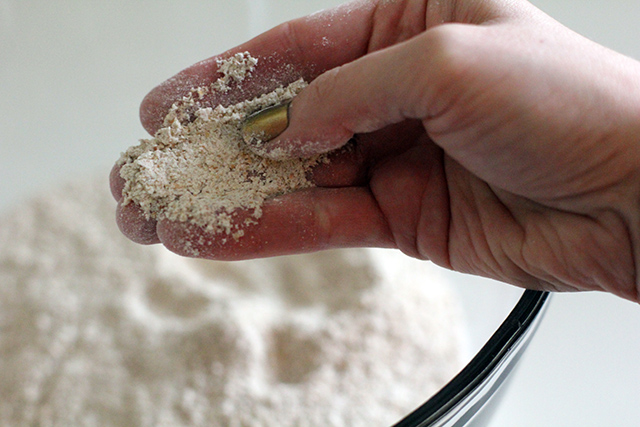
Graham flour

Graham flour offers a coarser grind than traditional whole wheat flour.

Knowing that if I put all my flavor eggs in the wheat basket I needed to make sure I picked a really flavorful starting flour, I decided to go with Hodgson Mill Old Fashioned Whole Wheat Flour, which is on the shelves at my local grocery store and offers a coarser graham flour grind. Depending on what’s available in your area, you could also use a more traditional whole wheat flour or supplement AP flour with appropriate proportions of wheat bran and wheat germ. I also had some barley malt syrup on hand from a recent bagel-making adventure, and discovered that this sweetened the cereal perfectly.

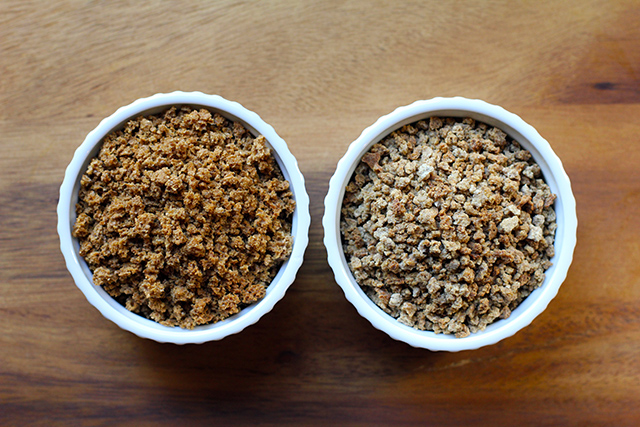
DIY Grape-Nuts: Let's compare.

DIY Grape-Nuts (right) offer plenty of crunch, yet are slightly less dense and less uniform than the commercial option.

In terms of cost, I figure you’re looking at about $2.80 in raw ingredients for seven cups/19 ounces of homemade cereal vs. $3.49 for six cups/24 ounces of the commercial version. While there is nothing challenging about this recipe, it does require some babysitting. The texture of the DIY batch is plenty crunchy, yet slightly less dense and less uniform than the commercial option.

DIY Grape-Nuts Cereal

17.5 ounces (3 1/2 cups) graham or whole wheat flour
1 teaspoon salt
1 teaspoon baking soda
1 1/2 cups buttermilk
1/2 cup barley malt syrup (at room temperature for easier mixing)

Heat oven to 350°F. Oil a 12×16 sheet pan.

In a large mixing bowl, measure dry ingredients and whisk to combine. Add buttermilk and barley malt syrup to the bowl and mix just until all dry ingredients are evenly combined.

Scrape batter out onto the sheet pan and smooth out to the edges as evenly as possible. Bake for 20 minutes, until edges are just browning and puling away from the pan.

Loosen cake with a spatula and flip out on a cooling rack immediately. Set aside to cool about 40 minutes.

DIY Grape-Nuts Cereal: Process

Once cooled, heat oven to 275°F. Working in four or five batches, roughly break up the cake into chunks by hand and then pulse in a food processor until the bits are the desired size.

Spread the bits across two 12×16 sheet pans and bake until completely dry (about 45 minutes), stirring the cereal and rotating the pans every 15 minutes.

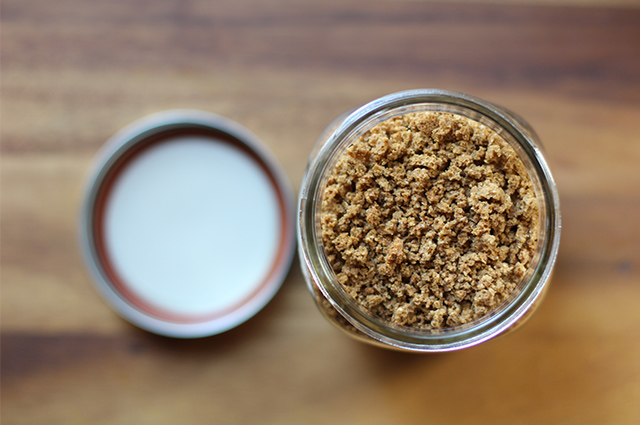
Once dry, turn off the oven, crack the door, and leave to cool. Store in an air-tight container.

DIY Grape-Nuts Cereal: Store in an airtight container.

*

This recipe and post were created for my “DIY vs. Buy” column on Serious Eats.
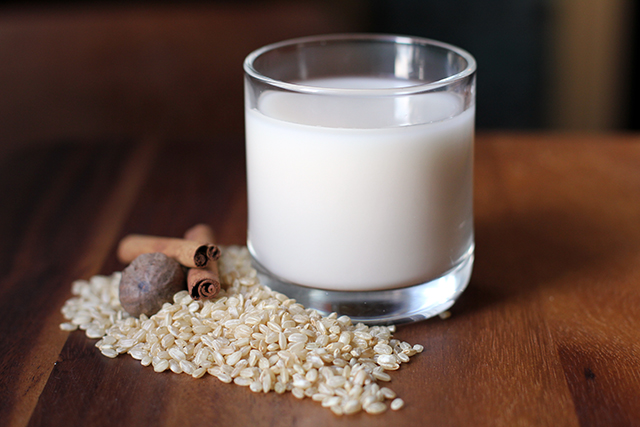
DIY Cultured Buttermilk

DIY Buttermilk

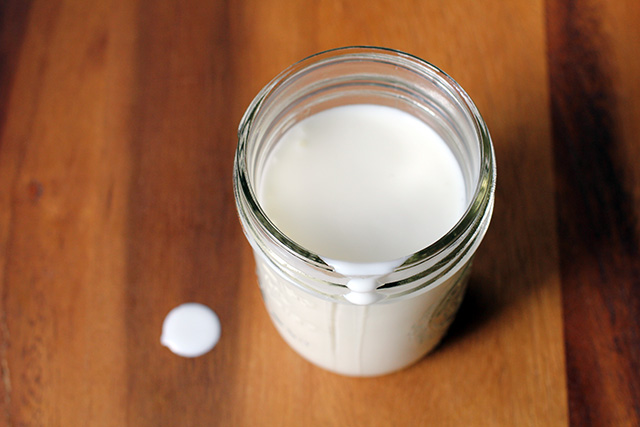
The first time I used a stand mixer to whisk my own butter out of heavy cream, I thought I could spread the results on my bread and bake with them, too, since I also then had just enough of what I thought was buttermilk left over to make a loaf of Irish soda bread. How neatly economical! However, I quickly discovered that what we mean when we say “buttermilk” today is a bit muddled, and that the thin white liquid that remained behind in my bowl after the butter was made was quite different from the type of buttermilk the recipe assumed I was using.

In 2012, when you purchase buttermilk from your local dairy or grocery (that is, if you can even find it—I often discover a carton or two wedged somewhere near the 7,000 flavors of fake coffee creamer) it’s a cultured dairy product that has a tart and slightly sour taste. It is often called for in baking (the acidity activates baking soda), is used to make dressings and sauces, or can simply be drunk by the glassful (though you won’t catch me doing that). Depending on what type of milk was cultured, it could be a creamy full-fat or 2% version (similar to a thin yogurt), or a thinner skim option. Label reading may reveal the addition of other thickeners—especially in the no-fat versions—such as tapioca starch, guar gum, locust bean gum, carrageenan, and/or carob bean gum.

Back in the day, however, buttermilk was a different beast. Based on my reading, it seems the story is this: Raw milk was not churned right away since a certain volume of cream would need to be collected and the milk and cream needed time to sit and separate. Bacteria naturally found in the milk would multiply, the milk would sour, and the “buttermilk” that was left behind after churning was, as a result, not the same as what is left after DIY-ing your own butter from pasteurized and homogenized milk. And neither of these versions is the same as the cultured buttermilk sold commercially at your local grocery today.

To DIY cultured buttermilk, you need a starter that contains the living bacteria required to ferment new batches—similar to making yogurt. If you have access to raw milk, you can start your own buttermilk culture, but you can also purchase freeze-dried starters (either to establish a mother culture or of the direct-set, one-time-use variety) or simply use store-bought buttermilk to culture more milk. You need to make sure the cultures are still active, however. When testing these various options, I didn’t have a problem using my local store-bought option as a starter, but the fresh buttermilk from a local dairy and the freeze-dried starter produced a quicker clabbering and a significantly better tasting buttermilk, in my opinion.

DIY Buttermilk

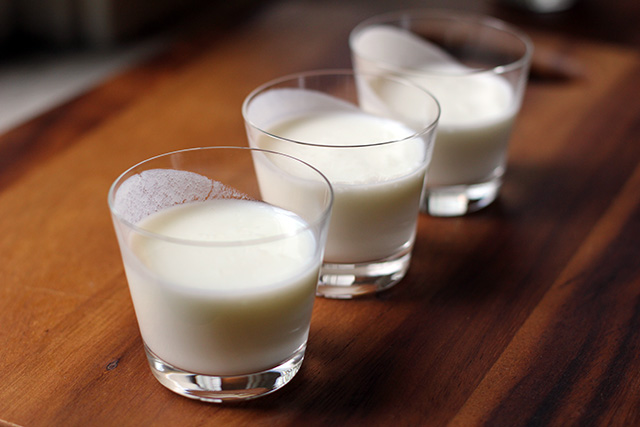
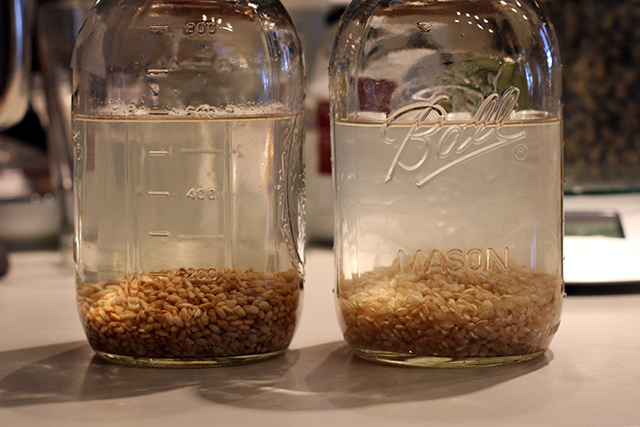
Whole vs 2% vs Skim: As you might expect, the buttermilk gets increasingly thick and creamy as you move from skim (left above) up to whole. Tasting it straight, the tartness of the whole-milk version is balanced by the rich, yogurt-like creaminess of the full fat milk, and that is somewhat true for the 2% version as well. The skim is very tart, thin, and less balanced to me, and I cannot see drinking this or recommending it for use in salad dressing unless personal taste or nutritional concerns make it preferable. For baking applications or in soups, however, any of these could be used.

As an additional experiment, I couldn’t resist attempting to culture some modern “buttermilk” after making butter (sort of the reverse process of old fashioned buttermilk) just to see what I might get. The result was as thin as the skim milk version, but the taste was much more drinkable, the tartness of the beverage balanced in this case not by a creaminess but by a buttery fattiness that seems to still infuse the milk. Just as old fashioned buttermilk is often noted to have contained a few bits of stray butter left behind after churning, the same could be found here. With a little salt, I could almost see sipping it. Almost.

And honestly, with so many jars full of buttermilk, in the end I also figured I might as well make my first batch of crème fraîche. This could be a new addiction.

A word on culturing temperature: Keeping the milk at the required warm room temperature is a challenge in my house now that the colder weather has set in. If the kitchen is warm from a marathon of weekend cooking, it’s not so hard to find a cozy 76°F corner for the bacteria to do their thing, but otherwise I have to get creative. Some cooks have recommended placing jars on top of the fridge or on some other warm appliance or high shelf in the house. I found a kitchen cabinet that runs warmer than the rest of the room due to location and had good luck (if slower clabbering times) at about 70°F there.

The Verdict

I was already a buttermilk fan, not only for baking but also for exceptional homemade salad dressings, but I don’t use enough dairy to make purchasing large volumes of different types worth while. By culturing my own buttermilk, I can have a small yet steady (and additive-free) supply to meet my needs, and use the rest of my weekly whole milk purchase to make yogurt, cheese, or just to lighten my coffee. You can make larger (or smaller) volumes as needed. I use a ratio of one tablespoon starter for every cup milk with reliable results. Unless your culture was not designed to be perpetuated (some freeze-dried options fall into this category), you can reserve a bit of each batch to culture the next. Some recipes indicate that you should pasteurize your milk first or at least warm it to 76°F. I added my starter directly to the cold milk and didn’t have any issues (or extra dishes to do).

DIY Cultured Buttermilk

2 tablespoons buttermilk (store-bought or activated dried starter)
2 cups milk (whole, 2%, or skim, depending on your nutritional needs and preferences)

In a mason jar or other glass container, thoroughly mix the starter and milk. Cover with a coffee filter or piece of cheese cloth (do not seal tightly with a lid) and leave to culture out of drafts at a warm room temperature (between 70-78°F is recommended) until milk has clabbered (10-24 hours).

To test if the milk has thickened, tip the jar slightly. It should move away from the wall of the jar as a single mass. Just as with yogurt making, once the milk sets, it will get more tart the longer you allow the culturing to continue.

Refrigerate to halt culturing for at least six hours. Stir before using.

*

This recipe and post was created for my “DIY vs. Buy” column on Serious Eats.
DIY Oyster Crackers In Your Soup

crackers_top

When I was a kid, the retired couple next door took on the role of surrogate grandparents/babysitters. Their kitchen was where I learned to make a pie crust, their garden was where I saw my first swiss chard in the wild, and their family room was where I caught up on every Matlock and Murder She Wrote episode ever produced. In my memories, there were always great snacks on offer at their house, but even more than the just-baked elderberry pie and sugar cookies, I remember the evenings we spent with a big bag of oyster crackers and a tub of butter. Yes, buttered crackers were what most impressed my seven-year-old self, and I still think back to those cozy, murder-mystery evenings whenever I see a bag.

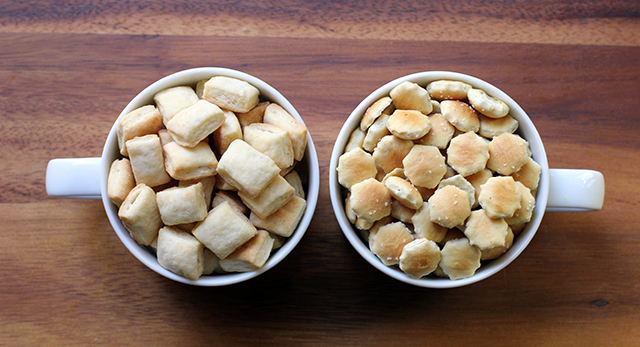
Whenever I actually taste the crackers in those bags these days, however, I wonder if it’s my palette or their production values that have shifted. I don’t remember them giving off the impression of…tissue paper quite so much, dissolving on the tongue like a communion wafer. So this version of the iconic cracker is just a little bit more solid, a little richer, a little butterier–it will stand up to but not overpower your soup.

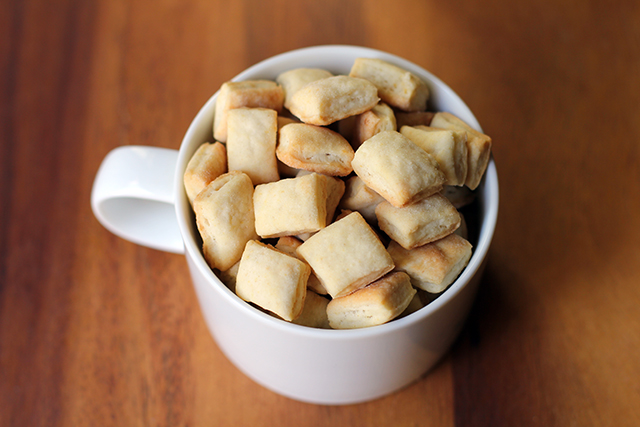
Now, I know what I said about DIY projects and getting the perfect shape, but I think those sesame sticks taught me an important lesson. While there may be cooks out there who can produce a bag’s worth of perfectly shaped and smiling goldfish crackers, I now know that I am not one of them. So while I understand that oyster crackers are often hexagon-shaped, after considering how to produce so many small bites with some degree of efficiency, I decided that rectangles were cute enough. (Approximate) uniformity would be the key to my cracker geometry. Once they poofed up in the oven, I didn’t miss those stop signs of carbohydrate one bit.

DIY Oyster Crackers: The comparison

This is a no-stress side project that could easily be done while your soup is simmering. That said, it gets flour all over the counter and you have to cut dough into small pieces, possibly negating the laid-back, one-pot cooking that is often what makes soup so attractive (to me, at least). As far as economic comparison, I bought a 12-ounce bag for a dollar, so I’m not even going to try and talk cost savings. Ingredient-wise, this homemade version swaps in butter for the palm, canola, and soybean oils in my grocery’s house brand. Beyond that, however, rather than coat the surface of the crackers with an envelope of salad dressing mix, this is an excellent opportunity to make your own signature flavor with seasonings such as dried herbs or black pepper mixed right into the dough. Being a Baltimorean now, I added a teaspoon of Old Bay, and the spike of flavor and heat it brought to crackers seemed to be an especially appropriate pairing with the falling temperatures.

DIY Oyster Crackers
makes about 2 cups

5 ounces (1 cup) AP flour
1 teaspoon kosher salt
1 teaspoon sugar
1 teaspoon baking powder
1 teaspoon (or to taste) Old Bay or seasoning of your choice (optional)
2 tablespoons cold unsalted butter, cubed
1/3 cup cold water, additional as needed

Measure dry ingredients into a mixing bowl and whisk to combine. Next, using a pastry cutter, work butter into the dry ingredients. Finally, add the water and lightly knead the dough just until all ingredients are incorporated. Add additional water by the tablespoon, if needed.

Form dough into a ball, set it on a lightly floured rolling surface, and cover with the overturned mixing bowl. Allow to rest for 15 minutes. Heat oven to 375°F.

When rest is complete, roll dough out on a well floured surface until about 1/8-inch thick. Cut dough into squares or rectangles (or circles, if you’re really willing to put some time into it) that are about 1/2-inch wide. Transfer to a parchment-lined baking sheet and space the shapes out as much as possible.

Bake for about 15 minutes, until crackers are showing color around the bottom edges. Turn oven off and crack the door open about eight inches. Leave crackers inside to cool and continue to crisp, about 30 minutes.

*

This recipe was created for my “DIY vs. Buy” column on Serious Eats.
Choosy Moms Choose DIY (Peanut Butter Edition)

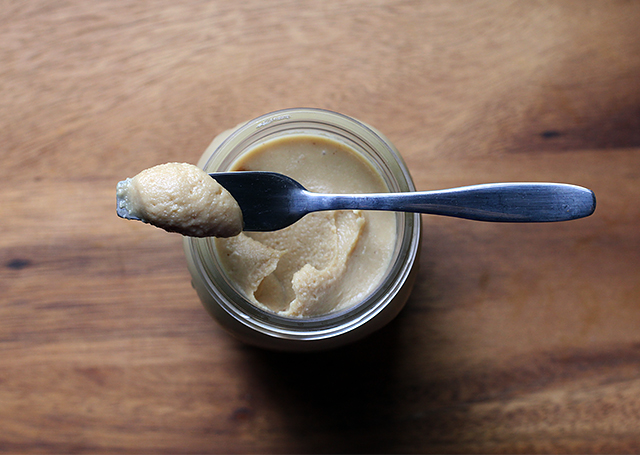
pb_top

Why don’t you just buy it?

Many DIY kitchen projects elicit this reaction, especially once the labor investment is revealed. Even if making your own means the removal of various chemicals, colorings, and preservatives, if it takes you five hours to crack out a bag of perfectly shaped and smiling goldfish crackers, is this a practical application of your time?

There are plenty of DIY projects that aren’t quite so involved, of course. Mayo. Salad dressing. Nut butters also fall into this category, the “recipe” being little more than “put ingredients in food processor and turn on.” Disappointed? I thought not. Even so, you may still be wondering: With so many peanut butter options already fighting for space on grocery store shelves, does it even matter if it takes 15 minutes rather than 15 hours to produce? Why…don’t you just buy it? I’m glad you asked.

Safety: The main reason I even thought to post about DIY-ing your own nut butters was due to the recall of yet another batch of contaminated peanut butter. I put so many more complicated condiments in jars here in Wonderland, it seemed silly not to add this no-brainer to the list.

Control: Peanut butter is one thing, but what about Cashew Almond Butter, or Hazelnut Cocoa Butter? When you DIY, you control type, quality, and quantity of the nuts and oils that go into each and every jar. Salt and sweeteners can be added to suit your tastes and nutrition goals, as well. Now things really start to get interesting.

Cost: When I did the math for Serious Eats, the supplies I was using didn’t dramatically result in cost savings until (perversely) the price comparison climbed into the really pure, “the only thing in that jar is peanuts” kind of $5.99, oil on top spread. To get a pure product and not have to try and figure out how to get the oil reincorporated is worth the homemade time investment as far as I’m concerned, though I did get some colorful tips on how to mix things up.

While considering what type of oil to include in my own DIY version, I wanted to find something that wouldn’t come with environmental concerns and yet still produced an excellent taste and texture. In my experience, using a small amount of coconut oil and then immediately transferring the finished product to the refrigerator results in a butter that holds together without getting oily on top or dry on the bottom before I use it up. I like its texture as well, because it spreads smoothly when totally cold, but isn’t runny on the knife.

DIY Simple Peanut Butter

16 ounces roasted unsalted peanuts
1 tablespoon coconut oil (be sure to use refined oil if a hint of coconut flavor would bother you)
1/2 teaspoon salt or to taste
Honey, agave, or other sweetener to taste (optional)

Place nuts, oil, salt, and sweetener (if using) in the bowl of food processor. Process until nuts break down, stopping occasionally to scrape the sides of the bowl as needed. My food processor likes to fling all the nuts to the sides of the bowl and out of reach of the blades, so I have to invest more time than I’d like scraping them back off until things get going. Using enough nuts to mostly fill up the processor bowl helps alleviate this issue.

DIY Peanut Butter: Processing

Continue to process until peanut butter reaches desired smoothness. Taste and adjust salt and sweetener as needed.

Due to the heat of the processing, the butter should pour easily into a clean container but will achieve a firm yet creamy consistency after chilling. Cover with a tight-fitting lid and store in the refrigerator to prevent separation. (I like Mason jars for this, of course, and am really loving the plastic storage lids)

*

This recipe was created for my “DIY vs. Buy” column on Serious Eats.
Real Deal: DIY Greek Yogurt

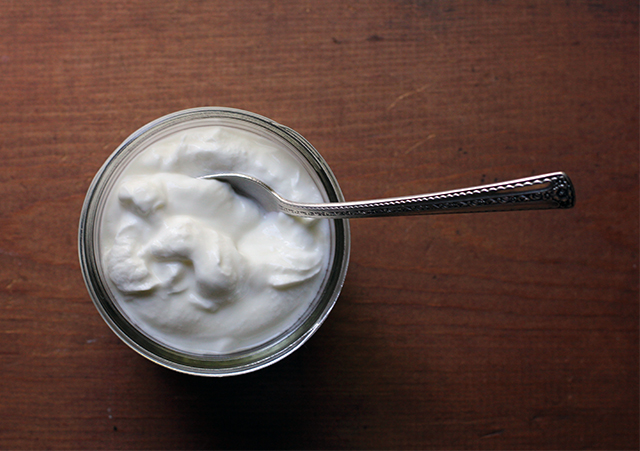
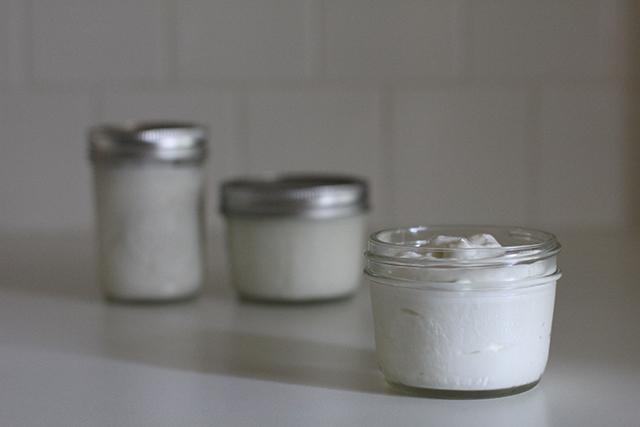
greek-yogurt-finished-two

I am not generally a “doing the math” kind of person. As a result, I end up economizing in weird ways. I’ll stand in a grocery store aisle agonizing over the cost/benefit of something based on price and ingredients and brand, maybe saving a dollar here with a bulk buy or spending a dollar there to get the organic option. Later that night, however, I won’t think twice about going out to dinner with my husband, making the utility of the entire exercise somewhat questionable.

When it comes to the Greek yogurt consumed in our house, however, I finally did all the math for my latest Serious Eats column, a process which left me convinced I no longer knew how to divide. I was shocked by what kind of savings I might manage in a given year if we could get off the little cups with the parchment paper tops and start making it all at home. But I was going to need a much more streamlined process than my yogurt-making appliance filled with little glass jars would allow, so the research began.

Producing yogurt at home may not be quite as simple as making ice cubes, but it’s not much more complicated than measuring liquid into containers and letting it reach or hold certain temperatures. Ultimately, if you can stir and read a thermometer, you have all the skill needed to culture your own. The process takes a lot of hands off time, however, so if you’re more accustomed to the immediate gratification of cookie baking, this may take some getting used to.

DIY Greek Yogurt: strained and portioned

A few things to consider before you begin:

  • Both the milk and the starter you select will impact the taste and consistency of the final product, and you will likely need to experiment some before you hit on your ideal ingredients. If you’re using fresh yogurt as your starter rather than freeze-dried, be sure to use a plain variety that contains live and active cultures.
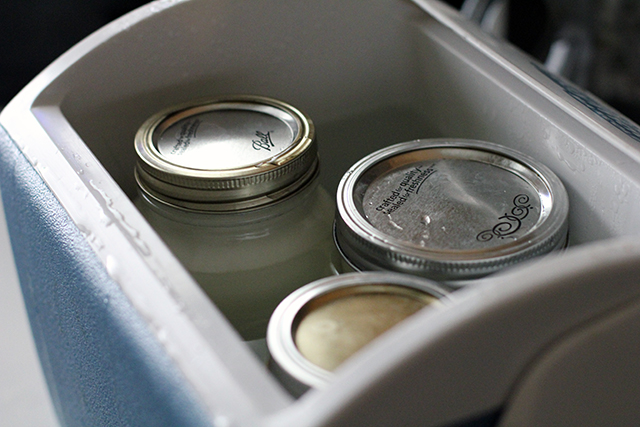
  • There is more than one way to incubate at 110°F—from a simple thermos to a special appliance specific to yogurt making. I found the method below (which I first learned about here) to be both simple and consistent, but you may want to experiment and use the process you find most efficient.
  • A useful trick I picked up from Alana Chernila’s The Homemade Pantry is to incubate a small portion of the milk and starter mixture in a 1/2-pint jar alongside the two filled quart jars. Reserve this smaller portion to culture your next batch of yogurt. If using the small cooler method outlined below, you can keep this smaller jar above the water line by setting it on top of a narrow, empty 1/2-pint jar.

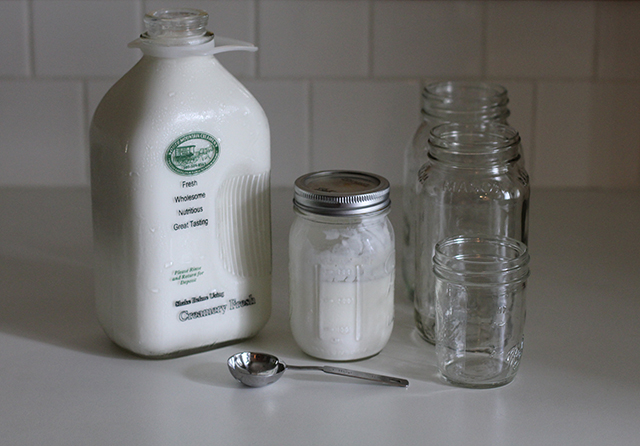
DIY Greek Yogurt: ingredients

DIY Greek Yogurt
8 cups milk
4 tablespoons plain yogurt with live and active cultures or freeze-dried yogurt starter

DIY Greek Yogurt: hot and cold

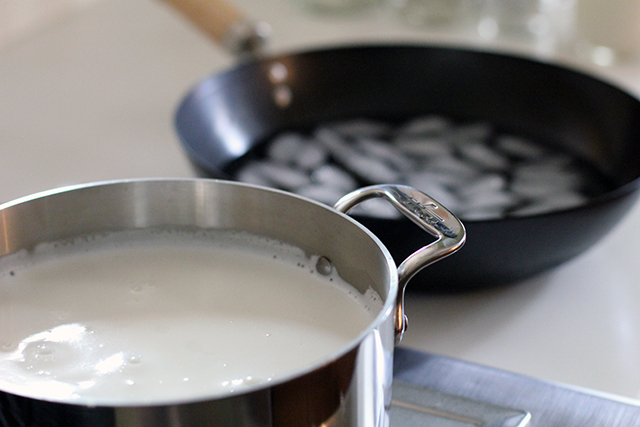
In a heavy-bottomed pot over medium heat, bring milk to 180°F, stirring regularly to prevent scorching.

Once milk has reached temperature, allow it to cool to 110°F (place pot in an ice bath to speed cooling, if desired). When milk has cooled, add yogurt to the pot and whisk thoroughly to combine.

DIY Greek Yogurt: incubation

Pour milk and starter mixture into two quart-sized jars (and smaller 1/2-pint, if using) and screw on lids. Place them in a small insulated cooler and fill with 120°F water until jars are submerged nearly up to their lids. Close cooler and leave in a draft-free, undisturbed place for six hours or until desired tartness is achieved.

When incubation is complete, remove jars from water bath and place in refrigerator for at least six hours to halt culturing and set yogurt.

DIY Greek Yogurt: straining

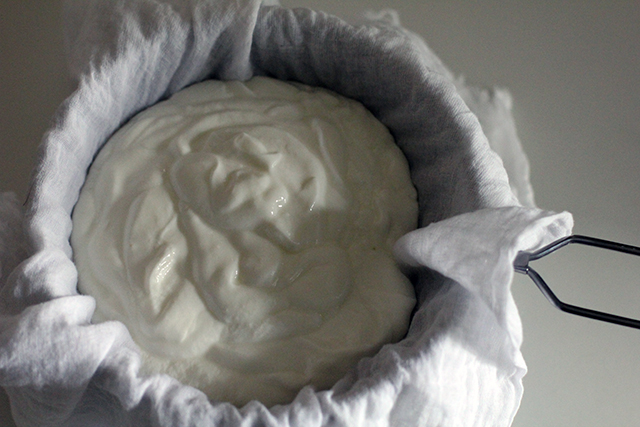
At this point, yogurt may be eaten, but to achieve a Greek-style consistency, it will need to be strained. Place a fine mesh strainer over a bowl and line it with two layers of cheese cloth. Spoon yogurt into lined strainer and allow to drain for two hours or until desired thickness is achieved.

Transfer yogurt to a storage container and refrigerate until needed. Remaining leftover whey (approximately two cups) may be reserved for another use if desired.