“Would you tell me, please, which way I ought to go from here?”
“That depends a good deal on where you want to get to,” said the Cat.
“I don’t much care where–” said Alice.
“Then it doesn’t matter which way you go,” said the Cat.
― Lewis Carroll, Alice in Wonderland
Brian and I named Wonderland Kitchen a couple of years before the site actually launched, dreaming up the idea on a long car ride to Vermont. After listening to me consider the possibility of maybe trying to make some time to write just a little about food, and for longer than was reasonable, my husband pulled the trigger for me and made a gift of the URL. Still, I dragged the idea in and out of my mental cupboard like a stock pot for quite a while longer, considering how it looked on the stove but never lighting the gas. Then one weekend in September of 2011, we drove to Vermont again. I didn’t take it as a sign so much as the chance to turn down the volume on the day-to-day grind just long enough to really evaluate my priorities. Taking time and attention away from building the career I already had as a music journalist seemed silly, yet I couldn’t shake the desire to diversify. By the end of that trip, the first iteration of Wonderland Kitchen had been built, and it’s been a motivator in the kitchen and a creative space I’ve been able to grow in ever since.
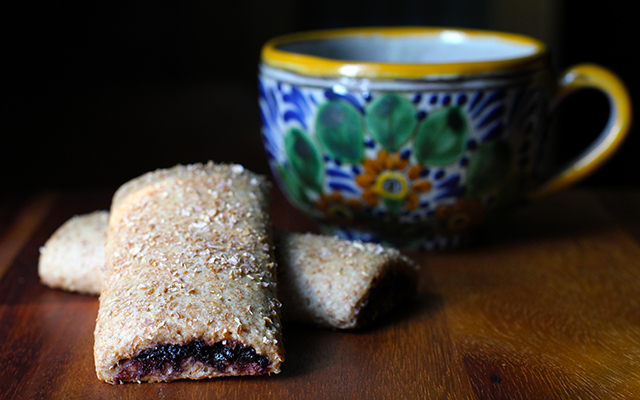
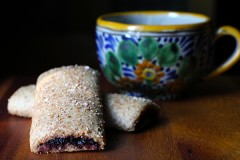
In all that time, I never really considered “where it was all going” because I was simply enjoying the ride too much to care. Yet as we mark this first year with a site upgrade thanks to Brian and the love and supportive appetites of many friends, the road keeps unspooling before us. One addition to these pages that I’m excited to debut today is that I’ll be contributing a bi-weekly column to the killer online food destination Serious Eats. For each piece, I’ll pull out my clipboard and do my DIY best to hack everything from breakfast cereals to Ho-Hos, though minus dyes, artificial flavors, and ingredients I cannot pronounce. To kick things off, I offer you a cereal bar that’s a far less sweet but much more elegant option than you’ll get in a box (recipe below, but spiffy presentation over on Serious Eats). Have a product you’d like me to take a crack at in a future column? Please let me know.
Who wants an unbirthday gift from Wonderland?
***Contest has closed; congrats to the winners!***
More than anything, I’m grateful to every reader for taking the time to meet up with me in this space over the past year. My awesome mother-in-law (Hi, Barbara!!) has sewn a couple lovely cloth market bags for me that I’d like to give away to celebrate. As there are only two, if you’d like one, please leave a comment below and let me know what projects you’re working on…or what ones you just might start any day now. If I only get two responses, well, everybody wins! Otherwise, I’ll use one of those neat random number generators. Please be sure to include an address in the email field that I can use to contact you and get your shipping address.
And now, here’s the first DIY vs Buy:
DIY Blueberry Cereal Bars
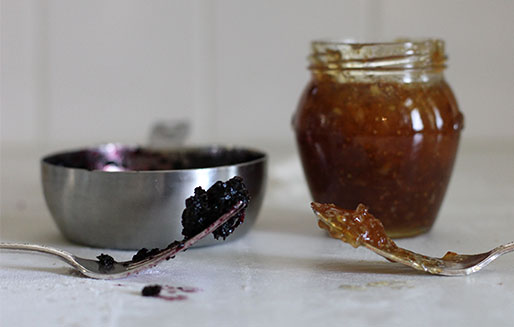
Note: If you would prefer not to make your own filling out of dried fruit, a thick fruit spread such as fig is a workable substitute. In my testing, commercial jams and preserves proved too runny when baked and would not be recommended.
makes 12 bars
1 hour active
2 1/2 hours total
For the Dough
5 ounces (1 cup) all-purpose flour
5 ounces (1 cup) whole wheat flour
1 ounces (1/4 cup) rolled oats
1/2 ounce (1/4 cup) wheat bran
2 1/2 ounces (1/3 cup packed) brown sugar
1 teaspoon baking powder
1/2 teaspoon salt
1/4 teaspoon cinnamon
4 tablespoons/1/4 cup cold unsalted butter, cubed.
2/3 cup whole milk
1 teaspoon vanilla extract
For the Filling
1 cup dried blueberries
1/2 cup water
For Assembly
1 egg white plus 1 teaspoon cold water, for wash
4 tablespoons wheat bran, for sprinkling
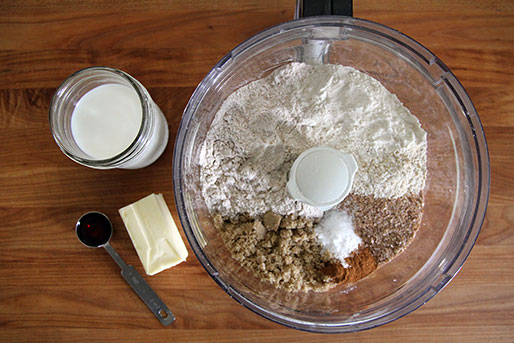
Measure flours, oats, wheat bran, brown sugar, baking power, salt, and cinnamon into the bowl of a food processor and pulse until ingredients are mixed and oats broken down. Add butter and pulse until pieces resembles coarse meal.
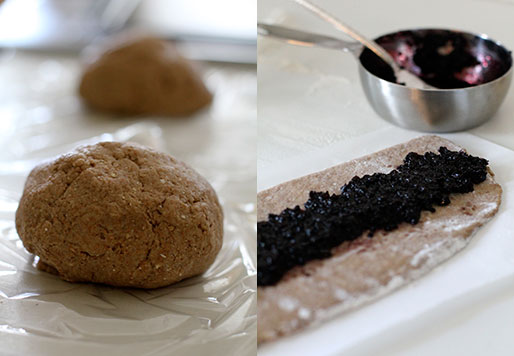
Stir vanilla into the milk and, with processor motor running, add liquids to the dry ingredients in a thin stream. Continue processing until dough comes together. Divide into two equal portions and flatten into 1/2-inch discs. Wrap each portion in plastic and refrigerate until firm enough to roll out, about two hours.
Meanwhile, make the filling. Place dried fruit and water into a small, heavy-bottomed sauce pan and bring to a boil. Reduce heat and simmer gently, covered, for 20 minutes, stirring occasionally. Transfer fruit and water to a food processor and process until broken down into a rough purée. Transfer filling to a bowl, cover, and refrigerate until needed.
When ready to assemble the bars, heat oven to 350°F with rack in the middle position.
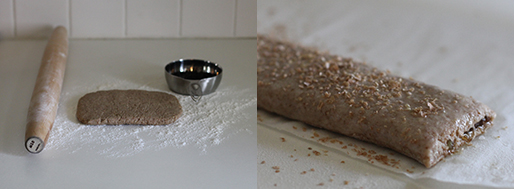
Flour rolling surface and place one portion of the dough in the center. Flour top of dough and roll into an 8×12-inch rectangle, turning regularly to prevent sticking. Cut dough in half the long way to create two 4×12-inch sheets. To aide with filling and shaping the bars, place each strip of dough on a similarly sized piece of baking parchment before proceeding. Brush any excess flour from dough surface with a dry pastry brush.
Down the 12-inch center line of each piece of dough, spread an even 1-inch strip of filling (about 2 1/2 tablespoons). Using the edge of the parchment as an aide, fold one long side of the dough over the filling, covering it slightly more than half way. Brush a light coating of the egg wash over the remaining edge and, again using the parchment to help keep things even, fold the second dough edge so that it overlaps the first by 1/4 inch. Press gently to seal and flip the bars over so that they are seam-side down. Cut each log into three 4-inch portions.
Brush any excess flour from dough surface with a dry pastry brush. Coat each bar with a thin layer of the egg wash and sprinkle tops with wheat bran. Leave bars on parchment strips and transfer to baking sheet.
Repeat steps five through seven with remaining dough and filling. Bake bars for 16-18 minutes, until just golden. Transfer to a wire rack until cool. Store at room temperature in an air-tight container.

