sides » Wonderland Kitchen
Browsing Category

sides

Spring Brunch Brilliance: Porch Waffle Party

Dark chocolate dipped clementines with sea salt

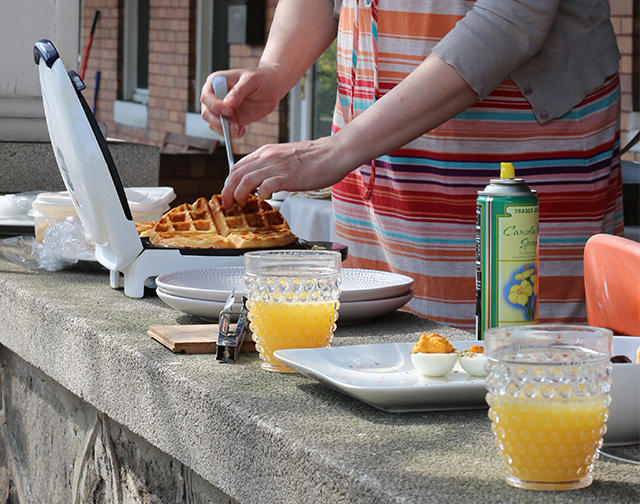
We stored up quite a bit of cabin fever here in Baltimore this winter, so as soon as the weekend temperatures began to touch the 70s, the neighbors fell into action to get our notoriously non-rowdy porch parties back on the social calendar. While these affairs normally allow us to enjoy some wine and dessert as a summer day cools its way into evening, we traded down to morning so that we could trade up to waffles and mimosas for this season’s kick-off event. After an unfortunate electrical fire, we were also inaugurating our resident waffle mistress’s brand new iron, so it was perhaps best to get things going outside—just to be safe.

Waffle with butter

How do you like to top your waffles?

Mistress of the waffle iron

Mistress of the waffle iron

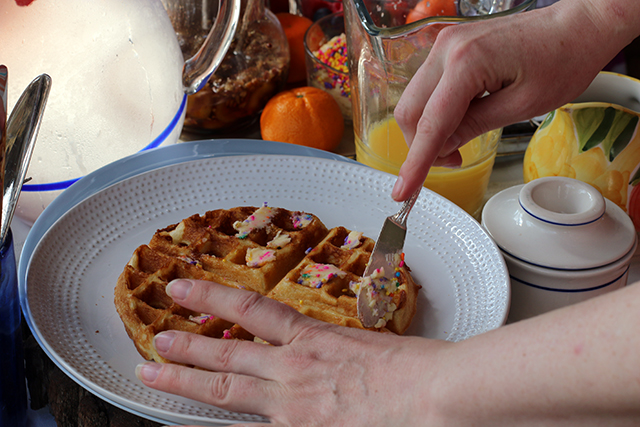
As the waffle production was very well in hand, I volunteered to provide some toppings. For once in my life I went simple, and I’m going to tattoo this lesson on my forearm so that I can enjoy making party food more and stress about it less. Whip a little honey into softened butter and add a tablespoon of sprinkles: perfect for the kids and takes about 5 minutes. Fry some banana slices in butter, deglaze the pan with bourbon, and stir in some pecans and a good dose of maple syrup: well worth the 20 minutes for the adult joy. A little fresh whipped cream and some mixed berries finished off the tray for the waffle traditionalists in the crowd.

Waffle topping table

Honey butter with sprinkles

Honey butter with sprinkles

With so little prep work to do, I also took a stab at some dark chocolate-dipped clementine slices with sea salt that had caught my eye on Pinterest. I don’t do a lot of fancy chocolate work, so I wasn’t super confident when I started the project, but this proved just as brainless as the rest. A 1/2 cup of good dark chocolate, a bit of shortening if you have some on hand to smooth things out, and then just melt it together in a double boiler, dip the slices, and rest them in rows on a parchment-lined cookie sheet. Finish a row and run a pinch of salt flakes down the line. Repeat. The only hard part was setting them down instead of eating them. I popped them in the fridge overnight, covered well in plastic wrap once the chocolate set hard. The next day I just had to pile them in a bowl.

For those who would like a little more detail in their recipes:

Honey Butter with Festive Sprinkles

Banana Bourbon Maple Syrup

Dark Chocolate-Dipped Clementine Slices with Sea Salt

How do you like to top your waffles and pancakes?

Having My (Double Chocolate) Cake (and Nibbling at the Edges)

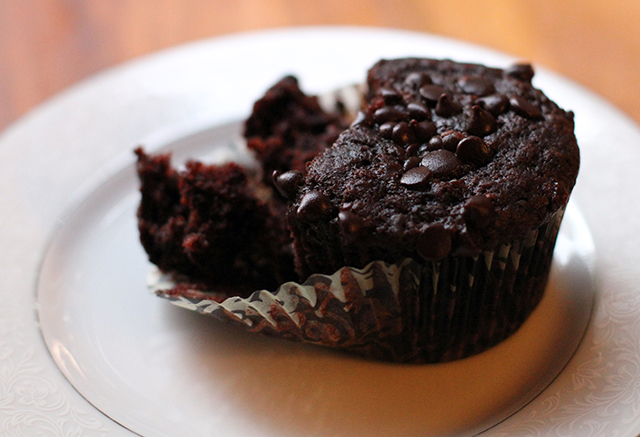
Double Chocolate Muffins

I mentioned that it might be a little quiet in Wonderland this summer, but even I wasn’t expecting the silence to be so drawn out. And the longer the gap, the harder the re-start. I have a small stack of draft posts, but I haven’t been quite sure how to put what was holding me back into words even for myself. Today, it was put into pictures with way more power that I ever could have generated.

That’s not to imply that I have lost interest in researching or testing recipes, writing about or photographing meals (and eating remains a central priority in my daily life, one way or another). There is something so energizing about sharing food with friends and family around the table; the fact that in 2013 you can tweet a quick picture of that meal to a recipe creator and invite them in for a virtual “thank you” bite is a very sweet icing indeed.

While I’m nowhere near as serious as some, I find blogging to be a beautiful final step in documenting what was once ephemeral women’s work. For me, however, it often comes at a cost in lost attention to the present.

With that in mind, I’ve dedicated myself (unconsciously at first, I’ll admit) to being a consumer of internet knowledge this past month rather than a contributor to the volume, and it’s been grand. I’ve actually finally made a lot of the dishes on my “To Try” Pinterest board! Here’s a round up of some of my new DIY discoveries and recipes. Yes, I fully grasp the ridiculousness of expressing anxiety about the volume of internet content in a new post published on the internet. It’s hard to let go of the dopamine hit that is online (over?)sharing, for sure.

Wonderland on Instagram (clockwise from top left): citronella soy candles; natural lipstick; cocoa butter lotion bars; double chocolate muffins.

Wonderland on Instagram (clockwise from top left): citronella soy candles; natural lipstick; cocoa butter lotion bars; pre-bake double chocolate muffins.

I’ve also turned the kitchen over to crafting some DIY beauty products. While I recently figured out that my body is much too irritated by the baking soda in this deodorant recipe (who knew?), I’m loving these other Wellness Mama concoctions:

While you’re at it, take a second to make a little olive oil candle scented with the essential oils of your choice to keep you company in the bath. I rigged this wick with a bit of picture frame wire.

evoo candle

Now that I’m almost all the way back on this pony, more on other projects, such as DIY bug spray and citronella soy candle making to come…

DIY Cornmeal from Popcorn (Plus Cornbread)

DIY cornmeal

There is perhaps no recipe I’ve investigated that is as simple and yet as fraught with passionate argument regarding the “correct” way to make it as cornbread. First, you have the ostensibly North/South difference of opinion on the use of sweeteners, and then further debate among the Southerners themselves ratcheting up tensions even further. Discussions regarding the ratio of flour to cornmeal, the number of eggs, and what kind of fat needs to be in the pan can then further exacerbate hostilities. And if you’re not already using a cast iron skillet to bake yours, you best duck when those who are come near.

I mention all this at the outset because adding to this battle is not my purpose in making cornbread this week. I’ve provided a simple recipe that suits my preferences, but I want to leave all the controversy aside (and the box of Jiffy mix as well) in order to highlight the great taste provided by freshly milled cornmeal.

With all the chatter out there concerning wheat, gluten, and human nutrition, there’s been a lot of discussion in food circles regarding sprouting and soaking grains and milling flours at home, but I haven’t taken that very far. And grinding my own cornmeal was something I hadn’t even begun to consider when I first stumbled upon discussions of how great the freshly milled variety made your cornbread. As cornmeal has a habit of sitting around in my pantry, the chance to DIY this product certainly intrigued me.

Type of Corn

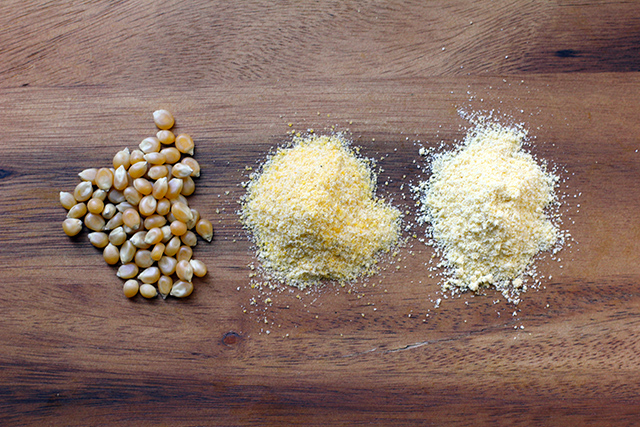
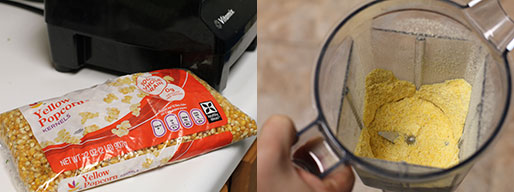
While I’ve seen a few references to drying and milling sweet corn, most cornmeal is made from the starchier field (a.k.a. dent) corn. Not having the space to grow and dry my own corn (not to mention that it’s March), the option that really lit my eyes up, however, was one I already had in my pantry: popcorn.

Equipment Needed

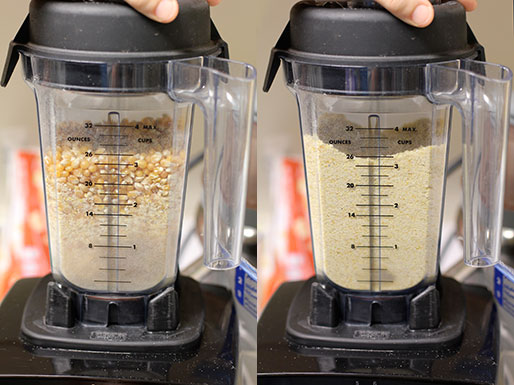
DIY cornmeal: Processing

DIY cornmeal: Processing

If you haven’t already invested in a grain mill (there are many types, from hand crank to KitchenAid attachment to sophisticated powered appliances), Vitamix benders are also powerful enough to grind dried corn into a beautiful yellow cornmeal if that’s an option for you. Even still, working in small batches is necessary so as not to overheat the meal during grinding. There are also people out there who use their coffee or spice grinders for small batches.

As a precaution, you may wish to sift the meal after it is initially ground to check for missed larger pieces, but I didn’t find this strictly necessary.

While I haven’t had the chance to try a proper grain mill yet, another tip I read frequently during my research is that if you’re having trouble grinding the corn–especially using a hand-cranked mill–try running the corn through on a very coarse setting and then grinding it a second time to get a finer grain. Less wear on your machine and yourself!

Whole Kernel vs. Refined/Degerminated

“Why not just buy cornmeal?” you may be asking yourself. Much of the conversation online surrounding growing and grinding your own corn concerns GMO and pesticide concerns. Beyond that, however, is the fact that many types of cornmeal available on grocery store shelves have been refined/degerminated. By removing the germ from the whole grain, the product will have a longer shelf life. However, that oil-rich and vitamin-packed germ is also where a lot of the nutrition lives. Grinding your own meal means you can preserve the whole grain aspect with less worry about rancidity. Simply grind meal as you need it, or store small batches in your freezer for maximum preservation.

Do you grind your own cornmeal or other grain products? What method do you use?

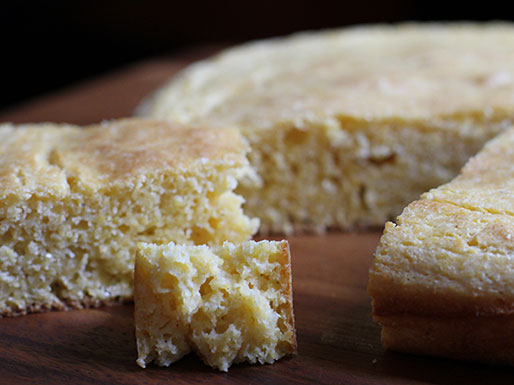
Cornbread:crumb

The Verdict

A 32-ounce bag of popcorn netted me 5 1/2 cups cornmeal, though grinding the amount needed just before use is recommended for maximum freshness. The special equipment is the real barrier to entry here–and some of it is frankly quite expensive. The richer corn flavor and overall freshness definitely provide a big push towards investing in an appliance that can get the job done. Beyond that, however, unless you’re buying in bulk, it seems that the popcorn vs cornmeal price points are negligible. I remain on the fence about adding grain milling to my regular kitchen tasks, and would love to hear more about the pros and cons from those of you who are doing it.

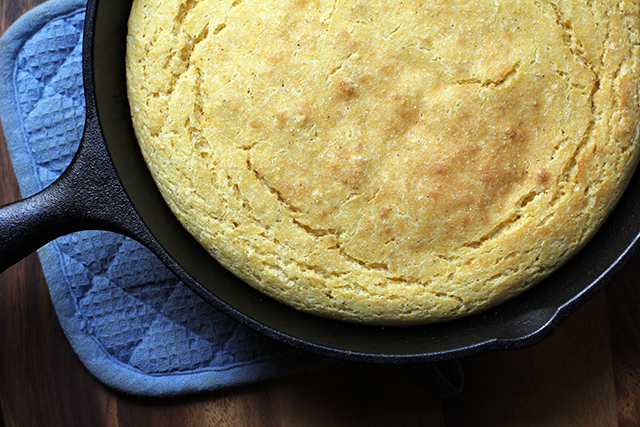
Cornbread

DIY Cornmeal Cornbread

DIY Cornmeal Cornbread

9 ounces of popcorn, ground into meal (alternatively, use 1 1/2 cups store-bought cornmeal)
1 cup AP flour
2 teaspoon baking powder
1 teaspoon salt
1 egg
2 cups buttermilk
2 tablespoon shortening, bacon drippings, or high heat oil

Place 10-inch cast iron skillet in oven on middle rack and heat to 450°F.

Meanwhile, whisk cornmeal, flour, baking powder, and salt together in a large bowl until evenly incorporated. In a medium bowl, lightly beat egg. Stir in buttermilk.

As oven nears 450°F, remove pan and add fat, allowing it to heat and coat the bottom.

Add egg and buttermilk to dry ingredients and then pour in excess fat from skillet as well, quickly mixing all ingredients together until just wetted. Pour batter into skillet and return to oven, baking 20-25 minutes, until top is just golden and edges have pulled away from the side of the pan.

Cornbread is best served warm fresh from the oven.

https://wonderlandkitchen.com/2013/03/diy-cornmeal-from-popcorn-plus-cornbread/

*
This recipe and post were created for my “DIY vs. Buy” column on Serious Eats.

A Feast of Vegetables, or How Not To Waste Your CSA

csa_top

Here in Wonderland Kitchen, some weekends are all about the big projects–sourdough bread baking or cheese making or pickled vegetable canning. Other weekends consist of 105-degree-shellacked days in which the majority of the “cooking” is devoted to sitting in the direct blast of the window air conditioner and contemplating the meal plan that requires the least amount of time out of its cool company. As you have probably already guessed, today I’m going to tell you about the latter.

I wasn’t going to post about any of these “recipes.” In fact, I was thinking of taking a couple weeks off–a little summer vacation–during which I would consider what this blog might best become as it cruises into its one-year anniversary. But then I started reading. The publication of The Locavore’s Dilemma seems to have sparked an entire series of forehead-slapping columns mirroring the same basic argument: namely, that people like me–a woman who finds a weekly trip to the farmers market both gratifying and the best way to feed myself and my family–well, we’re all just deluded, bougie romantics.

Now, that may be so, but it might also be that my compatriots are reading labels and health reports and making some decisions about what goes in their mouth. I’m not sure what big box grocery store the authors of The Locavore’s Dilemma shop at, but it must not be the ones I have access to in which the “real food” section is but a small slice of the proceedings and much of what’s on view is so waxed it’s sticky or so wilted that it’s yellow before I even get it home. I’ll take some grit and bugs and seasonal selection over all that, thanks. I don’t deny that I buy citrus year round, and I don’t feel the need to hide my avocados under my toilet paper, either, but I do directly trace the high percentage of plant consumption in my diet to the fresh and varied and delicious produce provided by the local farmers who sell to me here in Maryland.

The even stranger criticism I’ve read in these anti-CSA articles this week (I have not read the book itself) is that the system is “wasteful” because homemakers can’t manage the volume of food received, either when they travel and need less, or when they have guests and need more. This leads me to believe that the authors neither cook efficiently nor share with their friends and neighbors.
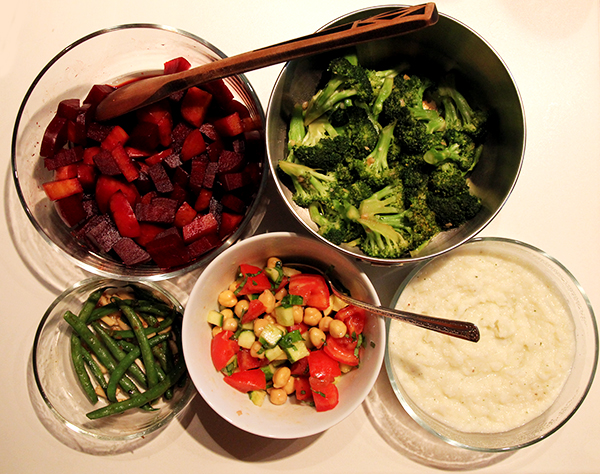
CSA Feast

Still, I’ll admit that I was feeling kind of down about the whole thing when I read this inspiring article about cooking to eat rather than following a recipe in order to cook. It both encouraged me (this is how I’m trying to teach myself to work more creatively off-script in the kitchen, even without any formal training) and reminded me why the CSA system works for me. It challenges me to use what I have while allowing me to keep it simple, because fresh quality produce usually doesn’t need much help.

Anyway, at the end of last season, I ran my own numbers and found that the CSA and farmers market supply chain worked for my health (mental and physical), my social life, and my pocket book, so we’re still committed. The measures of good economics and fair trade may vary, I suppose. Yesterday, I pulled our “harvest” out onto the counter and came up with a Saturday night feast that proceeded from planned to plated in well under an hour. I don’t claim any of these are actual recipes as much as they represent one set of solution-instructions to the problem that was dinner. How are you solving these equations lately?

Cold Tomato and Cucumber Salad

Cold Tomato and Cucumber Salad

1 small tomato, cored, seeded, and diced
1 small cucumber, from a friend’s garden, must be eaten already
1/2 cup leftover chick peas
4 basil leaves from the garden, shredded
Several generous drizzles of that fancy herbed olive oil we got for Christmas last year
salt to taste

Place all in a bowl, toss.

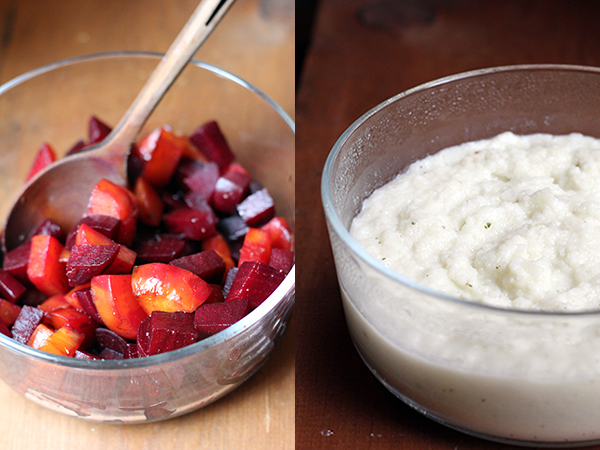
Creamed Kohlrabi

1 large bulb kohlrabi, peeled and cubed
1 large garlic clove
2 T buttermilk
1 tsp pesto from our friends a few blocks over
salt

Boil kohlrabi until fork tender. Drain and place vegetable and garlic in the bowl of a food processor and process until broken down. Add remaining ingredients and pulse a few more times to combine. Taste and add salt as needed. Serve hot.
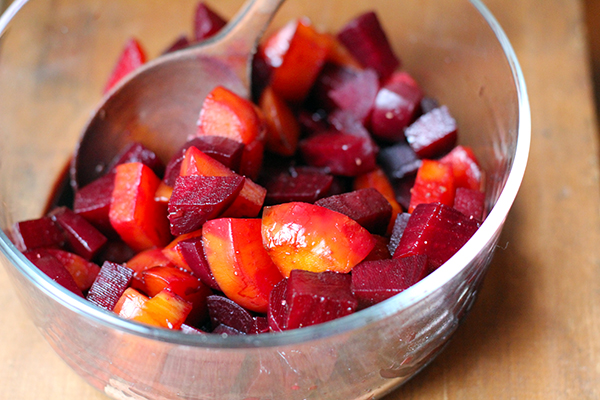
Beets in a Thyme Balsamic Glaze

Beets in a Sweet Thyme Balsamic Glaze

5 small beets, various colors, boiled, peeled, and cubed
4 T balsamic vinegar
4 thyme springs from the garden
1 tsp. honey

Place vinegar, thyme, and honey in a small sauce pan. Simmer until honey is dissolved, thyme is fragrant, and vinegar is somewhat reduced. Remove thyme sprigs and drizzle sauce over beets. Sprinkle dish with salt and pepper and toss to coat.

Five-Minute Broccoli

1 bunch broccoli, rinsed and cut into florets
1 T olive oil
2 cloves garlic, minced
3 T vegetable broth
Drizzle of tamari

Heat olive oil in a skillet and saute garlic and broccoli just until vegetable is bright green. Add broth and cover pan, steaming until vegetable reaches desired level of crispness. Drizzle with tamari to finish.
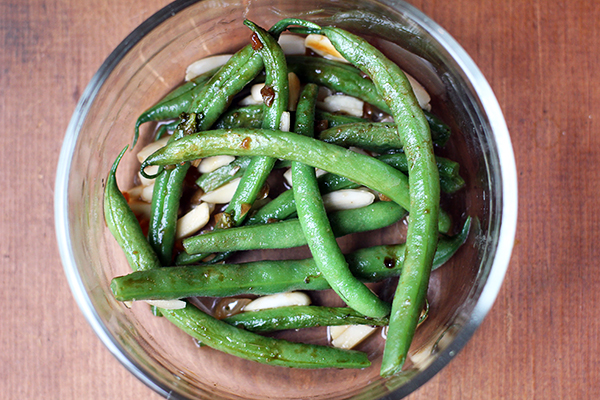
Backyard Garden String Beans

Backyard Garden String Beans + Party

12 green beans that are worth cooking because you grew them yourself, cleaned
sprinkle of lime juice from that lime you zested yesterday
Last of the sliced almonds still hanging out in the pantry

In the pan you just cooked the broccoli in, still coated with broth and oil and garlic bits, saute the beans. Wash remaining dishes and wipe counter off while they cook. When ready, sprinkle beans with almonds and lime juice.

Open some wine. Invite the neighbors over. Enjoy your feast.

Adventures in CSA Vegetable Preparation

haul_061612

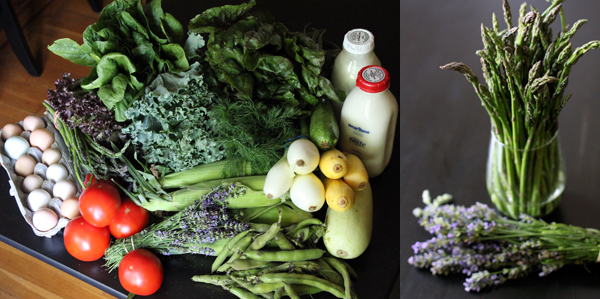
This week’s farmers market/CSA haul is smaller than it might first appear, I suspect, piled, as it is, with leafy greens of all shapes and types. Regardless of its feeding power, however, it was definitely not going to all fit in the ‘fridge in its current state. Measures had to be taken.

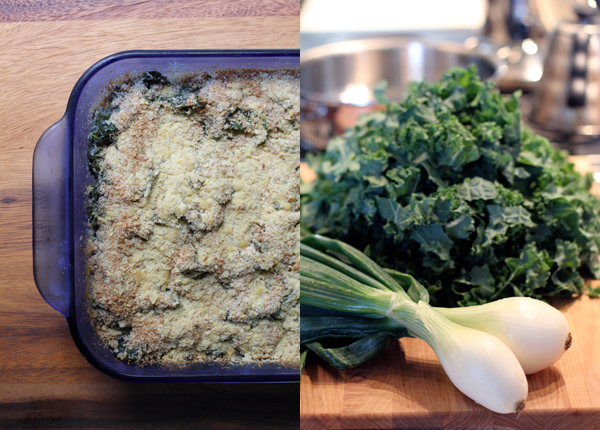
Kale and I are historically wary kitchenfellows. I like it, but I don’t like the aerobic workout that chewing it usually involves, even when massaged with salt for raw salads (though I am impressed that leftovers will hold up for days that way). I was set to show it who was boss and pulverize the kale down into a pesto again this week, but then I caught this recipe for a vegan kale gratin that actually wasn’t playing a false game of “Look mom, I’m eating my vegetables!” by drowning everything in cheese sauce. I did make a traditional cup of béchamel sauce, but stuck with the suggestion for the nutritional yeast topping. And amazingly, when it was sauteed and baked, I had managed to get all that kale into a 9×13 Pyrex baking dish.

Healthy Kale Gratin

Healthy Kale Gratin
Based on the vegan recipe by Rosewater and Thyme

2 T olive oil
1-2 bunches kale, rinsed, deribbed, and chopped (my CSA bunch was very large–probably about 8 packed cups even after chopping)
2 large spring onions, chopped, including light green part
2 garlic cloves, minced
1 cup béchamel sauce (your favorite recipe, or see below)
1/2 cup whole wheat bread crumbs
1 T nutritional yeast

Pre-heat oven to 400F and butter a 9×13 baking dish.

Heat olive oil in a deep saute pan and cook onions and garlic until softened. Add kale. Cover with a lid and cook until wilted, stirring every couple minutes. When kale is ready, add béchamel sauce to the pan and stir until all vegetables are evenly coated. Transfer this mixture to the prepared baking dish and evenly distribute. Top with bread crumbs and nutritional yeast, and bake until top is lightly browned and kale bubbling, about 18 minutes.

Béchamel Sauce

1 T butter
1T cornstarch
1 cup whole milk
salt and pepper to taste
couple scratches fresh nutmeg

Melt butter in a sauce pan and whisk in cornstarch. Gradually add milk in several portions and bring to a simmer, whisking continuously. Cook gently, reducing heat as needed, until thickened. Remove from heat and reserve.

Tomato, Fava Bean, and Spring Onion Pizza

Tomato, Fava Bean, and Spring Onion Pizza

This week’s shopping also included a new-to-me find: fava beans. If I had known about the labor-intensive processing required before they could be consumed, I might have skipped this purchase (or purchased more than just the scant quart box, which reduced to a mere half-cup of beans), but in the end this was probably the most manageable introduction. Once I had peeled them out of their pods and blanched them out of their exterior jackets, I suspected that my paltry net pile could be applied to little more than salad sprinkling. But I was already making dough (more on that later this week) and I was stocked with tomatoes and chopped spring onion greens (from the kale dish above), and suddenly pizza seemed like a great idea. Was there cheese in the house? There was cheese. We were all systems go.

Some notes when making pizza with fresh tomatoes that will allow you to avoid a soaked crust. 1) As early in the process as you can, slice and drain the tomatoes well (go ahead and give them a gentle squeeze over the sink) and then lay them out on a few layers of paper towels. Blot the tops with a few more. Leave them that way until ready to top your pie. 2) Pre-bake your shell for 8 minutes in a very hot oven (450F) before adding your toppings–on a pizza stone if you have one, or some unglazed clay tiles from Home Depot. Set the dough on a piece of parchment to make moving it around a snap (no sticking and safe to touch when hot), and use the back of a cookie sheet as a makeshift pizza peel. 3) Be conservative in the amount of topping (but not the type!). Return to oven and bake until crust has browned and cheese is bubbling and golden.

With a few grinds of red pepper flakes, this was a lovely and light use of fresh spring ingredients. There was no one but me home to enjoy it. #plusandminus

A Roasted Potato or Two (Fermented Mustard Edition)

potato_top

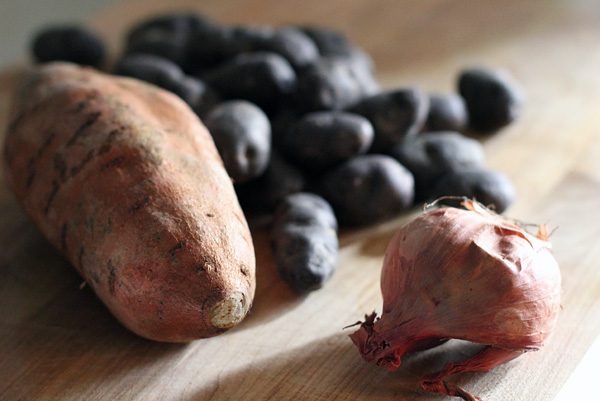
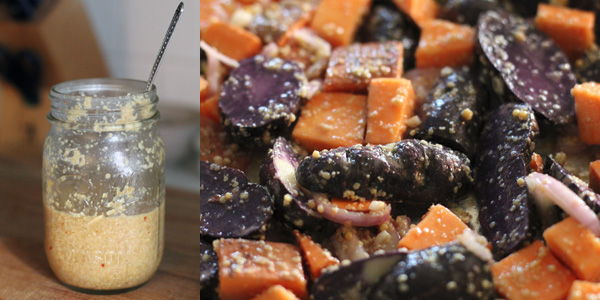
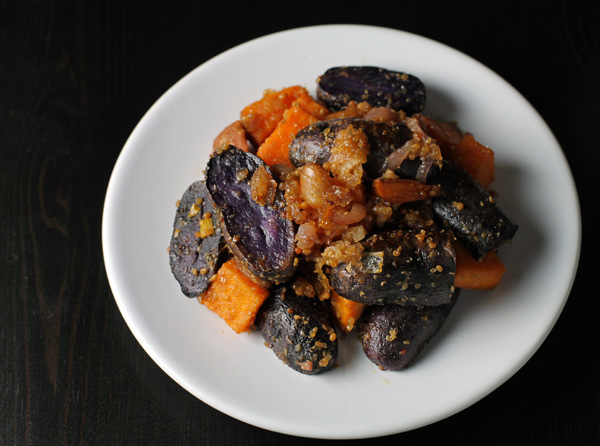
This roasted potato recipe has been copied, adapted, and praised all over the internet, so I wouldn’t have bothered posting about it myself if I hadn’t also been looking for the chance to tell you about this fermented mustard. Of course you may use store-bought (I’ve always made it that way before) and it is a very satisfying way to quickly prepare simple red skinned new potatoes (I promise you), but this variation–a unique mustard, a brightly colored mix of purple fingerling and sweet potatoes, plus a few sliced shallots–made it an especially fun dish.

Mustard Spiked Roasted Potatoes

The fermented mustard was a recent kitchen experiment of mine inspired by this post on Well Preserved. We’ve been enjoying the resulting condiment on sandwiches and such, but even though I’m guessing the high-heat roasting removes some of the health benefits that regular eaters of lacto-fermented foods are looking for, it was still a great tasting (and great smelling while roasting) addition to this dish. The shallots turned sweet in the oven, some a little crispy (these bits I hoarded for myself), and the color in the potatoes deepened into rich jewel tones.

The verdict: a perfect side for a summer cookout.

Mustard Spiked Roasted Potatoes

Mustard Spiked Roasted Potatoes
My take on an already popular recipe further inspired by Joy the Baker

1 quart purple fingerling potatoes, halved
1 sweet potato, cubed to a similar depth
2-3 shallots, halved and sliced
1/2 cup fermented mustard or whole grain Dijon
2 T olive oil
2 T melted butter
3 T lemon juice
Salt and pepper to taste

Line a rimmed baking sheet with foil and preheat the oven to 425°F while you prepare the vegetables and dressing.

Whisk together mustard, olive oil, melted butter, lemon juice, salt, and pepper. Place cut vegetables into a large bowl and drizzle with the dressing, tossing until pieces are evenly coated. Spoon the vegetables out onto the baking sheet, leaving any excess dressing in the bowl. Roast for 25-35 minutes–stirring half way through–until the potatoes have browned and are easily pierced with a fork. Enjoy with the picnic fare of your choice, or straight out of the bowl when no one is looking.