eat me » Wonderland Kitchen
Browsing Category

eat me

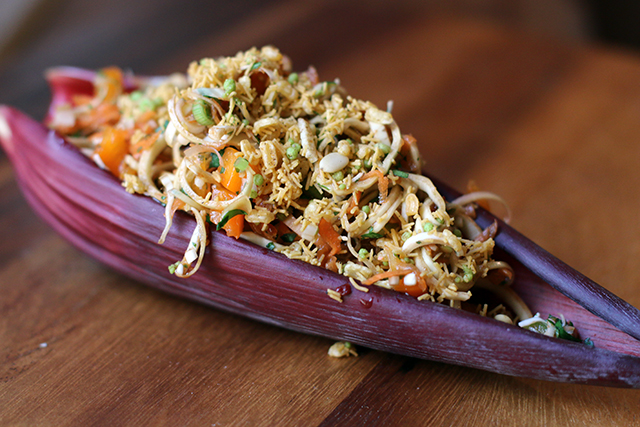
What Is That? Banana Blossom Salad

Banana Blossom Salald

I think there is nothing about New York I miss more than the amazing markets that populated my former neighborhood of Jackson Heights. Korean, Chinese, Japanese, Thai, Indian, Indonesian–if you needed exotic produce and quirky packaged goods, this was the place you came. If you needed anything more authentic, you could catch a flight just a few blocks north.

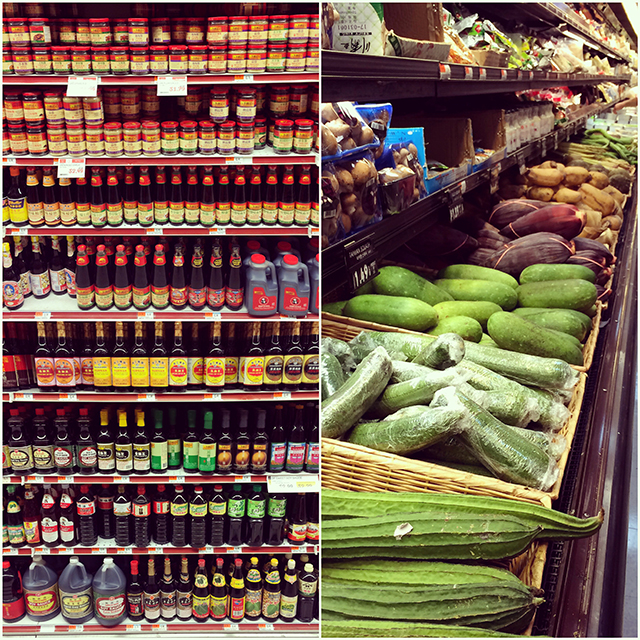
These days some of that longing is assuaged with a visit to the H Mart just west of downtown Baltimore. This large Korean grocery offers a dizzying array of fruits and vegetables that you won’t find at your local grocery, as well as aisle after aisle of strange and exotic snacks, canned goods, packaged convenience foods, and frozen dumplings of 101 varieties. Most of the condiments are not labeled in english, which adds a “box of chocolates” excitement to the shopping experience.

Since my trips are usually made spur of the moment, I don’t usually walk through the door with the idea that I’ll be gathering ingredients for a specific dish. As a result, my basket ends up filled with a lot of weird stuff. This goes some way towards explaining why there is lotus root in my crisper drawer and a dragon fruit on my counter.

This past weekend’s trip had me feeling especially adventurous, so I grabbed an item I had long been fascinated by but had zero idea how to actually prepare. Banana blossom in hand, I went home to investigate.

H Mart Shelves

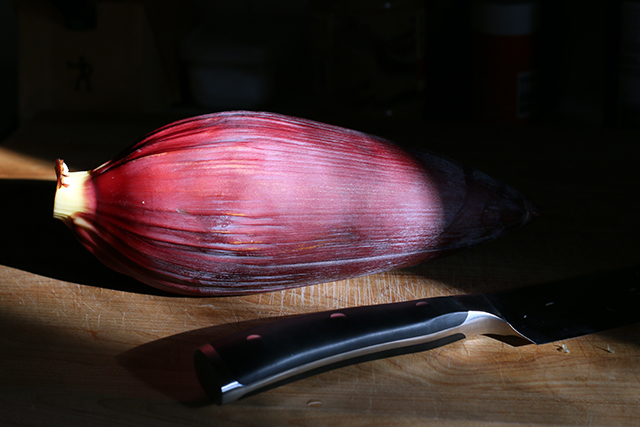
Banana Blossom: Unpeeled

Banana Blossom: Interior

You see those florets underneath each leaf? If you want to use them in a culinary capacity, you have to remove the inner pistil and scale from each and every one. (I can’t imagine doing that AND deveining shrimp, all for the same dish, but do let me know if you’ve tried it.) The flower prep a bridge too far for me on this outing, I decided to hunt for a salad recipe that used the core of the blossom and could otherwise be made out of ingredients I had on hand.

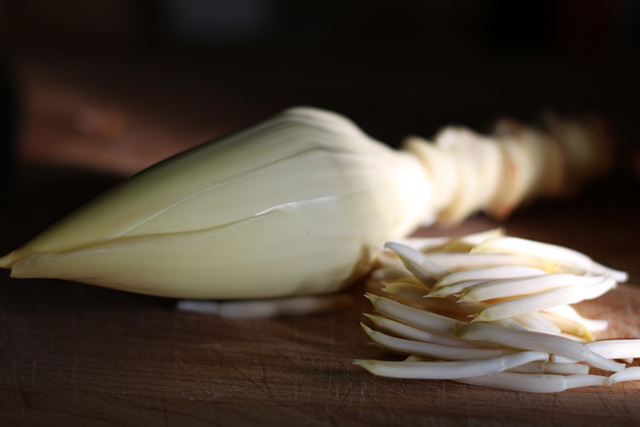
Banana Blossom: Peeled

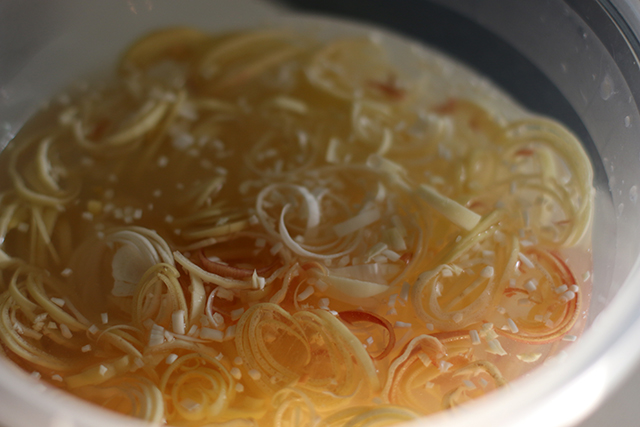
Banana Blossom: Soaking

After some frustrating googling, I landed on this recipe and decided it was something I could execute without screaming. Since I was in a rush, I pared it down even further.

Banana Blossom Salad
Adapted from Green Kitchen Stories to suit my laziness/pantry limits

1 banana blossom, outer leaves removed
2 cups ice water with 1 tablespoon fresh lime juice added
1 clementine, separated and each section halved
2 scallions, thinly sliced
1 carrot, shredded
1/2 bell pepper, chopped
2 tablespoons coriander and/or mint leaves, well chopped
chopped nuts or spicy india snack mix to top

Dressing:
1 tablespoon water
1 tablespoon honey
1 tablespoon tamari
1 tablespoon lime juice
1/4-1/2 teaspoon tuong ot toi (vietnamese chili garlic paste), or to taste

Remove dry exterior purple layers of the blossom, reserving two for use as salad bowls if desired. Discard the rest, as well as the florets found beneath each leaf unless reserving for another purpose.

Peel off the interior layers of the blossom if they come away, continuing to discard the florets. Roll up layers together like a cigar, and slice rings as thinly as possible. Once the leaves become impossible to peel back, slice rings from the heart itself. Immediately plunge the slices into the prepared citrus water. Let soak for about 20 minutes.

Meanwhile, assemble the dressing and mix well to combine. Adjust heat to suit.

Toss the remaining salad ingredients (aside from the crunchy topping of your choice) together, adding the well-drained blossoms once they are done soaking. Dress and toss the salad. Plate and top with the garnish of your choice.

Let’s Celebrate! Have a Lavender and Lemon Cookie

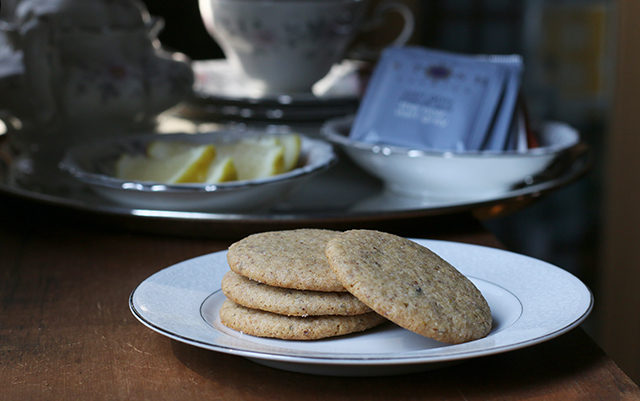
Lavender and Lemon Cookie

Though I have somewhat forgotten what the sun feels like due to this three-day sheet of rain it’s hiding behind, over the weekend a picnic was considered and I found myself in need of a simple, portable, no-silverware-required dessert-type experience. Since the suggested locations included our stunning local tulip patch, my mind turned to flowers–specifically the bag of dried lavender flowers I was already stocked with.

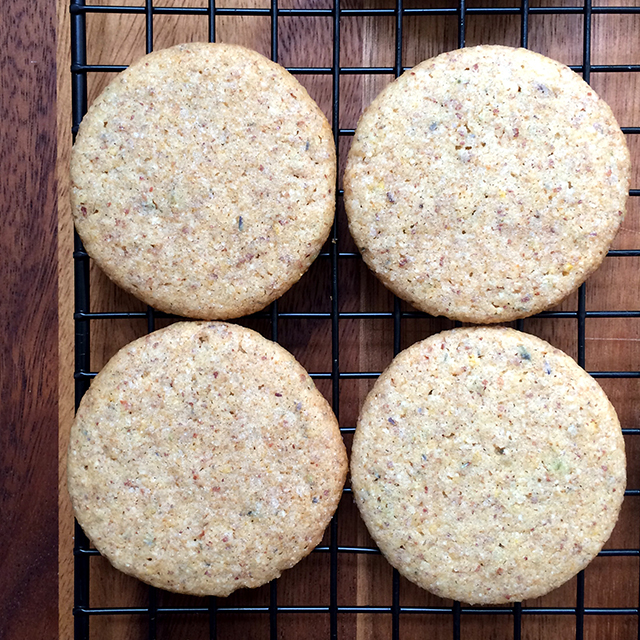
I must have googled lavender cakes and cookies and lemonades dozens of time in the past few years, but I had never followed through and actually executed a recipe. In this case, I needed something efficient in terms of time and effort, and bake-able out of what was already in the house. Giada De Laurentiis delivered with charm. Her Lavender and Lemon Cookies are short on ingredients, gentle on effort, and impressive on a plate.

Lavender and Lemon Cookie

Get the recipe: Lavender and Lemon Cookies

Other obligations meant that in the end we had to scrap the picnic, but inspired by these delicate treats, I broke out the fancy china for an appropriately random Wonderland-style tea party on the front porch.

This morning I’m enjoying the last of the cookies over on the music side of my life, as I try to get Dave Malloy’s highly addictive music out of my ear now that production is done on his profile and we begin to celebrate the 15th (15th!! Wow, where did the time go?) anniversary of NewMusicBox! Feeling like a little old lady in internet terms, so tea and a biscuit is quite the proper thing to indulge in.

Spring Brunch Brilliance: Porch Waffle Party

Dark chocolate dipped clementines with sea salt

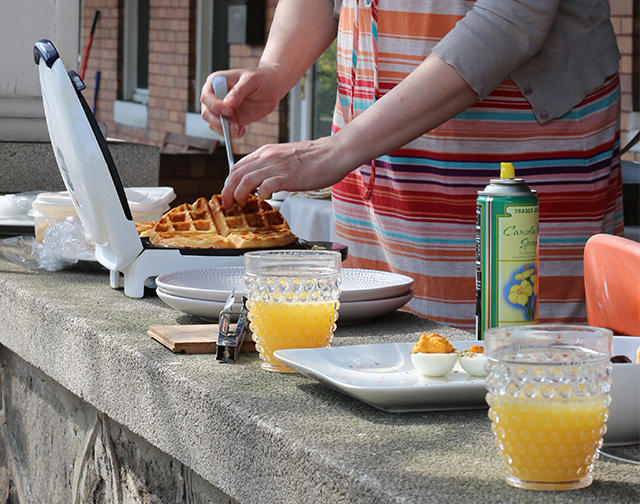
We stored up quite a bit of cabin fever here in Baltimore this winter, so as soon as the weekend temperatures began to touch the 70s, the neighbors fell into action to get our notoriously non-rowdy porch parties back on the social calendar. While these affairs normally allow us to enjoy some wine and dessert as a summer day cools its way into evening, we traded down to morning so that we could trade up to waffles and mimosas for this season’s kick-off event. After an unfortunate electrical fire, we were also inaugurating our resident waffle mistress’s brand new iron, so it was perhaps best to get things going outside—just to be safe.

Waffle with butter

How do you like to top your waffles?

Mistress of the waffle iron

Mistress of the waffle iron

As the waffle production was very well in hand, I volunteered to provide some toppings. For once in my life I went simple, and I’m going to tattoo this lesson on my forearm so that I can enjoy making party food more and stress about it less. Whip a little honey into softened butter and add a tablespoon of sprinkles: perfect for the kids and takes about 5 minutes. Fry some banana slices in butter, deglaze the pan with bourbon, and stir in some pecans and a good dose of maple syrup: well worth the 20 minutes for the adult joy. A little fresh whipped cream and some mixed berries finished off the tray for the waffle traditionalists in the crowd.

Waffle topping table

Honey butter with sprinkles

Honey butter with sprinkles

With so little prep work to do, I also took a stab at some dark chocolate-dipped clementine slices with sea salt that had caught my eye on Pinterest. I don’t do a lot of fancy chocolate work, so I wasn’t super confident when I started the project, but this proved just as brainless as the rest. A 1/2 cup of good dark chocolate, a bit of shortening if you have some on hand to smooth things out, and then just melt it together in a double boiler, dip the slices, and rest them in rows on a parchment-lined cookie sheet. Finish a row and run a pinch of salt flakes down the line. Repeat. The only hard part was setting them down instead of eating them. I popped them in the fridge overnight, covered well in plastic wrap once the chocolate set hard. The next day I just had to pile them in a bowl.

For those who would like a little more detail in their recipes:

Honey Butter with Festive Sprinkles

Banana Bourbon Maple Syrup

Dark Chocolate-Dipped Clementine Slices with Sea Salt

How do you like to top your waffles and pancakes?

Pioneer Days: In The Country Kitchen for Salt-Rising Bread

salt-rising bread

A little more than a year ago, I attempted an old-world recipe from Della Lutes’s completely charming cook book-meets-memoir The Country Kitchen (Little, Brown, and Company, 1936). A few months ago I then passed that book on to a friend, and we got to talking about another interesting recipe referenced in the text for salt-rising bread.

Or actually, almost a recipe, as far as contemporary expectations go. While Lutes quotes the rough method, she comes up just short enough on detail that I was hesitant to try it out. But I had something she did not: the internet.

And of course, the crowd provides. After reading up on the unique smells and the finicky challenges of this bread, I took a minute to gauge my sanity and then plowed ahead. I mean, I do all kinds of weird projects here in Wonderland, so why not? To hedge my bets, I went with the very thorough King Arthur guidelines provided in this post, and I was not disappointed!

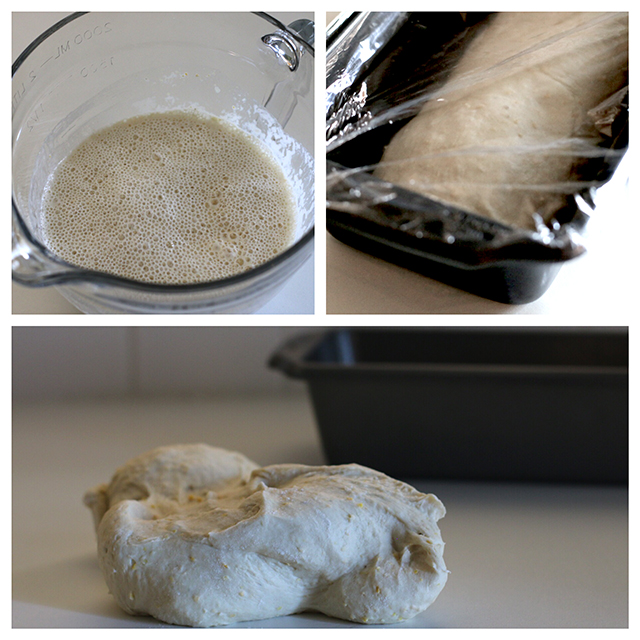
salt-rising bread: steps

Interesting points and some things to keep in mind:

Even though it’s called salt-rising, there’s actually not that much salt in the recipe. But there is no added commercial yeast. More details for the curious on the history and the name can be found here and more discussion can be had here.

Some other recipes use potatoes instead of cornmeal, or some combination. Others caution to only use whole grain cornmeal, which I did. (You can buy this—just check your package—or make your own!)

Everything they say about the smells the various stages of this dough emit are true and yet it’s just kind of weird, not stomach convulsingly terrible—to my nose at least. I’m also accustomed to strange cheeses and various fermentation projects, however, so perhaps I’ve simply built up a tolerance.

Most challenging part: You will need a method to keep the dough warm enough—between 90°F and 100°F according to the recipe I followed (though others go as low as 80°F). My oven offers a proofing setting at around 95°F, so I was golden and the development of the dough seemed to proceed on schedule, but your results may vary depending on what you can rig up. You will at least know if things are amiss at each stage, so it won’t just be a big surprise at the very end.

While I started this recipe just before I went to bed one night and didn’t end up with a loaf of bread until the following evening, the actual skills needed and dishes used/mess made are quite minimal, so this recipe is mostly a question of patience to my mind.

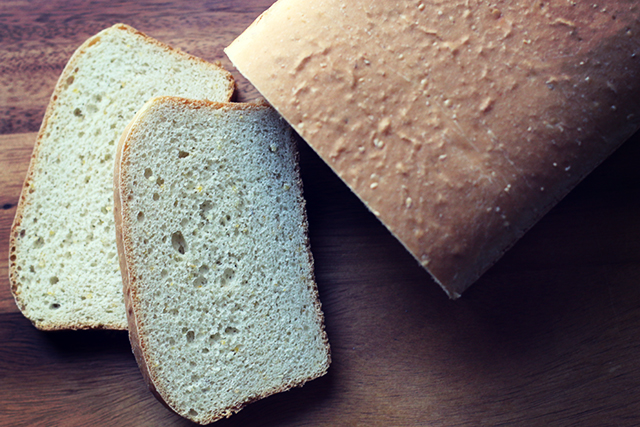
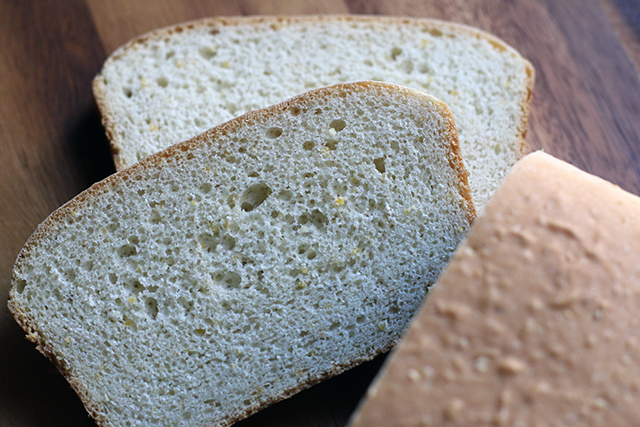
And the results are really interesting. The produced loaf has a fairly dense, dry crumb that stores well and makes for excellent toast (really the only way to eat it, in my opinion). Toasting perfects the inherent cheesy, nutty flavors in the dough that people note and that seem to be the nostalgic pull for many.

salt-rising bread

Salt-Rising Bread
As seen on King Arthur Flour, but the recipe’s providence goes back quite a bit further. For some additional process pictures and hand holding, I definitely recommend a read through KAF’s related blog post as well–just don’t panic!

Stage One

1/4 cup milk
2 tablespoons cornmeal
1 teaspoon sugar

Stage Two

1 cup hot water (120°F to 130°F)
1/2 teaspoon salt
1/2 teaspoon baking soda
1/2 teaspoon sugar
1 1/2 cups AP flour

Complete the Dough

4 tablespoons butter, softened
1/2 teaspoon salt
2 1/4 AP flour

Stage One: Scald the milk and cool to lukewarm. In a glass container large enough to allow for expansion (I used an 8-cup glass measure for stages one and two), combine the milk, cornmeal, and sugar. Whisk to combine until no lumps remain.

Cover with plastic wrap and let rest in a warm place (between 90°F and 100°F) for 8 to 12 hours. At the end of this stage, you should see some bubbles/foam on the surface and notice a slight smell. If not, you will need to start over (or abandon this project–no shame).

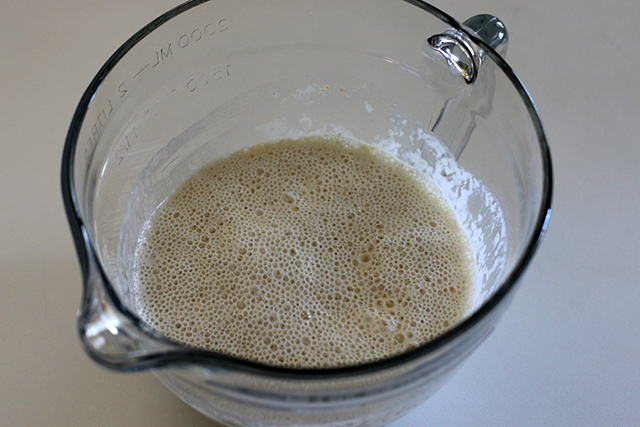
Stage Two: Combine the hot water, salt, baking soda, sugar, and flour and then stir this mixture into Stage One until evenly incorporated. Cover the bowl again and return to your warm place for two to four hours, until the starter has doubled and is quite bubbly and pungent. (The measuring cup makes this even easier to gauge; mine took about 3 hours.) Here again, if you don’t get the results described, you will need to begin again. If action just seems slow, try a warmer spot for a couple hours more.

salt-rising bread: bubbles

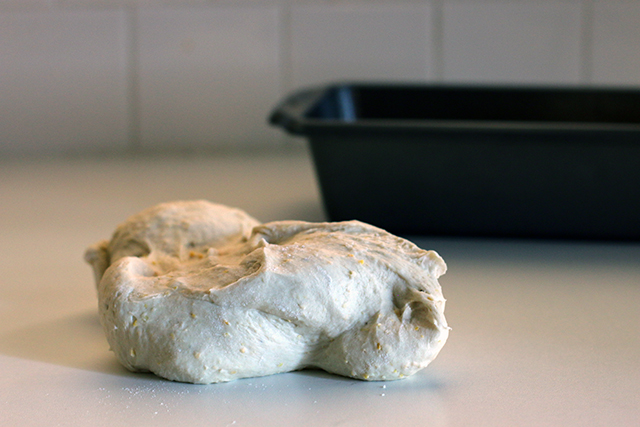
Complete the Dough: Transfer starter to a large bowl or stand mixer and add remaining ingredients. Knead until smooth.

salt-rising bread: dough

Form dough into a log and place in a greased loaf pan (8 1/2″ x 4 1/2” is recommended, but I used my 9” x 5” without issue). Cover again and return to the warm place until it crowns over the edge of the pan. The edges will round but the surface of the loaf may be relatively flat. This is expected.

Near the end of the rising time, heat the oven to 350°F. Bake for 40 minutes, until nicely browned.

Cool for 5 minutes in the pan then turn out onto a wire rack and cool completely before slicing. Stores well in plastic for about a week.

Baby Love: Sweet Treats and Cozy Knits

Pistachio, Orange, and Dark Chocolate Cinnamon Rolls

While handmade gifts for adults can be tricky to navigate, knitting for a new baby always feels right to me. They are much less likely to notice my mistakes! But seriously, to my mind knitting provides a great venue for reflecting on a new life and infusing some good thoughts into whatever soft and fuzzy creation you’d care to take on.

Last month friends welcomed a sweet little boy into their family. Considering the intense cold that we’re still battling here in the Mid-Atlantic, a simple little cap seemed like a useful item. Admittedly, I was also encouraged by the fact that I was almost guaranteed to complete the project before the new baby was filling out his college applications. I found a simple yet attractive pattern that would definitely flatter a variegated yarn. Since my color was subtle, I decided to just eyeball in a couple stripes for a little visual kick.

Cosset Baby Hat by Jenny Raymond

Get the pattern: Cosset Baby Hat by Jenny Raymond

Knowing that the sleep-deprived parents were also big fans of cinnamon rolls, I took the opportunity to finally test drive Joy the Baker’s stunning Pistachio, Orange, and Dark Chocolate Cinnamon Rolls. Even with her reduction of the Pioneer Woman’s original “ranch-sized” recipe down to 16 rolls, that’s still plenty to make this a “one pan to keep, one to pan to give away” project. Plus, while the production is somewhat time intensive, the process is actually fairly simple, the timing flexible (bake now or bake tomorrow!), the dough easy to work with, and the filling options ultimately innumerable. I assembled them the evening before and let them rest in the fridge overnight. The next morning, I let the chill come off them while I heated the oven and then baked them while I whipped up the glaze. I suspect that I will be bribing friends and neighbors with these for years to come!

Pistachio, Orange, and Dark Chocolate Cinnamon Rolls

Get the recipe: Pistachio, Orange, and Dark Chocolate Cinnamon Rolls by Joy the Baker

Do you have a go-to baby gift or food item you like to share with new parents?

Pamphlet Cooking: “Armenian” Soup

“Armenian” Soup

Last week’s Tomato Soup Cake recipe reminded me that, in addition to my stacks of proper cookbooks, I have also amassed quite an impressive pile of pamphlets, brochures, and small spiral-bound recipe collections. Most of these I acquired thanks to The Book Thing, an awesome organization here in Baltimore that redistributes books to the community free of charge. A few times a year I donate all the books I don’t need anymore and browse the cookbook shelf to see what new treats might catch my eye. And it’s these slim paper volumes—often old advertising gimmicks for baking soda or similar—that are my favorite scores.

My stash includes quite a few tempting offerings such as “The Little Book of Excellent Recipes” by The Mystery Chef (future post, promise!), but in flipping through a few of them I landed on a soup recipe in the less exotic sounding “CSA Pantry Collection #4” that I decided to test drive. As it turned out, CSA in this case stood not for community supported agriculture, as I had assumed, but rather the Celiac Spruce Association. Their recipe for Armenian Soup included dried apricots and a single potato swimming in a full 2 quarts of water. Currently challenged by yet another snow storm and freezing temperatures required some creative pantry thinking on my part if I was going to execute, so I used the pitted dates and sweet potatoes I had on hand and ended up using half the amount of stock called for. Which is to say I wouldn’t blame “CSA Pantry Collection #4” for this bastardized recipe, but between its inspiration and the bitter, bitter cold, I ended up with a soup that was appreciated thoroughly without having to slide down the street to the grocery store.

That all said, I’m not sure what the Armenians would have to say about it.

 “Armenian” Soup

“Armenian” Soup

1/3 cup red lentils
6 dates, chopped
1 large sweet potato, cubed (no need to peel)
1 quart vegetable broth
2 tablespoons lemon juice
1 teaspoon toasted and ground cumin
4 tablespoons parsley, chopped

The real joy of this recipe: its simplicity. Place all ingredients in a 4 quart sauce pan. Bring to a boil, then cover and reduce heat to simmer for 30 minutes. Puree until smooth. Season with salt and pepper as desired.

That’s it. You’re done. Let’s eat.