baking » Wonderland Kitchen
Browsing Tag

baking

Baby Love: Sweet Treats and Cozy Knits

Pistachio, Orange, and Dark Chocolate Cinnamon Rolls

While handmade gifts for adults can be tricky to navigate, knitting for a new baby always feels right to me. They are much less likely to notice my mistakes! But seriously, to my mind knitting provides a great venue for reflecting on a new life and infusing some good thoughts into whatever soft and fuzzy creation you’d care to take on.

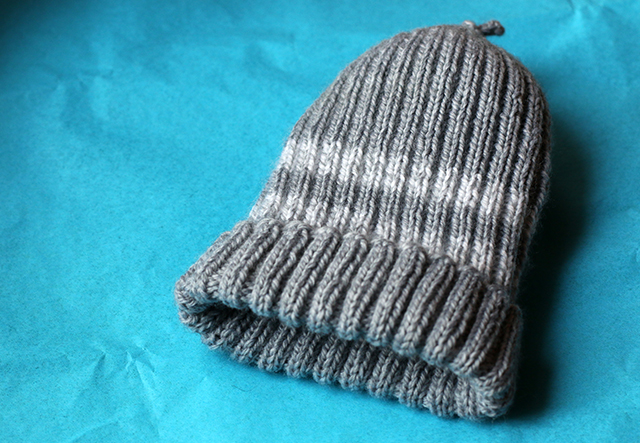
Last month friends welcomed a sweet little boy into their family. Considering the intense cold that we’re still battling here in the Mid-Atlantic, a simple little cap seemed like a useful item. Admittedly, I was also encouraged by the fact that I was almost guaranteed to complete the project before the new baby was filling out his college applications. I found a simple yet attractive pattern that would definitely flatter a variegated yarn. Since my color was subtle, I decided to just eyeball in a couple stripes for a little visual kick.

Cosset Baby Hat by Jenny Raymond

Get the pattern: Cosset Baby Hat by Jenny Raymond

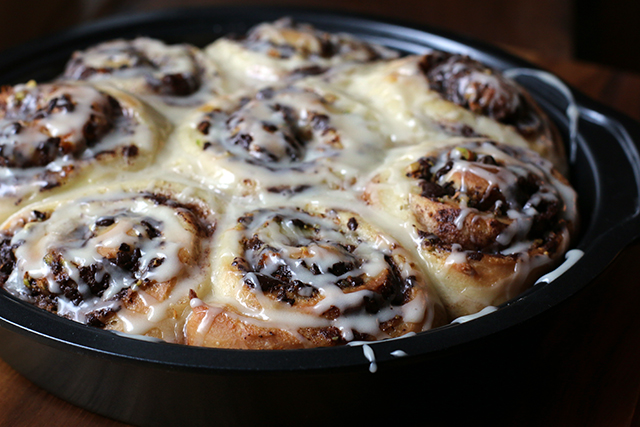
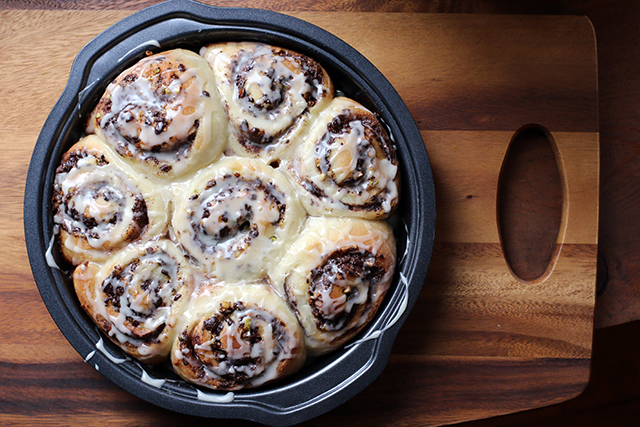
Knowing that the sleep-deprived parents were also big fans of cinnamon rolls, I took the opportunity to finally test drive Joy the Baker’s stunning Pistachio, Orange, and Dark Chocolate Cinnamon Rolls. Even with her reduction of the Pioneer Woman’s original “ranch-sized” recipe down to 16 rolls, that’s still plenty to make this a “one pan to keep, one to pan to give away” project. Plus, while the production is somewhat time intensive, the process is actually fairly simple, the timing flexible (bake now or bake tomorrow!), the dough easy to work with, and the filling options ultimately innumerable. I assembled them the evening before and let them rest in the fridge overnight. The next morning, I let the chill come off them while I heated the oven and then baked them while I whipped up the glaze. I suspect that I will be bribing friends and neighbors with these for years to come!

Pistachio, Orange, and Dark Chocolate Cinnamon Rolls

Get the recipe: Pistachio, Orange, and Dark Chocolate Cinnamon Rolls by Joy the Baker

Do you have a go-to baby gift or food item you like to share with new parents?

The Returned: How to Cook a Wolf

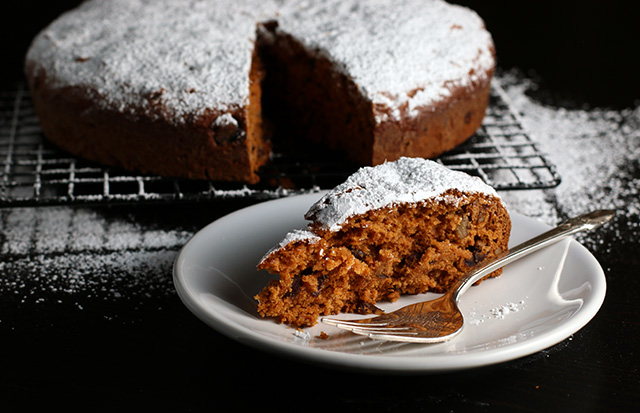
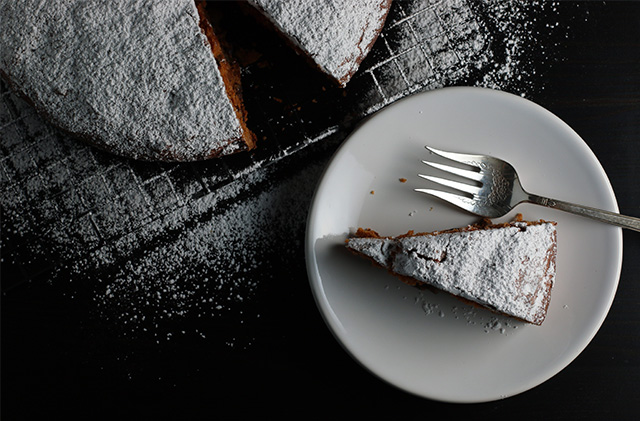
Tomato Soup Cake from How to Cook a Wolf

If I’m making amends for the sins of abandonment committed against my cookbooks here, it seems extra appropriate to do right by a book that isn’t even actually mine but rather one I borrowed from a neighbor and then proceeded to bury under an ever-growing pile of unread Lucky Peach issues. (Okay, I have a problem. We’ve clearly established that at this point.)

If you’re unfamiliar, How to Cook a Wolf (published originally in 1942) is a quick read, part rallying cry and part cookbook designed to aid and inspire home cooks in a time of stress and limitation. When I started the book, I was immediately struck by how much the ideas M.F.K. Fisher had about economics, nutrition, and making do had to say (adjusting for inflation and accounting for the proximity of war) to me sitting in my living room arm chair in 2014. My appreciation for her outlook only grew as the pages turned, as did my trust in her advice and appraisals after acknowledgements such as this one, crediting her sources for a “Cream of Potato Soup” that follows a bit of a tirade on doing things “correctly” vs. “eating according to your own tastes.”

However, there are compromises that can be admitted, whether you approve of them or not. Here is a recipe, a combination really of Escoffier’s Soupe à la Bonne Femme and one I found in a calendar published by the gas company in the Canton of Vaud in Switzerland.

Hear, hear! That’s a world-aware outlook and a flexibility of approach I can get behind. (It’s also probably why I can’t really hang with the Cook’s Illustrated folks, but that’s a convo for another post.)

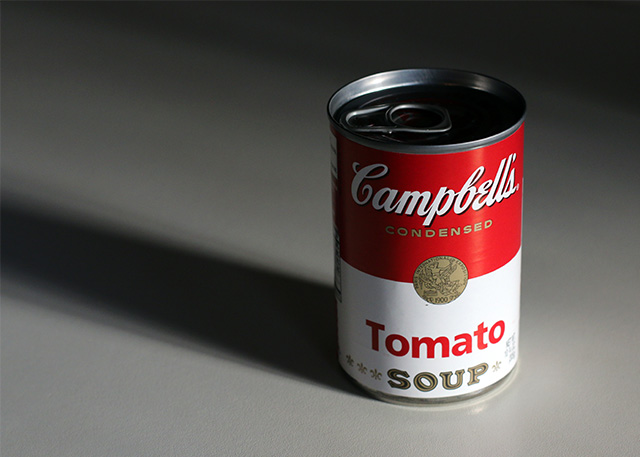
Canned Tomato Soup

Think of it as adding a little Warhol pizzazz to your baking?

I’m personally satisfied to report that I have now finished the book and returned it to its rightful owner, along with a portion of a cake from its pages that I just had to try out: Tomato Soup Cake. Also known as Mystery or Conversation Cake due to its surprising secret ingredient (which I doubt any taste tester would be able to ID), this is one of those recipes that seems to trace back for a lot of people to grandma’s special version and holiday family gatherings (and probably an advertising pamphlet produced by Campbell’s Soup!). It’s a spice cake that uses no eggs and only three tablespoons of fat, making it easy on the pantry and easily vegan to boot. You can dress it up with the mix-ins and spice combinations that best suit your guests and top it (maple cream cheese frosting, anyone?) however you like. I’ve included my version below, but as Fisher says, you should make yours “to you own tastes!”

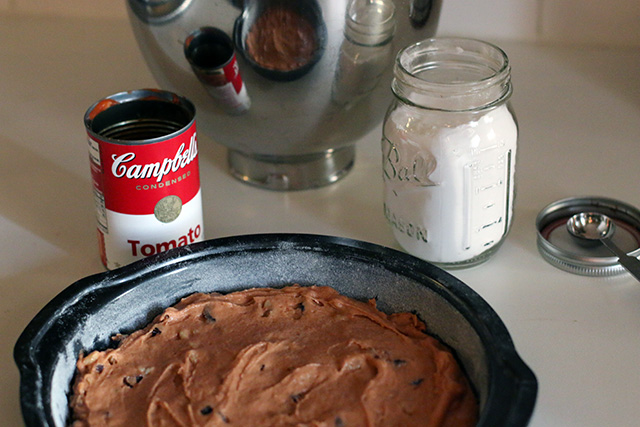
Tomato Soup Cake: Ready to Bake

Tomato Soup Cake
from How to Cook a Wolf

3 tablespoons shortening (or butter)
1 cup sugar
1 can condensed tomato soup
1 teaspoon baking soda
2 cups AP flour
1 teaspoon cinnamon
1 teaspoon mixed spice (I used 1/4 teaspoon of each of the following: ginger, allspice, cloves, and nutmeg.)
1 1/2 cups nuts and fruit, roughly chopped (I used 1/2 cup of each of the following: raisins, walnuts, and dates.)

Optional topping:
3 tablespoons powdered sugar dusted over top

Heat oven to 325°F. Butter and flour a 9-inch cake pan (line bottom with parchment if you are extra nervous about cake removal—I did and don’t regret it, but it was perhaps overkill for a cake of this texture). Set aside.

Measure flour and spices into a medium bowl and whisk to combine. Set aside.

Using a hand or stand mixer, cream shortening and sugar together until well blended and fluffy.

Stir baking soda into the soup and mix well. Add this and the flour/spice mixture to the creamed sugar in several alternating portions, mixing until fully incorporated. Fold in nuts and fruit.

Spoon into the prepared cake pan and smooth the top (batter will be quite thick). Bake for 45 minutes, or until a cake tester inserted into the center comes out clean. Cool for ten minutes in the pan and then turn out onto a wire rack to cool completely.

Top as desired.

Cake stores well and pleased even my non-spice-cake-liking friends, for what it’s worth.

Tomato Soup Cake from How to Cook a Wolf

The Countdown: The Beekman 1802 Heirloom Dessert Cookbook

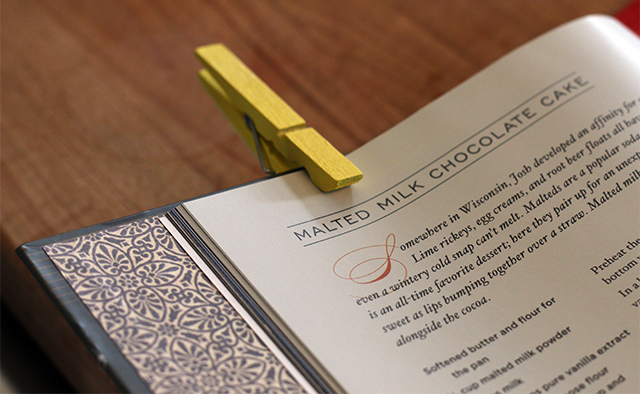
Malted Milk Chocolate Cake

In Wonderland Kitchen, recipe research almost always equals Google searches and Evernote-taking. I rarely crack an actual, physical cookbook when looking for knowledge and inspiration, and yet I cannot seem to stop buying them! And those that don’t arrive on my doorstep via UPS show up skillfully wrapped in the hands of generous friends or as orphan cast-offs schlepped home from some musty church basement book sale.

Now, here they all sit in precarious stacks around my office, their beseeching gaze rivaled only by the CDs I have yet to split the cellophane on and review for work.

And so, as a 2014 self-improvement project that does not require public exercise, I’m on a mission to review each book in turn, to sit down and get to know it a little, and select a recipe which I will make and share here with my kitchen crew. Which is to say I’ll be doing this for me, but hopefully you’ll get something out of it, too.

Real world cookbooks present challenges

Real world cookbooks present challenges

I’m starting out with The Beekman 1802 Heirloom Dessert Cookbook. Now, this is honestly a very lovely book featuring beautiful but not-too-precious photographs and charming writing. But while I follow their blog, lust after their farm house, and appreciate a balanced collection that won’t break my toe if it slides off the counter, really it’s leading out of the gate because my awesome mother-in-law gave me an autographed copy for my birthday and I still haven’t made anything from it!!!

…Ahem.

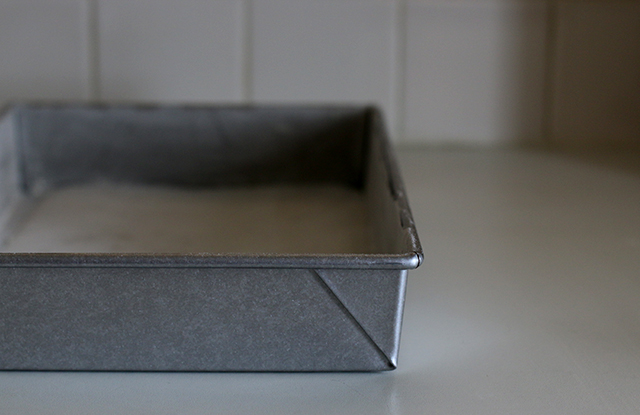
Baking pan ready for action

Now then, this is one of those books helpfully (if you’re into that kind of thing) arranged by season, starting with winter and a cozy list of baking projects. Though the recipe for “Snow Cream with Sweetened Condensed Milk” was tempting, I’m not sure that there’s any snow in Baltimore I’d feel safe serving to guests. As I paged through my options, I did appreciate that the desserts each seemed possible to execute without a professional pastry chef on stand by. A few of the recipes included commercial candy, which is not something I’d ever considered, and so usually being all DIY and kale and whatnot, I decided this was the way to go. Malted Milk Chocolate Cake: come to mama!

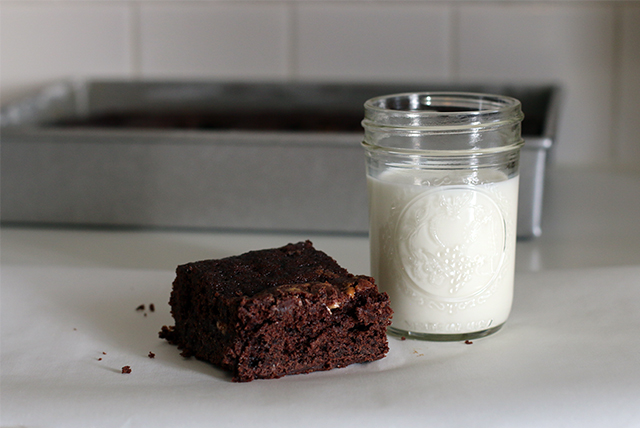
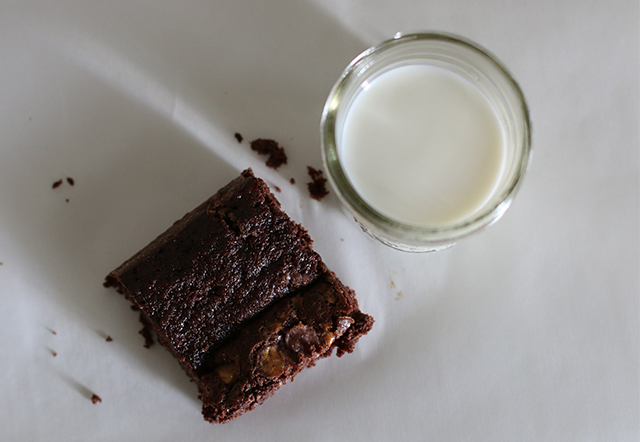
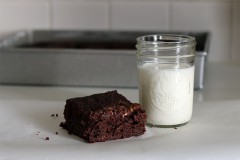
The cake came together just as easily as the one-page recipe implied, and the 9×13-inch pan serving 12-16 is no joke—this is a homey yet decadent chocolate cake-brownie of a treat, so you may want to keep your pieces quite small. I didn’t find it dry in the least, but offering coffee or a tall glass of milk to balance out the richness would not be amiss.

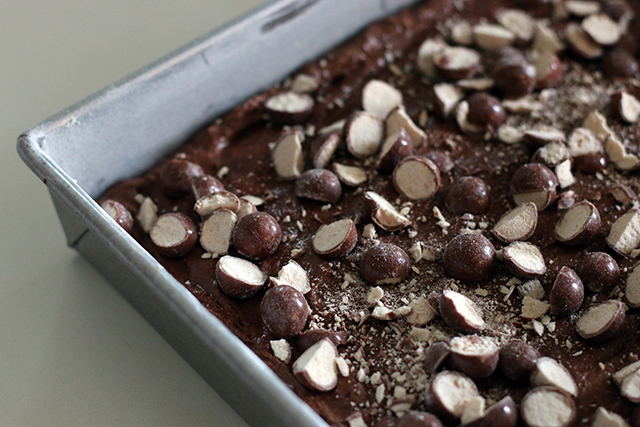
Malted Milk Chocolate Cake: Unbaked

Malted Milk Chocolate Cake
from The Beekman 1802 Heirloom Dessert Cookbook

1 1/3 cups whole milk
1/2 cup malted milk powder (I could only find chocolate flavored, and just went for it)
1 1/2 teaspoons vanilla extract

1 3/4 cups AP flour
1 cup unsweetened cocoa powder
2 teaspoons baking powder
1 teaspoon baking soda
1/2 teaspoon salt

8 ounces unsalted butter, room temperature
1 cup sugar
1 cup packed light brown sugar
4 large eggs, room temperature

1 cup coarsely chopped malted milk balls
(If you can promise not to eat more than three balls before baking, you can buy the 5 oz box. All others might want to consider purchasing more. I roughly halved the milk balls and just gave the pile an extra whack or two at the end for minimal rolling-to-the-floor.)

Butter a 9×13-inch cake pan and line the bottom with parchment. Butter the paper as well and flour the pan. Set aside.

Heat the oven to 350°F.

Measure out the milk and add the malted milk powder and the vanilla. Stir to combine.

Into a medium bowl, measure out the flour, cocoa powder, baking powder, baking soda, and salt. Run a whisk around the bowl several times until evenly incorporated. Set aside.

Using a hand or stand mixer, cream together the butter and sugars on medium until fluffy. Add the eggs one at a time, thoroughly mixing in each addition and scraping down the bowl as needed. Lower the mixer speed and add the remaining dry (excepting the milk balls) and liquid ingredients in several alternating portions, starting and ending with the dry. Scrape down the mixing bowl and make sure all the ingredients have been evenly incorporated. (I failed a little here–learn from my mistakes!!)

Pour the cake batter into the prepared baking pan and even out. Sprinkle the milk balls across the top.

Bake for about 40 minutes, until a cake tester (I’ve been loving using left over kabob skewers for this) comes out clean and the cake pulls away from the pan edge.

Cool completely on a wire rack. Cake can be served from and stored in the pan.

Malted Milk Chocolate Cake

Just Like Candy: #DIY Mixed Peel

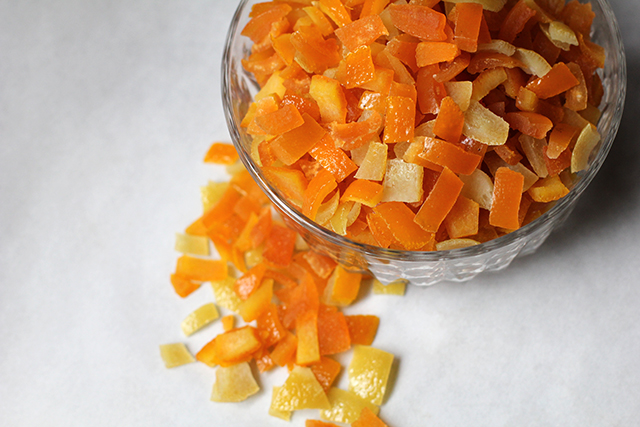
DIY Mixed Peel at Wonderland Kitchen

On days like today, Google makes me cry for both confusingly uplifting reasons as well as the terrifying visions of the future its actions conjure in my head. But while this best-indie-movie plot line and/or Kafka tale develops, Google’s search engine reliably solves my problems. The latest: What the hell is mixed peel?

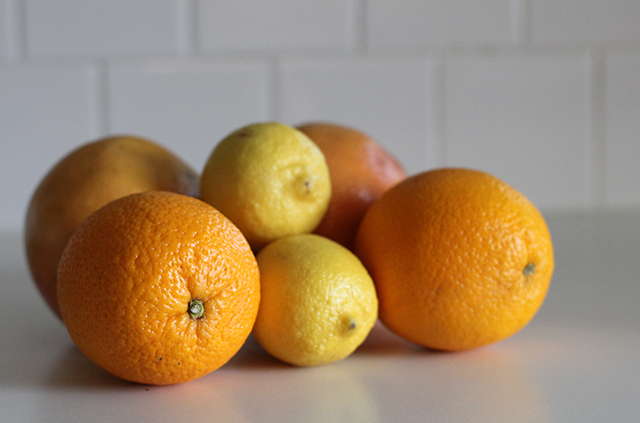
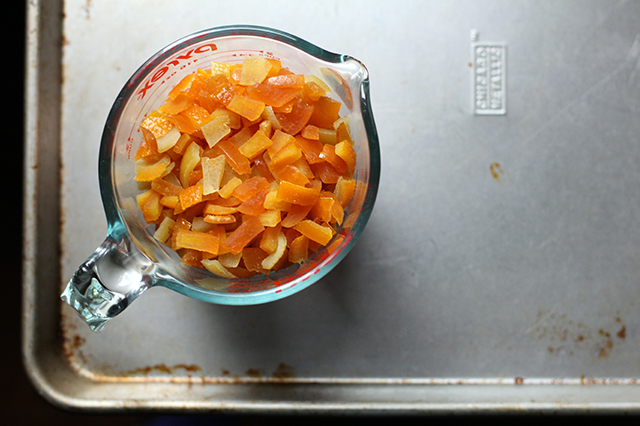
I went hunting with the goal of making this Alice in Wonderland-related Looking Glass cake. However, mixed peel not being an ingredient stocked at my local grocery, before the baking could begin it seemed I would need to DIY a key ingredient. The internet to the rescue, I was in business with a pile of citrus and a Googled recipe.

DIY Mixed Peel at Wonderland Kitchen

DIY Mixed Peel at Wonderland Kitchen

DIY Mixed Peel at Wonderland Kitchen

This is one of those super easy but several-day DIY projects that annoy the spontaneous among us. So make it now and then surprise yourself when you want to bake hot cross buns for Easter! (Note to self: Bake hot cross buns for Easter this year.) If you have the patience to cut up citrus peel and the skill to boil water, you are already pretty much done. Holiday goodies will definitely be kicked up a notch this season. (So yes, family, prepare for Wonderland fruit cakes this Christmas.) Anyway…

DIY Mixed Peel at Wonderland Kitchen

DIY Mixed Peel
Recipe via Best Recipes, desire due to The Alice in Wonderland Cookbook: A Culinary Diversion by John Fisher

Note: The original recipe calls for less fruit. I lived dangerously and added an extra lemon and one more orange. I was well pleased with the result, but be advised.

1 grapefruit
2 oranges
2 lemons
(or citrus combo of your choosing)
1 1/2 cups sugar

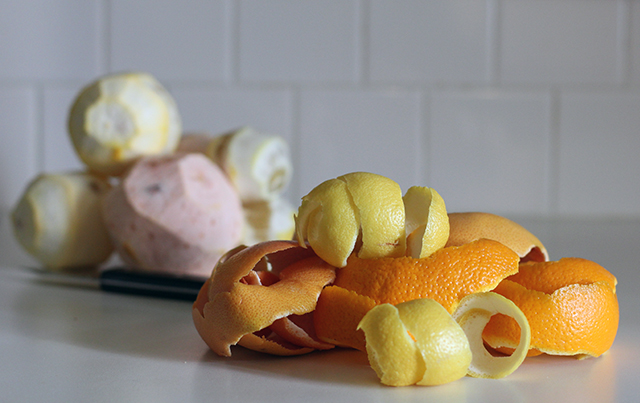
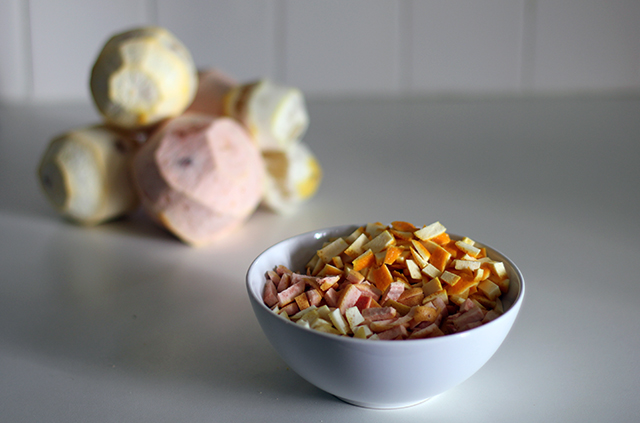
Peel citrus fruit, including as much of the pith as possible. Slice peels into approximately 1/4-inch pieces.

Place prepared citrus peel in a sauce pan and just cover with water. Bring to a boil and simmer for ten minutes. Drain and repeat, this time reserving 1/2 cup of the simmering liquid before draining.

Return boiled peel, 1/2 cup reserved liquid, 1/2 cup fresh water, and 1 cup sugar to sauce pan and stir to dissolve sugar while bringing to a boil. Remove from heat, cover, and let sit overnight (mine sat about 18 hours). The following day, add an additional 1/2 cup sugar and bring to a boil. Simmer for 15 minutes and then drain citrus peel thoroughly.

Line a baking sheet with parchment and spread out peel pieces to dry, tossing occasionally to prevent clumping. When peels are no longer wet (probably another 24 hours), place in a container with a tight-fitting lid and store in the refrigerator (or the freezer for a longer shelf life). According to my reading, prepared peels will withstand at least a month in the fridge.

Falling Into the Season: Maple Apple Bars

applecake_top

I didn’t post about the fact that my pal Marie and I cooked a bushel and peck worth of apples last weekend, ran them through (a freakin’ hand-crank) food mill, and put them into jars. But we did. We even added caramel to some, and calvados and cardamom to others for an adult-rated version. It was quite a delicious project, not terribly backbreaking when all was said and done, and should keep us in applesauce and apple jam for the foreseeable future. But more than that, it was an afternoon of fun in that way good work with close friends can turn out to be. Company in the kitchen is an important ingredient that shouldn’t be overlooked.

As it turns out, however, this applesauce also now connects me to a new acquaintance far beyond my kitchen walls. Thanks to the RSS/Twitter feeds streaming through Wonderland, I feel as if I have “met” a small army of amazing cooks who have so generously invited me into their homes and thoughts through their online writing. Amie Watson reached out to me after connecting with Wonderland Kitchen though a friend and suggested a recipe trade. I thought this was a most excellent idea.

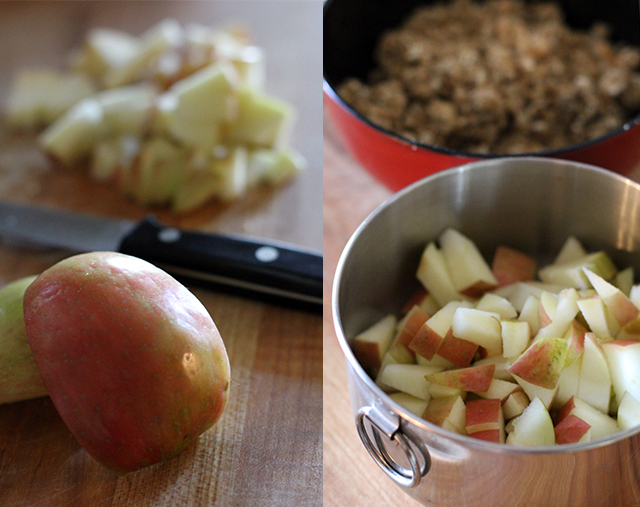
Apples for Maple Apple Bars

Once she told me she was going to make my cereal bars gluten free (an adaptation I’m excited to share), I thought–since I’m so into coconut oil these days–that perhaps I could completely anti-dairy and non-glutenate her Honey Almond Squares. But on reflection (and the realization that my chickpea flour cupboard was empty), I decided that was the opposite direction to take things. Considering the above-mentioned applesauce, plus the crisp weekend weather, I would add the wheat back in, swap in some deeper and darker sweet notes, and see what I got. I perhaps got completely carried away, but Amie’s recipe seemed welcoming to adaptation. Use an apple! Or use a pear! I like this approach; it’s much more in line with how I like to cook, and also where I tend to fail when baking. When the recipe offers guidelines as to where variation is possible, that’s my best chance for success right out of the gate.

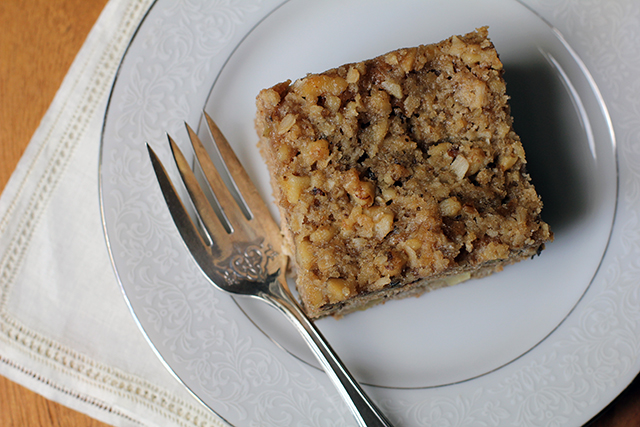
And I don’t think I’ve ruined Amie’s recipe in the process! I like to think of this version as just the opposite side of the same dessert coin. Where her bars, with their higher honey, mango, and almond notes, would make a perfect welcome to the warming temperatures of spring, here we say hello to the brisk snap in the fall air. It’s a rich, moist, spicy cake, and it practically begs you for a scoop of vanilla ice cream if you’re feeling super decadent (and not lactose intolerant–sorry Amie!).

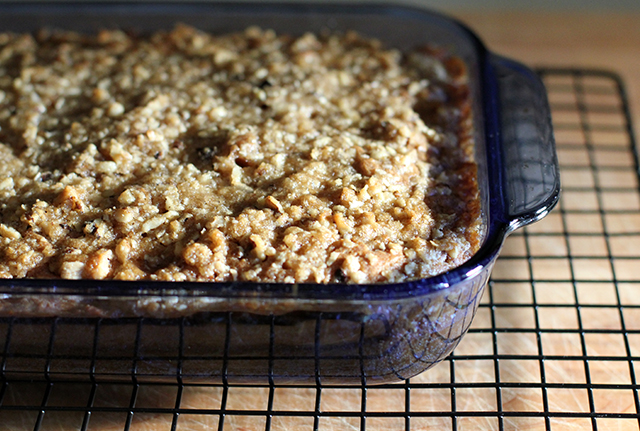
Maple Apple Bars: Baked

Maple Apple Bars
adapted from “Honey Almond Squares” as seen on Amie Watson’s Multiculturiosity

For the cake batter

1/4 cup butter, cubed
1/3 cup maple syrup
1 egg
1 teaspoon vanilla extract
1 cup applesauce
1 cup AP flour
1/2 cup whole wheat flour
1 teaspoon cinnamon
1/2 teaspoon nutmeg
1/2 teaspoon baking powder
1/2 teaspoon baking soda
1/4 teaspoon salt
1 apple, cubed
1/3 cup walnuts, chopped

For the streusel topping

1/2 cup brown sugar
3 tbsp rolled oats, coarsely ground
1/3 cup walnuts, chopped
1/4 cup butter, cubed

1. Heat oven to 350°F. Butter an 11″x7″ glass baking dish and set aside.

2. Measure dry ingredients for streusel topping into a bowl. Using your fingers, work in butter until the mixture is roughly incorporated and crumbly.

3. Using a stand mixer or in a large bowl, cream butter and maple syrup. Beat in the egg. Next, stir in the vanilla extract and apple sauce.

4. Measure dry ingredients into a medium bowl and whisk to combine. Add to the liquids and stir just until all ingredients are incorporated. Fold in walnuts and apples, then spoon batter into prepared baking dish, smoothing it out evenly with a spatula or the back of a spoon.

5. Sprinkle streusel topping over the top and bake for 35 minutes. Allow to cool on a wire rack before slicing and serving.

New Adventures in Wonderland & Hacking Blueberry Cereal Bars

cereal_top

“Would you tell me, please, which way I ought to go from here?”
“That depends a good deal on where you want to get to,” said the Cat.
“I don’t much care where–” said Alice.
“Then it doesn’t matter which way you go,” said the Cat.
― Lewis Carroll, Alice in Wonderland

Brian and I named Wonderland Kitchen a couple of years before the site actually launched, dreaming up the idea on a long car ride to Vermont. After listening to me consider the possibility of maybe trying to make some time to write just a little about food, and for longer than was reasonable, my husband pulled the trigger for me and made a gift of the URL. Still, I dragged the idea in and out of my mental cupboard like a stock pot for quite a while longer, considering how it looked on the stove but never lighting the gas. Then one weekend in September of 2011, we drove to Vermont again. I didn’t take it as a sign so much as the chance to turn down the volume on the day-to-day grind just long enough to really evaluate my priorities. Taking time and attention away from building the career I already had as a music journalist seemed silly, yet I couldn’t shake the desire to diversify. By the end of that trip, the first iteration of Wonderland Kitchen had been built, and it’s been a motivator in the kitchen and a creative space I’ve been able to grow in ever since.

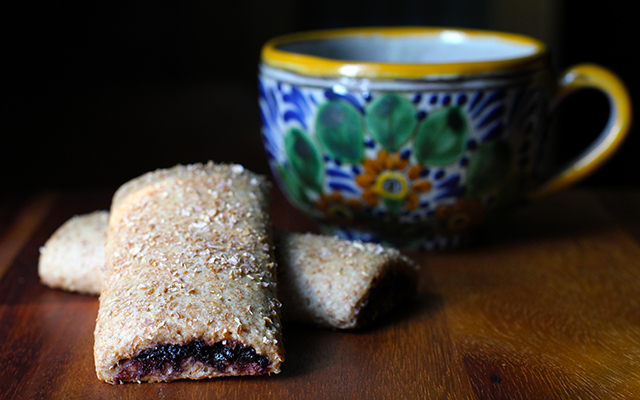
In all that time, I never really considered “where it was all going” because I was simply enjoying the ride too much to care. Yet as we mark this first year with a site upgrade thanks to Brian and the love and supportive appetites of many friends, the road keeps unspooling before us. One addition to these pages that I’m excited to debut today is that I’ll be contributing a bi-weekly column to the killer online food destination Serious Eats. For each piece, I’ll pull out my clipboard and do my DIY best to hack everything from breakfast cereals to Ho-Hos, though minus dyes, artificial flavors, and ingredients I cannot pronounce. To kick things off, I offer you a cereal bar that’s a far less sweet but much more elegant option than you’ll get in a box (recipe below, but spiffy presentation over on Serious Eats). Have a product you’d like me to take a crack at in a future column? Please let me know.

*

Who wants an unbirthday gift from Wonderland?
***Contest has closed; congrats to the winners!***

More than anything, I’m grateful to every reader for taking the time to meet up with me in this space over the past year. My awesome mother-in-law (Hi, Barbara!!) has sewn a couple lovely cloth market bags for me that I’d like to give away to celebrate. As there are only two, if you’d like one, please leave a comment below and let me know what projects you’re working on…or what ones you just might start any day now. If I only get two responses, well, everybody wins! Otherwise, I’ll use one of those neat random number generators. Please be sure to include an address in the email field that I can use to contact you and get your shipping address.

And now, here’s the first DIY vs Buy:

DIY Blueberry Cereal Bars
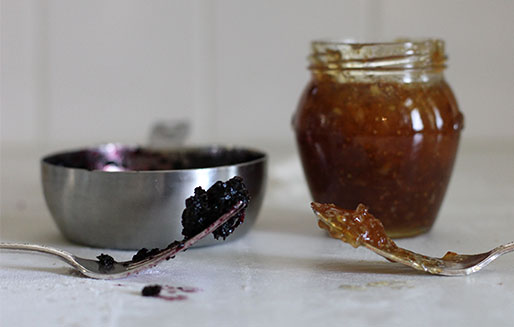
DIY Blueberry Cereal Bars: Filling

Note: If you would prefer not to make your own filling out of dried fruit, a thick fruit spread such as fig is a workable substitute. In my testing, commercial jams and preserves proved too runny when baked and would not be recommended.

makes 12 bars
1 hour active
2 1/2 hours total

For the Dough
5 ounces (1 cup) all-purpose flour
5 ounces (1 cup) whole wheat flour
1 ounces (1/4 cup) rolled oats
1/2 ounce (1/4 cup) wheat bran
2 1/2 ounces (1/3 cup packed) brown sugar
1 teaspoon baking powder
1/2 teaspoon salt
1/4 teaspoon cinnamon
4 tablespoons/1/4 cup cold unsalted butter, cubed.
2/3 cup whole milk
1 teaspoon vanilla extract

For the Filling
1 cup dried blueberries
1/2 cup water

For Assembly
1 egg white plus 1 teaspoon cold water, for wash
4 tablespoons wheat bran, for sprinkling
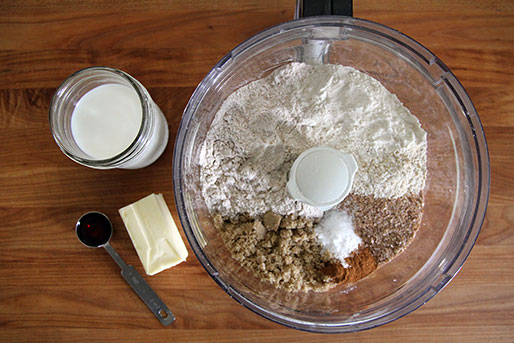
DIY Blueberry Cereal Bars: Ingredients

Measure flours, oats, wheat bran, brown sugar, baking power, salt, and cinnamon into the bowl of a food processor and pulse until ingredients are mixed and oats broken down. Add butter and pulse until pieces resembles coarse meal.

Stir vanilla into the milk and, with processor motor running, add liquids to the dry ingredients in a thin stream. Continue processing until dough comes together. Divide into two equal portions and flatten into 1/2-inch discs. Wrap each portion in plastic and refrigerate until firm enough to roll out, about two hours.
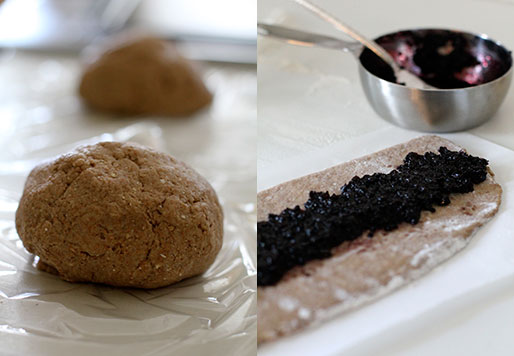
DIY Blueberry Cereal Bars: Dough

Meanwhile, make the filling. Place dried fruit and water into a small, heavy-bottomed sauce pan and bring to a boil. Reduce heat and simmer gently, covered, for 20 minutes, stirring occasionally. Transfer fruit and water to a food processor and process until broken down into a rough purée. Transfer filling to a bowl, cover, and refrigerate until needed.

When ready to assemble the bars, heat oven to 350°F with rack in the middle position.

Flour rolling surface and place one portion of the dough in the center. Flour top of dough and roll into an 8×12-inch rectangle, turning regularly to prevent sticking. Cut dough in half the long way to create two 4×12-inch sheets. To aide with filling and shaping the bars, place each strip of dough on a similarly sized piece of baking parchment before proceeding. Brush any excess flour from dough surface with a dry pastry brush.

Down the 12-inch center line of each piece of dough, spread an even 1-inch strip of filling (about 2 1/2 tablespoons). Using the edge of the parchment as an aide, fold one long side of the dough over the filling, covering it slightly more than half way. Brush a light coating of the egg wash over the remaining edge and, again using the parchment to help keep things even, fold the second dough edge so that it overlaps the first by 1/4 inch. Press gently to seal and flip the bars over so that they are seam-side down. Cut each log into three 4-inch portions.
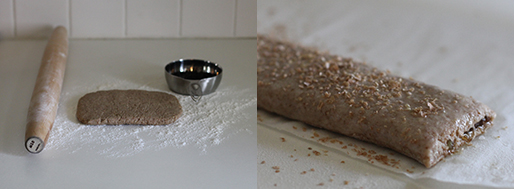
DIY Blueberry Cereal Bars: Assembly

Brush any excess flour from dough surface with a dry pastry brush. Coat each bar with a thin layer of the egg wash and sprinkle tops with wheat bran. Leave bars on parchment strips and transfer to baking sheet.

Repeat steps five through seven with remaining dough and filling. Bake bars for 16-18 minutes, until just golden. Transfer to a wire rack until cool. Store at room temperature in an air-tight container.