baking » Wonderland Kitchen
Browsing Tag

baking

The Cowboy and the Lady (New Christmas Cookie Edition, Part 2)

cookie_top

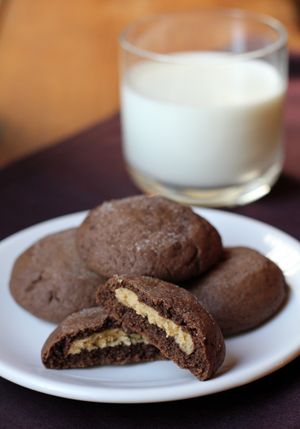
So, as I was saying, Christmas 2011 is crying out for some new sweet treats, and I’m endeavoring to deliver. My first pitch was a peanut butter filled chocolate cookie, and though it had something of a utilitarian, PTA-meeting vibe to me, what it lacked in flash it more than covered for in tastiness. I had admittedly baked with skepticism, but I snacked with gusto.

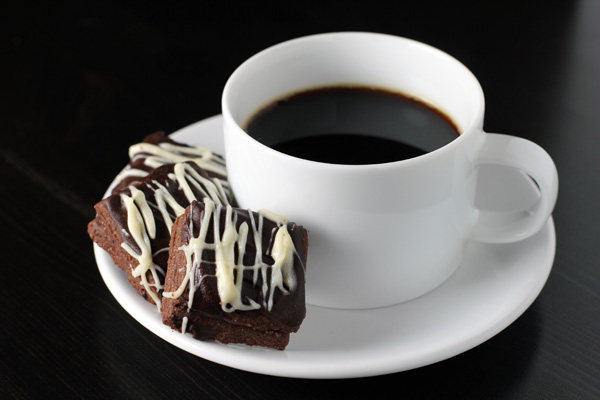
As a counterweight to that, I selected a chocolate mint sandwich cookie which brought new meaning to the idea of multi-step baking. No step was difficult, but the devil was definitely in the details. Dried fruit needed to be chopped, dough needed to be chilled, rolled, and cut into identical squares. Chocolates were unwrapped and two different types melted–individually! There was baking and sandwiching and icing and drizzling. And finally, there was a house full of amazing, minty, chocolatey smells and a plate full of pretty cookies. They sure looked fancy; they tasted great. But I was so tired that all I really wanted to do was curl up under a blanket with a hot mug of coffee and a couple more of the peanut butter filled ones.

Chocolate Mint Cookie Sandwiches

Chocolate Mint Cookie Sandwiches
adapted from 1 Dough, 100 Cookies

2 1/4 cups AP flour
1/2 cup unsweetened cocoa powder*
1/3 cup dried cranberries, finely chopped *
pinch salt
1 cup butter, softened
3/4 cup sugar
1 egg yolk
2 tsp. vanilla extract

15 after-dinner mints**
4 oz semisweet chocolate pieces
2 oz white chocolate pieces ***

In a medium bowl, whisk together flour, cocoa powder, cranberry pieces, and salt. Set aside.

In the bowl of a stand mixer, cream the butter and sugar, then add egg yolk and vanilla and mix well. Add dry ingredients and mix until just combined. Divide dough in half, wrap each piece in plastic, and refrigerate for one hour.

Once dough has chilled, preheat oven to 375°F and line two baking sheets with parchment.

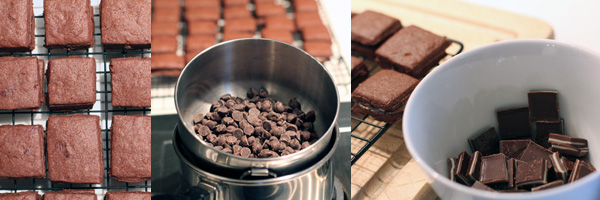
Roll out and cut each piece of dough into 15 2.5″ squares (for a total of 30). I made 1.5″ squares and simply ended up with quite a few additional cookies. Bake each sheet for about 10 minutes (until cookies are firm). As soon as you remove them from the oven, top half the squares with a mint and cover with remaining cookies, pressing lightly. Transfer to a wire rack and allow to cool completely. Your kitchen will now smell amazing, attracting the attention of family members and pets, so monitor your cookies with care!

Chocolate Mint Cookie Sandwiches

When cookies have cooled, melt the semisweet chocolate pieces in a bowl over a pot of simmering water. Allow to cool and drizzle over the sandwiches. Once the semisweet chocolate has set, repeat the process with the white chocolate. Enjoy the fancy sweets.

*I tossed these two ingredients in my small food processor and whirled them around for a minute. It made quick work of the chopping, and the powder kept the dried fruit pieces from sticking together in a clump.

**I used Andes chocolate mints, but made smaller cookies so I broke 28 of them in half. The left over pieces I just tossed in with the semisweet chocolate when I melted it for the glaze.

***My white chocolate was very dry when melted. A small amount of vegetable oil thinned it to a drizzle-able consistency.

Comfort and Joy! (New Christmas Cookie Edition)

cookies_top

I was bored with Christmas baking, and I hadn’t even started yet. Let me back up.

On Friday, my mom called to ask how my Christmas preparations were coming along. I gazed out my window at the Halloween pumpkin still decomposing on my front porch and refused to assume her plan-ahead, Martha Stewart decorating drive.

I don’t like to pack my holiday celebrations too tightly, and I was still working off Thanksgiving dinner, thankyouverymuch. Still, an examination of the calendar did indicate that perhaps some hustle on my part was in order. While I wasn’t ready to make a public lawn statement quite yet, I figured that some baking might help ease me into the spirit of the season. When I turned to my usual Christmas cookie contenders, however–the peanut butter blossoms, the pecan tarts, the Hungarian half-moons–they were all so perfect and lovely and…uninspiring somehow. I decided that I needed to break tradition: Christmas 2011 needed a new cookie.

Thus began the epic Googling. (What? I’m a girl who likes her research!) In the end I settled on two experiments. This is the first, the “cozier” and less fussy of the duo. A friend came back from a block party raving about them a few weeks ago and even though they are laid back, they sure are tasty. I think what sold me is how they are kind of like a Buckeye–a peanut butter ball wrapped in chocolate; what’s not to love?–but (bonus!) in this version they also function as cookies. I was not disappointed.

Cooks all over blogland have gone to town on this recipe (which appears to have originated in an issue of Better Homes and Gardens), so whatever version you need, you can probably find one to suit (the vegans, in particular, have done a range of adaptions). I went with this posting by Culinary in the Country, mostly just because I liked his cookie flattening technique and the fact that he, too, whisks his dry ingredients.

Peanut Butter Filled Chocolate Cookies
Recipe from Culinary in the Country; adapted from Better Homes and Gardens

Dough:
1 1/2 cups all-purpose flour
1/2 cup unsweetened cocoa powder
1/2 teaspoon baking soda
1/4 teaspoon salt
1/2 cup unsalted butter, softened
1/2 cup granulated sugar
1/2 cup packed brown sugar
1/4 cup peanut butter
1 large egg
1 T milk
1 teaspoon vanilla

Filling:
3/4 cup sifted powdered sugar
1/2 cup peanut butter
pinch salt

For assembly:
a few tablespoons granulated sugar

Measure flour, cocoa powder, baking soda, and salt into a medium bowl and whisk to combine.

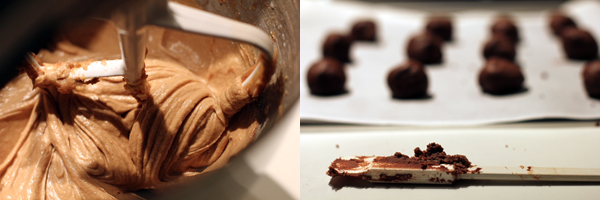
In a large bowl or stand mixer, cream butter, sugars, and peanut butter until smooth. Add the egg, milk, and vanilla, and continue mixing until well combined. Add dry ingredients and mix just until combined.

Cover two baking sheet with parchment and divide dough into 32 pieces. (I only got 29 and wasn’t disappointed with their size, so use your own judgement.) Quickly shape into balls.

Preheat oven to 350°F.

In a medium bowl or stand mixer, mix powdered sugar, peanut butter, and salt until smooth. Divide into enough pieces to fill your chocolate balls. I found the filling coherent and malleable enough to roll it out into a log, so I did that and simply divided it evenly with a butter knife rather than guess on individual balls, as the original recipe suggested.

Flatten each chocolate ball in the palm of your hand and top with a piece of the peanut butter filling. Fold chocolate dough as evenly as possible around the peanut butter and shape back into a ball before placing it on the baking sheet again. My “round” ball cookies always come out slightly flat, which in this case actually worked in my favor (see next step).

Lightly flatten each cookie with the bottom of a glass dipped in granulated sugar. You might need to get it a little greasy first to get the sugar to stick.

Bake cookies one sheet at a time until the surface of the cookies begins to crack slightly, about 8 minutes. Allow cookies to cool for 1 minute on the baking sheet, then transfer to wire rack and cool completely.

Pecan and Whipped Cream Cake (Twitter Made Me Bake It Edition)

cake_top

Even though my professional life revolves around creating multimedia content for websites, I am a social media skeptic. I don’t know why I’m so contrary, but there it is. So when we were assembling Wonderland Kitchen and Brian twisted my arm to adopt my @wonderlandk handle, I’ll admit that I was a reluctant Tweeter. Still, I picked out a few foodies to follow, and enjoyed lurking in the digital shadows, checking in on their chatter and lovely recipes from time to time. When one particularly delicious blogger announced his latest cake creation, I threw in my first comment:

I promptly wondered why I’d bothered. Then, a few seconds later, a response popped up:

We went back and forth like that a few more times, and even though it was about a minute of total mental effort, it stuck with me afterward. Here we were, two strangers unlikely to have otherwise ever traded a word in our lifetimes, suddenly connected by cake. It was sweet, simple, and only existentially soul-shaking if you stared at it too hard. (Ahem.)

Flash forward to today, and I made this cake, and @rvank sent his good wishes, and now I’ll take it along, over river/through woods, to the Thanksgiving feast we plan to share with our family tomorrow. The world feels a little closer, a little warmer as a result of these casual connections, so a shout from Wonderland to everyone out there reading and cooking this weekend: We here in this kitchen raise a glass to you and yours, wishing you all the best as we celebrate the bounty of the season.

And now, the cake! This recipe reminds me how much more I love baking when you can weigh your ingredients. So pull out your kitchen scale and let’s get to it. Thanksgiving is only a few hours away!

Pecan and Whipped Cream Cake

adapted by Chasing Delicious from a Bo Friberg recipe (Thanks to @rvank for the recipe and inspiring my purchase of a cake carrier to protect it during transport.)

4 ounces pecans
1 ounce powdered sugar
5 ounces bread flour
4 ounces cake flour
1 1/2 teaspoons baking powder
3/4 teaspoon salt
2 cups heavy cream
11 ounces granulated sugar
4 eggs
1 teaspoon vanilla

Preheat oven to 375°F. Butter and flour a bundt pan.

Place pecans and powdered sugar together in the bowl of a food processor and pulse until nuts are broken down just a bit rougher than a meal. Transfer to a medium-sized bowl, and add in the flours, baking powder, and salt. Whisk to combine and set aside.

In a second bowl, whip the heavy cream until stiff peaks form. Set aside.

In a third bowl, beat eggs, sugar, and vanilla together for several minutes. Then, using a wide spatula, fold half of the dry ingredients into the egg/sugar mixture, followed by half of the whipped cream. Repeat the process again with the remaining portions of each, fully incorporating but taking care not to over-mix and deflate the batter.

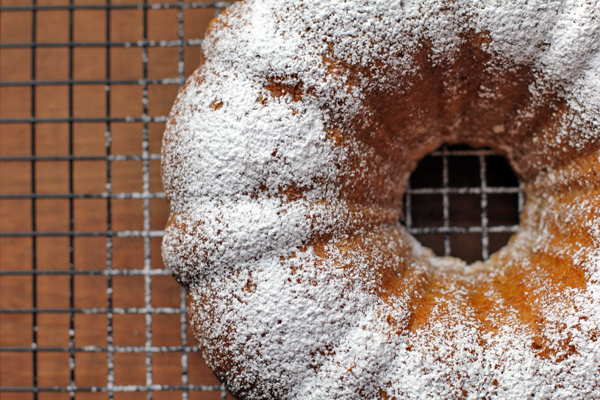
Pour into the prepared bundt pan and smooth with the spatula. Place in the preheated oven and immediately reduce the baking temperature to 325°F.* Bake for 45-50 minutes. A toothpick inserted into the cake won’t be clean, should come out with crumbs sticking to it, not raw batter. Cool on a rack, then loosen and turn out onto your serving platter. It should fall right out, but a light dusting of powdered sugar will disguise most removal-inflicted scars.

*I forgot this step and found myself flying back down the stairs five minutes later. Disaster averted, I still ended up baking my cake for closer to 53 minutes, which is typical of my oven. Here’s hoping I judged correctly; bread I have down, but cakes still make me nervous.

A Vegetarian At Thanksgiving

bread_top

Even though I’m a vegetarian, as a fan of all things cooking and presentation, holiday meals are high priority–even ones designed around a dressed up roasted bird (or perhaps bourbon brined and fried?). Over the years as an invited guest at the feasts of others, I’ve contributed my share of wild rice and dried fruit side dishes or defaulted to pie baking duty. Considering 2011 has been my year of bread, however, for this year’s round I went looking for an appropriate holiday loaf.

Which brings me to my second “even though,” because even though I am not Jewish, I have been addicted to braiding up dough ever since trying my hand at challah–and I haven’t even gotten to the double-decker celebration version yet!

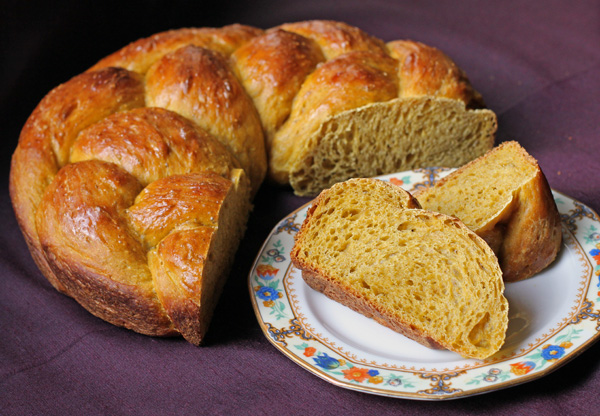
All of this preamble gets us around to how I ended up landing on this King Arthur recipe for Holiday Pumpkin Bread and declaring it a perfect candidate. Featuring fall flavors, it’s not too sweet yet unusual enough to stand out, plus its round celebratory braid reinforces the sentiment of love and community gathered around the table for more than just an average Thursday night meal.

I found the construction of the bread to be straightforward, and even mixing the somewhat sticky dough was a snap since I just piled all the ingredients in a bowl and let my stand mixer go to work. Most of the required investment is simply in time while waiting out the two rises. A little oil on your hands and your counter space keeps the soft dough from adhering to anything while forming the circular braid, and the lovely smells of pumpkin and spice even before the baking begins are enough to keep the baker motivated. Once the rounds hit the oven, good luck keeping attracted family members from devouring them before your holiday meal. Luckily, the recipe makes two loaves.

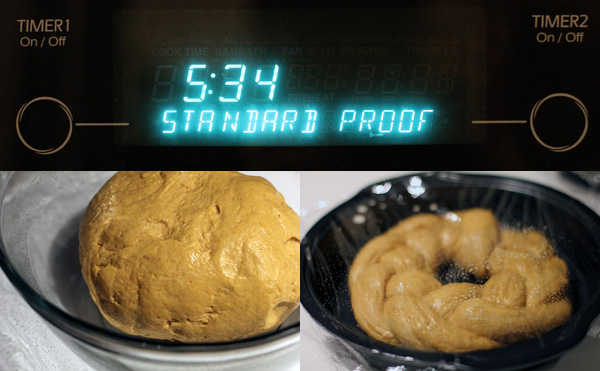
On a personal note, a nifty thing I discovered as a result of my broken oven and the paging through the instruction manual I did in an attempt to troubleshoot: this appliance is way fancier than I realized when we moved in and it even has a proofing feature! This is going to make winter bread baking–which can be a little tricky in our sometimes drafty, radiator-heated home–a lot more efficient. I bet this might work for yogurt making as well…

Spiced Pumpkin Celebration Bread
adapted from King Arthur Flour

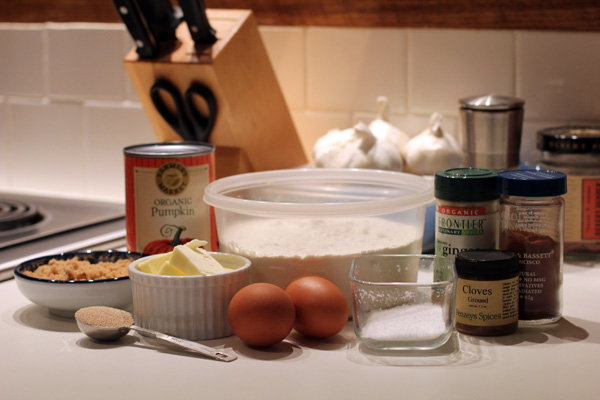
20 oz (4 3/4 cups) AP flour
1 teaspoon cinnamon
1 teaspoon ground ginger
1/4 teaspoon ground cloves
2 1/2 ounces (1/3 cup) brown sugar
1 1/2 teaspoons salt
1 tablespoon instant yeast
15-ounce can pumpkin
2 large eggs
1/4 cup melted butter

*additional egg, beaten with water as needed, for egg wash

Place all the ingredients (except for the egg wash) in a large bowl or the bowl of a stand mixer and mix and knead until smooth. The dough is somewhat sticky, but take care not to add too much additional flour so that the bread remains moist and light. Transfer to an oiled bowl, cover with plastic wrap, and allow to rise for about 90 minutes.

Once dough has puffed up (but not really doubled) lightly oil your workspace and hands and divide the dough into six even pieces. Working with three at a time, roll each into a log about 1.5 inches thick and braid, pulling the loaf into a round and joining the individual ends together. Lightly oil a 9-inch cake pan and place the braid in the center. Repeat the process with the remaining dough, then cover both with a sheet of greased plastic wrap. Allow to rise again, 60-90 minutes.

Preheat the oven to 350°F. When second rise is complete, gently remove plastic and brush each loaf with the egg wash. Bake for 30 minutes until golden (or until the center of the dough registers 190°F). Remove loaves from the pans and place on a wire rack. Cool completely before slicing.

***I’m not sure this recipe meets the requirements for Cathy Elton’s call for heart healthy T-day recipes, but at least it’s homemade so no weird additives! If you’ve come to Wonderland looking for such nutrition-conscious festive dishes, perhaps a batch of Celeriac and Lentils with Hazelnut and Mint will suit.

Nostalgia for the Cookie Jar

cookie_top

Even though it’s easy for me to ask for the check and skip the dessert menu, I do have a twinge of nostalgia when it comes to the cookie jar. A kind, grandmotherly sort of woman who used to live across the street from me when I was but a grade-schooler would often indulge my precocious conversation and offer me my choice of vanilla or chocolate sandwich cookie from the container she kept on her kitchen counter. She also gave me a small china statue of the Virgin Mary which I still cherish well into adulthood and well past my Catholicism, but I have to say, I miss her cookie jar.

However, I’m reliving some of that related joy this week. A friend gifted me a nifty little recipe book that boasts 100 variations on a basic butter cookie dough, and I wanted to make a batch for her in appreciation of her thoughtfulness. Though I was initially attracted to some of the more complex examples, in the end I settled on this simpler cashew and poppy seed slice-and-bake treat, which turns out a cookie that I’d call “bonus shortbread.” Not too sweet, and a perfect partner for afternoon tea and conversation. I put some of them in a tin right beside my kettle where they look quite at home.

Cashew and Poppy Seed Cookies
from 1 Dough, 100 Cookies

1 cup butter, softened
3/4 sugar
1 egg yolk
2 1/2 cups AP flour
1 tsp. cinnamon
pinch of salt
1 cup cashews, chopped
3 T poppy seeds (or enough to coat outside edge of cookies)

Cashew and Poppy Seed Cookies: Process

In a medium-sized bowl, whisk together flour, cinnamon, salt, and nuts. Set aside.

Cream together butter and sugar. Add egg yolk and continue mixing until well combined. Add in flour/nut mixture in two batches. Dough should be stiff enough to form into a log (take care not to leave an air pocket in the middle as I did). Spread poppy seeds in a shallow dish and roll the log through them to coat. Wrap dough in plastic and refrigerate for 60 minutes or until firm.

Preheat over to 375°F.

Remove chilled dough from plastic and slice into 1/2-inch rounds. Place on parchment-lined baking sheets and bake for 12 minutes, until lightly golden at the edges (I did not get much color, so don’t wait on this). Allow to cool for 10 minutes on the sheets before removing to a wire rack to cool completely.

Hey Honey, It’s Your Birthday*

cake_top2

In embarrassing Libra fashion, I must have changed my mind w/r/t the type of cake I wanted to make for the now annual Libra birthday party at least five times. Last year’s entry was a hit, so I was feeling the follow-up pressure, it’s true. But more than that, there’s also finally a full-on fall chill in the air, so I wanted something more rich and comforting than sharply sugary.

Kitten and I wait for the cake to bake. Which one will it be?

Still, the options were myriad. First, there was the red wine and chocolate idea, then the bundt cake thought, a browse or two through the photos on Tastespotting, a passing fancy with Baked’s White Out cake (which I thought might compliment Rebecca’s trial of the salty chocolate and caramel one) but just reading about the icing made my teeth hurt. Whether deemed too sweet or not fancy enough for a celebration, nothing felt like it would fit comfortably in with a casual evening house party in October.

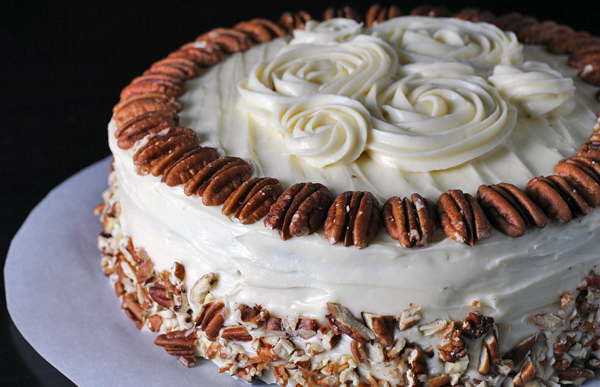
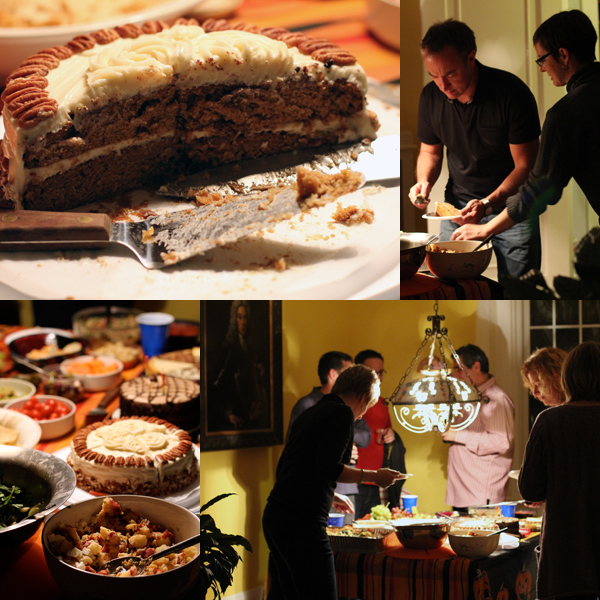
Then I remembered that cream cheese and maple syrup frosting, and landed pretty quickly on this pumpkin cake. Seems the David Leite recipe has already done a do-se-do or two around the internet, but it’s definitely worth another dance.

*For all those who grew up with Captain Zoom’s birthday message from the moon, a nostalgia ride can be found here.

Pumpkin Cake with Maple Cream Cheese Frosting
as seen on Leite’s Culinaria

To make the cake

1 stick unsalted butter, at room temperature, plus more for the pans
1 cup firmly packed dark-brown sugar
1/3 cup granulated sugar
2 cups cake flour, plus more for the pans
2 teaspoons baking powder
1 teaspoon baking soda
1 teaspoon ground cinnamon
1 teaspoon ground ginger
1/2 teaspoon ground nutmeg
1/8 teaspoon ground cloves
1/2 teaspoon salt
1/4 teaspoon freshly ground black pepper
2 large eggs
1/2 cup buttermilk mixed with 1 teaspoon vanilla
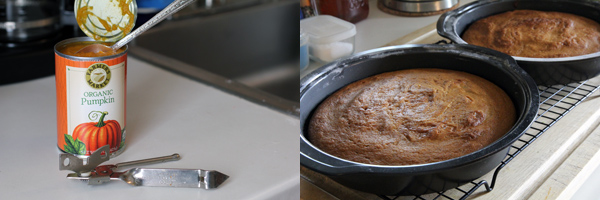
1 1/4 cups canned solid-pack pumpkin

Bring butter and eggs up to room temperature.

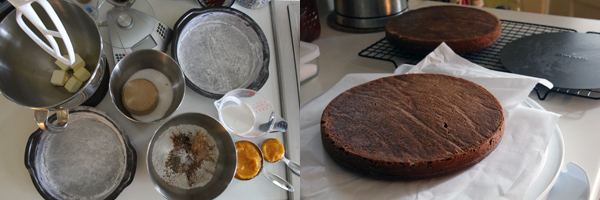
Preheat the oven to 350°. You’ll need two cake pans (8-inch if you have them, but 9-inch won’t ruin your cake). Butter each pan, line the base with parchment paper, butter that surface, and flour the entire interior of both pans.

Measure out the sugars into one bowl, and the remaining dry ingredients into another. Run a whisk around each bowl to evenly incorporate.

Beat the butter and sugars together on medium speed until fluffy.

Add the eggs, one at a time, scraping down the sides (and bottom! I had some sugar that got stuck there) of the mixing bowl after each addition. Alternate adding the flour and milk mixtures, beginning and ending with the flour. Beat in the pumpkin until smooth. Divide the batter equally between the pans.

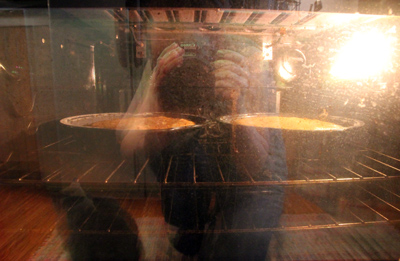
Bake the cakes until a toothpick inserted into the center comes out clean, about 30 minutes. Cool the cakes on racks in the pans for 10 minutes, then remove, peel off parchment, and allow to cool completely.

To make the frosting

16 ounces cream cheese, softened
1 stick unsalted butter, at room temperature
2 cups confectioners’ sugar
1/4 cup pure maple syrup

Pecans, toasted and roughly chopped, to garnish

Beat all the ingredients (minus the pecans) on medium until fluffy. Place bottom layer of cake on serving plate or stand, frost the top, and place the remaining cake on top. Continue frosting the sides and top, garnish with nuts and remaining icing (rosettes are actually really easy to do), and refrigerate the cake for 30 minutes to allow the frosting to set.

Enjoy!