eat me » Wonderland Kitchen
Browsing Category

eat me

Back to Basics: Bread and (Macadamia Nut) Butter

macadamia_top

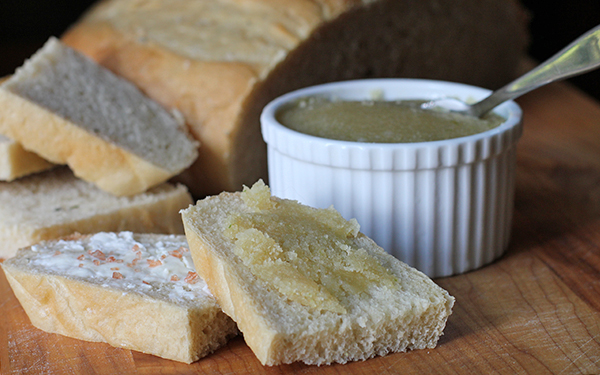
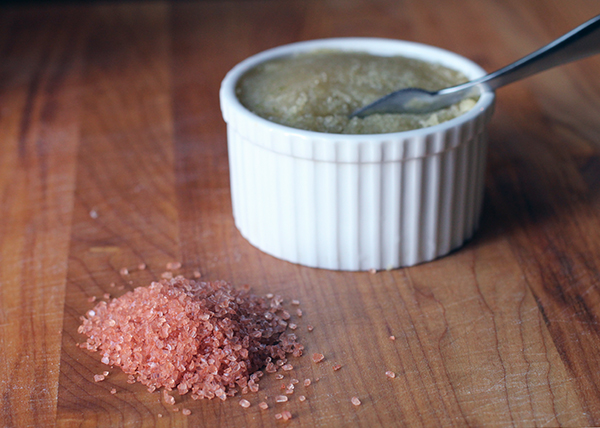
Since we spent the majority of our time on Kauai lulled by the sound of the surf and napping in lounge chairs, it’s probably good that we didn’t do a ton of eating in the off hours. Most of our food came from the grocery just down the street or right from the hotel (including a fantastic dinner at the on-site restaurant, Red Salt). I ate lobster tail for the first time–an even bigger surprise, since apparently my jet lagged brain did not read the entry for the ravioli carefully enough and so I didn’t see it coming–but what I really loved was the bread, served with a delicious butter and a small bowl of red salt for sprinkling on top.

Glass Beach on Kauai

Glass Beach on Kauai (mostly black sand and scampering crabs when we visited at dusk, very sparse sea glass)

We did put on real clothes long enough to check out the beer at the Kauai Island Brewery & Grill one night and to grab a pizza at Brick Oven (which gets bonus points in my mind for their fabulous mascot). And for a big road trip one evening, we drove halfway around the island to catch a meal at the vegetarian-friendly Postcards Cafe.

Koa Kea Pool

Photo by @briansacawa

By the time we set out on the 1.5 hour drive, I think I may have built up the restaurant in my mind beyond reasonable expectation. The venue was charming and the staff excellent, but I didn’t find my entrée of tofu, vegetables, and rice in a coconut curry broth to be remarkable in any way. Perhaps that was just a poor selection on my part, but since the GF/V options seemed to be a point of pride for the establishment, I was ready to be dazzled. The trio of artichoke/mushroom/walnut, creamy roasted eggplant, and traditional olive tapenades that we started with was indeed fabulous, however. And there was another sidelight brought to the table that really captured my attention: slices of house-baked bread sharing a basket with a dish of macadamia nut butter. I quizzed the friendly waiter about the makings; this was a souvenir of island life I was intent on taking home with me.

Yes, in the midst of tropical drinks anchored down with fresh pineapple slices and excellently prepared seafood everywhere you looked, leave it to me to get obsessed with the bread and butter. Home again and dreaming of the seashore, I took to baking some rosemary bread just so I could top it with my new favorite spreads.

Macadamia Nut Butter & Red Salt

Macadamia Nut Butter

1 cup macadamia nuts
1 tsp. agave nectar
1/4 tsp. salt
2 scallions, sliced

Place nuts in the bowl of a food processor and let run for a couple of minutes, stopping to scrape down sides as needed. Once the nuts resemble a coarse meal, add agave, salt, and scallions, and continue to process until the butter has achieved desired smoothness.

The butter at Postcards is very chunky. If I had reserved another quarter cup of the nuts, I would have hand chopped those and stirred them into the finished butter before packing into a serving bowl. Next time!

Child of Invention: Shake and Pour Pantry Peanut Dressing

dressing_over

There is a comforting romance to tracing your culinary roots back to grandma’s stained cookbooks or memories of mom letting you wear her apron and stir. These bits of nostalgia are stereotypically accented with the recollection of shared kitchen laughter and lessons learned at the elbows of others—food preparation that bonded the family and ended in feasts of Norman Rockwell perfection.

In my case, however, this love affair with formulas and mixtures and experiments began in the garage. My father had set up an old Formica-topped table, behind the cars and next to the lawn mower, where I could spend hours by myself just messing around in my own imaginary kitchen. I made milk by shaking together baby powder and water in a cast-off baby bottle, “reduced” dish detergent by pouring it into a plastic bowl and leaving it out in the sun until it congealed. Once, after I saw a special on PBS, I even took a handful of clay from some craft supplies we had and formed my own wine vat, mashing up grapes from our vines and sealing this mixture inside, burying the whole thing in the ground just as I had seen on TV. The next spring when I unburied the clay container and brought a glass of the reeking fermented liquid to my mother, the color drained from her face at the idea that I might have been drinking it. I was only eight, but still—perhaps they should not let me spend quite so much time alone in the garage.

Polaroids from my 1st grade science fair project. The experimental side of cooking is what attracted me.

I didn’t think much about those days once school and friends and violin lessons took over my focus and “playtime” was a thing of my past. In college I cooked to survive, and as a single working woman in New York, I cooked only on the rare occasion that I was actually in my apartment long enough to eat. Once I married, moved, and established a real home, cooking became a more seriously integrated part of living and my inner mad scientist reawoke. My fridge is now crammed with jars of housemade pickles and chutneys and various condiments. I lug home gallons of whole milk that I turn into yogurt and cheeses, fruit and honey that I ferment into mead. My freezer is packed with flours and yeasts of various sorts; I keep a jar filled with the latest sourdough starter, a life that I labored to bring into this world and yet now keep forgetting to feed.

I love to research but I’m not such a fan of measuring, so my favorite dishes tend to be more memory than recipe-based. In the process, I destroy and I discover. I’m still eight-years old really, just better outfitted this time.

*

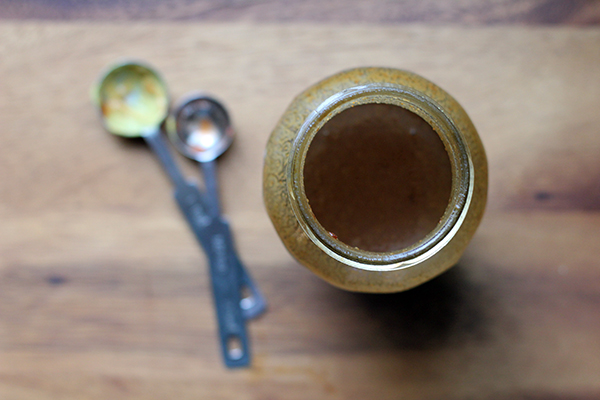
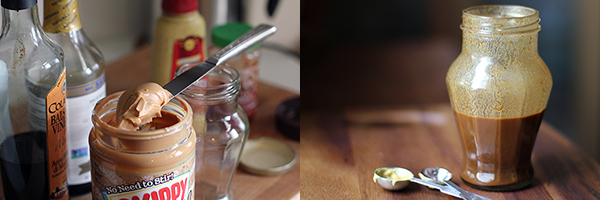
Shake and Pour Pantry Peanut Dressing

Shake and Pour Pantry Peanut Dressing

When it comes to dinner salads, there is a point between a heavy dairy laced dressing and a simple vinaigrette that I often find myself seeking in order to accent a full meal of raw vegetables. More often than not, I’ll end up turning to this spunky peanut butter-based recipe. Though honestly, I feel like the instructions which follow should read along the lines of: “Open refrigerator. Remove several complimentary condiments. Shake together and pour.” Because really that’s what I do. I promise I actually measured the recipe below, but I’m never so careful in real life. I almost always forget at least one ingredient, and sometimes I add others, such as honey or toasted sesame oil. If there’s not enough of something, I just use something else.

As if that wasn’t a slippery enough slope, I also adjust it several times throughout its shelf-life to suit different purposes. Need it thicker for cooked veggies or as a dumpling dipping sauce? Spoon in more peanut butter and shake. Need it thinner again to cover another round of salads or to kick up some quinoa? Taste and add more liquid and adjust heat–usually a bit of soy sauce and a squeeze of mustard will do it.

2-3 T peanut butter (processed or natural, chunky or smooth)
4 T tamari (I use reduced sodium)
2 T balsamic vinegar
1 tsp. mustard
1/2 tsp tuong ot toi (vietnamese chili garlic paste)

Measure all ingredients into a jar with a tight fitting lid. Shake until well combined. Taste and adjust balance to suit your tastes. Refrigerate until needed.

A Feast of Vegetables, or How Not To Waste Your CSA

csa_top

Here in Wonderland Kitchen, some weekends are all about the big projects–sourdough bread baking or cheese making or pickled vegetable canning. Other weekends consist of 105-degree-shellacked days in which the majority of the “cooking” is devoted to sitting in the direct blast of the window air conditioner and contemplating the meal plan that requires the least amount of time out of its cool company. As you have probably already guessed, today I’m going to tell you about the latter.

I wasn’t going to post about any of these “recipes.” In fact, I was thinking of taking a couple weeks off–a little summer vacation–during which I would consider what this blog might best become as it cruises into its one-year anniversary. But then I started reading. The publication of The Locavore’s Dilemma seems to have sparked an entire series of forehead-slapping columns mirroring the same basic argument: namely, that people like me–a woman who finds a weekly trip to the farmers market both gratifying and the best way to feed myself and my family–well, we’re all just deluded, bougie romantics.

Now, that may be so, but it might also be that my compatriots are reading labels and health reports and making some decisions about what goes in their mouth. I’m not sure what big box grocery store the authors of The Locavore’s Dilemma shop at, but it must not be the ones I have access to in which the “real food” section is but a small slice of the proceedings and much of what’s on view is so waxed it’s sticky or so wilted that it’s yellow before I even get it home. I’ll take some grit and bugs and seasonal selection over all that, thanks. I don’t deny that I buy citrus year round, and I don’t feel the need to hide my avocados under my toilet paper, either, but I do directly trace the high percentage of plant consumption in my diet to the fresh and varied and delicious produce provided by the local farmers who sell to me here in Maryland.

The even stranger criticism I’ve read in these anti-CSA articles this week (I have not read the book itself) is that the system is “wasteful” because homemakers can’t manage the volume of food received, either when they travel and need less, or when they have guests and need more. This leads me to believe that the authors neither cook efficiently nor share with their friends and neighbors.

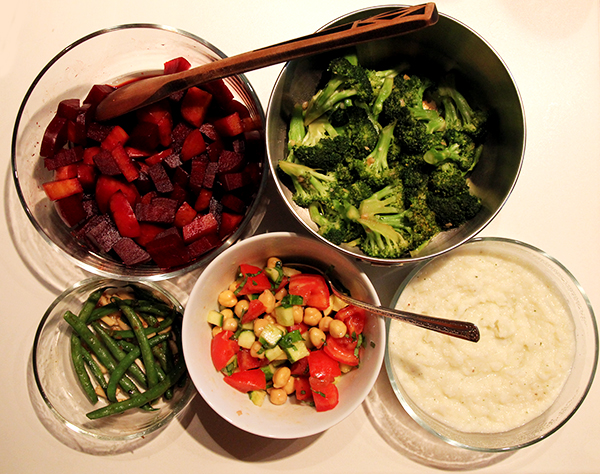
CSA Feast

Still, I’ll admit that I was feeling kind of down about the whole thing when I read this inspiring article about cooking to eat rather than following a recipe in order to cook. It both encouraged me (this is how I’m trying to teach myself to work more creatively off-script in the kitchen, even without any formal training) and reminded me why the CSA system works for me. It challenges me to use what I have while allowing me to keep it simple, because fresh quality produce usually doesn’t need much help.

Anyway, at the end of last season, I ran my own numbers and found that the CSA and farmers market supply chain worked for my health (mental and physical), my social life, and my pocket book, so we’re still committed. The measures of good economics and fair trade may vary, I suppose. Yesterday, I pulled our “harvest” out onto the counter and came up with a Saturday night feast that proceeded from planned to plated in well under an hour. I don’t claim any of these are actual recipes as much as they represent one set of solution-instructions to the problem that was dinner. How are you solving these equations lately?

Cold Tomato and Cucumber Salad

Cold Tomato and Cucumber Salad

1 small tomato, cored, seeded, and diced
1 small cucumber, from a friend’s garden, must be eaten already
1/2 cup leftover chick peas
4 basil leaves from the garden, shredded
Several generous drizzles of that fancy herbed olive oil we got for Christmas last year
salt to taste

Place all in a bowl, toss.

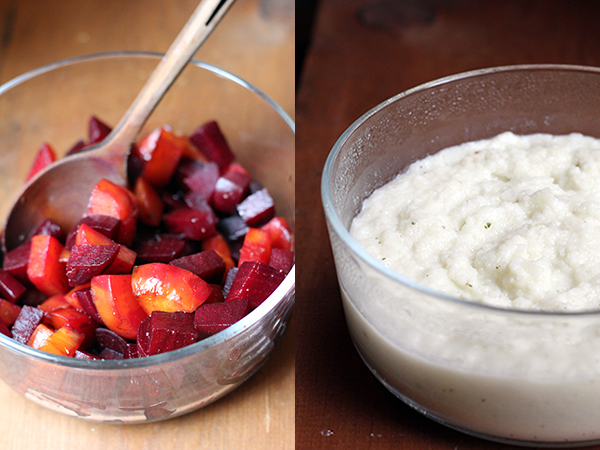
Creamed Kohlrabi

1 large bulb kohlrabi, peeled and cubed
1 large garlic clove
2 T buttermilk
1 tsp pesto from our friends a few blocks over
salt

Boil kohlrabi until fork tender. Drain and place vegetable and garlic in the bowl of a food processor and process until broken down. Add remaining ingredients and pulse a few more times to combine. Taste and add salt as needed. Serve hot.

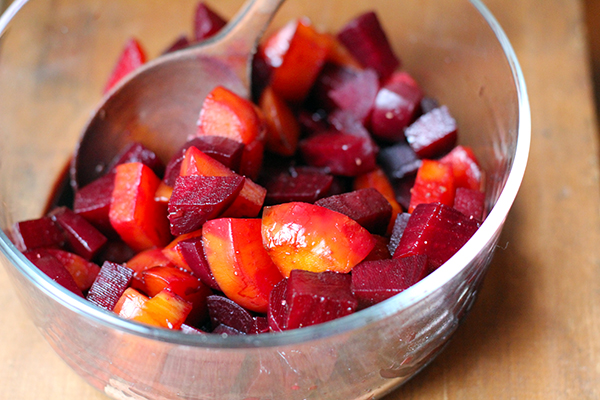
Beets in a Thyme Balsamic Glaze

Beets in a Sweet Thyme Balsamic Glaze

5 small beets, various colors, boiled, peeled, and cubed
4 T balsamic vinegar
4 thyme springs from the garden
1 tsp. honey

Place vinegar, thyme, and honey in a small sauce pan. Simmer until honey is dissolved, thyme is fragrant, and vinegar is somewhat reduced. Remove thyme sprigs and drizzle sauce over beets. Sprinkle dish with salt and pepper and toss to coat.

Five-Minute Broccoli

1 bunch broccoli, rinsed and cut into florets
1 T olive oil
2 cloves garlic, minced
3 T vegetable broth
Drizzle of tamari

Heat olive oil in a skillet and saute garlic and broccoli just until vegetable is bright green. Add broth and cover pan, steaming until vegetable reaches desired level of crispness. Drizzle with tamari to finish.

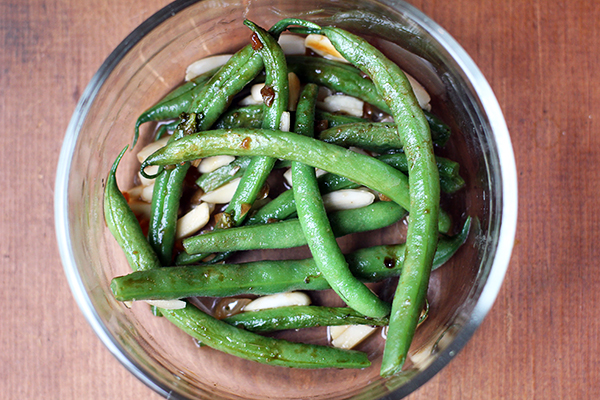
Backyard Garden String Beans

Backyard Garden String Beans + Party

12 green beans that are worth cooking because you grew them yourself, cleaned
sprinkle of lime juice from that lime you zested yesterday
Last of the sliced almonds still hanging out in the pantry

In the pan you just cooked the broccoli in, still coated with broth and oil and garlic bits, saute the beans. Wash remaining dishes and wipe counter off while they cook. When ready, sprinkle beans with almonds and lime juice.

Open some wine. Invite the neighbors over. Enjoy your feast.

Savory Summer Pie: Tomatoes and Corn and Biscuit Crust, Oh My

cornpie_top

I may have grown up amid Ohio’s horizon-filling corn fields, with tomatoes piled high at every farmer’s stand we passed, but I had never tasted the Southern treat that is tomato corn pie until a few years ago. Since that revelatory time, however, it has become the dish that announces “Summer!” in our kitchen (and celebrates its bounty a few times more throughout the season).

Tomato Corn Pie

Despite all that, somehow it has never ended up detailed here in Wonderland. I think I get distracted. There’s that weekend when I arrive at the market and see that the stall at the end has a pickup bed backed in and filled with ears of corn, and that the man who’s been selling the fresh spring peas has now traded them for bushels of the reddest, ripest fruit. I get a little dizzy. Apparently, I don’t come to again until the pie is baked and eaten. Apparently, I don’t consider sharing.

And it also has to do with the fact that a small army of writers have already blogged their way through the Gourmet recipe and posted all about how awesome this pie is, so it has always seemed silly to add to the noise about it. There are plenty of variations out there now as well: tomatoes roasted, a crust spiked with this seasoning or that one. The fact that I am extra generous with the filling–mounding up the corn and tomato slices and going extra hard with the basil–hardly seemed worth reporting.
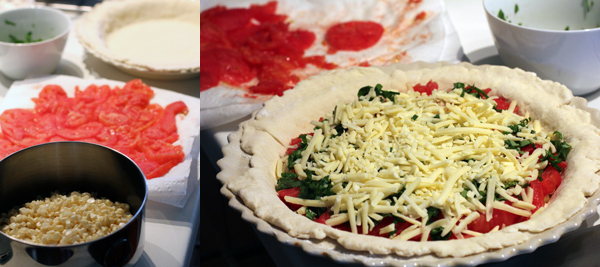
Tomato Corn Pie

Once, however, I did read a post in which a cook expressed extreme displeasure in the finished dish. It was all wrong, she wrote, and I was weirdly crestfallen over this, that my favorite pie wasn’t universally loved. She disliked the crust (“But it’s a delicious, buttery biscuit!” I shouted at the computer screen). It was then that she really drew down on my thick slices of heaven and blamed the mayo.

Now, I have heard of these strange beasts, people who feel about mayonnaise the way others react to cilantro–with an innate disgust that deeply confuses the camp of addicted fans. Being both Team Mayo and Team Cilantro myself, I usually take a shoulder-shrugging “more for me” stance in the face of these expressed tastes. But the first tomato corn pie of 2012 has changed all that. I got home with my produce, shucked my corn, peeled and seeded and squeezed and blotted my tomatoes, chopped my herbs, whipped my mayo and lemon, shredded my cheese, and mixed the most lovely biscuit crust of my career. I assembled it all, crimping the edges and, yes, gloating already about how lovely it all was when I chanced to look over and see that the measuring cup full of the lemony mayo dressing was still sitting there, on the wrong side of my pie.

Unkind thoughts were mentally expressed. Also, I learned that you cannot, no matter how much you might desire to, pour the dressing in through the top crust vents. Just a little FYI.

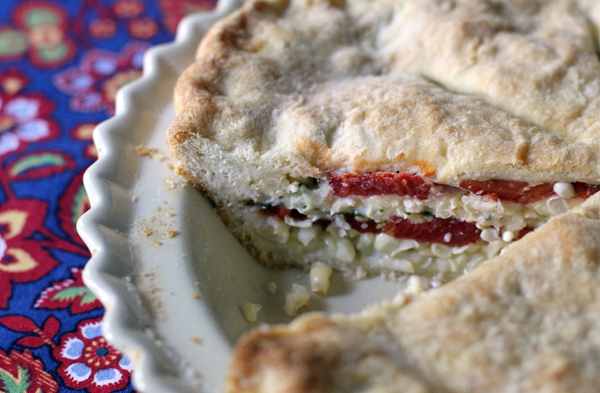
So, I tossed the sauce into the ‘fridge and the pie into the oven, counted it as a lesson in humility, and tried to move on. When I took a bite of the baked pie, however, I discovered that I just might have stumbled onto something. First, for all the “mayo is gross” sayers in the crowd, this pie is tasty–not as tasty!!–but still plenty good sans the condiment. When made correctly, however, this recipe has a tendency to soak through its bottom crust no matter how vicious you get with the draining and blotting of all the sweet juices out of the tomatoes. This time, I cut and was rewarded with a perfectly platable slice–even the first piece popped right out of the dish with barely a chip in the bottom crust. I drizzled a bit of the unintentionally reserved dressing over the top like some kind of icing. I think this just might become a thing.

So make your own tomato corn pie, with or without mayo. No need to do anything but slice off the corn kernels, in my opinion, but definitely peel and seed and squeeze and blot those tomatoes.
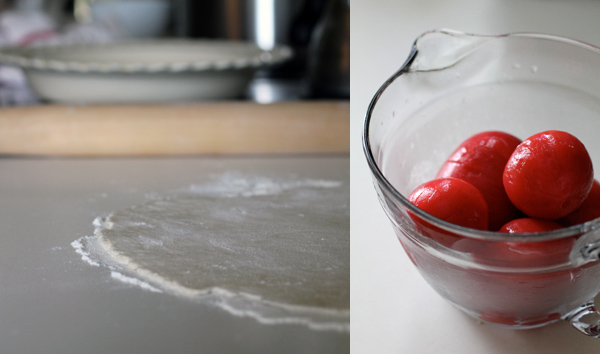
Tomato Corn Pie

Savory Tomato Corn Pie
as seen across the internet, most traceable back to Gourmet

For the crust

2 cups all-purpose flour
1 tablespoon baking powder
1 teaspoons kosher salt
6 T cold unsalted butter
3/4 cup whole milk

For the filling

4 large, meaty tomatoes, peeled, cored and sliced crosswise, drained of their juices
3 ears of corn
3 T finely chopped basil
1 T finely chopped chives
2 cups sharp cheddar, grated
pepper
1/3 cup mayonnaise
2 T fresh lemon juice
1 T butter, melted, for brushing the top crust

Prepare the tomatoes by cutting a shallow X in the bottom of each and dunking then in a boiling water for 10 seconds, then submerging them in ice water. The skins should easily peel off at this point, sticking only if there are imperfections in the fruit. Slice and squeeze gently, discarding liquid and seeds. I like to begin with this step so that I can lay out the slices out on paper towels and get as much drainage time as possible.

Whisk flour, baking powder, and salt together in a medium-sized bowl. Add 6 T butter in small cubes and, using with a pastry cutter or your preferred method, work the butter into the dry ingredients. When the mixture resembles a coarse meal, add the milk and mix just until all ingredients are incorporated. Divide roughly in half (I add just a touch more weight to what will become my bottom crust and wrap in plastic. I like to flatten the dough into rough discs and refrigerate until ready to roll out.

Cut the corn off the cobs and roughly chop. Prepare the cheese, whisk the mayo and lemon dressing together, and chop the herbs.

When ready to assemble the pie, heat the oven to 400F.

Unwrap one of the dough pieces and place on a well-floured counter. Flour the top of the dough as well and roll out to fit your 9-inch pie plate. Working in batches, place half the sum total of each–corn, tomato slices, herbs, and cheese–in the shell and then repeat. Finish by drizzling the mayo dressing over the filling (though you may omit this step if you absolutely must). Roll out the top crust and seal the edges. Slice vents in the top and brush with the melted butter. Bake for 30 minutes or until golden.

Tomato Corn Pie slice

Canning and Preserving: The Season So Far

jars2

I am a “learning by doing” type of person, but I’ve never enjoyed group classes. I may not get much from reading instructions, but I do like to make my mistakes in the privacy of my own home, on my own terms and on my own schedule. It’s not the most efficient method of knowledge acquisition, I’ll grant you, but it’s what has always worked for me.

Last year a lot of my study concerned bread, particularly sourdough. I trialed, I errored, and I learned a lot. And now I really feel like I know something, something satisfying in the same way that working to play the violin well provided but that getting a good grade never did. (There are actually a lot of music/bread parallels, I’ve discovered.)

Anyway, whereas last year’s kitchen was filled with yeasts and starters and flour everywhere, this year I’ve been working my way into canning. I know, I know, I’m very late to this party and riding the trend almost at the point of cliche, but it turns out this is a good thing because everyone and their sister published a beautiful book on canning and I am now actively applying these textbook lessons. (Yes, due to the need for food safety, in this case I’m even reading and following instructions to the letter.)

Canning and Preserving

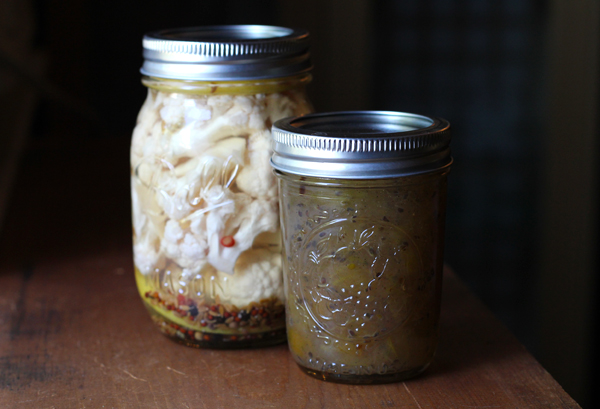
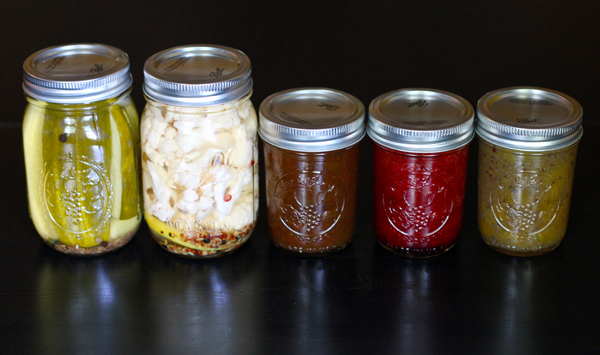
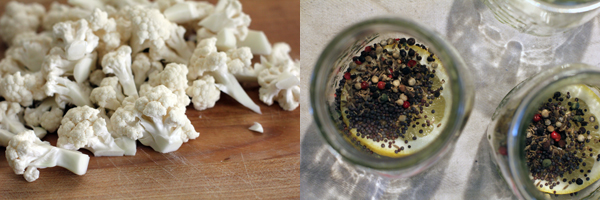
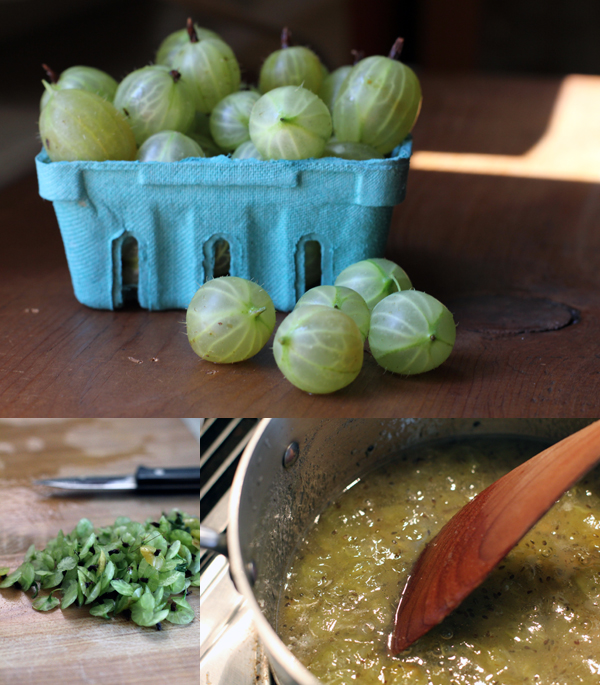
Since I am buying my produce from the market (heavily shaded urban gardening is just not high-yield), my batches so far have been just a few jars each, but this also keeps things manageable (and, if I screw something up royally, it won’t be such a waste). So far, we’ve got (as seen above): Classic Dill Pickles and Lemony Pickled Cauliflower from Marisa McClellan’s Food in Jars: Preserving in Small Batches Year-Round, plus her small batch recipes for Rhubarb Chutney and Honey Sweetened Strawberry Jam. And finally, a Gooseberry Jam from The Preservation Kitchen that I found especially attractive due to its comparatively low sugar content and the addition of vanilla.

Canning and Preserving: CauliflowerCanning and Preserving: Gooseberries

I also broke down and, even though I certainly don’t feel like eating sauerkraut at this point in the season, I sliced up that 5 lb. cabbage lurking in my fridge (a gift from a friend’s farm) to at least make some for later. I now have another bucket of it set out to ferment in the corner. It’ll be due to process in a few weeks.

The next request I’ve had is for ketchup. If you have a lead on a great recipe, please do let me know. I’m competing with the ghost memory of a grandma’s prize-winning concoction, so I’ll need something stellar.

Ultimate DIY Picnic: Housemade Buns & Mayo

rolls_top

I did not intend to bake my own hamburger buns when the week began.

The thing of it was, I kept eating Brian’s whole wheat store-bought ones, simultaneously lamenting both their dwindling number and their shoddy quality. After polishing off half the bag–what? I was feeling nostalgic for the NYC egg sandwiches of my youth–it seemed only fair that I replace them, but I was hoping for something a little less prone to collapse. Maybe I could make them? That seemed likely to be prohibitively labor intensive for any pre-workday morning, but before I hit the store, I hit the Google. As per usual, King Arthur Flour delivered a recipe for a spectacular dough: a snap to mix, a dream to shape, and an end product that elicited a satisfying number of “You made these?!” responses from their consumers.

I mixed in some whole wheat flour, melted and cooled (rather than just softened) my butter accidentally, and reduced the sugar a bit the second time around (they go fast!), but this recipe is stellar either way.

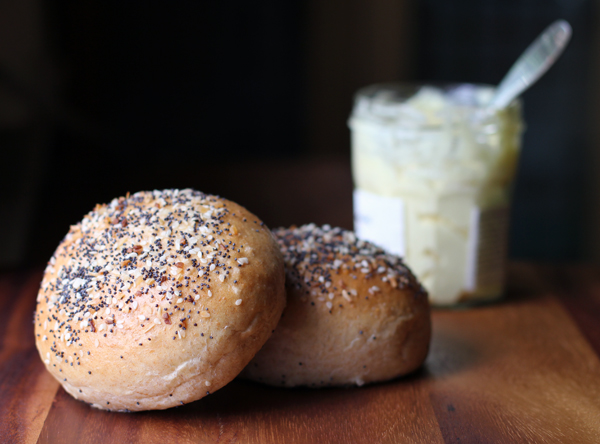
Everything Burger Buns and One Minute Mayo

Everything Burger Buns
only slightly adapted from King Arthur Flour

3/4 cup water
1 T instant yeast
3T sugar
100 g whole wheat flour
318 g all purpose flour
1 egg plus 1 egg white for wash (add remaining yolk to dough, if you like, or reserve for homemade mayo–see recipe below)
1 1/2 tsp kosher salt
2 T butter, softened
3 T “everything bagel” topping

Place all ingredients in a large bowl or stand mixer and knead, but hand or by hook, until a smooth dough has formed. Lightly oil the bowl and surface of the dough, cover, and leave to rise until doubled, about 90 minutes.

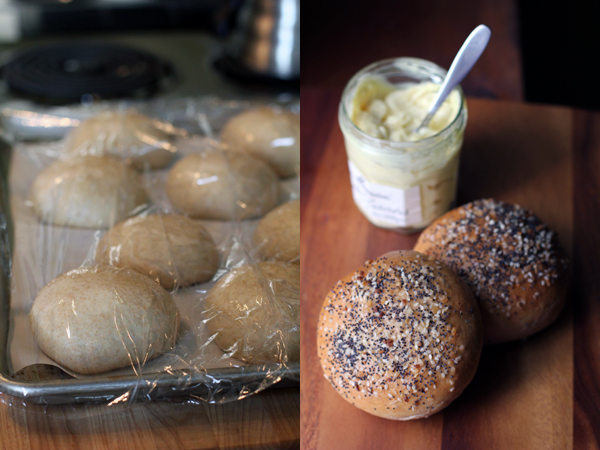
Line a baking sheet with parchment paper. Deflate the dough and divide into eight equal piece. Shape each piece into a ball (I like to gather the edges of the dough into something of a very small balloon knot, and then place each roll on the sheet, knot-side down, patting it gently on top to spread the roll out a bit). Cover and leave to rise another hour.

During the second rise, preheat your oven to 375F. Beat the egg white with a little cool water and, when the rolls are ready for the oven, remove cover and gently brush the tops with the wash. Sprinkle each with the “everything bagel” topping, or the seed combo of your choice. Bake for 15-18 minutes, until golden. Cool completely on a wire rack before slicing.
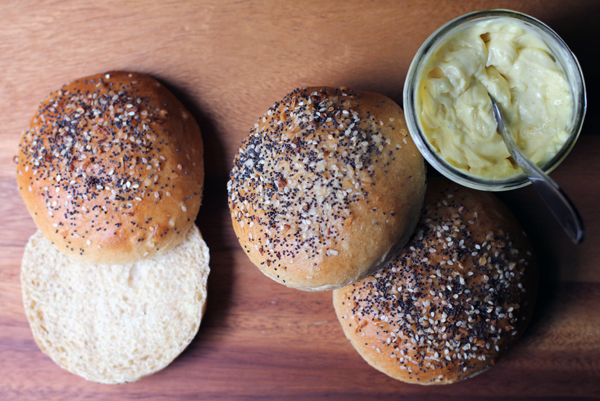
Everything Burger Buns and One Minute Mayo

One-Minute Mayo

After two batches of the buns above, I had two yolks hanging out in the ‘fridge, demanding I make good use of them every time I opened the door. There are, of course, a million mayo recipes out there online, and I make no claims to have had any part in inventing this process. But I do love executing it. This is the formula I’m using currently. You’ll need an immersion blender for this method.

2 egg yolks
1 tsp. lemon juice
2 tsp. vinegar
1 tsp. mustard
1/4 tsp. salt
1 cup vegetable oil (some people include a bit of olive oil, but this has never worked for me; it always overpowers, never in a good way)
1 garlic clove (optional)

Allow all ingredients to warm to room temperature. Place everything but the oil and garlic in the base of a container just wide enough to accommodate your immersion blender (the cup that often comes packaged with one is perfect). Cover these ingredients with the business end of the blender wand and gently pour in the oil around it, so that the oil remains suspended above the rest. Begin pulsing the blender in two-second bursts until streams of emulsified mayo start to appear at the bottom of the glass. This won’t take very long at all. Continuing with the bursts, slowly moving the blender up towards the top of glass, plunging up and down a bit as needed, until all oil is incorporated. Scrap down blender. If using the garlic, use a press to crush the clove into the mayo. Stir well to incorporate. Taste and add additional salt as needed. Transfer to a container with a tight-fitting lid and refrigerate until picnic time!