csa & vegetables » Wonderland Kitchen
Browsing Category

csa & vegetables

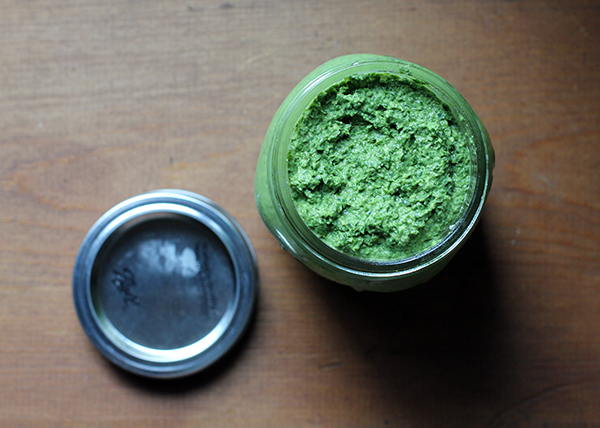
The Joy of (Not) Cooking: Kale Pesto

kale_over

The first days into an August that could variously be described as sticky, gritty, or just plan oppressive (same as it ever was? yes, but still), my kitchen projects are decidedly anti-cooking. In fact, I’m to the point that I will stop to consider whether bending over to lug the food processor out of its storage space is worth the effort, so you can see how things have ground to a kind of halt here in Wonderland.

Still, when your CSA haul means you have acquired not only two heads of lettuce for your nightly no-cook dinner salads but also a bunch of swiss chard and a bunch of kale–all of which needs to fit in the ‘fridge in some manner–steps must be taken.

Lately, this is when kale pesto becomes very attractive. Kale may be the ultimate cliche of the super natural food blogger (seriously, click and read that), but I get exhausted just looking at it. The thought of kale chips has never inspired me to kitchen action (though I will happily eat yours!), and the idea of chewing a week’s worth of kale salads at home will force me to suggest dining out. This kale pesto, however, reduces down neatly to a pint-sized jar, ready to be smeared on pizzas and sandwiches of all kinds, to be tossed with pasta, or to serve as a dip for veggies and pita chips.

Kale Pesto

1 bunch kale, stems removed (about 6 cups–however much I have, I just pack it in)
3/4 cup walnuts (or pecans, pistachios, pine nuts, or a mix of these)
2 garlic cloves
3 T nutritional yeast
1/2 tsp. salt or to taste
juice of one lemon
1/2 cup olive oil

Place garlic cloves, nuts, nutritional yeast, and salt in the large bowl of your food processor and pulse to evenly break down nuts. Stop and pack half of the kale into the processor bowl. Drizzle the lemon juice and half of the olive oil over the kale and process until there is room enough to add the rest of the kale and remaining olive oil.

Continue processing until desired texture is achieved. Stop to scrap down the sides of the bowl as needed. Taste and add additional salt or nutritional yeast if desired. Add more oil if you need a looser consistency. I like to leave mine thick so I can spread a deep layer of it on sandwiches and then thin it in portions for use on pasta, etc.

Pack the finished pesto into a jar with a tight-fitting lid, adding a bit of additional olive oil to the top surface of the spread to prevent discoloration if you anticipate significant time between uses.

A Feast of Vegetables, or How Not To Waste Your CSA

csa_top

Here in Wonderland Kitchen, some weekends are all about the big projects–sourdough bread baking or cheese making or pickled vegetable canning. Other weekends consist of 105-degree-shellacked days in which the majority of the “cooking” is devoted to sitting in the direct blast of the window air conditioner and contemplating the meal plan that requires the least amount of time out of its cool company. As you have probably already guessed, today I’m going to tell you about the latter.

I wasn’t going to post about any of these “recipes.” In fact, I was thinking of taking a couple weeks off–a little summer vacation–during which I would consider what this blog might best become as it cruises into its one-year anniversary. But then I started reading. The publication of The Locavore’s Dilemma seems to have sparked an entire series of forehead-slapping columns mirroring the same basic argument: namely, that people like me–a woman who finds a weekly trip to the farmers market both gratifying and the best way to feed myself and my family–well, we’re all just deluded, bougie romantics.

Now, that may be so, but it might also be that my compatriots are reading labels and health reports and making some decisions about what goes in their mouth. I’m not sure what big box grocery store the authors of The Locavore’s Dilemma shop at, but it must not be the ones I have access to in which the “real food” section is but a small slice of the proceedings and much of what’s on view is so waxed it’s sticky or so wilted that it’s yellow before I even get it home. I’ll take some grit and bugs and seasonal selection over all that, thanks. I don’t deny that I buy citrus year round, and I don’t feel the need to hide my avocados under my toilet paper, either, but I do directly trace the high percentage of plant consumption in my diet to the fresh and varied and delicious produce provided by the local farmers who sell to me here in Maryland.

The even stranger criticism I’ve read in these anti-CSA articles this week (I have not read the book itself) is that the system is “wasteful” because homemakers can’t manage the volume of food received, either when they travel and need less, or when they have guests and need more. This leads me to believe that the authors neither cook efficiently nor share with their friends and neighbors.

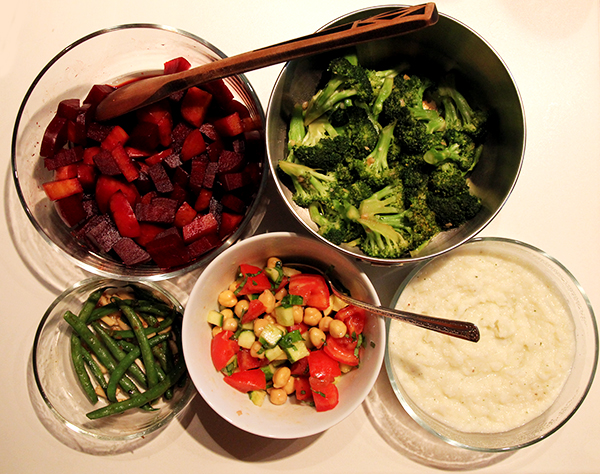
CSA Feast

Still, I’ll admit that I was feeling kind of down about the whole thing when I read this inspiring article about cooking to eat rather than following a recipe in order to cook. It both encouraged me (this is how I’m trying to teach myself to work more creatively off-script in the kitchen, even without any formal training) and reminded me why the CSA system works for me. It challenges me to use what I have while allowing me to keep it simple, because fresh quality produce usually doesn’t need much help.

Anyway, at the end of last season, I ran my own numbers and found that the CSA and farmers market supply chain worked for my health (mental and physical), my social life, and my pocket book, so we’re still committed. The measures of good economics and fair trade may vary, I suppose. Yesterday, I pulled our “harvest” out onto the counter and came up with a Saturday night feast that proceeded from planned to plated in well under an hour. I don’t claim any of these are actual recipes as much as they represent one set of solution-instructions to the problem that was dinner. How are you solving these equations lately?

Cold Tomato and Cucumber Salad

Cold Tomato and Cucumber Salad

1 small tomato, cored, seeded, and diced
1 small cucumber, from a friend’s garden, must be eaten already
1/2 cup leftover chick peas
4 basil leaves from the garden, shredded
Several generous drizzles of that fancy herbed olive oil we got for Christmas last year
salt to taste

Place all in a bowl, toss.

Creamed Kohlrabi

1 large bulb kohlrabi, peeled and cubed
1 large garlic clove
2 T buttermilk
1 tsp pesto from our friends a few blocks over
salt

Boil kohlrabi until fork tender. Drain and place vegetable and garlic in the bowl of a food processor and process until broken down. Add remaining ingredients and pulse a few more times to combine. Taste and add salt as needed. Serve hot.

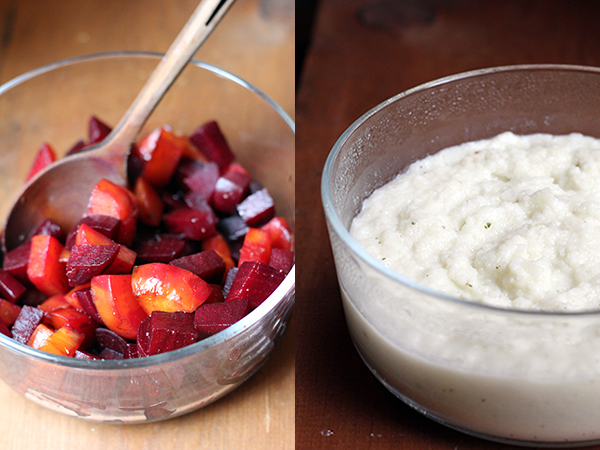
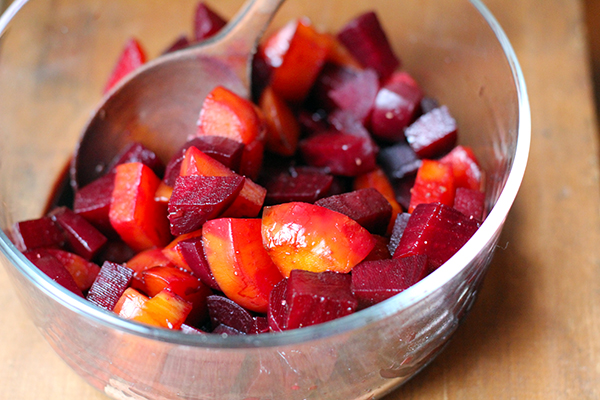
Beets in a Thyme Balsamic Glaze

Beets in a Sweet Thyme Balsamic Glaze

5 small beets, various colors, boiled, peeled, and cubed
4 T balsamic vinegar
4 thyme springs from the garden
1 tsp. honey

Place vinegar, thyme, and honey in a small sauce pan. Simmer until honey is dissolved, thyme is fragrant, and vinegar is somewhat reduced. Remove thyme sprigs and drizzle sauce over beets. Sprinkle dish with salt and pepper and toss to coat.

Five-Minute Broccoli

1 bunch broccoli, rinsed and cut into florets
1 T olive oil
2 cloves garlic, minced
3 T vegetable broth
Drizzle of tamari

Heat olive oil in a skillet and saute garlic and broccoli just until vegetable is bright green. Add broth and cover pan, steaming until vegetable reaches desired level of crispness. Drizzle with tamari to finish.

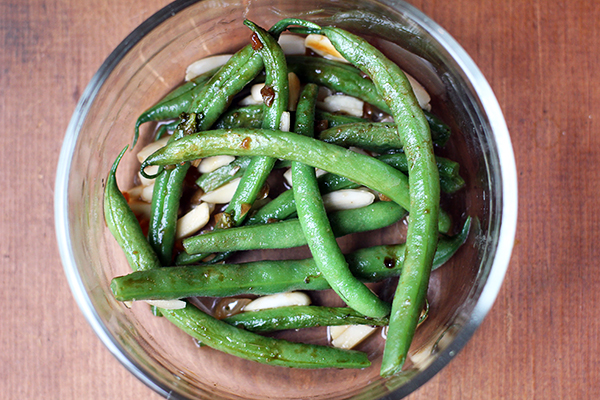
Backyard Garden String Beans

Backyard Garden String Beans + Party

12 green beans that are worth cooking because you grew them yourself, cleaned
sprinkle of lime juice from that lime you zested yesterday
Last of the sliced almonds still hanging out in the pantry

In the pan you just cooked the broccoli in, still coated with broth and oil and garlic bits, saute the beans. Wash remaining dishes and wipe counter off while they cook. When ready, sprinkle beans with almonds and lime juice.

Open some wine. Invite the neighbors over. Enjoy your feast.

Savory Summer Pie: Tomatoes and Corn and Biscuit Crust, Oh My

cornpie_top

I may have grown up amid Ohio’s horizon-filling corn fields, with tomatoes piled high at every farmer’s stand we passed, but I had never tasted the Southern treat that is tomato corn pie until a few years ago. Since that revelatory time, however, it has become the dish that announces “Summer!” in our kitchen (and celebrates its bounty a few times more throughout the season).

Tomato Corn Pie

Despite all that, somehow it has never ended up detailed here in Wonderland. I think I get distracted. There’s that weekend when I arrive at the market and see that the stall at the end has a pickup bed backed in and filled with ears of corn, and that the man who’s been selling the fresh spring peas has now traded them for bushels of the reddest, ripest fruit. I get a little dizzy. Apparently, I don’t come to again until the pie is baked and eaten. Apparently, I don’t consider sharing.

And it also has to do with the fact that a small army of writers have already blogged their way through the Gourmet recipe and posted all about how awesome this pie is, so it has always seemed silly to add to the noise about it. There are plenty of variations out there now as well: tomatoes roasted, a crust spiked with this seasoning or that one. The fact that I am extra generous with the filling–mounding up the corn and tomato slices and going extra hard with the basil–hardly seemed worth reporting.
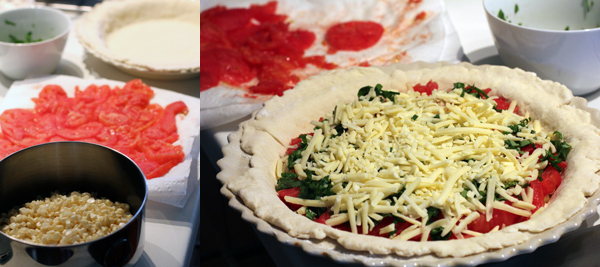
Tomato Corn Pie

Once, however, I did read a post in which a cook expressed extreme displeasure in the finished dish. It was all wrong, she wrote, and I was weirdly crestfallen over this, that my favorite pie wasn’t universally loved. She disliked the crust (“But it’s a delicious, buttery biscuit!” I shouted at the computer screen). It was then that she really drew down on my thick slices of heaven and blamed the mayo.

Now, I have heard of these strange beasts, people who feel about mayonnaise the way others react to cilantro–with an innate disgust that deeply confuses the camp of addicted fans. Being both Team Mayo and Team Cilantro myself, I usually take a shoulder-shrugging “more for me” stance in the face of these expressed tastes. But the first tomato corn pie of 2012 has changed all that. I got home with my produce, shucked my corn, peeled and seeded and squeezed and blotted my tomatoes, chopped my herbs, whipped my mayo and lemon, shredded my cheese, and mixed the most lovely biscuit crust of my career. I assembled it all, crimping the edges and, yes, gloating already about how lovely it all was when I chanced to look over and see that the measuring cup full of the lemony mayo dressing was still sitting there, on the wrong side of my pie.

Unkind thoughts were mentally expressed. Also, I learned that you cannot, no matter how much you might desire to, pour the dressing in through the top crust vents. Just a little FYI.

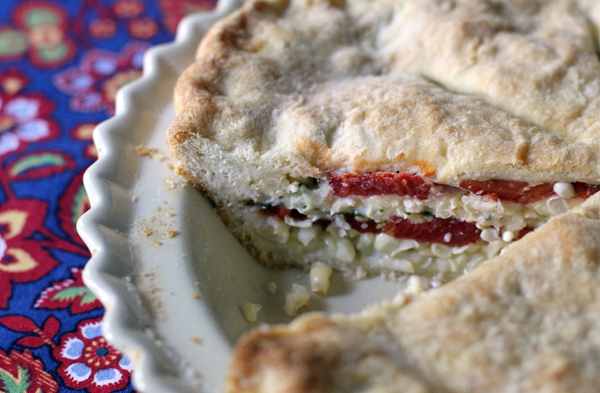
So, I tossed the sauce into the ‘fridge and the pie into the oven, counted it as a lesson in humility, and tried to move on. When I took a bite of the baked pie, however, I discovered that I just might have stumbled onto something. First, for all the “mayo is gross” sayers in the crowd, this pie is tasty–not as tasty!!–but still plenty good sans the condiment. When made correctly, however, this recipe has a tendency to soak through its bottom crust no matter how vicious you get with the draining and blotting of all the sweet juices out of the tomatoes. This time, I cut and was rewarded with a perfectly platable slice–even the first piece popped right out of the dish with barely a chip in the bottom crust. I drizzled a bit of the unintentionally reserved dressing over the top like some kind of icing. I think this just might become a thing.

So make your own tomato corn pie, with or without mayo. No need to do anything but slice off the corn kernels, in my opinion, but definitely peel and seed and squeeze and blot those tomatoes.
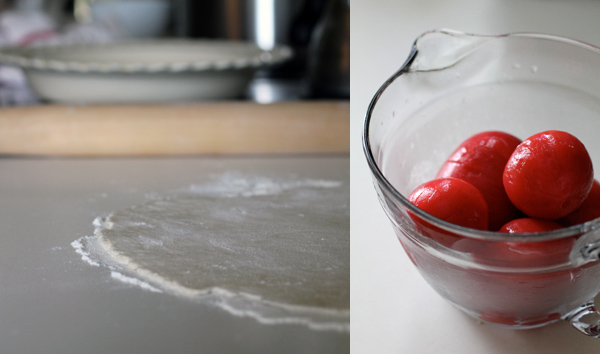
Tomato Corn Pie

Savory Tomato Corn Pie
as seen across the internet, most traceable back to Gourmet

For the crust

2 cups all-purpose flour
1 tablespoon baking powder
1 teaspoons kosher salt
6 T cold unsalted butter
3/4 cup whole milk

For the filling

4 large, meaty tomatoes, peeled, cored and sliced crosswise, drained of their juices
3 ears of corn
3 T finely chopped basil
1 T finely chopped chives
2 cups sharp cheddar, grated
pepper
1/3 cup mayonnaise
2 T fresh lemon juice
1 T butter, melted, for brushing the top crust

Prepare the tomatoes by cutting a shallow X in the bottom of each and dunking then in a boiling water for 10 seconds, then submerging them in ice water. The skins should easily peel off at this point, sticking only if there are imperfections in the fruit. Slice and squeeze gently, discarding liquid and seeds. I like to begin with this step so that I can lay out the slices out on paper towels and get as much drainage time as possible.

Whisk flour, baking powder, and salt together in a medium-sized bowl. Add 6 T butter in small cubes and, using with a pastry cutter or your preferred method, work the butter into the dry ingredients. When the mixture resembles a coarse meal, add the milk and mix just until all ingredients are incorporated. Divide roughly in half (I add just a touch more weight to what will become my bottom crust and wrap in plastic. I like to flatten the dough into rough discs and refrigerate until ready to roll out.

Cut the corn off the cobs and roughly chop. Prepare the cheese, whisk the mayo and lemon dressing together, and chop the herbs.

When ready to assemble the pie, heat the oven to 400F.

Unwrap one of the dough pieces and place on a well-floured counter. Flour the top of the dough as well and roll out to fit your 9-inch pie plate. Working in batches, place half the sum total of each–corn, tomato slices, herbs, and cheese–in the shell and then repeat. Finish by drizzling the mayo dressing over the filling (though you may omit this step if you absolutely must). Roll out the top crust and seal the edges. Slice vents in the top and brush with the melted butter. Bake for 30 minutes or until golden.

Tomato Corn Pie slice

Canning and Preserving: The Season So Far

jars2

I am a “learning by doing” type of person, but I’ve never enjoyed group classes. I may not get much from reading instructions, but I do like to make my mistakes in the privacy of my own home, on my own terms and on my own schedule. It’s not the most efficient method of knowledge acquisition, I’ll grant you, but it’s what has always worked for me.

Last year a lot of my study concerned bread, particularly sourdough. I trialed, I errored, and I learned a lot. And now I really feel like I know something, something satisfying in the same way that working to play the violin well provided but that getting a good grade never did. (There are actually a lot of music/bread parallels, I’ve discovered.)

Anyway, whereas last year’s kitchen was filled with yeasts and starters and flour everywhere, this year I’ve been working my way into canning. I know, I know, I’m very late to this party and riding the trend almost at the point of cliche, but it turns out this is a good thing because everyone and their sister published a beautiful book on canning and I am now actively applying these textbook lessons. (Yes, due to the need for food safety, in this case I’m even reading and following instructions to the letter.)

Canning and Preserving

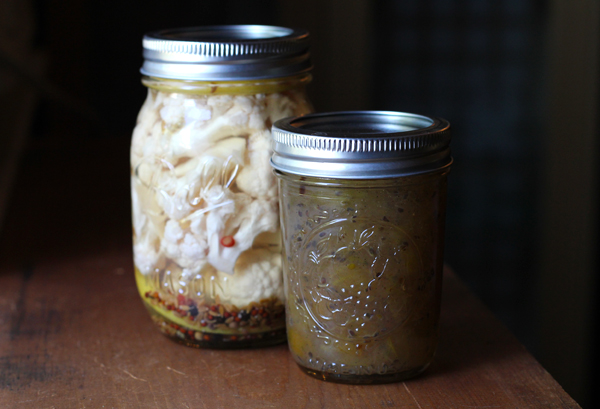
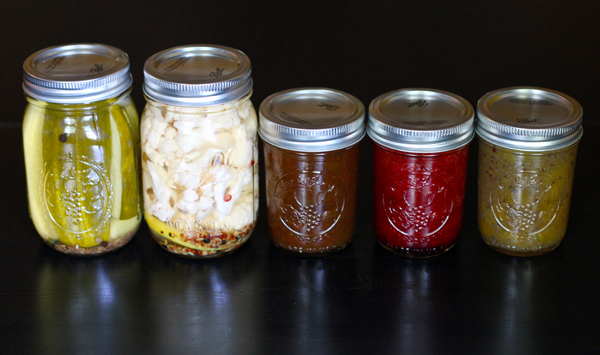
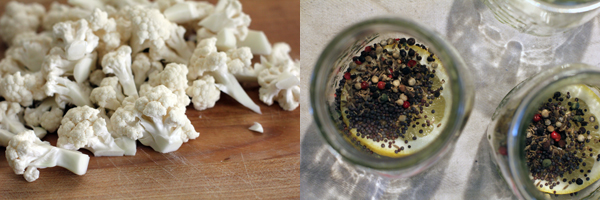
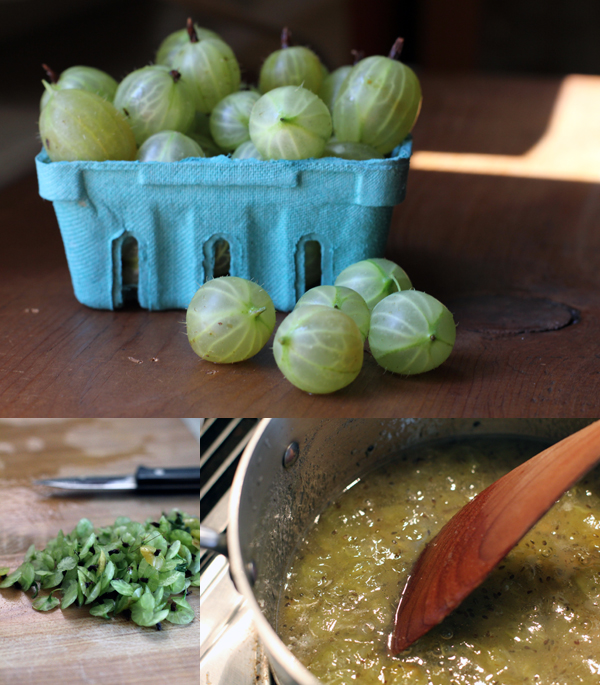
Since I am buying my produce from the market (heavily shaded urban gardening is just not high-yield), my batches so far have been just a few jars each, but this also keeps things manageable (and, if I screw something up royally, it won’t be such a waste). So far, we’ve got (as seen above): Classic Dill Pickles and Lemony Pickled Cauliflower from Marisa McClellan’s Food in Jars: Preserving in Small Batches Year-Round, plus her small batch recipes for Rhubarb Chutney and Honey Sweetened Strawberry Jam. And finally, a Gooseberry Jam from The Preservation Kitchen that I found especially attractive due to its comparatively low sugar content and the addition of vanilla.

Canning and Preserving: CauliflowerCanning and Preserving: Gooseberries

I also broke down and, even though I certainly don’t feel like eating sauerkraut at this point in the season, I sliced up that 5 lb. cabbage lurking in my fridge (a gift from a friend’s farm) to at least make some for later. I now have another bucket of it set out to ferment in the corner. It’ll be due to process in a few weeks.

The next request I’ve had is for ketchup. If you have a lead on a great recipe, please do let me know. I’m competing with the ghost memory of a grandma’s prize-winning concoction, so I’ll need something stellar.

Adventures in CSA Vegetable Preparation

haul_061612

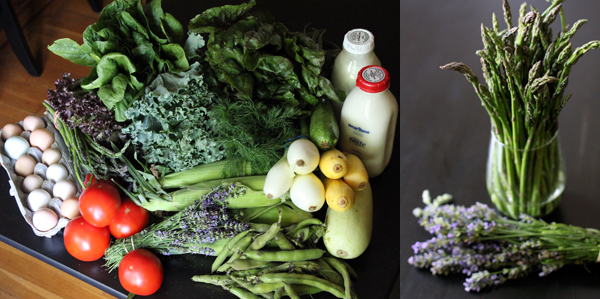
This week’s farmers market/CSA haul is smaller than it might first appear, I suspect, piled, as it is, with leafy greens of all shapes and types. Regardless of its feeding power, however, it was definitely not going to all fit in the ‘fridge in its current state. Measures had to be taken.

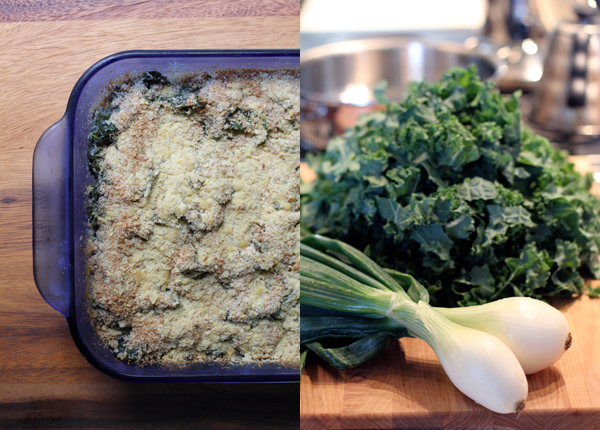
Kale and I are historically wary kitchenfellows. I like it, but I don’t like the aerobic workout that chewing it usually involves, even when massaged with salt for raw salads (though I am impressed that leftovers will hold up for days that way). I was set to show it who was boss and pulverize the kale down into a pesto again this week, but then I caught this recipe for a vegan kale gratin that actually wasn’t playing a false game of “Look mom, I’m eating my vegetables!” by drowning everything in cheese sauce. I did make a traditional cup of béchamel sauce, but stuck with the suggestion for the nutritional yeast topping. And amazingly, when it was sauteed and baked, I had managed to get all that kale into a 9×13 Pyrex baking dish.

Healthy Kale Gratin

Healthy Kale Gratin
Based on the vegan recipe by Rosewater and Thyme

2 T olive oil
1-2 bunches kale, rinsed, deribbed, and chopped (my CSA bunch was very large–probably about 8 packed cups even after chopping)
2 large spring onions, chopped, including light green part
2 garlic cloves, minced
1 cup béchamel sauce (your favorite recipe, or see below)
1/2 cup whole wheat bread crumbs
1 T nutritional yeast

Pre-heat oven to 400F and butter a 9×13 baking dish.

Heat olive oil in a deep saute pan and cook onions and garlic until softened. Add kale. Cover with a lid and cook until wilted, stirring every couple minutes. When kale is ready, add béchamel sauce to the pan and stir until all vegetables are evenly coated. Transfer this mixture to the prepared baking dish and evenly distribute. Top with bread crumbs and nutritional yeast, and bake until top is lightly browned and kale bubbling, about 18 minutes.

Béchamel Sauce

1 T butter
1T cornstarch
1 cup whole milk
salt and pepper to taste
couple scratches fresh nutmeg

Melt butter in a sauce pan and whisk in cornstarch. Gradually add milk in several portions and bring to a simmer, whisking continuously. Cook gently, reducing heat as needed, until thickened. Remove from heat and reserve.

Tomato, Fava Bean, and Spring Onion Pizza

Tomato, Fava Bean, and Spring Onion Pizza

This week’s shopping also included a new-to-me find: fava beans. If I had known about the labor-intensive processing required before they could be consumed, I might have skipped this purchase (or purchased more than just the scant quart box, which reduced to a mere half-cup of beans), but in the end this was probably the most manageable introduction. Once I had peeled them out of their pods and blanched them out of their exterior jackets, I suspected that my paltry net pile could be applied to little more than salad sprinkling. But I was already making dough (more on that later this week) and I was stocked with tomatoes and chopped spring onion greens (from the kale dish above), and suddenly pizza seemed like a great idea. Was there cheese in the house? There was cheese. We were all systems go.

Some notes when making pizza with fresh tomatoes that will allow you to avoid a soaked crust. 1) As early in the process as you can, slice and drain the tomatoes well (go ahead and give them a gentle squeeze over the sink) and then lay them out on a few layers of paper towels. Blot the tops with a few more. Leave them that way until ready to top your pie. 2) Pre-bake your shell for 8 minutes in a very hot oven (450F) before adding your toppings–on a pizza stone if you have one, or some unglazed clay tiles from Home Depot. Set the dough on a piece of parchment to make moving it around a snap (no sticking and safe to touch when hot), and use the back of a cookie sheet as a makeshift pizza peel. 3) Be conservative in the amount of topping (but not the type!). Return to oven and bake until crust has browned and cheese is bubbling and golden.

With a few grinds of red pepper flakes, this was a lovely and light use of fresh spring ingredients. There was no one but me home to enjoy it. #plusandminus

A Roasted Potato or Two (Fermented Mustard Edition)

potato_top

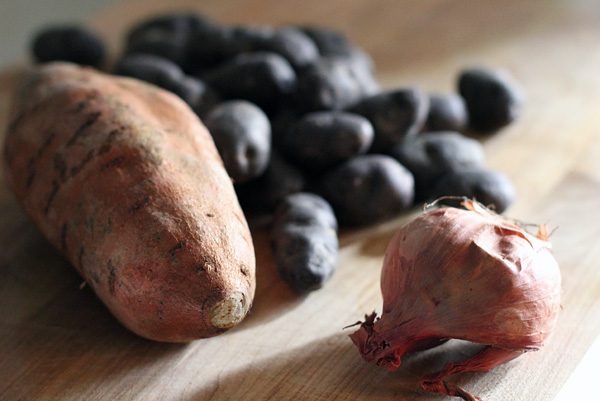
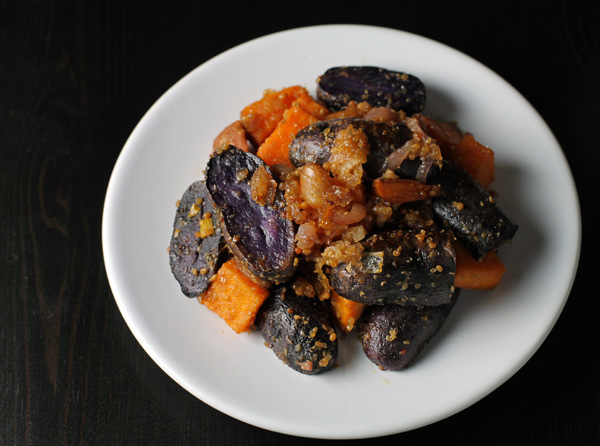
This roasted potato recipe has been copied, adapted, and praised all over the internet, so I wouldn’t have bothered posting about it myself if I hadn’t also been looking for the chance to tell you about this fermented mustard. Of course you may use store-bought (I’ve always made it that way before) and it is a very satisfying way to quickly prepare simple red skinned new potatoes (I promise you), but this variation–a unique mustard, a brightly colored mix of purple fingerling and sweet potatoes, plus a few sliced shallots–made it an especially fun dish.

Mustard Spiked Roasted Potatoes

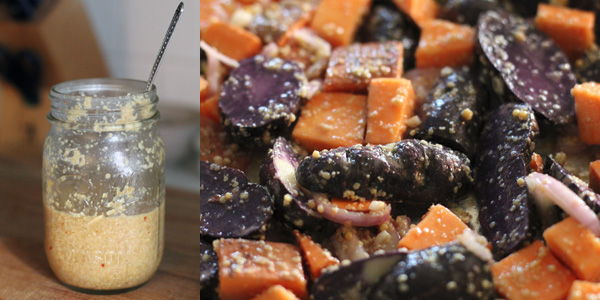
The fermented mustard was a recent kitchen experiment of mine inspired by this post on Well Preserved. We’ve been enjoying the resulting condiment on sandwiches and such, but even though I’m guessing the high-heat roasting removes some of the health benefits that regular eaters of lacto-fermented foods are looking for, it was still a great tasting (and great smelling while roasting) addition to this dish. The shallots turned sweet in the oven, some a little crispy (these bits I hoarded for myself), and the color in the potatoes deepened into rich jewel tones.

The verdict: a perfect side for a summer cookout.

Mustard Spiked Roasted Potatoes

Mustard Spiked Roasted Potatoes
My take on an already popular recipe further inspired by Joy the Baker

1 quart purple fingerling potatoes, halved
1 sweet potato, cubed to a similar depth
2-3 shallots, halved and sliced
1/2 cup fermented mustard or whole grain Dijon
2 T olive oil
2 T melted butter
3 T lemon juice
Salt and pepper to taste

Line a rimmed baking sheet with foil and preheat the oven to 425°F while you prepare the vegetables and dressing.

Whisk together mustard, olive oil, melted butter, lemon juice, salt, and pepper. Place cut vegetables into a large bowl and drizzle with the dressing, tossing until pieces are evenly coated. Spoon the vegetables out onto the baking sheet, leaving any excess dressing in the bowl. Roast for 25-35 minutes–stirring half way through–until the potatoes have browned and are easily pierced with a fork. Enjoy with the picnic fare of your choice, or straight out of the bowl when no one is looking.