breads & breakfast » Wonderland Kitchen
Browsing Category

breads & breakfast

National Peanut Butter and Jelly Day: Peanut Butter & Pickle Variation

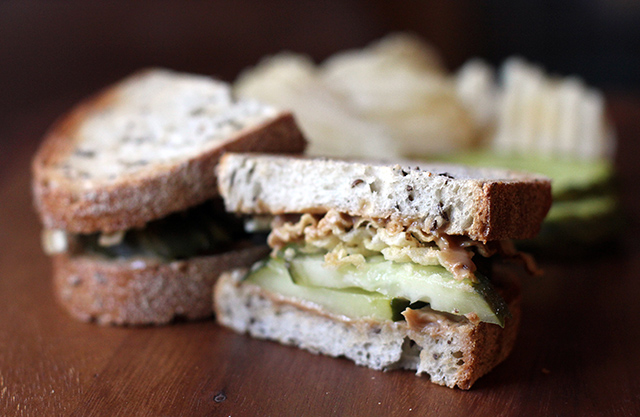
Peanut Butter & Pickle Sandwich

National Mustard Day (August 5)? National Split Pea Soup Week (the second week of November)? The volume of so-called “national food holidays” tends to make me uncomfortable in the same way that overly sentimental greeting cards do–the thought is largely inoffensive, but the meaning generic and diluted. (Though maybe not when it comes to National Margarita Day. That one I think I’d keep in regular rotation.)

I would have overlooked National Peanut Butter and Jelly Day today, except that it seems to have stirred up the conversation around the peanut butter and pickle variation and this is a sandwich I feel compelled to advocate for. It being my snack of preference as a picky-eater kid, I was honestly shocked to discover how many people think this is a dish entirely too gross to even consider tasting. For me, it carries the memory of sneaking in late from high school dates and hanging out in the quiet of the kitchen, all the ingredients laid out on the counter while I made my preparations by the dim glow of the stove’s overhead light. Inevitably, my mom would hear me clanking around and get out of bed to ask how my night had been. Then she’d shuffle back to her room, wondering aloud why I hadn’t bothered to eat properly while I was out.

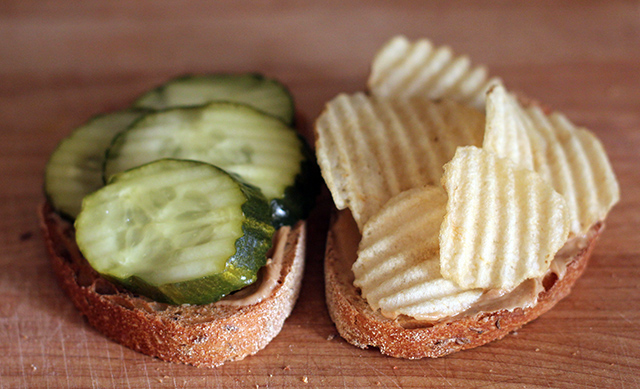
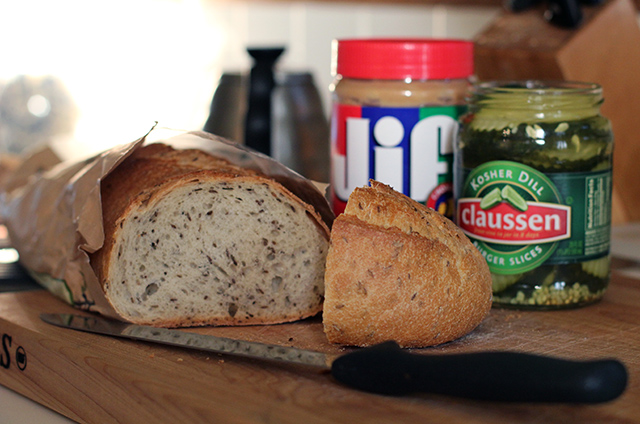
Peanut Butter & Pickle Sandwich: Makings

Was my PB&P just a passing teenage infatuation? While for some reason I had largely abandoned this childhood sweetheart when I left Ohio, our reconnection was as delicious as I could have hoped for. A suspicious “what are you eating?” inquiry and taste bite request from my husband had him making his own before my plate was clean. Should you wish to take a pass on this sweet and savory treat, well, the more for us. But you won’t know what you’re missing.

Peanut Butter & Pickle Sandwich: Slices

Peanut Butter & Pickle Sandwich

Peanut Butter & Pickle Sandwich

rye bread (seeded preferred)
peanut butter (a sweet variety is best, for balance)
kosher dill pickle slices (though some prefer the sweetness of bread and butter style)
potato chips (thick ridged variety, if possible)

Toast the bread and spread both slices with a generous layer of peanut butter. Layer pickle slices over one slice and crush chips over the other. Sandwich together and slice in half.

Plate with additional chips and pickles if you’re feeling fancy; eat over the sink at 2 a.m. and don’t clean the crumbs off the counter before you go to bed if you’re feeling rebellious.

https://wonderlandkitchen.com/2013/04/national-peanut-butter-and-jelly-day-peanut-butter-pickle-variation/

rye bread (seeded preferred)
peanut butter (a sweet variety is best, for balance)
kosher dill pickle slices (though some prefer the sweetness of bread and butter style)
potato chips (thick ridged variety, if possible)

Toast the bread and spread both slices with a generous layer of peanut butter. Layer pickle slices over one slice and crush chips over the other. Sandwich together and slice in half. Plate with additional chips and pickles if you’re feeling fancy; eat over the sink at 2 a.m. and don’t clean the crumbs off the counter before you go to bed if you’re feeling rebellious.

DIY Kefir: The Champagne of Milk

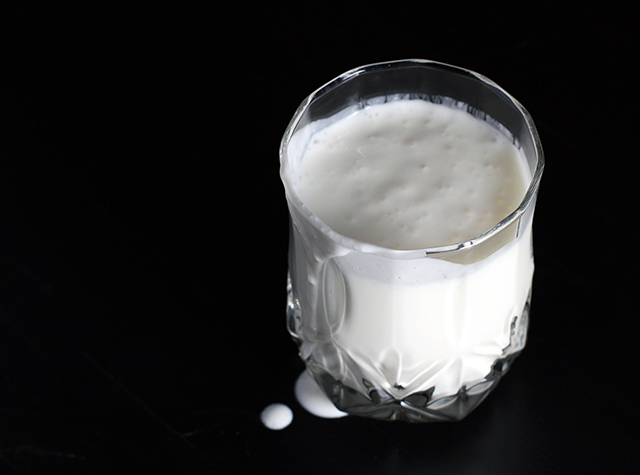
DIY Kefir

If you’re looking for a probiotic-loaded DIY dairy project that’s a little less involved than yogurt making, the cultured milk drink known as kefir (keh-FEER) just might be for you. For as wildly as yogurt has overtaken our supermarket shelves, not to mention how often Jamie Lee Curtis has regaled us with its health benefits through our televisions, I’m surprised in a way that kefir hasn’t staked more of claim alongside. Admittedly, this “slightly thinner than yogurt” beverage does have a tangy, somewhat sour and yeasty flavor that may not appeal to all palates, and it is sometimes called “the champagne of milk” due to its slight effervescence. Yet even with the sweeteners and other additives found in many of the commercial varieties sold here in the States, its availability is still relatively narrow (and often somewhat pricey). All the more reason to try your hand at making it yourself, controlling both the process and the ingredients.

If you have milk, a glass jar, a plastic or wooden spoon, and a strainer, you’re almost ready to make your first batch. You’ll also need a way to culture the milk into kefir, which can be done in a limited way using a previous batch of kefir containing active cultures or a freeze-dried powdered starter. But for endless culturing and a more extensive list of involved bacteria and yeasts, you’re going to need to acquire dairy kefir grains. While I have seen some people refer to this method as the “hard way,” I think that is more a reference to the need to keep actively feeding the grains and to the possible variabilities in the outcome. The active time required each day will actually only take a couple of minutes.

When I was first offered a share of grains by a woman in my neighborhood, the DIY-er in me jumped at the chance even before I knew much of anything about the fascinating fermentation process I was about to get immersed in. The grains—which can often be described as resembling gummy cauliflower florets, but which can also be much smaller—aren’t actually a grain of any type, but rather a mass of live bacteria and yeasts which, if well cared for, will continue to culture future kefir batches indefinitely.

And if the idea isn’t weird enough for you yet, it seems that no one really knows how the kefir grains came to be. While they will grow and multiply as they eat the lactose in the milk, no one has been able to generate a kefir grain independently, and some even consider them a gift from God. Their origin has been traced to the Caucasus Mountains, where the culturing process likely aided in the preservation of milk before the advent of refrigeration.
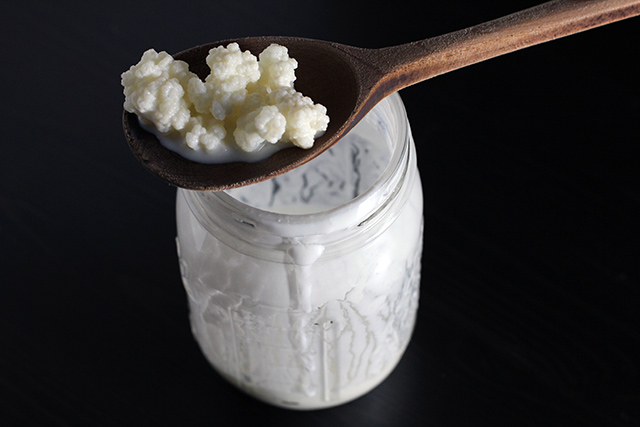
Kefir Grains

Sourcing Kefir Grains

Much like a sourdough starter or kombucha SCOBY, you can look for a local maker willing to share with you or purchase grains online. Grains that have been shipped may need to be reconstituted, but even active grains from a nearby source will likely need time to acclimate to a new environment and milk type. Being patient and embracing a period of experimentation at the beginning and any time there is a change in the process (i.e., milk type) will help you avoid frustration and disappointment. I fully confess to learning this lesson the hard way.

The Basics

Culturing kefir requires nothing more than placing the grains and milk in a glass container (leave plenty of headspace), covering it with a paper towel or coffee filter secured with a rubber band, and placing it somewhere out of drafts and sunlight, ideally between 68°F and 78°F. I find that a spot in a kitchen cupboard works well for this, as long as I don’t forget it’s in there.

Once the grains are active (follow package directions if reviving dehydrated grains), a basic formula of about one tablespoon worth of grains to two cups of milk fermented for about 24 hours is the standard process. Once the milk has cultured, the grains are strained out using a plastic (preferred) or stainless steel sieve (other metals can damage the grains or leech into the kefir, and should not be used at any point in the process) and the kefir can then be consumed or refrigerated. The grains are then fed fresh milk, and the process begins again. The grains do not need to be rinsed unless they become contaminated with foreign materials (aka try not to drop them on the kitchen floor).
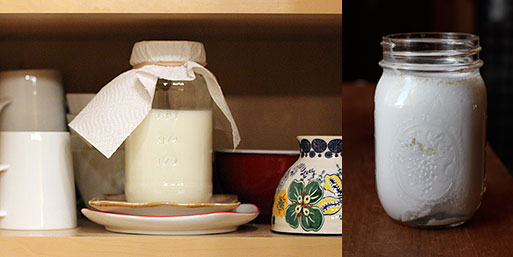
Kefir: Process

A kitchen cupboard makes a good place to stash your culturing kefir. I like to stop, stir, and strain mine just when it’s starting to show small pockets of whey separation (right).

A kitchen cupboard makes a good place to stash your culturing kefir. I like to stop, stir, and strain mine just when it’s starting to show small pockets of whey separation (right).

Variables, Variables, Variables
(Or: Adjustments, Adjustments, Adjustments)

That being said, fermentation projects are perhaps more an art form than an exact science. The type of milk, the ratio of milk to grains (and the available surface area of the grains in use), and the culturing time and temperature can all impact the taste of the final product.

I found that it took a couple of batches for my grains to start producing a consistent result once I got them home. After a batch or two of adjustment, I wanted to get a firmer handle on the process, so I left the milk to culture about 12 hours overnight, and then began to stir the grains around every few hours and taste the milk using a clean spoon. In this way, I was better able to pinpoint when my milk had thickened and achieved a taste that was agreeable to me.

Once you are comfortable with this part of the process, there are still myriad variations to explore: adding sweeteners and/or fruit before consuming, secondary fermentation options (with or without added flavorings), or even the creation of things such as kefir cheese. Need a buttermilk substitute when baking? Your kefir will be there. You can also use dairy kefir grains to ferment non-animal milks such as soy or coconut, but the grains will need to be refreshed in animal milk every few batches to maintain their health. Those looking for a truly vegan option may wish to explore what’s possible using water kefir grains instead.

Care and Feeding

Despite the implied upkeep, you don’t need to take your grains on vacation with you. They can be stored in fresh milk in the refrigerator for a week or two, or can be rinsed and dried completely and then stored in the refrigerator for a longer period. I have not yet had to store my grains for more than a few days, but you can read more about recommended methods here.
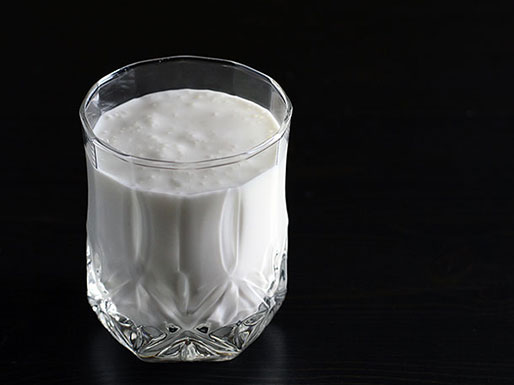
DIY Kefir

The Verdict

Especially if there are not many people in your home who are interested in a morning smoothie fortified with kefir or an afternoon snack of kefir and cookies, I can see that daily production could become overwhelming. If kefir will only be a very occasional treat in your kitchen, the powdered starter might make more sense. Still, learning about these amazing little balls of culturing action was so interesting to me, I would definitely recommend it as something any DIY enthusiast should at least give a try. Apparently you can even eat them, though I haven’t been that brave just yet. And I’m in no way qualified to speak to the many health benefits ascribed to kefir consumption, but there is plenty of interesting reading out there for those who would like to dig in deeper.

Ready to fall down this rabbit hole? You might start here and here.

*

This post was created for my “DIY vs. Buy” column on Serious Eats.

DIY Cornmeal from Popcorn (Plus Cornbread)

DIY cornmeal

There is perhaps no recipe I’ve investigated that is as simple and yet as fraught with passionate argument regarding the “correct” way to make it as cornbread. First, you have the ostensibly North/South difference of opinion on the use of sweeteners, and then further debate among the Southerners themselves ratcheting up tensions even further. Discussions regarding the ratio of flour to cornmeal, the number of eggs, and what kind of fat needs to be in the pan can then further exacerbate hostilities. And if you’re not already using a cast iron skillet to bake yours, you best duck when those who are come near.

I mention all this at the outset because adding to this battle is not my purpose in making cornbread this week. I’ve provided a simple recipe that suits my preferences, but I want to leave all the controversy aside (and the box of Jiffy mix as well) in order to highlight the great taste provided by freshly milled cornmeal.

With all the chatter out there concerning wheat, gluten, and human nutrition, there’s been a lot of discussion in food circles regarding sprouting and soaking grains and milling flours at home, but I haven’t taken that very far. And grinding my own cornmeal was something I hadn’t even begun to consider when I first stumbled upon discussions of how great the freshly milled variety made your cornbread. As cornmeal has a habit of sitting around in my pantry, the chance to DIY this product certainly intrigued me.

Type of Corn

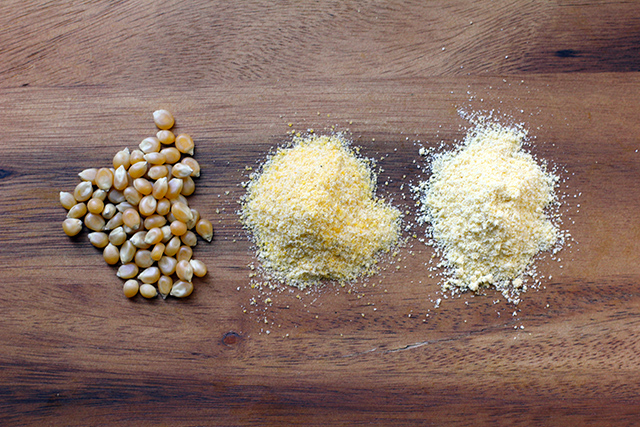
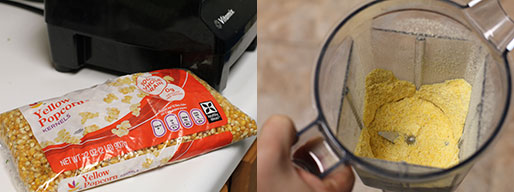
While I’ve seen a few references to drying and milling sweet corn, most cornmeal is made from the starchier field (a.k.a. dent) corn. Not having the space to grow and dry my own corn (not to mention that it’s March), the option that really lit my eyes up, however, was one I already had in my pantry: popcorn.

Equipment Needed

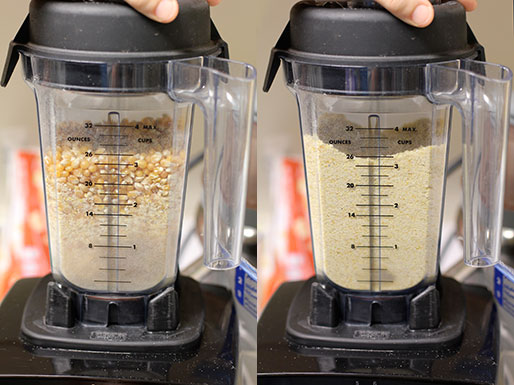
DIY cornmeal: Processing

DIY cornmeal: Processing

If you haven’t already invested in a grain mill (there are many types, from hand crank to KitchenAid attachment to sophisticated powered appliances), Vitamix benders are also powerful enough to grind dried corn into a beautiful yellow cornmeal if that’s an option for you. Even still, working in small batches is necessary so as not to overheat the meal during grinding. There are also people out there who use their coffee or spice grinders for small batches.

As a precaution, you may wish to sift the meal after it is initially ground to check for missed larger pieces, but I didn’t find this strictly necessary.

While I haven’t had the chance to try a proper grain mill yet, another tip I read frequently during my research is that if you’re having trouble grinding the corn–especially using a hand-cranked mill–try running the corn through on a very coarse setting and then grinding it a second time to get a finer grain. Less wear on your machine and yourself!

Whole Kernel vs. Refined/Degerminated

“Why not just buy cornmeal?” you may be asking yourself. Much of the conversation online surrounding growing and grinding your own corn concerns GMO and pesticide concerns. Beyond that, however, is the fact that many types of cornmeal available on grocery store shelves have been refined/degerminated. By removing the germ from the whole grain, the product will have a longer shelf life. However, that oil-rich and vitamin-packed germ is also where a lot of the nutrition lives. Grinding your own meal means you can preserve the whole grain aspect with less worry about rancidity. Simply grind meal as you need it, or store small batches in your freezer for maximum preservation.

Do you grind your own cornmeal or other grain products? What method do you use?

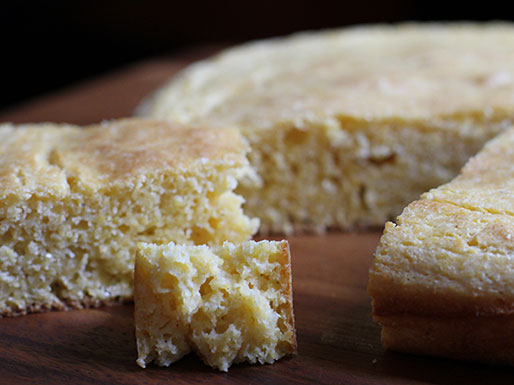
Cornbread:crumb

The Verdict

A 32-ounce bag of popcorn netted me 5 1/2 cups cornmeal, though grinding the amount needed just before use is recommended for maximum freshness. The special equipment is the real barrier to entry here–and some of it is frankly quite expensive. The richer corn flavor and overall freshness definitely provide a big push towards investing in an appliance that can get the job done. Beyond that, however, unless you’re buying in bulk, it seems that the popcorn vs cornmeal price points are negligible. I remain on the fence about adding grain milling to my regular kitchen tasks, and would love to hear more about the pros and cons from those of you who are doing it.

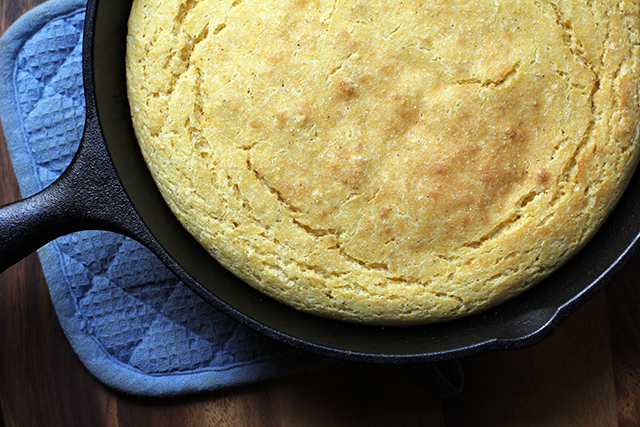
Cornbread

DIY Cornmeal Cornbread

DIY Cornmeal Cornbread

9 ounces of popcorn, ground into meal (alternatively, use 1 1/2 cups store-bought cornmeal)
1 cup AP flour
2 teaspoon baking powder
1 teaspoon salt
1 egg
2 cups buttermilk
2 tablespoon shortening, bacon drippings, or high heat oil

Place 10-inch cast iron skillet in oven on middle rack and heat to 450°F.

Meanwhile, whisk cornmeal, flour, baking powder, and salt together in a large bowl until evenly incorporated. In a medium bowl, lightly beat egg. Stir in buttermilk.

As oven nears 450°F, remove pan and add fat, allowing it to heat and coat the bottom.

Add egg and buttermilk to dry ingredients and then pour in excess fat from skillet as well, quickly mixing all ingredients together until just wetted. Pour batter into skillet and return to oven, baking 20-25 minutes, until top is just golden and edges have pulled away from the side of the pan.

Cornbread is best served warm fresh from the oven.

https://wonderlandkitchen.com/2013/03/diy-cornmeal-from-popcorn-plus-cornbread/

*
This recipe and post were created for my “DIY vs. Buy” column on Serious Eats.
Picture Imperfect Tastes: The Apple Dowdy

Aunt Hanner's Apple Dowdy

I wasn’t going to write about my little weekend adventure into historical cooking, but then I caught this post which, in addition to being very moving in its broader terms, included a kicker towards the end: “I sometimes worry that commoditized simplicity will become fetish, and ultimately an over-stressed trend.” Ah, yes, that back-to-basics lifestyle showcased so perfectly on many a Pinterest board transformed into a danger all its own? I took her point.

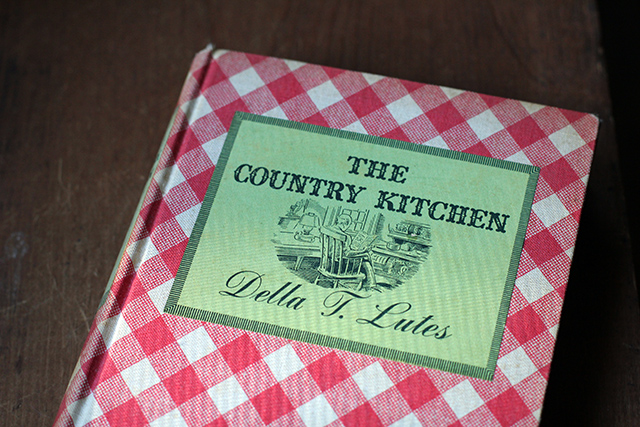
Here I’ll offer a flip side to the situation, however. Ever since devouring Della Lutes’s The Country Kitchen (Little, Brown, and Company, 1936) during a road trip last summer, I’ve meant to go back and actually try to cook some of the classically imprecise recipes sprinkled throughout the text (though Lutes does go the extra mile in trying to help the reader get a handle on how things were done if classic biscuit ratios aren’t already ingrained). It was the current chill that finally got this project accomplished, however, and in the end I settled on making the Apple Dowdy: “not a dumpling, a pudding or a pie–deep-dish or otherwise. It is just a dowdy–sort of common, homely, gingham-like, but it has character.”

The Country Kitchen

Now, as I have likely mentioned before, I hate to measure. Reading and then correctly following instructions goes against my genetic makeup. As a result, baking often terrifies me. But in this recipe, I felt a permission to follow instinct that your typical, weighed out in grams baking situation doesn’t encourage. Portions where emotional (“with generous judgment”) and relaxed (“a slight scattering”). Plus, with a suggested cook time of 3 hours (!!) there would be none of this “at 18 minutes it’s baked through, at 20 minutes it’s burned” stress. I exaggerate, but you’ve been there, right?

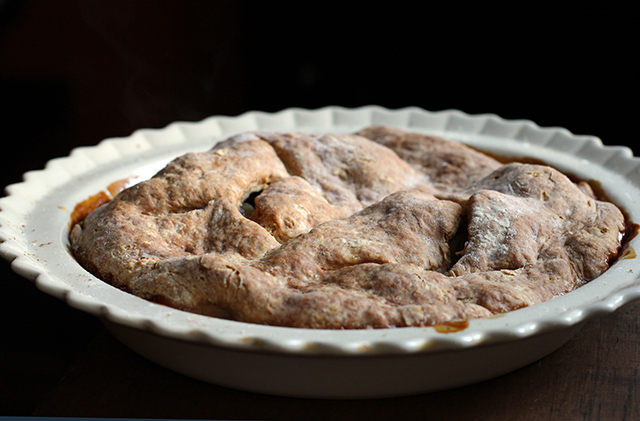
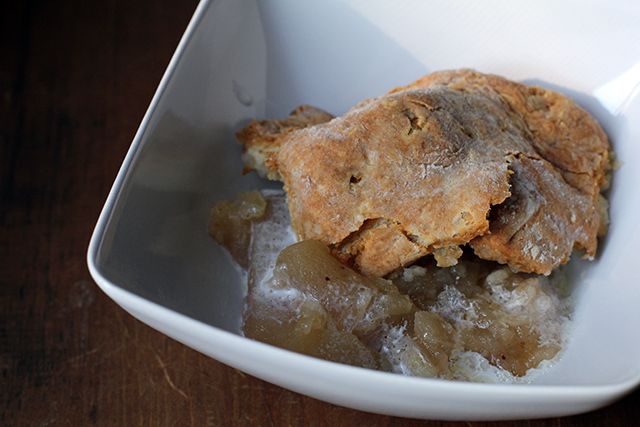
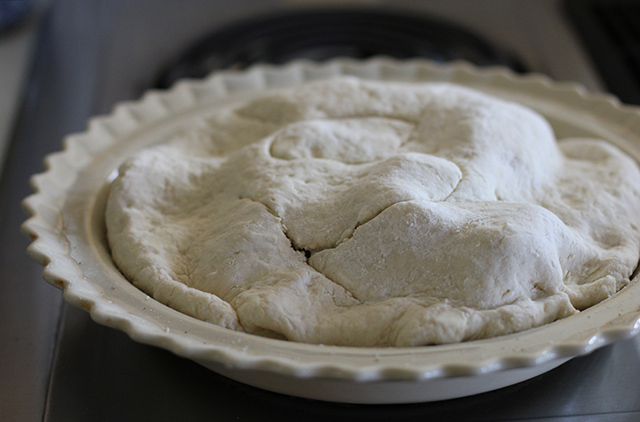
Not having a “deep earthen pudding dish” on hand, I used a ceramic pie plate. This turned out to be too large, requiring that I roll my dough thinner than the indicated 3/4 inch and, as a result, reducing my baking time to 2 hours. I suppose I could have tented it with foil to prevent over-browning, but it smelled so good that I could wait no longer. I’ll try and follow the directions more carefully next time, but served warm out of the oven with a splash of cream, this dowdy was straightforwardly delicious. I hesitate to get into any additional cliches of “classically simple” and “old world,” but maybe because its construction was so basic (pantry staples!), its assembly so laid back (15 minutes, inspiration to oven!), it was a truly fine and satisfying way to warm up the house and the spirit on a cold winter’s afternoon.

Aunt Hanner's Apple Dowdy

Aunt Hanner’s Apple Dowdy

for the filling

4 or 5 medium apples, tart and firm, peeled and quartered (I used an apple slicer/corer and so ended up with 8 slices per apple)
brown sugar (sprinkle enough to suit your apples)
nutmeg (“a slight scattering”)
cinnamon (“a little less”)
salt (“dash”)
butter (“with generous judgment,” about a teaspoon per serving)
1/2 cup warm water

for the crust

1 cup AP flour
2 teaspoons baking powder
1/4 teaspoon salt
2 tablespoons butter
1/2 cup milk

Heat oven to 325°F.

Fill your baking dish with prepared apples and scatter sugar, spices, and butter over top. Pour in water at the side.

In a medium bowl whisk flour, baking powder, and salt, and cut in butter. Add milk and stir just until dough comes together. Roll out on a floured counter until about 3/4-inch thick and just large enough to cover apples. Fit and crimp down over top and slash top to vent.

Aunt Hanner's Apple Dowdy: Unbaked

Bake for three hours, watching to make sure crust does not over-brown. Serve warm straight from the oven with a splash of cream and extra sugar if desired.

DIY Dairy-Free Coconut Yogurt

DIY Dairy-Free Coconut Yogurt

My first attempt at dairy-free yogurt earlier this fall was a disaster. Admittedly, I was feeling a little cocky since I’d had a run of really great batches of Greek yogurt. I was so confident, in fact, that I didn’t even hunt around online ahead of time for tips. This was especially dumb since I’ve never needed to adhere to a dairy-free diet myself and was quite inexperienced. I simply dove in with my Tetra Pak of coconut milk beverage and my vegan yogurt starter. The result: a nauseatingly curdled liquid that was immediately fed to the drain in the kitchen sink.

Appropriately chastened, I started reading. There are myriad ways to make traditional yogurt, and going dairy-free only increases the number of variables. I played around with sweeteners, thickeners, and styles of coconut milk to land on the version I liked best, and used a method for incubating that works for me. Your preferences may vary, of course, and I hope you’ll share them in the comments.

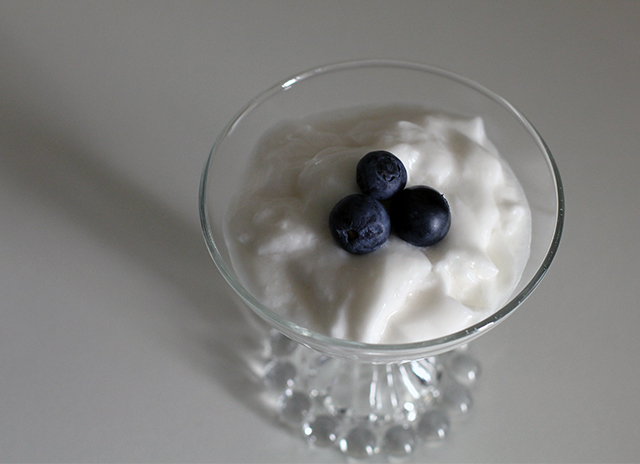
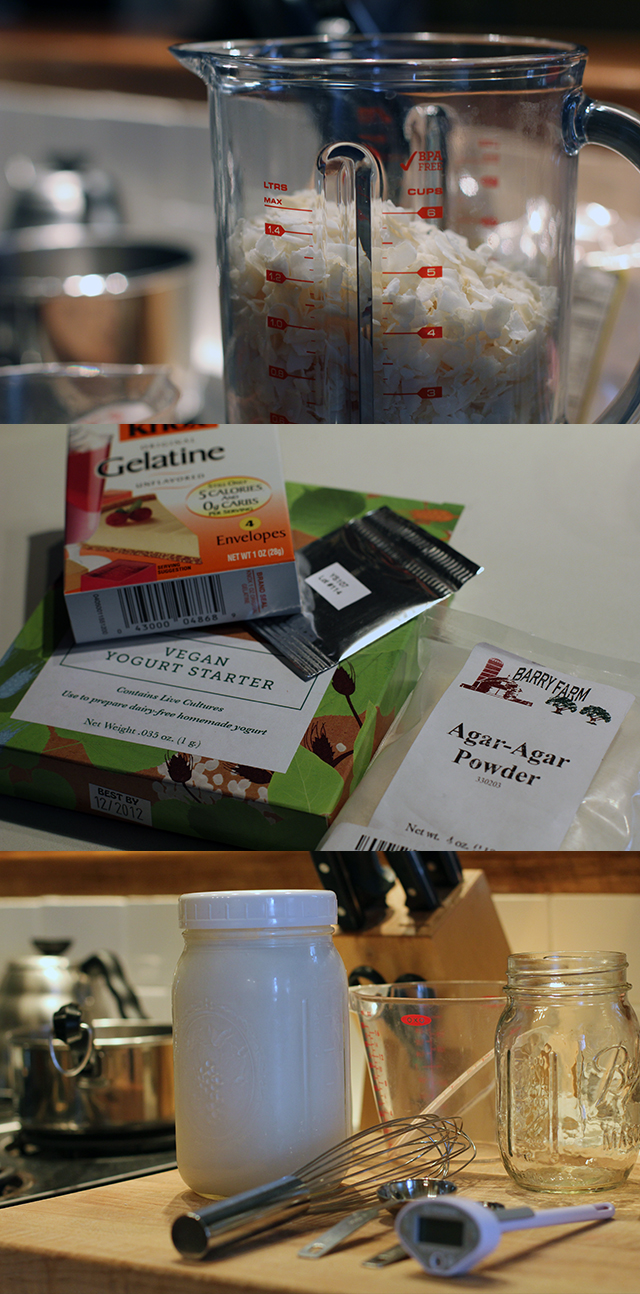
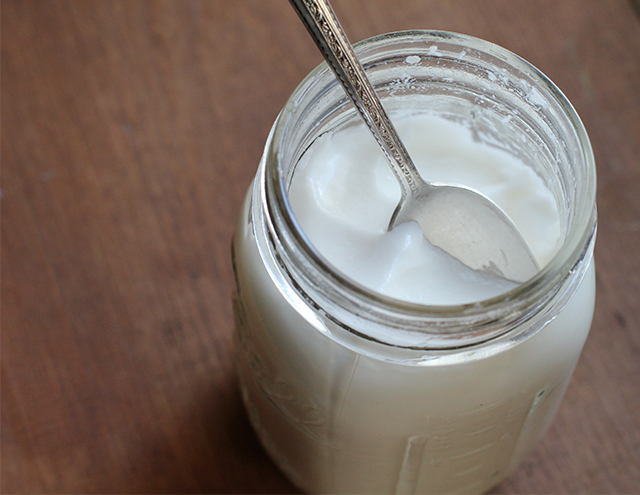
Not All Coconut Milk Is Created Equal: First off, I have found the “milk” sold in those convenient Tetra Paks–often specifically labeled as a “beverage”–to be too watered down to make a good yogurt. Canned is a viable option, and initially I thought I’d go this direction–especially when I thought the idea of “fresh” coconut milk was going to require finding a coconut supplier and a hammer. Ultimately, however, I found that using unsweetened dried coconut flakes provided a workload I could handle while still delivering exceptional taste. It also allowed me to control how much water was added to the milk. The resulting yogurt was fresh and bright, thick enough to hold a spoon but not so gelled that it broke up in my mouth like jello.

Canned: Light vs Regular Coconut Milk: Before I decided to go the (partially) DIY coconut milk route, I tried out both regular and light versions of the canned option. For the record, coconut milk has a high level of saturated fat, and there is much debate over the health risks and benefits of this food. Assessing things purely on taste, I liked the regular well enough, but found the reduced-fat option to have an odd taste, quite chalky with very little hint of actual coconut.

Since the milk was already fortified with some thickeners, I got a solid set with just the addition of 1/2 teaspoon agar agar powder dissolved into a half cup of boiling water to four cups milk. A second batch fortified with two teaspoons of gelatin with the same quantity of milk produced a thinner though tasty yogurt, similar to a kefir. However, canned milk, even full fat, still had a somewhat chalky taste to me, which is why I ultimately settled on making my own milk with coconut flakes.

Dairy-Free Coconut Yogurt: Process

Sweeteners: This is another area where I should have read before I leapt into non-dairy yogurt making. Unlike cow milk, alternatives require additional sugars in order for the cultures to have enough to eat during fermentation. With so many variables already in play, I decided to stick with traditional sugar. Honey and maple syrup also seem to be popular among cooks.

The Verdict:

I was surprised to see that even though the yogurt shelves at my local grocery have exploded in recent years, there were no non-dairy options. At the larger grocery a few miles away, I could pick up a six-ounce cup of coconut yogurt for $1.89. At this same location, I could purchase a bag of thick, high-quality unsweetened coconut flakes (more like chips) for $3.49–enough for six cups of milk (and therefor six cups of yogurt). While that’s not accounting for the other additives in the recipe, some of which require special sourcing, it’s still not close to the $15.12 it would cost to purchase the same quantity commercially. Plus, you’re controlling the ingredient list. Whether this is all ultimately worth the work involved is, of course, only something you can judge.

Coconut Yogurt: Thick and Creamy

I ordered vegan yogurt starter from Cultures for Health. Their website also offers a wealth of advice that I found extremely helpful while experimenting.

DIY Dairy-Free Coconut Yogurt
make approximately four cups

4 cups unsweetened dried coconut flakes
4 1/2 cups water, divided
2 tablespoons sugar
1/2 teaspoon agar agar powder
2 tablespoons tapioca starch
Direct-set vegan yogurt starter

Place dried coconut in blender carafe and add 4 cups just-boiled water. Allow to soak for 30 minutes and then blend on highest speed for two minutes. Set aside until cool enough to handle.

Once cooled, strain through a nut milk bag or fine sieve into bowl. Add sugar and stir to dissolve. If not ready to proceed right away, milk can be stored, covered tightly, in the refrigerator. Otherwise, continue with next step.

Place milk in a saucepan and heat over medium-low flame. Add tapioca starch and whisk until well dissolved. Meanwhile, in a second saucepan, bring 1/2 water to a boil and add agar agar powder. Whisk and simmer until well dissolved, then pour into the heated coconut milk.

Allow to cool, whisking occasionally, to 110°F (check package directions on your starter for alternate instructions/variations). Add starter, whisking again to evenly distribute, and pour milk into a glass container and incubate at 110°F using the method of your choice. (I like the cooler method discussed here.)

When incubation is complete (using the method above, mine took about seven hours), move jar to the refrigerator to chill and halt culturing, at least six hours. Yogurt is now ready to eat.

*

This recipe and post were created for my “DIY vs. Buy” column on Serious Eats.
DIY Grape-Nuts Cereal

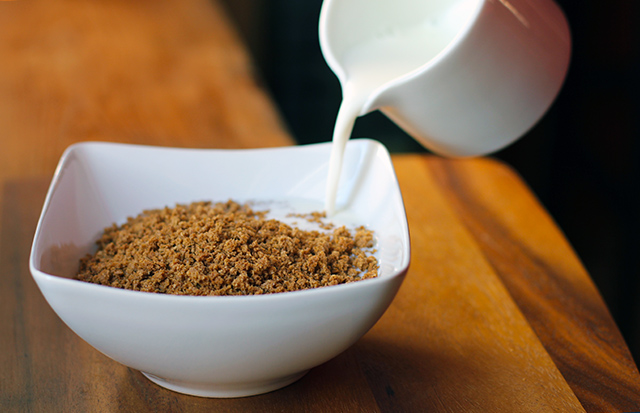
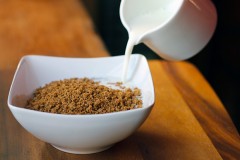
grape-milk

Born and educated in Ohio as I was, drives made through the beautiful farmlands of nearby Amish communities or miles clocked behind their buggies on nearly empty country roads are scenes I associate with almost all the family car trips of my childhood. I fully acknowledge that it’s a lifestyle I’ve romanticized as a result, but I don’t see the harm if it leads to me watching interesting documentaries on PBS or picking up the occasional cookbook.

My recent nosing around is how I came to own Cooking from Quilt Country by Marcia Adams. It’s a volume packed with simple and hearty Amish cooking, but the first thing I really wanted to try out of the book was the recipe for what Adams referred to as Graham Nuts but most of us know as Post Grape-Nuts. Conveniently, the recipe called for two cups of buttermilk, an ingredient I had in excess after my last post.

When all was said and done, these cereal bits were tasty and characteristically molar-cracking. They were also very, very sweet and flavorful, thanks to the brown sugar, vanilla, and cinnamon. My husband dubbed them “Grape-Nuts meet Cinnamon Toast Crunch” to give you a sense of where things fell. The recipe even suggested serving the cereal with more brown sugar on top! This is awesome on the one hand—and if you are a hardworking farmhand, possibly totally acceptable—but it hardly makes for the kind of super healthy breakfast cereal I equate with the name. So I took to the internet, but found only recipes along a similar theme, some even adding butter and other oils and sweeteners. Not the direction I was looking to go.

For my version, I decided to reel things in. According to the ingredients listed on the commercial Grape-Nuts box, the cereal contained only whole grain wheat flour, malted barley flour, salt, and dried yeast, plus added vitamins and minerals. The taste was only very slightly sweet, but attractive due to its rich nutty flavor. That’s what I wanted to capture. I researched the differences between true graham flour (used in the original Amish recipe) and the varieties of whole wheat flour available on the market, and finally got a firm grasp on where wheat germ and wheat bran fit in on this product span. (If any readers sprout and/or simply mill their own flour, I’d love to hear how this recipe works for you.) I also considered alternative sweeteners that would deliver a less forward flavor punch and more of the slightly sweet malty flavor of the boxed cereal.

Graham flour

Graham flour offers a coarser grind than traditional whole wheat flour.

Knowing that if I put all my flavor eggs in the wheat basket I needed to make sure I picked a really flavorful starting flour, I decided to go with Hodgson Mill Old Fashioned Whole Wheat Flour, which is on the shelves at my local grocery store and offers a coarser graham flour grind. Depending on what’s available in your area, you could also use a more traditional whole wheat flour or supplement AP flour with appropriate proportions of wheat bran and wheat germ. I also had some barley malt syrup on hand from a recent bagel-making adventure, and discovered that this sweetened the cereal perfectly.

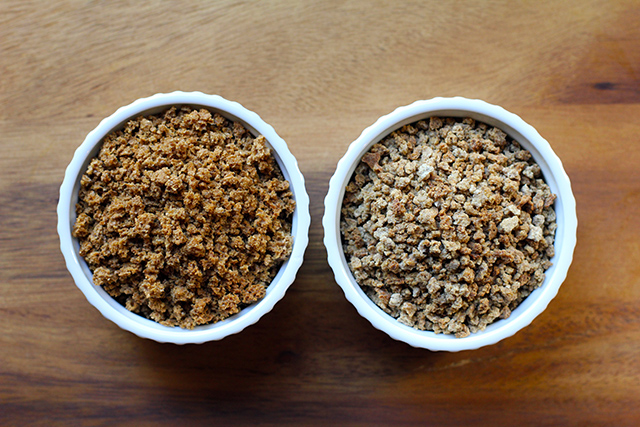
DIY Grape-Nuts: Let's compare.

DIY Grape-Nuts (right) offer plenty of crunch, yet are slightly less dense and less uniform than the commercial option.

In terms of cost, I figure you’re looking at about $2.80 in raw ingredients for seven cups/19 ounces of homemade cereal vs. $3.49 for six cups/24 ounces of the commercial version. While there is nothing challenging about this recipe, it does require some babysitting. The texture of the DIY batch is plenty crunchy, yet slightly less dense and less uniform than the commercial option.

DIY Grape-Nuts Cereal

17.5 ounces (3 1/2 cups) graham or whole wheat flour
1 teaspoon salt
1 teaspoon baking soda
1 1/2 cups buttermilk
1/2 cup barley malt syrup (at room temperature for easier mixing)

Heat oven to 350°F. Oil a 12×16 sheet pan.

In a large mixing bowl, measure dry ingredients and whisk to combine. Add buttermilk and barley malt syrup to the bowl and mix just until all dry ingredients are evenly combined.

Scrape batter out onto the sheet pan and smooth out to the edges as evenly as possible. Bake for 20 minutes, until edges are just browning and puling away from the pan.

Loosen cake with a spatula and flip out on a cooling rack immediately. Set aside to cool about 40 minutes.

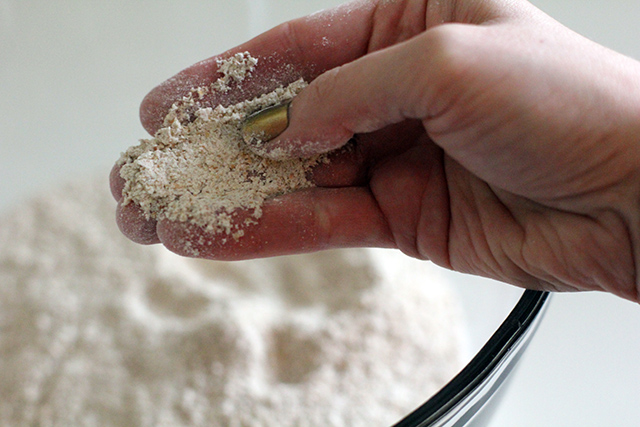
DIY Grape-Nuts Cereal: Process

Once cooled, heat oven to 275°F. Working in four or five batches, roughly break up the cake into chunks by hand and then pulse in a food processor until the bits are the desired size.

Spread the bits across two 12×16 sheet pans and bake until completely dry (about 45 minutes), stirring the cereal and rotating the pans every 15 minutes.

Once dry, turn off the oven, crack the door, and leave to cool. Store in an air-tight container.

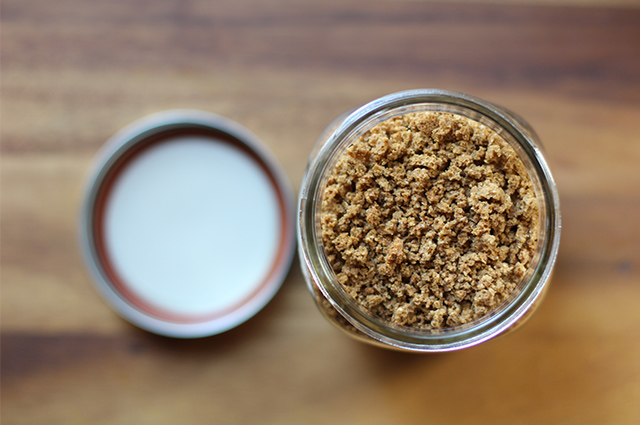
DIY Grape-Nuts Cereal: Store in an airtight container.

*

This recipe and post were created for my “DIY vs. Buy” column on Serious Eats.