Wonderland Kitchen - 3/14 - 2012 Archives
Browsing Archive

2012

First Taste of Autumn: The Cylburn

cylburn_top

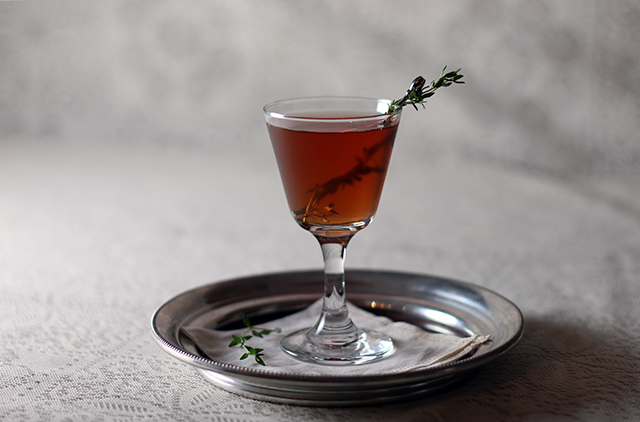
People sometimes speak of seasons transitioning from one to the next, but for me it always seems to happen suddenly. One morning, I’m setting out in shorts and a t-shirt and the next I’m sporting long pants, a sweater, and possibly a wool coat. Not that I’m complaining. Fall is my favorite season and, for me, there’s nothing quite like the feel of autumn’s chilly morning air, the smell of a freshly raked leaf pile, or the sight of leaves changing color and trees with half bare branches. To celebrate autumn’s arrival, I came up with this crisp and herbaceous gin-based cocktail. The drink gets its name from the Cylburn Arboretum, a beautiful 207-acre arboretum and botanical garden in Baltimore, and a perfect place to peep the autumn leaves.

First Taste of Autumn: The Cylburn

The Cylburn

1 oz. Ransom Old Tom Gin
1/2 oz. Hayman’s Old Tom Gin
3/4 oz. Lustau Manzanilla Sherry
1/2 oz. Bénédictine
2 dashes Angostura Bitters
Sprig of thyme for garnish

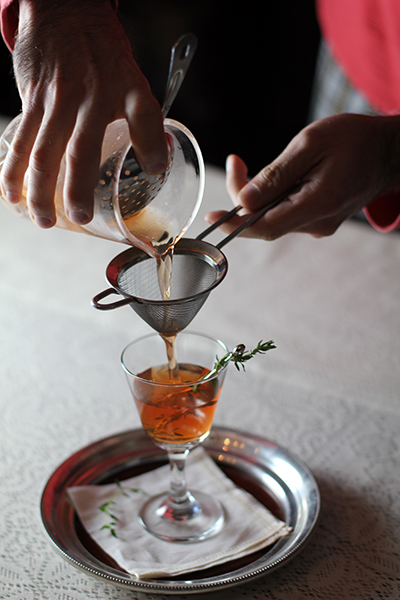
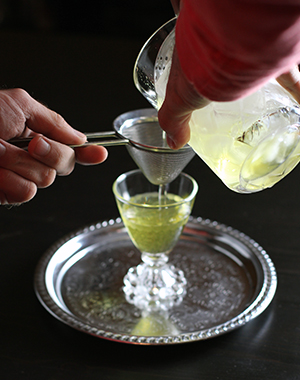
Combine the gin, sherry, Bénédictine, and bitters in a mixing glass. Stir with ice and strain into a chilled cocktail glass. Garnish with a sprig of thyme.

Real Deal: DIY Sesame Sticks

ss_top

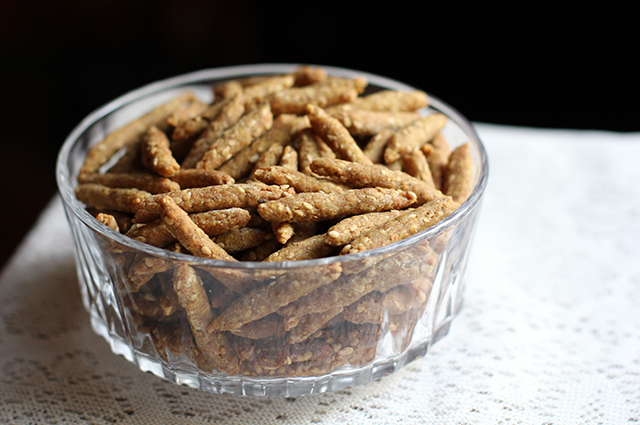
No trip to the bulk bin area of the supermarket is ever quite complete to me without bagging a few scoops out of the sesame stick container. After so much barley and millet and quinoa has been piled up in my cart, something a little fun and snappy just seems to be in order. I had never even considered making them for myself at home as a result–the whole point of the exercise was that it was a treat–but they seemed like a simple enough thing to whip up in the kitchen once I started to think about it.

And, at the end of the day, they can be more or less a one-bowl-and-stir creation. The shaping is where I got hung up. At first, I thought I could get a dough that would just flow out of the wide nozzle of a pastry gun, but that was a fool’s game. A rolled out and neatly sliced dough was quite tasty when baked up, but the straight-edged rectangles visually said “cracker” to me more than “fun snack!” They just weren’t the little snakes of sesame that my brain recognized and loved. So I picked up a piece of the raw cut dough, rolled it quickly just three times between my palms, and there is was. By the time I had a whole sheet, however, I wondered how much I really cared about the shape. What was so wrong with rectangles, my back protested. So shape them however your tastes demand. Uniformity for even baking is the important thing.
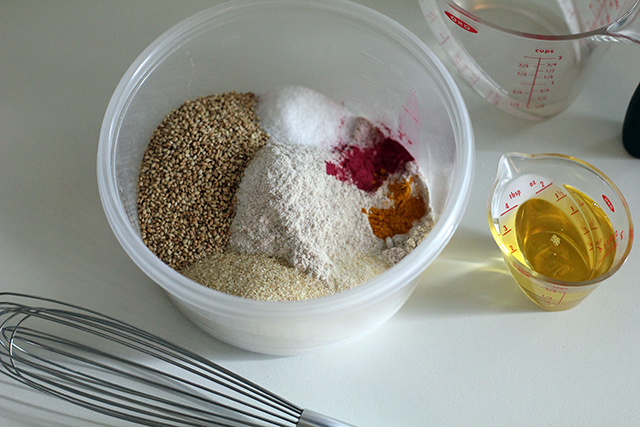
Sesame Sticks: Ingredients

DIY Sesame Sticks
makes about 3 cups

1 cup (5 ounces) whole wheat flour
1/2 cup (2 ounces) toasted sesame seeds
1/4 cup (1 1/2 ounces) cup fine cracked wheat
1/4 teaspoon turmeric
1/4 teaspoon beet root powder
1 teaspoon garlic powder or to taste
1 teaspoon kosher salt or to taste
4 tablespoons vegetable oil
6 tablespoons water

Combine flour, sesame seeds, cracked wheat, turmeric, beet powder, garlic powder, and salt in a medium bowl and whisk thoroughly to combine. In a small bowl, combine water and oil. Stir wet ingredients into dry ingredients. Combine thoroughly, kneading any remaining bits into the dough by hand.

Divide dough in half and wrap each in plastic, flattening into inch-thick squares. Refrigerate for 30 minutes to allow dough to firm up before rolling.

Once dough has chilled, heat oven to 350°F. On a lightly floured surface, roll out dough to 1/8-inch thickness and, using a knife or pizza wheel, cut into small rectangles (approximately 1/4-inch by 3/4-inch). Alternately, roll and cut dough to your desired shape. Uniformity is more important than size to assure even baking.
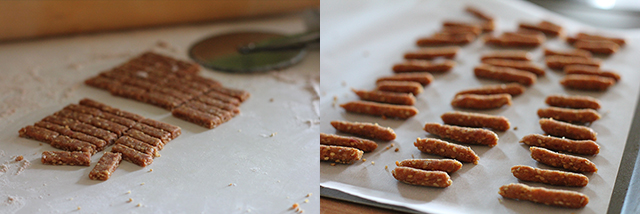
Sesame Sticks: Shaping

Leave the pieces as they are or roll each one quickly between your palms to form thin rods. Place on parchment-lined baking sheet.

Bake for ten minutes, then flip or roll the pieces around on the sheet so that the bottoms don’t brown. Continue baking 5-8 minutes more, until sticks are crisp but not browning. Remove from oven and cool completely. Store in an airtight container.

*

This recipe was created for my “DIY vs. Buy” column on Serious Eats.

White Negroni: Anger That Forgot Where it Came From

White Negroni

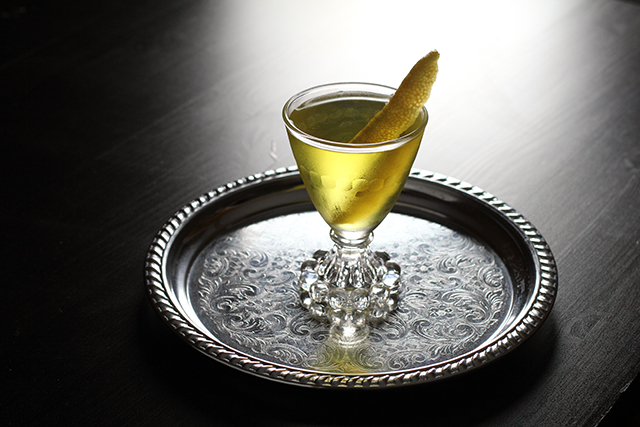
I was originally planning to title this post “A White Negroni and the Trouble with Suze” as a way of venting the frustration I had accumulated while playing around with the bitter French aperitif to largely lackluster results. My struggle came not necessarily from the liqueur itself, but rather from how it seemingly refused to play well with others. I found that the very qualities that make Suze such a singular spirit when enjoyed on its own—a quick splash of sweetness followed by an intense and long, lingering bitterness—also make it somewhat difficult to tame in the context of a mixed drink. Definitely not an impossible task, but perhaps one of the reasons you don’t see a heck of a lot of cocktails with Suze in them.

White Negroni

Now, I like my bitter aperitifs as much as the next guy, but when it comes to cocktails I prefer balance. And that proved to be the main challenge in constructing this drink since despite many efforts to reign in Suze’s persistent bitterness in various ways, it continually bullied its way to the front of the palate. Eventually, thankfully, finally, and much to my pleasure, lest I feel as though I’d wasted a few weeks time not to mention half a bottle of a perfectly wonderful bitter liqueur, I arrived at a combination of gin, Suze, and vermouth that, to me, felt balanced. (And that, coming from a Libra, should carry some weight.) However, the perfectionist in me wasn’t quite content.

After tasting a version mixed with Old Tom and another with a London Dry—each lending their own unique and interesting flavor profiles—I decided to split the difference and go with equal parts Hayman’s Old Tom and Plymouth, which makes for a nice combination and also appeases the Negroni purist in me by keeping the drink in equal parts. The coup de grâce is a trio of lemon peels twisted over the drink. Of course, as always, you are free to play with the gins to satisfy your own taste, but the following is how the drink is served at our house.

Anger That Forgot Where it Came From

3/4 oz. Plymouth Gin
3/4 oz. Hayman’s Old Tom Gin
3/4 oz. Suze
3/4 oz. Dolin Blanc Vermouth
3 wide lemon twists

Combine the gin, Suze, and vermouth in a mixing glass. Add ice and stir until well chilled. Strain into a chilled cocktail glass, twist the three lemon peels over the drink, and drop one in for garnish.

DIY Garlic Powder (No Vampires Edition)

garlocpowder_featured

It was when I last went looking for our shaker of garlic powder that I was finally motivated to clean out the pantry. After rummaging around for a bit, I discovered it well-hidden in obscurity at the very back of the shelf, its label dusty and faded, its contents distressingly clumpy. Truth be told, that garlic powder had been in my husband’s life longer than I had. Tossing it into the waste bin, I had more fear that its sudden absence would inspire vampire infestation than that I’d miss it in the kitchen. Which is to say, I did not expect my life to change one bit.

Clearly, garlic powder is not a spice rack item I think much about. However, though it’s a seasoning that inspires an eyebrow-raising level of animosity in some quarters, I don’t have any snobbery about using it. I had just kind of forgotten about it. It had slipped out of my life along with those batches of Chex Mix and slices of garlic bread toasted under the broiler that had flavored my childhood.

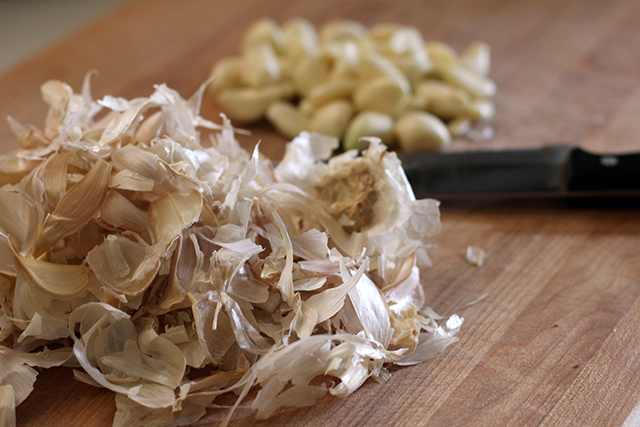
DIY Garlic Powder: peelings

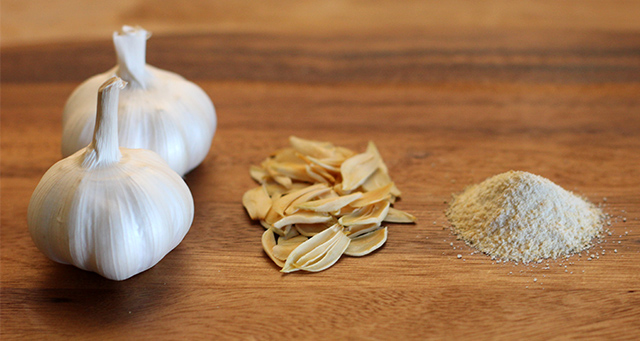
Having just discovered the “dehydrate” setting on my oven, I figured why not try making a batch of my own? I did the math for this week’s Serious Eats column, but if you don’t care much about that part, know that in the end I had a small jar of powerfully attractive powder. It’ll be much easier to remember to use this stuff.

DIY Garlic Powder

This process also works for onions, and I took the opportunity to do a tray of each simultaneously without damaging the flavor of either. Out of one 13-ounce white onion (chopped fine), I was able to produce 1/2 cup of dried flakes, which reduced to 3 tablespoons of onion powder. It’s a very small amount, but it has a very sweet taste–like a fried onion ring.

Be prepared for your house to fill with the strong scent of garlic during the dehydration period.

2 garlic bulbs (about 5 oz.), cloves separated and peeled

DIY Garlic Powder: drying

Slice garlic very thinly and spread out in a single layer on a dehydrator tray. Alternatively, you can use drying racks or a parchment-lined baking sheet in your oven (convention setting if you have one) with the door cracked open (I found that an old wine cork works well for this purpose).

Dehydrate at 130°F, stirring and turning slices every few hours until garlic is fully dry. When dehydration is complete, the garlic chips will snap in half rather than bend. This could take nine or more hours, depending on the thickness of your slices and the vagaries of your appliance.

DIY Garlic Powder: grinding

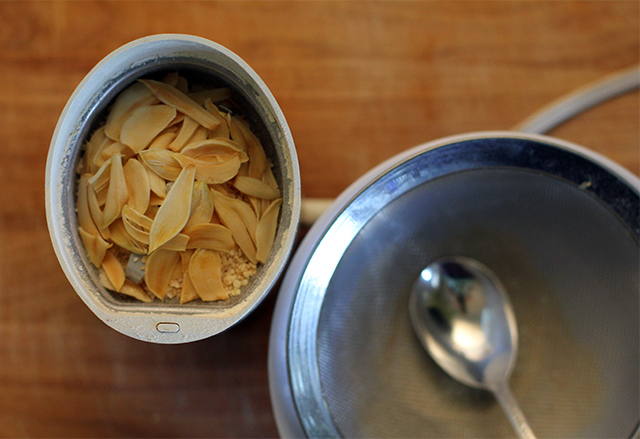
Allow garlic to cool completely and then grind to desired consistency (I use a coffee grinder that I reserve for spices). If you want to make sure that the powder is fairly even and fine, pass the ground garlic through a mesh strainer, catching the larger bits for a second pass through the grinder. Store finished powder in an airtight container in a cool, dark place. Makes approximately 2 oz.

Historical Advice on Housekeeping

cookbook

I’ve been having a great time reverse engineering a lot of processed foods of late, and even some grocery store staples. Most of the time, it’s dramatically cheaper to make your own, and it makes me feel better about what we’re eating when I can pronounce everything that’s gone into it. You might not agree that this is strictly necessary, but when the “simple” yogurt in the dairy aisle has six ingredients, to my mind something has gone very, very wrong. Yet at the same time, even if I can make tahini at home, do I really need to?

When it comes to exploring DIY foods and even some health and beauty products, I’m still learning so much that I feel it’s worth the time and effort for me to keep on experimenting. I’ve also made a habit of picking up cookbooks from past decades to see what tips and tricks and terrible applications of mayonnaise I might discover. Today I added two new books to my collection, and stumbled upon some advice that highlights just how much has changed for the “housewife.” For as much as I have valued looking back at “how we used to do it,” this was a stark reminder that romanticizing the past too much would be a mistake.

First up: Hints from Heloise–From the Air Force to Air Force Wives (1973)

This one struck a chord right away, since I am an Army wife myself. On examination, it’s not quite “The Good Housewife’s Guide” that I was at first expecting. Instead, the 14-page pamphlet is filled with simple, sensible tips, but the introduction is a flashback to a time when only men served:

Hints from Heloise--From the Air Force to Air Force Wives (1973)

In the eyes of the Air Force, the Air Force wife is something very special. Special because she, more than anyone else, shapes and determines her husband’s attitudes and ambitions. And over the years, the Air Force has learned that with the right kind of environment at home, any man becomes a better worker and more valuable in his job….And who knows, with the help of Heloise’s hints, perhaps you’ll have even more spare time to devote to that man of yours.

Sexism is one thing, but the harsh manual labor aspects of homemaking were penned into the front of a copy of The Rumford Complete Cook Book (1930) by Lily Haxworth Wallace that I discovered. A previous owner had outlined how to make soap and cleaning solutions, neither of which I’m particularly anxious to replicate or use.

soap recipe

Soap

5 1/2 lbs. melted fat. Melt and while cooling put 1 quart warm water in a granite pail. Add 1 can concentrated lye and 1/2 cup of Borax. When cool add 1 cup ammonia and then slowly add the cool melted fat and stir for a few minutes. Pour into a shallow granite pan and set in the sun to bleach. Next day, cut into pieces as you like. Make soap on a day when you can do it outside or else the fumes get in your nose and throat.

To Wash Walls

1 cup ammonia
1/2 cup vinegar
1/4 cup bicarbonate soda

Add water to make one gallon.

A Cocktail for the Giro d’Italia: Maglia Rosa

MagliaRosa

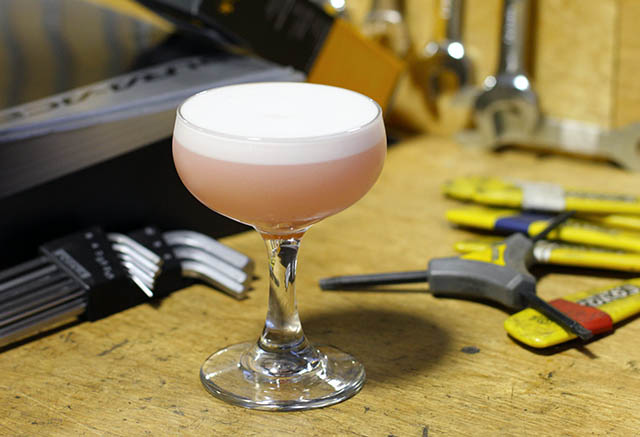
There aren’t many places you will find some of the world’s toughest dudes battling for the honor to wear a pink shirt, but that’s exactly what happens for three weeks in May each year at the Giro d’Italia, one of professional cycling’s three Grand Tours. Known for its legendary champions, mythical feats of heroism, epic climbs, and frenzied fans, the Giro exhibits a distinctive flavor of unpredictability and passion with many riders fueling themselves and their efforts with raw emotion, in stark contrast to the calculated tactics that have come to typify the Tour de France over the past decade or so. Cyclists like Fausto Coppi, Mario Cippolini, and Marco Pantani run the gamut from legendary to flamboyant to tragic, each of their stories lending more color to an already colorful event. And, of course, the color that every rider in the Giro d’Italia dreams of is pink, the color of the race leader’s jersey, the Maglia Rosa.

If we were to talk about the inspiration for the Maglia Rosa cocktail in terms of the chicken and the egg–the chicken being the Giro d’Italia and the egg being the color pink–the egg unquestionably came first. After cooking up a batch of housemade raspberry syrup, I started searching for recipes that would allow me to make use of my new ingredient. As usual, when working with something new, I settled on a classic: the Clover Club. Having never mixed one before, I was struck, as I’m sure many are, by its vivid pinkish hue. But rather than disregard it as something for the girls, as Esquire once did, I thought, “Hey, that’s the same color as the Giro d’Italia leader’s jersey. I wonder if it’s possible to give it more Italian flavor.” I figured I had a 50/50 chance: it could either be tasty, or it could end up down the drain. Pretty good odds, in my opinion, and worth giving it a shot.

The goal, of course, was to retain the color, and after considering my options with regard to which Italian spirits I could substitute for the gin, I decided on grappa. Tweaking the spec slightly, but remaining somewhat close to the Clover Club, yielded an interesting but, by and large, unmemorable variation. The key, as it turned out, was to rinse the glass with sambuca. Doing so added a delicate nose to the ungarnished cocktail with the anise providing just the right amount of subtle complexity to the drink’s taste. Prelibato.

Maglia Rosa

1 1/2 oz. Lorenza Inga Grappa di Moscato
1/2 oz. Dolin Dry Vermouth
1/2 oz. lemon juice
1/2 oz. Housemade Raspberry Syrup
1/4 oz. Romana Sambuca
1 egg white

Combine the grappa, vermouth, lemon juice, raspberry syrup, and egg white in a mixing glass. Dry shake for 7-10 seconds to allow the egg white to emulsify. Add ice, shake well, and fine strain into a chilled coupe rinsed with sambuca.

Thanks to Twenty20 Cycling Co. for letting us turn their workbench into a bar.