Wonderland Kitchen - 2/14 - 2012 Archives
Browsing Archive

2012

DIY Jellied Cranberry Sauce (Ridges Optional)

cranberry_top

I grew up in a household of “normal” American cuisine: our mac and cheese was boxed, our casserole was tuna, and our cranberry sauce? Our cranberry sauce had ridges running along the side–the mark of the can it came from. Since traveling out in the world, I have of course since been introduced to homemade, gourmet, and small-batch artisan versions of a lot of foods, but some attachments die hard. And sometimes, well, sometimes on balance boxed is just best.

This brings me around to how I decided that DIY canned cranberry sauce would be my “heart healthy” project for Cathy’s annual Thanksgiving round-up. Granted, cranberry sauce is always going to have a bit of sweetener in it to balance the tartness of the berries, but I figured if I could get the high fructose corn syrup and the plain old regular corn syrup out of the equation, we were still making strides toward a product that did the body a little better if not entirely good.

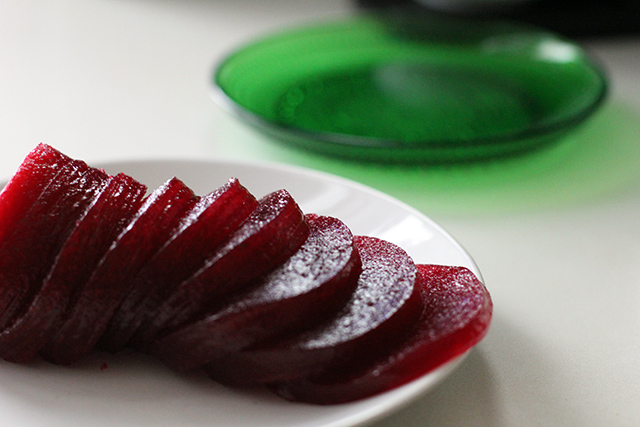
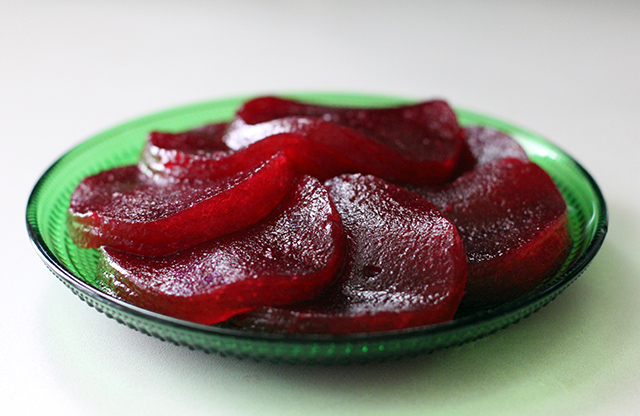
DIY Jellied Cranberry Sauce: Sliced

For my recipe, I decided to use fruit juice and honey as my sweeteners. Though research had told me that using white sugar would require no additional pectin to get a good set, by using honey, I also needed to add this step. This finished jelly does differ from the commercial version in that you can definitely detect that honey was used. I like this–the sauce isn’t muddled with extra spices or exotic flavorings, but it is just a little more complex. White sugar would likely get you closer to the commercial taste, however, if that’s what you’re going for.

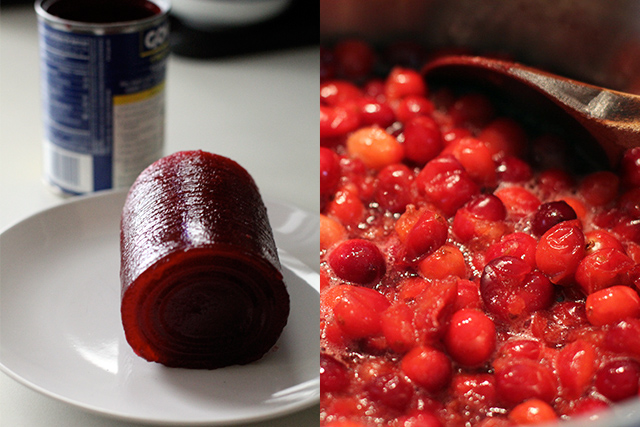
Jellied Cranberry Sauce: Commercial Variety

Jellied Cranberry Sauce: Commercial variety-check that gel!

Since I had already purchased a can of jellied cranberry sauce for comparison’s sake–for a $1, mind you, so add that into your considerations–I also had the bright idea that I would use the can as my mold, thereby silencing any readers or relatives who just could not deal with a cranberry sauce unmarked by rings along the edge. I thought I was being incredibly clever until I found out a couple of minutes ago that Marisa over at Food in Jars totally did that last year. BPA-free to boot.

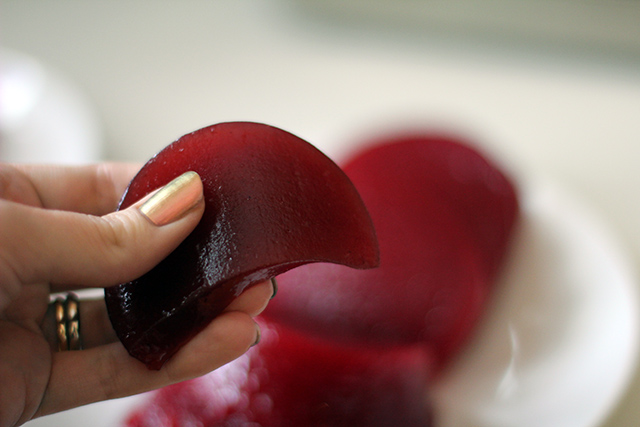
What I discovered about my DIY cranberry sauce, however, is that while it is firm enough to be sliced and handled, it doesn’t come close to the commercial jelly in the can. Truly, that product has an almost terrifyingly firm yet not chewy in the mouth consistency. I’m not sure how they manage it! I did get my jelly out of the can without incident, but as a frazzled holiday host, make sure to take a deep breath and steady your hands before you cut and plate your sauce in those perfect circular slices–otherwise it could quickly turn into a fool’s game laced with profanities.

DIY Jellied Cranberry Sauce: Process

DIY Jellied Cranberry Sauce (Ridges Optional)

12 ounces whole cranberries, washed and picked over, mushy berries removed
3/4 cup water or juice (I used a tart grape juice I had on hand to good effect. I suspect apple or orange would be nice compliments as well.)
3/4 cup honey
Pectin–I used Pomona’s (2 teaspoons calcium water and 2 teaspoons pectin powder)

Put the juice in a heavy-bottomed soup pot and bring to a boil. Add berries and cook, stirring occasionally, just until most of the berries have popped and begun to soften (about five minutes). Remove from heat.

Using a food mill (recommended) or a sieve and the back of a ladle, mash the softened fruit through the strainer leaving the peels behind. Discard the peels and return the strained fruit to a clean pot. Add the calcium water to the fruit.

Stir the pectin powder into the measured honey, mixing well to evenly combine, then add this mixure to the fruit in the pot. Bring to a boil and cook, stirring constantly, for one minute.

Pour the sauce into the mold of your choice and allow to cool undisturbed until set. Turn out onto the serving dish of your choice just before serving.

In the Russet Gold of This Vain Hour

russet_640

For this cocktail, I had a fairly clear idea of what I was after. I was looking to create a drink that would round out the darker end of Wonderland Kitchen’s fall offerings—something slightly complex and rich, but not cloying. I sometimes regard drinks with a multitude of ingredients a little suspiciously, as though their creators were attempting to flex some sort of mixological muscles. But having now imagined my own hooch hydra, I may start to reconsider that position.

It all comes down to balance and if a cocktail tastes like a bunch of things thrown together and swirled around for the heck of it, well, that may just be the case. I would have pulled the plug on this particular project if I detected any of that going on, but thankfully what emerged was something I considered to be intriguing, exactly in line with my original intent, and pretty darn tasty to boot. The cocktail gets its name from the title track of an album by the late-1990s alternative rock group The Autumns.

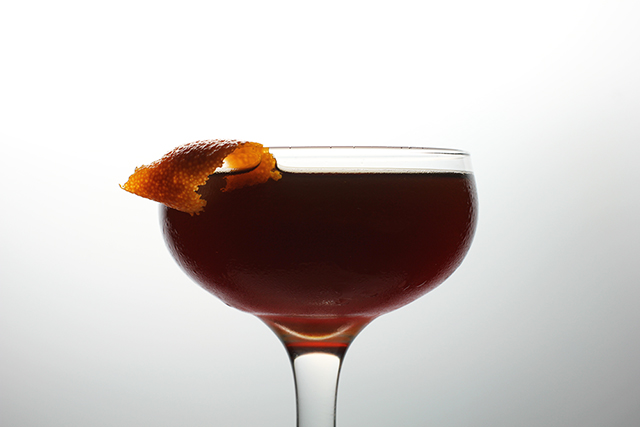
In the Russet Gold of This Vain Hour

1 1/2 oz. Pierre Ferrand Ambre Cognac
1/2 oz. Smith & Cross Naval Strength Rum
1/2 oz. Amaro Montenegro
1 oz. Punt e Mes
1 tsp. St. Elizabeth Allspice Dram
1 tsp. Demerara Syrup
Flamed orange peel for garnish

Combine the cognac, rum, amaro, Punt e Mes, allspice dram, and demerara syrup in a mixing glass. Stir with ice and strain into a chilled coupe. Flame an orange peel over the top of the drink and drop it in for garnish.

DIY Oyster Crackers In Your Soup

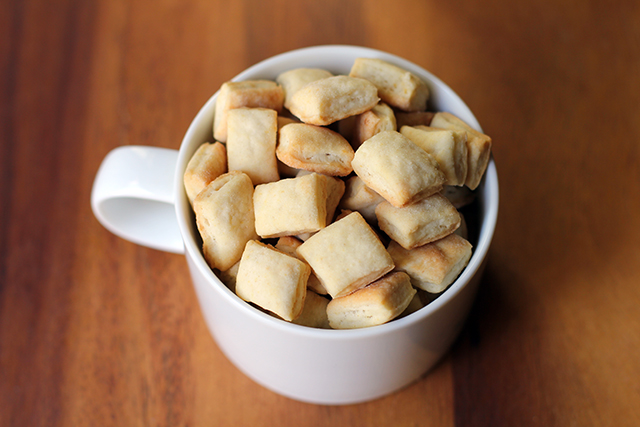
crackers_top

When I was a kid, the retired couple next door took on the role of surrogate grandparents/babysitters. Their kitchen was where I learned to make a pie crust, their garden was where I saw my first swiss chard in the wild, and their family room was where I caught up on every Matlock and Murder She Wrote episode ever produced. In my memories, there were always great snacks on offer at their house, but even more than the just-baked elderberry pie and sugar cookies, I remember the evenings we spent with a big bag of oyster crackers and a tub of butter. Yes, buttered crackers were what most impressed my seven-year-old self, and I still think back to those cozy, murder-mystery evenings whenever I see a bag.

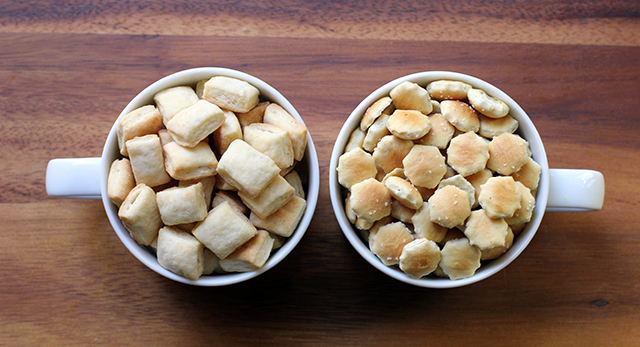
Whenever I actually taste the crackers in those bags these days, however, I wonder if it’s my palette or their production values that have shifted. I don’t remember them giving off the impression of…tissue paper quite so much, dissolving on the tongue like a communion wafer. So this version of the iconic cracker is just a little bit more solid, a little richer, a little butterier–it will stand up to but not overpower your soup.

Now, I know what I said about DIY projects and getting the perfect shape, but I think those sesame sticks taught me an important lesson. While there may be cooks out there who can produce a bag’s worth of perfectly shaped and smiling goldfish crackers, I now know that I am not one of them. So while I understand that oyster crackers are often hexagon-shaped, after considering how to produce so many small bites with some degree of efficiency, I decided that rectangles were cute enough. (Approximate) uniformity would be the key to my cracker geometry. Once they poofed up in the oven, I didn’t miss those stop signs of carbohydrate one bit.

DIY Oyster Crackers: The comparison

This is a no-stress side project that could easily be done while your soup is simmering. That said, it gets flour all over the counter and you have to cut dough into small pieces, possibly negating the laid-back, one-pot cooking that is often what makes soup so attractive (to me, at least). As far as economic comparison, I bought a 12-ounce bag for a dollar, so I’m not even going to try and talk cost savings. Ingredient-wise, this homemade version swaps in butter for the palm, canola, and soybean oils in my grocery’s house brand. Beyond that, however, rather than coat the surface of the crackers with an envelope of salad dressing mix, this is an excellent opportunity to make your own signature flavor with seasonings such as dried herbs or black pepper mixed right into the dough. Being a Baltimorean now, I added a teaspoon of Old Bay, and the spike of flavor and heat it brought to crackers seemed to be an especially appropriate pairing with the falling temperatures.

DIY Oyster Crackers
makes about 2 cups

5 ounces (1 cup) AP flour
1 teaspoon kosher salt
1 teaspoon sugar
1 teaspoon baking powder
1 teaspoon (or to taste) Old Bay or seasoning of your choice (optional)
2 tablespoons cold unsalted butter, cubed
1/3 cup cold water, additional as needed

Measure dry ingredients into a mixing bowl and whisk to combine. Next, using a pastry cutter, work butter into the dry ingredients. Finally, add the water and lightly knead the dough just until all ingredients are incorporated. Add additional water by the tablespoon, if needed.

Form dough into a ball, set it on a lightly floured rolling surface, and cover with the overturned mixing bowl. Allow to rest for 15 minutes. Heat oven to 375°F.

When rest is complete, roll dough out on a well floured surface until about 1/8-inch thick. Cut dough into squares or rectangles (or circles, if you’re really willing to put some time into it) that are about 1/2-inch wide. Transfer to a parchment-lined baking sheet and space the shapes out as much as possible.

Bake for about 15 minutes, until crackers are showing color around the bottom edges. Turn oven off and crack the door open about eight inches. Leave crackers inside to cool and continue to crisp, about 30 minutes.

*

This recipe was created for my “DIY vs. Buy” column on Serious Eats.

Fall Tequila Cocktail: The French Intervention

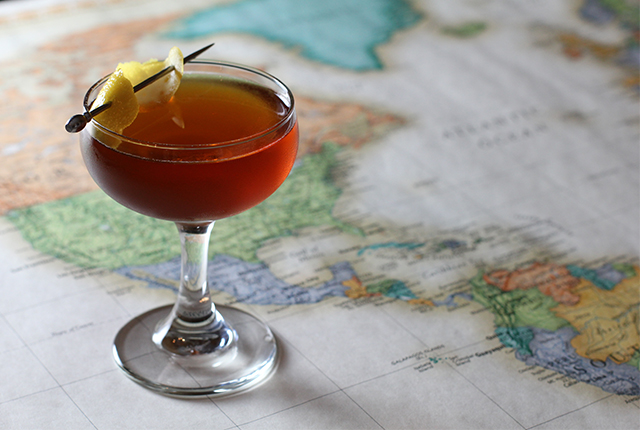
frenchintervention_top

Crafting original cocktails—for me, at least—is a process that calls for one part imagination and at least five parts experimentation. While Version 1.0 of any given recipe rarely passes muster, it opens doors to any number of paths leading to the final destination. Sometimes the solution is simple, though most often it requires a good bit of refinement. Around here, recently, it’s been more of the latter. In order to dial in the spec for The Cylburn, we hosted a tasting party that featured sundry variations on the theme; while in the case of my Suze-infused White Negroni I almost scrubbed the whole project after exhaustive attempts to tweak it to perfection didn’t seem to get me any closer to my desired result. However, every so often lightning strikes and a first draft is deemed of superior quality, being instantly advanced to final draft status without having to undergo any editing or further scrutinization. Call it the product of accrued mixological experience or call it a fluke, but such was the case with The French Intervention, a cocktail whose name even came easily.

A confluence of two things sparked the idea for this drink. First, there was tequila. In an unfortunate case of guilt by association, tequila often gets a bad rap as a liquor to be consumed in one gulp, in mass quantities, and with a side of salt and lime. Yet, it seemed to me that its earthy flavor profile might make it an excellent, not to mention unexpected, candidate as the base spirit in a fall cocktail. And having just picked up a bottle of El Espolòn, I was eager to test my hypothesis. The second was something I happened upon while wandering the aisles of a local wine and spirits shop—a postcard advertising the Can-Can Classic Cocktail Competition, a challenge to create a new drink using the French St-Germain elderflower liqueur. I accepted the challenge, dreamt up the recipe you see below, and was surprised that my maiden voyage produced such an interesting and balanced result—a cocktail I truly believed coulda been a contender.

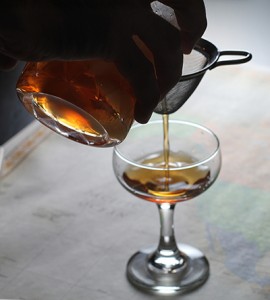
The French Intervention: Pour

Well, it turns out the drink actually couldn’t have been a contender, as close inspection of the fine print revealed that submitted cocktails need contain 1 oz. of St-Germain. My scant 1/2 oz. just wasn’t going to cut it. (Queue sad trombone sound.) But, to me, the drink was definitely a winner and rather than mess with success for a chance at a $10,000 cash prize—who needs that anyway, right?—I was content to simply add it to Wonderland Kitchen’s fall cocktail menu.

A word on the name. The French Intervention refers to Napoleon III of France’s invasion of Mexico in 1861—a campaign meant to give President Benito Juárez a collective piece of Britain, Spain, and France’s mind after the former decided to stop sending interest payments to the three nations, who so happened to be Mexico’s major creditors. But it wasn’t just a debt-collecting mission for Napoleon III—Britain and Spain actually backed out when they found out there was an actual invasion planned—there was also a little something about financing his empire with the Mexican silver that was just laying around waiting to be mined, as well as keeping the burgeoning power of the United States in check while it was somewhat preoccupied with its own Civil War. Sneaky guy.

As a coda, while double checking to see that The French Invention had not already been ascribed to an alcoholic concoction, I serendipitously discovered that the drink’s spec tips its hat to Harry Craddock’s Napoleon cocktail. Granted, not the same Napoleon, but close enough for jazz.

The French Intervention

2 oz. El Espolòn Tequila Blanco
1/2 oz. Cynar
1/2 oz. St-Germain Elderflower Liqueur
2 dashes Angostura Bitters
Wide lemon twist for garnish

Combine the tequila, Cynar, St-Germain, and bitters in a mixing glass. Stir with ice and strain into a chilled coupe. Twist the lemon peel over the drink to express the oils and garnish.

Choosy Moms Choose DIY (Peanut Butter Edition)

pb_top

Why don’t you just buy it?

Many DIY kitchen projects elicit this reaction, especially once the labor investment is revealed. Even if making your own means the removal of various chemicals, colorings, and preservatives, if it takes you five hours to crack out a bag of perfectly shaped and smiling goldfish crackers, is this a practical application of your time?

There are plenty of DIY projects that aren’t quite so involved, of course. Mayo. Salad dressing. Nut butters also fall into this category, the “recipe” being little more than “put ingredients in food processor and turn on.” Disappointed? I thought not. Even so, you may still be wondering: With so many peanut butter options already fighting for space on grocery store shelves, does it even matter if it takes 15 minutes rather than 15 hours to produce? Why…don’t you just buy it? I’m glad you asked.

Safety: The main reason I even thought to post about DIY-ing your own nut butters was due to the recall of yet another batch of contaminated peanut butter. I put so many more complicated condiments in jars here in Wonderland, it seemed silly not to add this no-brainer to the list.

Control: Peanut butter is one thing, but what about Cashew Almond Butter, or Hazelnut Cocoa Butter? When you DIY, you control type, quality, and quantity of the nuts and oils that go into each and every jar. Salt and sweeteners can be added to suit your tastes and nutrition goals, as well. Now things really start to get interesting.

Cost: When I did the math for Serious Eats, the supplies I was using didn’t dramatically result in cost savings until (perversely) the price comparison climbed into the really pure, “the only thing in that jar is peanuts” kind of $5.99, oil on top spread. To get a pure product and not have to try and figure out how to get the oil reincorporated is worth the homemade time investment as far as I’m concerned, though I did get some colorful tips on how to mix things up.

While considering what type of oil to include in my own DIY version, I wanted to find something that wouldn’t come with environmental concerns and yet still produced an excellent taste and texture. In my experience, using a small amount of coconut oil and then immediately transferring the finished product to the refrigerator results in a butter that holds together without getting oily on top or dry on the bottom before I use it up. I like its texture as well, because it spreads smoothly when totally cold, but isn’t runny on the knife.

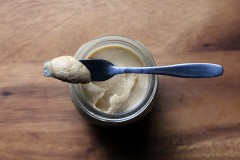
DIY Simple Peanut Butter

16 ounces roasted unsalted peanuts
1 tablespoon coconut oil (be sure to use refined oil if a hint of coconut flavor would bother you)
1/2 teaspoon salt or to taste
Honey, agave, or other sweetener to taste (optional)

Place nuts, oil, salt, and sweetener (if using) in the bowl of food processor. Process until nuts break down, stopping occasionally to scrape the sides of the bowl as needed. My food processor likes to fling all the nuts to the sides of the bowl and out of reach of the blades, so I have to invest more time than I’d like scraping them back off until things get going. Using enough nuts to mostly fill up the processor bowl helps alleviate this issue.

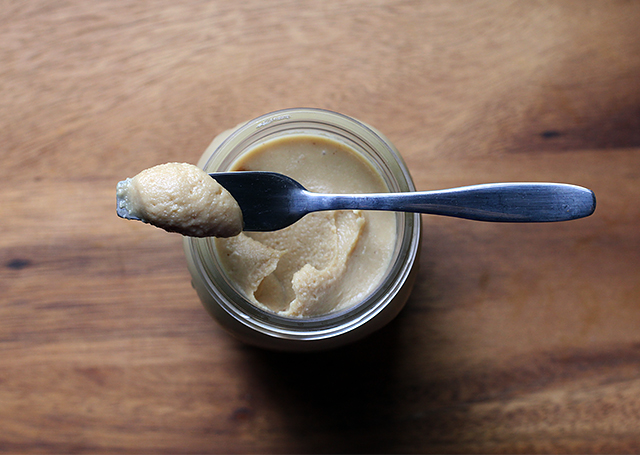
DIY Peanut Butter: Processing

Continue to process until peanut butter reaches desired smoothness. Taste and adjust salt and sweetener as needed.

Due to the heat of the processing, the butter should pour easily into a clean container but will achieve a firm yet creamy consistency after chilling. Cover with a tight-fitting lid and store in the refrigerator to prevent separation. (I like Mason jars for this, of course, and am really loving the plastic storage lids)

*

This recipe was created for my “DIY vs. Buy” column on Serious Eats.

Falling Into the Season: Maple Apple Bars

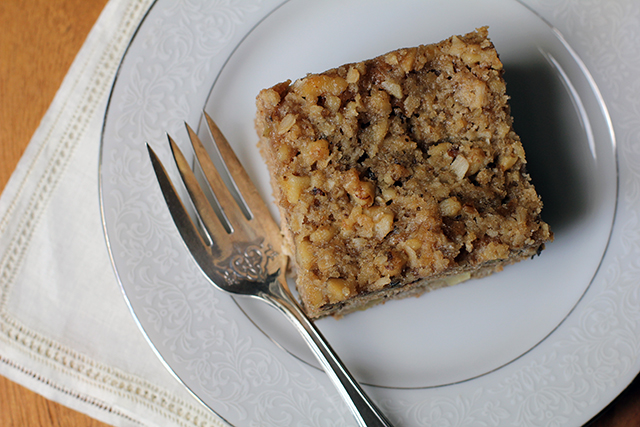
applecake_top

I didn’t post about the fact that my pal Marie and I cooked a bushel and peck worth of apples last weekend, ran them through (a freakin’ hand-crank) food mill, and put them into jars. But we did. We even added caramel to some, and calvados and cardamom to others for an adult-rated version. It was quite a delicious project, not terribly backbreaking when all was said and done, and should keep us in applesauce and apple jam for the foreseeable future. But more than that, it was an afternoon of fun in that way good work with close friends can turn out to be. Company in the kitchen is an important ingredient that shouldn’t be overlooked.

As it turns out, however, this applesauce also now connects me to a new acquaintance far beyond my kitchen walls. Thanks to the RSS/Twitter feeds streaming through Wonderland, I feel as if I have “met” a small army of amazing cooks who have so generously invited me into their homes and thoughts through their online writing. Amie Watson reached out to me after connecting with Wonderland Kitchen though a friend and suggested a recipe trade. I thought this was a most excellent idea.

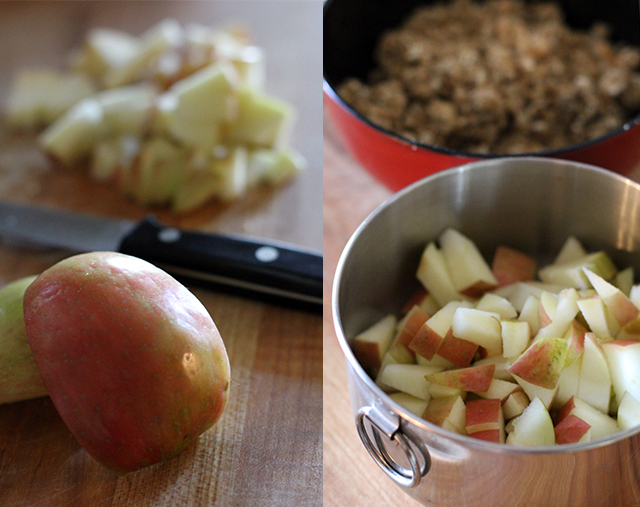
Apples for Maple Apple Bars

Once she told me she was going to make my cereal bars gluten free (an adaptation I’m excited to share), I thought–since I’m so into coconut oil these days–that perhaps I could completely anti-dairy and non-glutenate her Honey Almond Squares. But on reflection (and the realization that my chickpea flour cupboard was empty), I decided that was the opposite direction to take things. Considering the above-mentioned applesauce, plus the crisp weekend weather, I would add the wheat back in, swap in some deeper and darker sweet notes, and see what I got. I perhaps got completely carried away, but Amie’s recipe seemed welcoming to adaptation. Use an apple! Or use a pear! I like this approach; it’s much more in line with how I like to cook, and also where I tend to fail when baking. When the recipe offers guidelines as to where variation is possible, that’s my best chance for success right out of the gate.

And I don’t think I’ve ruined Amie’s recipe in the process! I like to think of this version as just the opposite side of the same dessert coin. Where her bars, with their higher honey, mango, and almond notes, would make a perfect welcome to the warming temperatures of spring, here we say hello to the brisk snap in the fall air. It’s a rich, moist, spicy cake, and it practically begs you for a scoop of vanilla ice cream if you’re feeling super decadent (and not lactose intolerant–sorry Amie!).

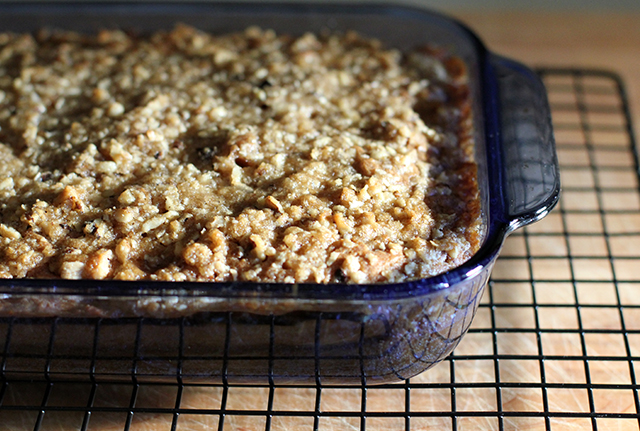
Maple Apple Bars: Baked

Maple Apple Bars
adapted from “Honey Almond Squares” as seen on Amie Watson’s Multiculturiosity

For the cake batter

1/4 cup butter, cubed
1/3 cup maple syrup
1 egg
1 teaspoon vanilla extract
1 cup applesauce
1 cup AP flour
1/2 cup whole wheat flour
1 teaspoon cinnamon
1/2 teaspoon nutmeg
1/2 teaspoon baking powder
1/2 teaspoon baking soda
1/4 teaspoon salt
1 apple, cubed
1/3 cup walnuts, chopped

For the streusel topping

1/2 cup brown sugar
3 tbsp rolled oats, coarsely ground
1/3 cup walnuts, chopped
1/4 cup butter, cubed

1. Heat oven to 350°F. Butter an 11″x7″ glass baking dish and set aside.

2. Measure dry ingredients for streusel topping into a bowl. Using your fingers, work in butter until the mixture is roughly incorporated and crumbly.

3. Using a stand mixer or in a large bowl, cream butter and maple syrup. Beat in the egg. Next, stir in the vanilla extract and apple sauce.

4. Measure dry ingredients into a medium bowl and whisk to combine. Add to the liquids and stir just until all ingredients are incorporated. Fold in walnuts and apples, then spoon batter into prepared baking dish, smoothing it out evenly with a spatula or the back of a spoon.

5. Sprinkle streusel topping over the top and bake for 35 minutes. Allow to cool on a wire rack before slicing and serving.