peanut butter » Wonderland Kitchen
Browsing Tag

peanut butter

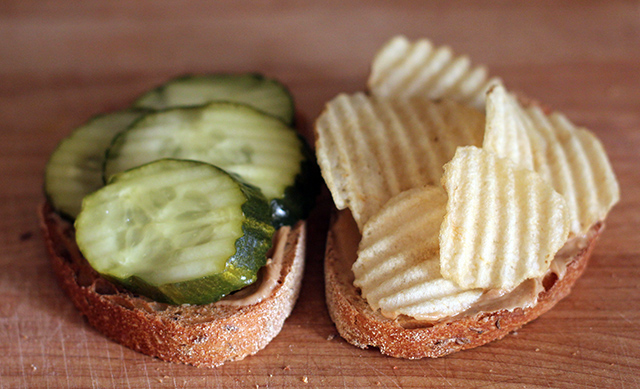
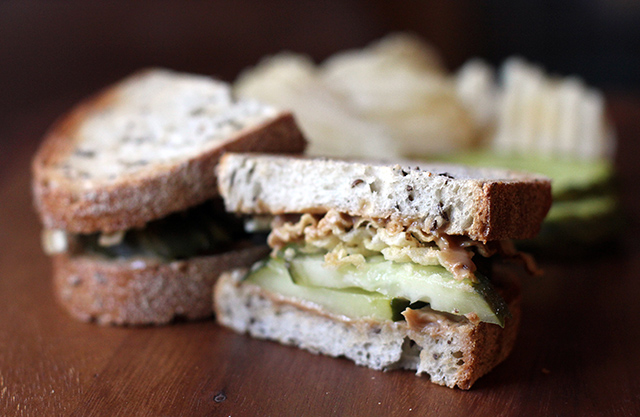
National Peanut Butter and Jelly Day: Peanut Butter & Pickle Variation

Peanut Butter & Pickle Sandwich

National Mustard Day (August 5)? National Split Pea Soup Week (the second week of November)? The volume of so-called “national food holidays” tends to make me uncomfortable in the same way that overly sentimental greeting cards do–the thought is largely inoffensive, but the meaning generic and diluted. (Though maybe not when it comes to National Margarita Day. That one I think I’d keep in regular rotation.)

I would have overlooked National Peanut Butter and Jelly Day today, except that it seems to have stirred up the conversation around the peanut butter and pickle variation and this is a sandwich I feel compelled to advocate for. It being my snack of preference as a picky-eater kid, I was honestly shocked to discover how many people think this is a dish entirely too gross to even consider tasting. For me, it carries the memory of sneaking in late from high school dates and hanging out in the quiet of the kitchen, all the ingredients laid out on the counter while I made my preparations by the dim glow of the stove’s overhead light. Inevitably, my mom would hear me clanking around and get out of bed to ask how my night had been. Then she’d shuffle back to her room, wondering aloud why I hadn’t bothered to eat properly while I was out.

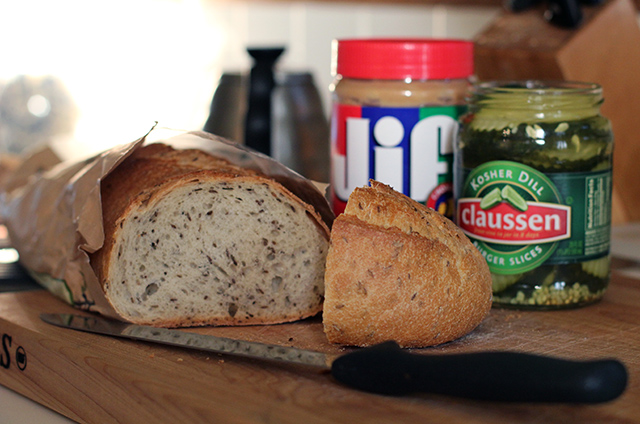
Peanut Butter & Pickle Sandwich: Makings

Was my PB&P just a passing teenage infatuation? While for some reason I had largely abandoned this childhood sweetheart when I left Ohio, our reconnection was as delicious as I could have hoped for. A suspicious “what are you eating?” inquiry and taste bite request from my husband had him making his own before my plate was clean. Should you wish to take a pass on this sweet and savory treat, well, the more for us. But you won’t know what you’re missing.

Peanut Butter & Pickle Sandwich: Slices

Peanut Butter & Pickle Sandwich

Peanut Butter & Pickle Sandwich

rye bread (seeded preferred)
peanut butter (a sweet variety is best, for balance)
kosher dill pickle slices (though some prefer the sweetness of bread and butter style)
potato chips (thick ridged variety, if possible)

Toast the bread and spread both slices with a generous layer of peanut butter. Layer pickle slices over one slice and crush chips over the other. Sandwich together and slice in half.

Plate with additional chips and pickles if you’re feeling fancy; eat over the sink at 2 a.m. and don’t clean the crumbs off the counter before you go to bed if you’re feeling rebellious.

https://wonderlandkitchen.com/2013/04/national-peanut-butter-and-jelly-day-peanut-butter-pickle-variation/

rye bread (seeded preferred)
peanut butter (a sweet variety is best, for balance)
kosher dill pickle slices (though some prefer the sweetness of bread and butter style)
potato chips (thick ridged variety, if possible)

Toast the bread and spread both slices with a generous layer of peanut butter. Layer pickle slices over one slice and crush chips over the other. Sandwich together and slice in half. Plate with additional chips and pickles if you’re feeling fancy; eat over the sink at 2 a.m. and don’t clean the crumbs off the counter before you go to bed if you’re feeling rebellious.
Choosy Moms Choose DIY (Peanut Butter Edition)

pb_top

Why don’t you just buy it?

Many DIY kitchen projects elicit this reaction, especially once the labor investment is revealed. Even if making your own means the removal of various chemicals, colorings, and preservatives, if it takes you five hours to crack out a bag of perfectly shaped and smiling goldfish crackers, is this a practical application of your time?

There are plenty of DIY projects that aren’t quite so involved, of course. Mayo. Salad dressing. Nut butters also fall into this category, the “recipe” being little more than “put ingredients in food processor and turn on.” Disappointed? I thought not. Even so, you may still be wondering: With so many peanut butter options already fighting for space on grocery store shelves, does it even matter if it takes 15 minutes rather than 15 hours to produce? Why…don’t you just buy it? I’m glad you asked.

Safety: The main reason I even thought to post about DIY-ing your own nut butters was due to the recall of yet another batch of contaminated peanut butter. I put so many more complicated condiments in jars here in Wonderland, it seemed silly not to add this no-brainer to the list.

Control: Peanut butter is one thing, but what about Cashew Almond Butter, or Hazelnut Cocoa Butter? When you DIY, you control type, quality, and quantity of the nuts and oils that go into each and every jar. Salt and sweeteners can be added to suit your tastes and nutrition goals, as well. Now things really start to get interesting.

Cost: When I did the math for Serious Eats, the supplies I was using didn’t dramatically result in cost savings until (perversely) the price comparison climbed into the really pure, “the only thing in that jar is peanuts” kind of $5.99, oil on top spread. To get a pure product and not have to try and figure out how to get the oil reincorporated is worth the homemade time investment as far as I’m concerned, though I did get some colorful tips on how to mix things up.

While considering what type of oil to include in my own DIY version, I wanted to find something that wouldn’t come with environmental concerns and yet still produced an excellent taste and texture. In my experience, using a small amount of coconut oil and then immediately transferring the finished product to the refrigerator results in a butter that holds together without getting oily on top or dry on the bottom before I use it up. I like its texture as well, because it spreads smoothly when totally cold, but isn’t runny on the knife.

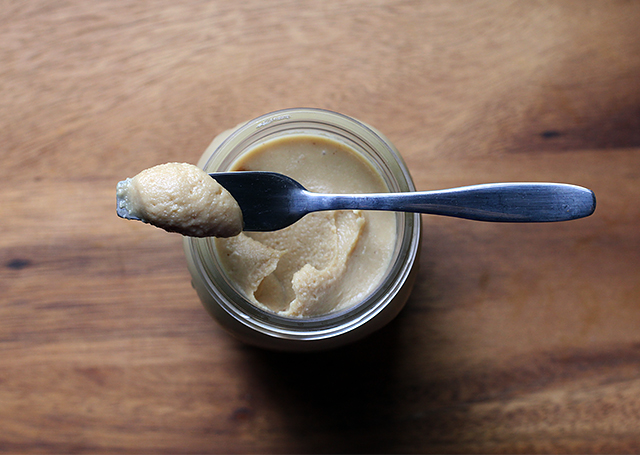
DIY Simple Peanut Butter

16 ounces roasted unsalted peanuts
1 tablespoon coconut oil (be sure to use refined oil if a hint of coconut flavor would bother you)
1/2 teaspoon salt or to taste
Honey, agave, or other sweetener to taste (optional)

Place nuts, oil, salt, and sweetener (if using) in the bowl of food processor. Process until nuts break down, stopping occasionally to scrape the sides of the bowl as needed. My food processor likes to fling all the nuts to the sides of the bowl and out of reach of the blades, so I have to invest more time than I’d like scraping them back off until things get going. Using enough nuts to mostly fill up the processor bowl helps alleviate this issue.

DIY Peanut Butter: Processing

Continue to process until peanut butter reaches desired smoothness. Taste and adjust salt and sweetener as needed.

Due to the heat of the processing, the butter should pour easily into a clean container but will achieve a firm yet creamy consistency after chilling. Cover with a tight-fitting lid and store in the refrigerator to prevent separation. (I like Mason jars for this, of course, and am really loving the plastic storage lids)

*

This recipe was created for my “DIY vs. Buy” column on Serious Eats.

Child of Invention: Shake and Pour Pantry Peanut Dressing

dressing_over

There is a comforting romance to tracing your culinary roots back to grandma’s stained cookbooks or memories of mom letting you wear her apron and stir. These bits of nostalgia are stereotypically accented with the recollection of shared kitchen laughter and lessons learned at the elbows of others—food preparation that bonded the family and ended in feasts of Norman Rockwell perfection.

In my case, however, this love affair with formulas and mixtures and experiments began in the garage. My father had set up an old Formica-topped table, behind the cars and next to the lawn mower, where I could spend hours by myself just messing around in my own imaginary kitchen. I made milk by shaking together baby powder and water in a cast-off baby bottle, “reduced” dish detergent by pouring it into a plastic bowl and leaving it out in the sun until it congealed. Once, after I saw a special on PBS, I even took a handful of clay from some craft supplies we had and formed my own wine vat, mashing up grapes from our vines and sealing this mixture inside, burying the whole thing in the ground just as I had seen on TV. The next spring when I unburied the clay container and brought a glass of the reeking fermented liquid to my mother, the color drained from her face at the idea that I might have been drinking it. I was only eight, but still—perhaps they should not let me spend quite so much time alone in the garage.

Polaroids from my 1st grade science fair project. The experimental side of cooking is what attracted me.

I didn’t think much about those days once school and friends and violin lessons took over my focus and “playtime” was a thing of my past. In college I cooked to survive, and as a single working woman in New York, I cooked only on the rare occasion that I was actually in my apartment long enough to eat. Once I married, moved, and established a real home, cooking became a more seriously integrated part of living and my inner mad scientist reawoke. My fridge is now crammed with jars of housemade pickles and chutneys and various condiments. I lug home gallons of whole milk that I turn into yogurt and cheeses, fruit and honey that I ferment into mead. My freezer is packed with flours and yeasts of various sorts; I keep a jar filled with the latest sourdough starter, a life that I labored to bring into this world and yet now keep forgetting to feed.

I love to research but I’m not such a fan of measuring, so my favorite dishes tend to be more memory than recipe-based. In the process, I destroy and I discover. I’m still eight-years old really, just better outfitted this time.

*

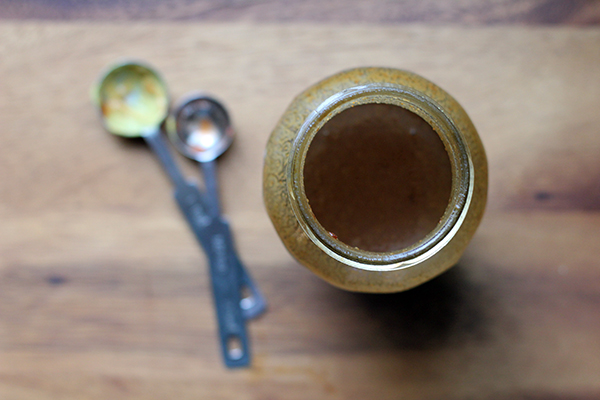
Shake and Pour Pantry Peanut Dressing

Shake and Pour Pantry Peanut Dressing

When it comes to dinner salads, there is a point between a heavy dairy laced dressing and a simple vinaigrette that I often find myself seeking in order to accent a full meal of raw vegetables. More often than not, I’ll end up turning to this spunky peanut butter-based recipe. Though honestly, I feel like the instructions which follow should read along the lines of: “Open refrigerator. Remove several complimentary condiments. Shake together and pour.” Because really that’s what I do. I promise I actually measured the recipe below, but I’m never so careful in real life. I almost always forget at least one ingredient, and sometimes I add others, such as honey or toasted sesame oil. If there’s not enough of something, I just use something else.

As if that wasn’t a slippery enough slope, I also adjust it several times throughout its shelf-life to suit different purposes. Need it thicker for cooked veggies or as a dumpling dipping sauce? Spoon in more peanut butter and shake. Need it thinner again to cover another round of salads or to kick up some quinoa? Taste and add more liquid and adjust heat–usually a bit of soy sauce and a squeeze of mustard will do it.

2-3 T peanut butter (processed or natural, chunky or smooth)
4 T tamari (I use reduced sodium)
2 T balsamic vinegar
1 tsp. mustard
1/2 tsp tuong ot toi (vietnamese chili garlic paste)

Measure all ingredients into a jar with a tight fitting lid. Shake until well combined. Taste and adjust balance to suit your tastes. Refrigerate until needed.

Comfort and Joy! (New Christmas Cookie Edition)

cookies_top

I was bored with Christmas baking, and I hadn’t even started yet. Let me back up.

On Friday, my mom called to ask how my Christmas preparations were coming along. I gazed out my window at the Halloween pumpkin still decomposing on my front porch and refused to assume her plan-ahead, Martha Stewart decorating drive.

I don’t like to pack my holiday celebrations too tightly, and I was still working off Thanksgiving dinner, thankyouverymuch. Still, an examination of the calendar did indicate that perhaps some hustle on my part was in order. While I wasn’t ready to make a public lawn statement quite yet, I figured that some baking might help ease me into the spirit of the season. When I turned to my usual Christmas cookie contenders, however–the peanut butter blossoms, the pecan tarts, the Hungarian half-moons–they were all so perfect and lovely and…uninspiring somehow. I decided that I needed to break tradition: Christmas 2011 needed a new cookie.

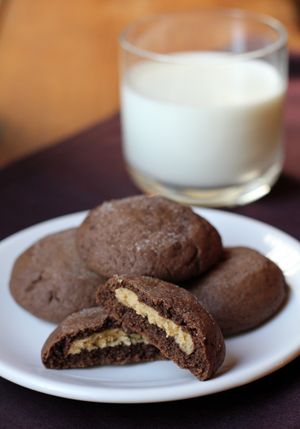
Thus began the epic Googling. (What? I’m a girl who likes her research!) In the end I settled on two experiments. This is the first, the “cozier” and less fussy of the duo. A friend came back from a block party raving about them a few weeks ago and even though they are laid back, they sure are tasty. I think what sold me is how they are kind of like a Buckeye–a peanut butter ball wrapped in chocolate; what’s not to love?–but (bonus!) in this version they also function as cookies. I was not disappointed.

Cooks all over blogland have gone to town on this recipe (which appears to have originated in an issue of Better Homes and Gardens), so whatever version you need, you can probably find one to suit (the vegans, in particular, have done a range of adaptions). I went with this posting by Culinary in the Country, mostly just because I liked his cookie flattening technique and the fact that he, too, whisks his dry ingredients.

Peanut Butter Filled Chocolate Cookies
Recipe from Culinary in the Country; adapted from Better Homes and Gardens

Dough:
1 1/2 cups all-purpose flour
1/2 cup unsweetened cocoa powder
1/2 teaspoon baking soda
1/4 teaspoon salt
1/2 cup unsalted butter, softened
1/2 cup granulated sugar
1/2 cup packed brown sugar
1/4 cup peanut butter
1 large egg
1 T milk
1 teaspoon vanilla

Filling:
3/4 cup sifted powdered sugar
1/2 cup peanut butter
pinch salt

For assembly:
a few tablespoons granulated sugar

Measure flour, cocoa powder, baking soda, and salt into a medium bowl and whisk to combine.

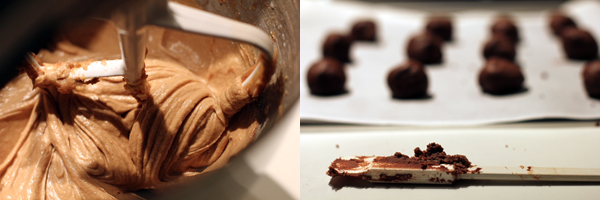
In a large bowl or stand mixer, cream butter, sugars, and peanut butter until smooth. Add the egg, milk, and vanilla, and continue mixing until well combined. Add dry ingredients and mix just until combined.

Cover two baking sheet with parchment and divide dough into 32 pieces. (I only got 29 and wasn’t disappointed with their size, so use your own judgement.) Quickly shape into balls.

Preheat oven to 350°F.

In a medium bowl or stand mixer, mix powdered sugar, peanut butter, and salt until smooth. Divide into enough pieces to fill your chocolate balls. I found the filling coherent and malleable enough to roll it out into a log, so I did that and simply divided it evenly with a butter knife rather than guess on individual balls, as the original recipe suggested.

Flatten each chocolate ball in the palm of your hand and top with a piece of the peanut butter filling. Fold chocolate dough as evenly as possible around the peanut butter and shape back into a ball before placing it on the baking sheet again. My “round” ball cookies always come out slightly flat, which in this case actually worked in my favor (see next step).

Lightly flatten each cookie with the bottom of a glass dipped in granulated sugar. You might need to get it a little greasy first to get the sugar to stick.

Bake cookies one sheet at a time until the surface of the cookies begins to crack slightly, about 8 minutes. Allow cookies to cool for 1 minute on the baking sheet, then transfer to wire rack and cool completely.

How To Bake Cookies (and Make Friends) Without Really Trying

milkcookie

I’m traveling a lot lately, which is probably how I got to reminiscing about all the globe-trotting adventures I used to have when I was younger and less gainfully employed.

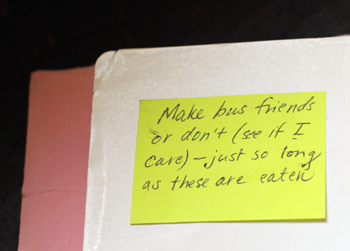
Greyhound carted me between cities scattered across the Northeast one memorable summer, and I took advantage of frequent layovers to spend time with friends who didn’t mind sharing their couches and their kitchens. I still have a little Post-It note that was attached to a sack lunch I was packed off with once. I didn’t have much of a sweet tooth, but it was suggested that on a multi-state bus ride, cookies could turn out to be a valuable commodity. Even though I was heading off down the road again, I didn’t need to go it alone (one way or the other).

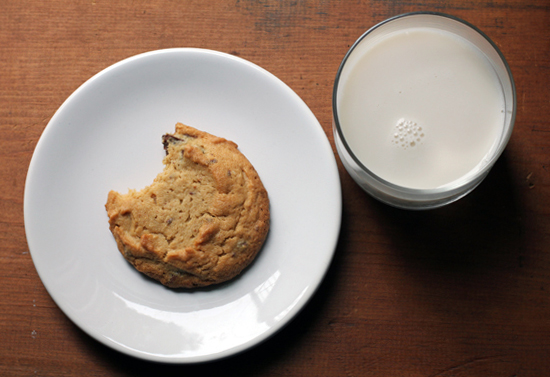
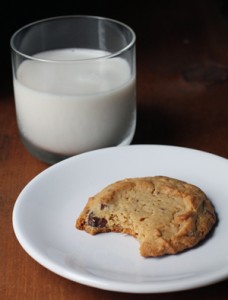
Desserts are not normally my thing, it’s true, but the sweet and savory one-two punch of these Salted Peanut Butter Cookies called out to me when I spotted them just a few days ago on Orangette. So much so that this recipe shot to the top of my “To Make ASAP” list.

I made a half-batch the first time out, even though I strongly suspected in advance that I was going to love their sweet and salty contrast. The recipe scaled down for me very easily (especially if you are weighing all your ingredients). I still ended up with 16 good-sized cookies (3″-4″ across), and I suspect that travel buddies old and newly met will help me make them disappear quickly enough. Unless I accidentally end up eating them all myself.


Salted Peanut Butter Cookies

Adapted from Autumn Martin and Hot Cakes Confections (via Orangette)

240 grams (2 cups plus 1 tsp.) pastry flour
5 grams (1 tsp.) baking soda
12 grams (1 T. plus 1 tsp.) kosher salt
275 grams (2 sticks plus 3.5 T.) unsalted butter, at room temperature
200 grams (about 1 ¼ cup, packed) dark brown sugar
170 grams (¾ cup plus 2.5 T.) sugar
2 large eggs
400 grams (1 ½ cup) natural salted creamy peanut butter
2 tsp. vanilla extract
170 grams (2 bars of 3 oz. each) milk chocolate, chopped

Preheat the oven to 350°F.

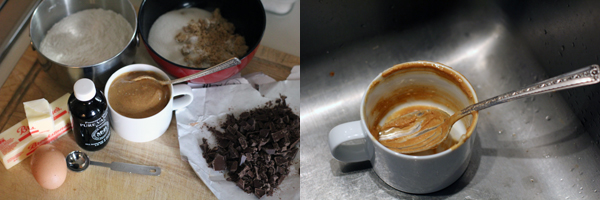
I very rarely bake, but when I do, I try to actually lay out and pre-measure all of my ingredients before beginning to mix. While cooking on the fly without a formal mise en place doesn’t often trip me, I find that the baking experience is considerably less stressful when all the pantry rummaging and ingredient portioning is done in advance. On top of that, I use my kitchen scale for accuracy–therefore avoiding worries that my flour is packed either too loosely or too tightly, or that I’ll fumble while leveling off a measuring cup and end up wearing half of it. So, with that strategy in mind:


In bowl #1 measure out the brown and white sugar.

In bowl #2 measure out the peanut butter and the vanilla.

In bowl #3 measure out the flour, baking soda, and salt. Whisk to combine.

Finally, in the bowl of a stand mixer (if that’s what you’re using) or a large mixing bowl, place softened butter. Beat in sugars, and then eggs (one at a time). Scrape down the bowl, add in the peanut butter and vanilla, and beat until well combined. Add the dry ingredients in several portions, mixing gently to incorporate fully. Finally, add in the chocolate pieces and mix just long enough to evenly incorporate. Scrape down bowl and beater(s).

Using a scoop or large spoon, scoop batter onto a baking sheet lined with parchment paper. I safely used a scant 1/4 cup of dough and could fit 9 cookies per sheet, but start conservatively as they do spread out and you don’t want them all running together. Bake for 15 minutes, just until the sides begin to color and the top still looks undercooked. I over-baked my first batch, and while they were good, the soft and chewy second pan was the clear winner. Allow to cool completely on a rack before removing from the pan.

According to Orangette, this dough–scooped out and frozen in single-cookie-sized portions–stores really well. Just bake the cookies without defrosting as above, but you’ll probably need to extend the baking time to 20 minutes. Sounds like a wonderful(ly dangerous) impromptu treat, if you ask me. Good to have should friends unexpectedly pull into town.