featured » Wonderland Kitchen
Browsing Tag

featured

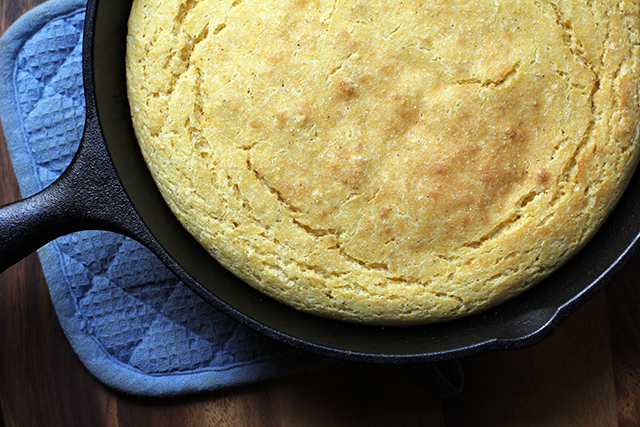
DIY Cornmeal from Popcorn (Plus Cornbread)

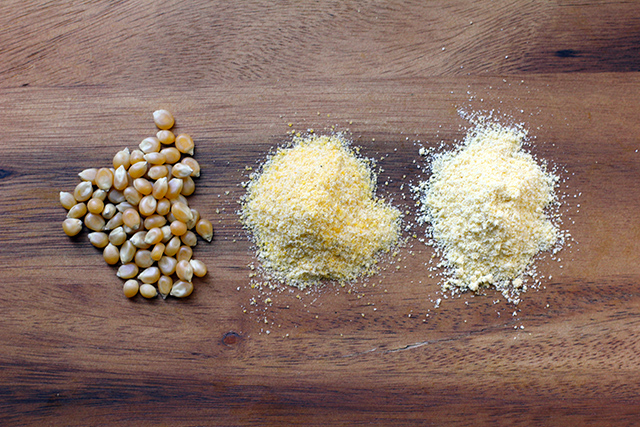
DIY cornmeal

There is perhaps no recipe I’ve investigated that is as simple and yet as fraught with passionate argument regarding the “correct” way to make it as cornbread. First, you have the ostensibly North/South difference of opinion on the use of sweeteners, and then further debate among the Southerners themselves ratcheting up tensions even further. Discussions regarding the ratio of flour to cornmeal, the number of eggs, and what kind of fat needs to be in the pan can then further exacerbate hostilities. And if you’re not already using a cast iron skillet to bake yours, you best duck when those who are come near.

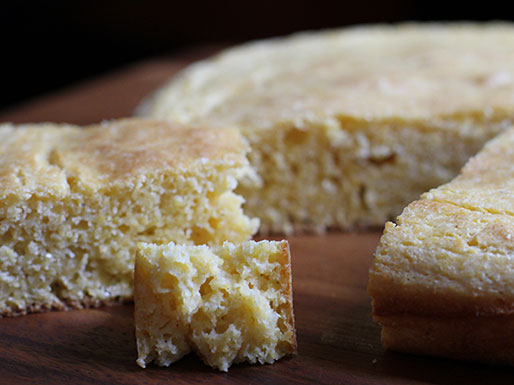
I mention all this at the outset because adding to this battle is not my purpose in making cornbread this week. I’ve provided a simple recipe that suits my preferences, but I want to leave all the controversy aside (and the box of Jiffy mix as well) in order to highlight the great taste provided by freshly milled cornmeal.

With all the chatter out there concerning wheat, gluten, and human nutrition, there’s been a lot of discussion in food circles regarding sprouting and soaking grains and milling flours at home, but I haven’t taken that very far. And grinding my own cornmeal was something I hadn’t even begun to consider when I first stumbled upon discussions of how great the freshly milled variety made your cornbread. As cornmeal has a habit of sitting around in my pantry, the chance to DIY this product certainly intrigued me.

Type of Corn

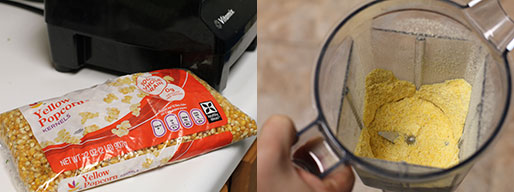
While I’ve seen a few references to drying and milling sweet corn, most cornmeal is made from the starchier field (a.k.a. dent) corn. Not having the space to grow and dry my own corn (not to mention that it’s March), the option that really lit my eyes up, however, was one I already had in my pantry: popcorn.

Equipment Needed

DIY cornmeal: Processing

DIY cornmeal: Processing

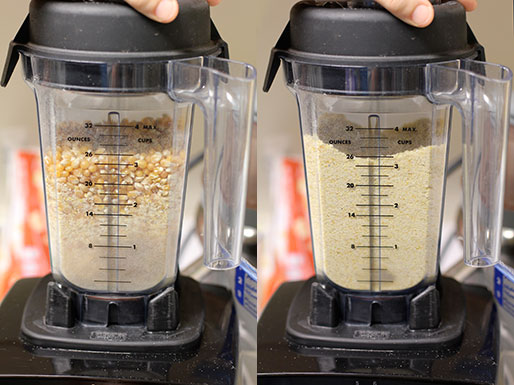
If you haven’t already invested in a grain mill (there are many types, from hand crank to KitchenAid attachment to sophisticated powered appliances), Vitamix benders are also powerful enough to grind dried corn into a beautiful yellow cornmeal if that’s an option for you. Even still, working in small batches is necessary so as not to overheat the meal during grinding. There are also people out there who use their coffee or spice grinders for small batches.

As a precaution, you may wish to sift the meal after it is initially ground to check for missed larger pieces, but I didn’t find this strictly necessary.

While I haven’t had the chance to try a proper grain mill yet, another tip I read frequently during my research is that if you’re having trouble grinding the corn–especially using a hand-cranked mill–try running the corn through on a very coarse setting and then grinding it a second time to get a finer grain. Less wear on your machine and yourself!

Whole Kernel vs. Refined/Degerminated

“Why not just buy cornmeal?” you may be asking yourself. Much of the conversation online surrounding growing and grinding your own corn concerns GMO and pesticide concerns. Beyond that, however, is the fact that many types of cornmeal available on grocery store shelves have been refined/degerminated. By removing the germ from the whole grain, the product will have a longer shelf life. However, that oil-rich and vitamin-packed germ is also where a lot of the nutrition lives. Grinding your own meal means you can preserve the whole grain aspect with less worry about rancidity. Simply grind meal as you need it, or store small batches in your freezer for maximum preservation.

Do you grind your own cornmeal or other grain products? What method do you use?

Cornbread:crumb

The Verdict

A 32-ounce bag of popcorn netted me 5 1/2 cups cornmeal, though grinding the amount needed just before use is recommended for maximum freshness. The special equipment is the real barrier to entry here–and some of it is frankly quite expensive. The richer corn flavor and overall freshness definitely provide a big push towards investing in an appliance that can get the job done. Beyond that, however, unless you’re buying in bulk, it seems that the popcorn vs cornmeal price points are negligible. I remain on the fence about adding grain milling to my regular kitchen tasks, and would love to hear more about the pros and cons from those of you who are doing it.

Cornbread

DIY Cornmeal Cornbread

DIY Cornmeal Cornbread

9 ounces of popcorn, ground into meal (alternatively, use 1 1/2 cups store-bought cornmeal)
1 cup AP flour
2 teaspoon baking powder
1 teaspoon salt
1 egg
2 cups buttermilk
2 tablespoon shortening, bacon drippings, or high heat oil

Place 10-inch cast iron skillet in oven on middle rack and heat to 450°F.

Meanwhile, whisk cornmeal, flour, baking powder, and salt together in a large bowl until evenly incorporated. In a medium bowl, lightly beat egg. Stir in buttermilk.

As oven nears 450°F, remove pan and add fat, allowing it to heat and coat the bottom.

Add egg and buttermilk to dry ingredients and then pour in excess fat from skillet as well, quickly mixing all ingredients together until just wetted. Pour batter into skillet and return to oven, baking 20-25 minutes, until top is just golden and edges have pulled away from the side of the pan.

Cornbread is best served warm fresh from the oven.

https://wonderlandkitchen.com/2013/03/diy-cornmeal-from-popcorn-plus-cornbread/

*
This recipe and post were created for my “DIY vs. Buy” column on Serious Eats.

Mixing Islay: The Coal Fire Cocktail

The Coal Fire Cocktail - Wonderland Kitchen

At home, I’ve been on a bit of a single malt scotch kick recently. The smokier and peatier the better. Maybe it’s the time of year, but right now there is nothing more satisfying to me than 2 ounces of peaty, smoky, and briny Isaly scotch. It could also be that I’m just projecting our desire for a wood burning fireplace in our living room into my glass. But let’s not get too psychoanalytic.

Though single malts are best taken neat with just a few drops of water, I simply couldn’t resist trying to find a way to get those flavors into a cocktail. If you think you would like the taste of the last log in the fireplace, burned all the way down, embers ashy yet aglow, then this cocktail is definitely for you. That description pretty much sums it up. The recipe calls for Ardbeg 10, but any smoky and peaty Islay single malt—like a Lagavulin 16 or Laphroaig Quarter Cask—would certainly make an acceptable substitute. Sláinte!

Coal Fire

1 1/2 oz. Pikesville Rye
1/2 oz. Ardbeg 10 Year Islay Single Malt Scotch
1/2 oz. Taylor Madeira Wine
1/2 oz. Grade B Maple Syrup
1/4 tsp. Los Nahaules Mezcal Joven
2 dashes Angostura Bitters
Flamed orange peel for garnish

Combine the rye, scotch, Madeira, maple syrup, mezcal, and bitters in a mixing glass. Stir with ice and strain into a chilled coupe. Flame an orange peel and drop it in for garnish.

DIY Tomato Powder/Paste/Instant Soup

DIY Tomato Powder/Paste

Admittedly, February is probably the least sensible time for a Mid-Atlantic resident to deal with tomatoes. Still, with pretty much everyone I know battling some form of cold/flu/sinus travesty and I myself popping cough drops and drinking mugs of broth for the past couple weeks, I started daydreaming about DIY instant soups free of questionable additives and shocking sodium content. Being a vegetarian, these thoughts leaned towards vegetable-based options rather than chicken and noodles, and the dehydrator I was gifted over the holidays this year suggested all kind of possibilities.

The best course, it seemed to me at the time, would be to start with dehydrated tomato powder to which I could add other seasonings. The local grocery’s produce section offered a depressingly unripe and waxy selection of the fruit, so I settled on some decent-looking plum tomatoes, figuring I’d at least get the most flesh for my dollar that way. I swallowed the $2.29/lbs. price tag; it would have been $3.99/lbs. if I had selected organic fruit.

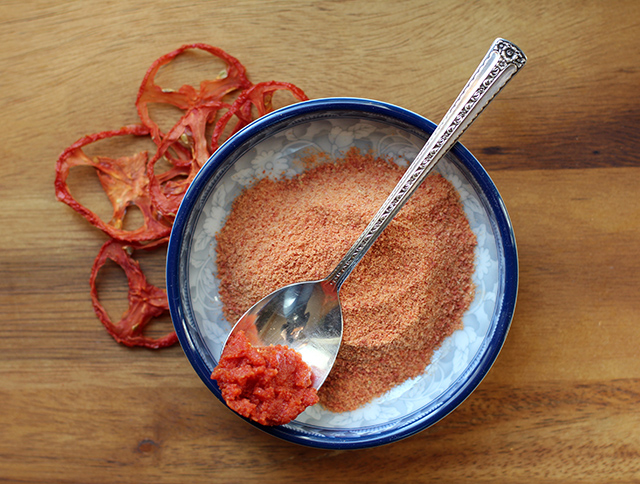
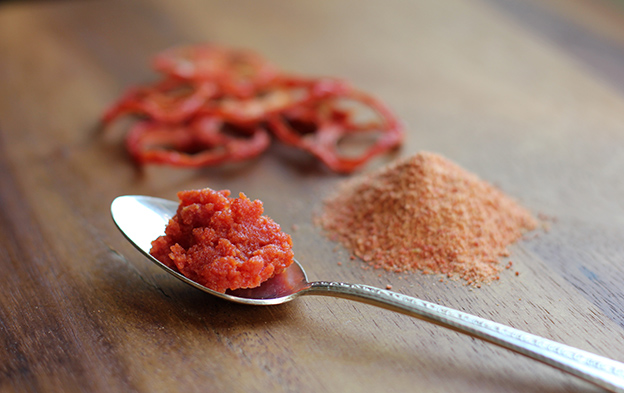
I cored and de-seeded (but did not peel) two pounds of tomatoes, slicing them in 1/4-inch rings and fitting about a pound per tray in my dehydrator. Unlike the garlic drying, the smell that filled the kitchen was much less overwhelming. Ten hours later, I had a lovely looking pile of perfectly crisp tomato slices, and after popping most of them in the blender I had…1/4 cup of tomato powder. In my heart I had known all along this was an August project, when tomatoes are available by the bushel for under $20. Clearly the math on this DIY project was not really going to work out at this winter rate. I would be much better off buying it.

However, the concentrated flavor of the powder was amazing and not to be wasted. I can see adding this to all kinds of soups, sauces, dips, and dressings, kneading it into bread dough, or sprinkling it on top of pizza along with some garlic powder. And for those concerned about acidic tomatoes and BPA in packaging, it’s a great way to store a large quantity of the former within a small pantry footprint and have “just add water” access to everything from tomato paste to tomato sauce and juice.

Do you use tomato powder? What are your favorite applications?

DIY Tomato Powder/Paste

Tomato Powder: The Method

Wash, core, slice, and de-seed plum tomatoes. Spray dehydrator racks lightly with oil and evenly spread out slices. They can touch but should not overlap. Dehydrate at 135°F for five hours and flip slices. Continue dehydrating until completely crisp, about five hours more.

Allow slices to cool completely and check again to make sure they are completely crisp. Then, using a blender or coffee grinder, reduce the slices to a powder. If grind is uneven, sift powder though a mesh sieve and regrind larger chunks. Store in an airtight glass container in a cool, dark place. Rehydrate portions of the powder to desired consistencies as needed.

The Verdict

I loved the tomato powder itself: versatile, storage-efficient, and delicious. However, it doesn’t make sense to DIY this project in any quantity without access to fresh local tomatoes in bulk. Until then, I will either wait or purchase powder online, where even organic options are available for about $20 per pound.

DIY Instant Tomato Bell Pepper Soup

DIY Instant Tomato Bell Pepper Soup

Note: I experimented with both instant nonfat dry milk and dry whole milk and–when powders were pre-mixed–couldn’t prevent either milk type from curdling upon heating. Non-dairy powdered coffee creamer did work, but a read through the ingredient list pretty much negates the DIY effort if keeping hydrogenated oils and artificial additives out of the soup is a motivator. However, using only the vegetable powders made for such a rich and tasty broth, I didn’t find myself missing the cream.

All of the vegetable powders and dried herbs can be made using a dehydrator at home. Diced onion and rings of de-seeded red bell pepper can be dehydrated and powdered in a similar fashion to the tomato powder above.

2 tablespoons tomato powder
1 teaspoon red bell pepper powder
1/4 teaspoon onion powder (or more to taste)
salt and pepper to taste
pinch of dried dill, parsley, or basil (optional)
1 1/4 cups boiling water

To make single-serving portions, measure vegetable powders and spices in proportions above into sealable plastic bags. When ready to serve, add 1 1/4 cups boiling water and stir until all powder is dissolved.

*

This recipe and post were created for my “DIY vs. Buy” column on Serious Eats.

DIY Black Tahini and Beet Hummus

Black Tahini Beet Hummus

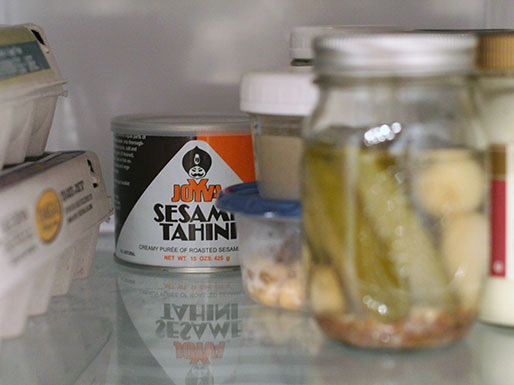
There are few constants in my kitchen, but one of them might be the high probability that there is a semi-full can of tahini hiding out at the back of the fridge on any given evening. Its precise origin and month of purchase are murky. I’m sure I thought about inking the date on the lid when I first open it, but I didn’t.

Lurking tahini

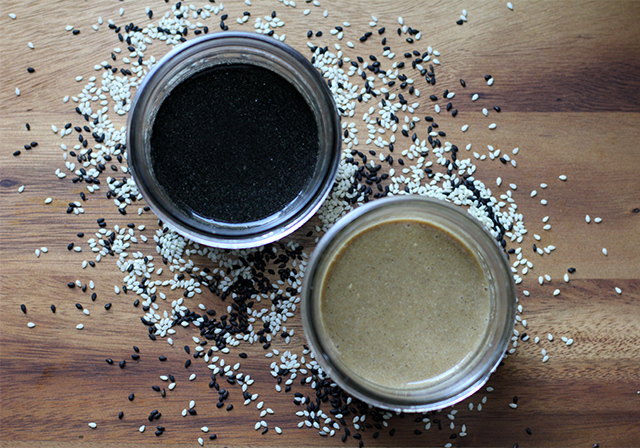
For anyone nodding along with me here, I have a new philosophy: I will henceforth buy sesame seeds and make my own tahini as needed, a 1/2 cup at a time. True, DIY versions of the purée may not be quite as smooth as the commercial variety. However, I found that a cup of seeds and a couple tablespoons of oil given a two-minute run in my blender came way too close to argue over. And if you were thinking about arguing, let’s talk again after you’ve tried to stir the separated oil back into the that neglected-for-weeks tahini in your fridge.

To make things a little more exotic, when I spotted some black sesame seeds at the grocery recently, I wondered: Was black tahini a thing? Yes! And not only that, I found it to blend smooth with half the amount of oil needed to convert white sesame seeds, plus the flavor was less bitter. I got a sweeter, nuttier paste. Plus, the color is just amazing (or terrifying, I suppose, depending on your tastes).

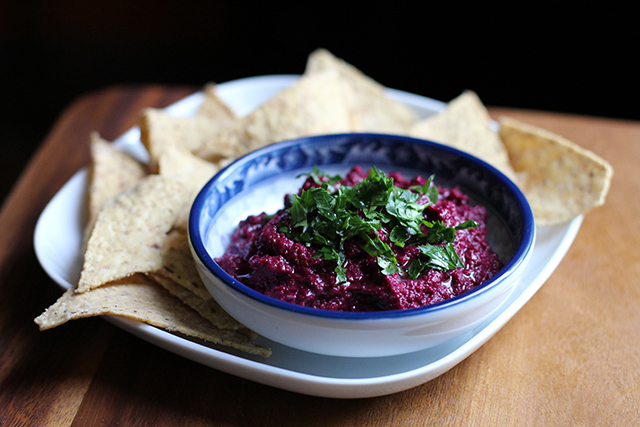
With such black gold at my finger tips, I decided to add it to a hummus that could stand up to it, pigment-wise. The Hungarian in my soul cried out for beets, though even if you are not normally a fan of this superfood, you may yet enjoy this dip. The color alone is sure to turn a few heads at your next gathering.

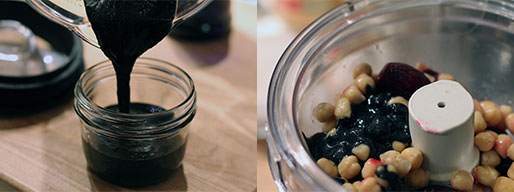
I decided to use my blender to process the tahini rather than my food processor, as the bowl is narrower and there are more blades on the job. Unlike my food processor, it is much harder for the seeds to cling to the sides away from the cutting action. However, my hopes to make even smaller batches in the blender and process the hummus in the same container right on top were, sadly, a fail. A cup of sesame seeds made a beautiful 1/2 cup of black tahini in minutes; a 1/4 cup of seeds just made a splattered unprocessed mess. Your appliances may serve you better.

Black Tahini

The Method: DIY Black Tahini

1 cup black sesame seeds, toasted just until fragrant (since they are black, take care not to burn them)
2 tablespoons olive oil, plus addition as needed

Place toasted sesame seeds and olive oil in a blender. Purée one minute, scrape down sides, and purée an additional minute, adding more olive oil as needed. Continue blending until smooth and pourable. Transfer to a jar with a tight-fitting lid and store, covered, in the refrigerator.

NB: The process is identical if using white sesame seeds, though I found that I needed twice the amount of oil. Using untoasted white seeds, however, produced a bitter tahini that I could not recommend.

The Verdict

Like many condiment projects, the major benefits of DIY-ing your own relate to freshness and control over ingredients. Once again, there is also a cost/time consideration. Even without making a bulk purchase, I paid $3.99 for 8 ounces of black sesame seeds which (using the method above) results in about a cup of tahini. Commercial versions of the same volume retail for anywhere from $5.29 to $12.59. Personally, the chance to step back to just a jar of sesame seeds in the pantry that can be used both to whip up small batches of tahini and in other projects as well makes this the way to go.

Beet Hummus: Processing

DIY Black Tahini and Beet Hummus

Makes: about 2 1/2 cups

DIY Black Tahini and Beet Hummus

4 medium beets (about 8 ounces), roasted, peeled, and cubed
1 (15-ounce) can chickpeas, drained and rinsed
1 teaspoon cumin seed, toasted and ground
2 tablespoons black tahini (or substitute regular tahini)
3 tablespoons lemon juice
1 tablespoon balsamic vinegar
1 clove garlic
1/2 teaspoon kosher salt, or to taste
4 tablespoons olive oil, plus additional as needed
parsley for garnish

Place all ingredients in a food processor and run until smooth, adding additional oil as needed to achieve desired consistency. Garnish with an additional drizzle of olive oil and chopped parsley.

https://wonderlandkitchen.com/2013/02/diy-black-tahini-and-beet-hummus/

4 medium beets (about 8 ounces), roasted, peeled, and cubed
1 (15-ounce) can chickpeas, drained and rinsed
1 teaspoon cumin seed, toasted and ground
2 tablespoons black tahini (or substitute regular tahini)
3 tablespoons lemon juice
1 tablespoon balsamic vinegar
1 clove garlic
1/2 teaspoon kosher salt, or to taste
4 tablespoons olive oil, plus additional as needed
parsley for garnish

Place all ingredients in a food processor and run until smooth, adding additional oil as needed to achieve desired consistency. Garnish with an additional drizzle of olive oil and chopped parsley.

*

This recipe and post were created for my “DIY vs. Buy” column on Serious Eats.

Award Winning: Lonely Angel No. 35

Lonely Angel #35

A cocktail is always infinitely more compelling to me if it has an interesting story to accompany it. And of the original recipes I’ve created, Lonely Angel No. 35, a Negroni variation that uses the French St-Germain elderflower liqueur, definitely takes the cake in the story department.

I created this drink on the night of Thursday, October 4, 2012. It was my birthday. But it was a birthday night devoid of the usual birthday accoutrements. There was no cake. There was no dinner out at a restaurant (or an exquisitely prepared feast at home). No friends or family around to celebrate, as Molly was in NYC on business. Boo-hoo, right? I wasn’t even home for most of the evening myself as I had performed a concert earlier that night. So when I arrived back at home at 10:30 p.m. that night, I decided that I’d fix myself a drink. Always up for an experiment, I decided to mix a variation on my beloved Negroni.

My choice of ingredients was influenced as much by what we currently had on the shelf as by the disappointment I was still nursing after learning that my cocktail The French Intervention wasn’t eligible for Martha Stewart and St-Germain’s Fifth Annual Can-Can Classic Cocktail Competition because it didn’t feature enough St-Germain. The contest rules–which I originally neglected to read, of course–specified that submitted drinks needed to include 1 oz. of St-Germain; The French Intervention only uses 1/2 oz. A Negroni variation, I thought, could be the perfect showcase for that volume of the liqueur as long as the other ingredients could stand up to it.

I chose Evan Williams Single Barrel Vintage Bourbon in place of the gin and Cynar instead of Campari to shade it more towards the mellow side. The coup de grâce, however, was my decision to float four dashes of Angostura for an initial added kick of bitterness. That simple tweak makes the drink. If you know St-Germain, you know that it finishes strong. So putting the Angostura front and center sets up a really neat effect and balances the drink as it progresses across the palate.

I ended up submitting this drink to the Can-Can Classic Cocktail Competition and promptly forgot that I had. That is until two weeks ago when I received emails from both St-Germain and Martha Stewart Living. Though Lonely Angel No. 35 wasn’t the grand prize winner, it was chosen as a runner up. As a prize I received a bottle of St-Germain as well as a custom St-Germain bicycle. Not too shabby!

Lonely Angel #35

So, the name. The ‘lonely’ part should be obvious—I was alone on my birthday. What’s more lonely than that? The ‘angel’ in the title is a bit more cryptic and convoluted. My birthday is October 4. Written out numerically it is 1004. If you say that number in Korean—one thousand four—it is pronounced chun-sa. In the Korean language that is also a homonym for ‘angel.’ Get it? And No. 35? It was my thirty-fifth birthday. So there you have it.

Lonely Angel No. 35
Runner Up, Fifth Annual Can-Can Classic Cocktail Competition

1 oz. Evan Williams Single Barrel Vintage Bourbon
1 oz. Cynar
1 oz. St-Germain Elderflower Liqueur
4 dashes Angostura Bitters
Wide orange twist for garnish

Combine the bourbon, Cynar, and St-Germain in a mixing glass. Stir with ice and strain over one large ice cube into a rocks glass. Float four dashes of the bitters and garnish with a wide orange twist.

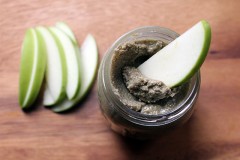
DIY Pumpkin (Pie) Seed Butter

DIY Pumpkin (Pie) Seed Butter

Between making nut butters and non-dairy milks, everywhere I look I now see how a motor and some pantry staples can result in easy-to-whip-up versions of commercial products: tahini, sunflower butter, nut/grain/coconut milks. This is how I found myself standing in the bulk aisle considering what else might make for a tasty spread or beverage. I spied the pumpkin seeds and wondered, hey, would pumpkin seed butter taste good? Is that a thing already? (It is, though it is a pricey and not necessarily readily available option.)

In a general grocery store situation, the pepitas may already be salted and roasted, so no need to add additional salt unless it’s your preference. If you have raw hauled seeds, you can toast them in the oven before processing. Of course, some people are looking to keep their diet raw, and you can use raw seeds if that suits your nutritional preferences best. However, roasting will deliver a richer flavor.

Due to the high fat content of the seeds, they can easily go rancid. Take care to purchase fresh seeds and then keep them in a sealed bag or airtight container. Seeds can be stored in the refrigerator or freezer for a longer shelf life.

January’s unrelenting grey drizzle has me in the mood for something warm and comforting, so I have seasoned this recipe with homemade pumpkin pie spice and maple syrup. You may certainly omit or reduce any spices you don’t like, and use honey or another sweetener instead or omit these things completely.

I was surprised to read comments along the lines of, “an acquired taste, but I’ll eat it because it’s healthy,” attached to some commercial versions of pumpkin seed butter. Maybe it’s because I soup mine up with a touch of sweetener and spice, but I could eat the whole jar with a spoon if no one was looking. And if there are nut allergy concerns, you may find this to be a great tasting and safe alternative (though check with your healthcare professional first).

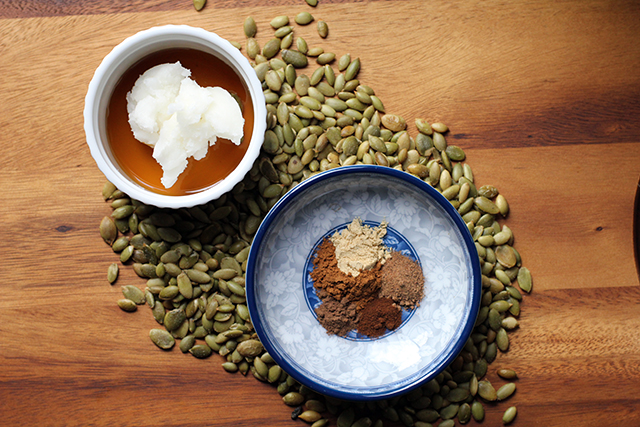
DIY Pumpkin (Pie) Seed Butter: Ingredients

DIY Pumpkin (Pie) Seed Butter
makes approximately 2 cups

Note: If you have raw hauled seeds, toast them in a 350° oven, stirring occasionally, for ten minutes or until fragrant, popping, and lightly browned. Oiling them is not necessary. Add a 1/4 teaspoon salt (or to taste) to the recipe.

3 cups roasted and salted pepitas
1/2 teaspoon ground cinnamon
1/4 teaspoon ground nutmeg
1/4 teaspoon ground ginger
1/8 teaspoon ground allspice
1/8 teaspoon ground cloves
2 teaspoons maple syrup, or to taste
2 tablespoons neutral oil of your choice, plus additional as needed

Combine all ingredients in the bowl of a food processor and process, stopping occasionally to scrap down sides, until desired consistency is reached. Add more oil by the tablespoonful as needed if the butter is too dry.

Scoop butter into a container with a tight-fitting lid and store in the refrigerator.

*

This post was shared in a blog hop hosted by the awesome Frugal Days, Sustainable Ways. The site offers tons of inspiring DIY ideas, so definitely check it out!

This recipe and post were created for my “DIY vs. Buy” column on Serious Eats.