diy » Wonderland Kitchen
Browsing Tag

diy

Better Than a Silver Packet: DIY Cream Cheese

DIY Cream Cheese

The deeper I dig into DIYing basic household foods such as rice milk or nut butters, the weirder I sometimes feel about sharing those processes here. Sure, a recipe for homemade cereal bars might come in handy, but a lot of these typical grocery store items–from tahini to garlic powder–end up being pretty simple to produce from scratch in the average kitchen when all is said and done. So perhaps you might think of these posts as more of a Pinterest board of reminders or inspirations when it starts to feel like everything you buy has soy lecithin and whey derivatives added. Sure, you can toss readymade items into your shopping basket as needed, but if you have a few minutes and don’t like the ingredient list on a given product, you can probably whip up your own with a few pantry staples.

For as easy as culturing buttermilk or kefir turned out to be, cream cheese was not a project I was expecting to be so simple. I couldn’t have been more wrong. Yogurt making is almost challenging in comparison.

Pasteurized vs. Ultra Pasteurized

Almost all the articles I’ve read on cheese making have stressed that you cannot use ultra pasteurized milk or cream (the structure of the milk proteins have been damaged). However, I find it increasingly difficult to acquire dairy that is not ultra pasteurized when shopping at a standard grocery store. The organic milk is especially bad in this regard. Apparently people paying big money for these products do not want them to spoil quickly, a concern that supersedes other considerations. And while I love using the rich fresh-from-the-cow, non-homogenized, lightly pasteurized milk I can get from the local dairy at the farmers market, that’s not always practical logistically (only obtainable on Saturday) or financially ($4 per half gallon). Many people will violently advocate for raw milk, whatever it takes to get your hands on it. I haven’t tried it, but I have made other substitutions–the cheap (probably just?) pasteurized whole milk and ultra pasteurized cream available–and still produced a tasty cream cheese.

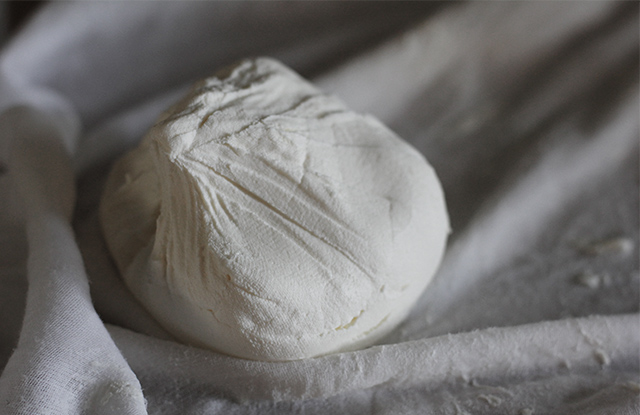
DIY Cream Cheese: Strained

This Is Not Your KRAFT Philadelphia Cream Cheese

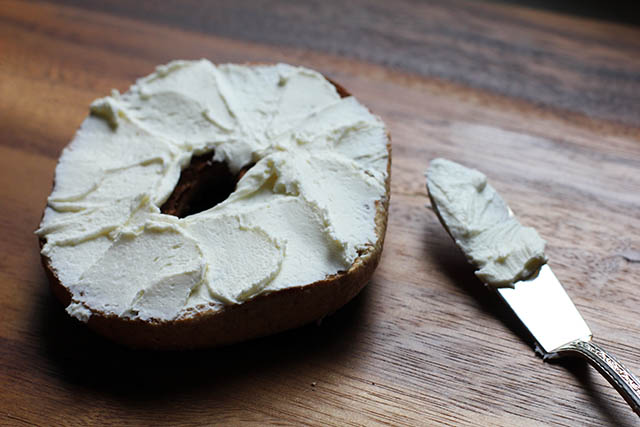
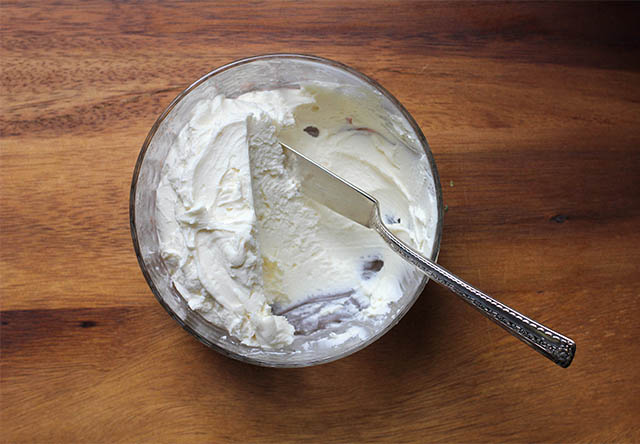
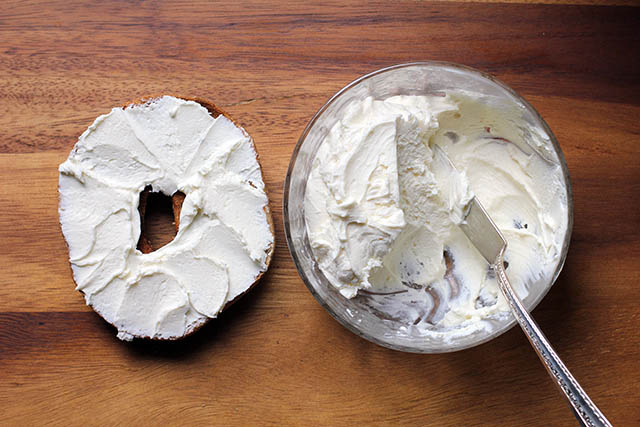
Philly cream cheese is surely the standard most people (Americans, at least) will be judging any cream cheese against, and in my experience this is not that–and that’s a good thing. No matter how long I let my cheese drain, there is a shiny, spackle-like consistency to commercial cream cheese that I have not produced here. This cheese is richer and more buttery, slightly softer but not in any way runny. When adding in flavorings such as maple syrup or dill and salt and whipping briskly with a fork to incorporate, I am able to produce a lovely spread that contains no Xanthan Gum, and/or Carob Bean Gum, and/or Guar Gum, no preservatives, and no “natural flavor”. Seven days later, it still tastes fantastic.

The Verdict

I seriously doubt I will ever buy commercial cream cheese again. There is definitely a cost consideration here in terms of both the dairy and the special ingredients, but I think the taste and quality make it worth the investment (and might even encourage me to eat less and savor more). This cream cheese made me want to bake a dozen everything bagels and invite the neighbors over for brunch….At least until I remembered that my bagel baking, unlike my cream cheese making, is still a work in progress.

DIY Cream Cheese: Thick and Rich

DIY Cream Cheese

Makes: 13 ounces of cream cheese and two cups of whey

DIY Cream Cheese

for tips and supplies, see Cultures for Health

Cream cheese starter cultures containing both the starter culture and rennet are available.

While culturing the cheese with buttermilk rather than a mesophilic starter is riskier due to variations in the active cultures present, I found that the taste of the resulting cream cheese was just slightly more tangy and very attractive.

2 cups heavy cream
2 cups whole milk
1 drop liquid vegetable rennet dissolved in 2 tablespoons water
1/8 tsp. (one packet) mesophilic starter culture OR 1 ounce buttermilk
1/4 teaspoon salt or other flavorings (optional)

In a pot (with a fitted lid for later steps), heat milk and cream to 75°F, stirring regularly.

Remove pot from stove and add the buttermilk OR sprinkle the mesophilic starter culture over the surface of the milk and allow to dissolve for two minutes. Stir gently. Add diluted rennet mixture and combine using an up and down motion with your spoon under the surface of the milk just until evenly incorporated. Cover pot with lid, wrap in a few kitchen towels, and place in a warm location (70°F-75°F) to incubate, about 14 hours.

When cheese is ready to be drained, it will resemble yogurt. Spoon into a strainer lined with a piece of butter muslin. Clip the corners of the muslin together and allow to drain over a bowl (cupboard handles and safety pins can come in handy here) until desired firmness is reached, 7-10 hours.

Mix in a 1/4 teaspoon salt or other flavorings as desired. Transfer to a container with a tight-fitting lid and refrigerate.
https://wonderlandkitchen.com/2013/04/better-than-a-silver-packet-diy-cream-cheese/

NOTE: Produces 13 ounces of cream cheese and two cups of whey.

Cream cheese starter cultures containing both the starter culture and rennet are available.

While culturing the cheese with buttermilk rather than a mesophilic starter is riskier due to variations in the active cultures present, I found that the taste of the resulting cream cheese was just slightly more tangy and very attractive.

2 cups heavy cream
2 cups whole milk
1 drop liquid vegetable rennet dissolved in 2 tablespoons water
1/8 tsp. (one packet) mesophilic starter culture OR 1 ounce buttermilk
1/4 teaspoon salt or other flavorings (optional)

In a pot (with a fitted lid for later steps), heat milk to 75°F, stirring regularly.

Remove pot from stove and add the buttermilk OR sprinkle the mesophilic starter culture over the surface of the milk and allow to dissolve for two minutes. Stir gently. Add diluted rennet mixture and combine using an up and down motion with your spoon under the surface of the milk just until evenly incorporated. Cover pot with lid, wrap in a few kitchen towels, and place in a warm location (70°F-75°F) to incubate, about 14 hours.

When cheese is ready to be drained, it will resemble yogurt. Spoon into a strainer lined with a piece of butter muslin. Clip the corners of the muslin together and allow to drain over a bowl (cupboard handles and safety pins can come in handy here) until desired firmness is reached, 7-10 hours.

Mix in a 1/4 teaspoon salt or other flavorings as desired. Transfer to a container with a tight-fitting lid and refrigerate.DIY Cream Cheese: Savor It!

Sugar Rush: DIY Raisins

DIY Raisins

I’ve never been much of a dried fruit fan, and I think I can trace the root of this back to those little red boxes of raisins so frequently tossed onto my elementary school lunch bag. In my memory, the raisins always ended up packed tightly into the bottom of the box, requiring precision coaxing to remove them from their cardboard shell. They may very well have been nature’s candy, but I would just as well have skipped dessert altogether.

Considering the marketing tag line that raisins are just “grapes and sunshine,” DIYing your own might not seem all that necessary or cost effective, and I would give you that. Still, I had read some things about how lovely homemade could be and wanted to try it out before those really amazing grapes I can never stop myself from purchasing in large quantities hit the farmers market this year.

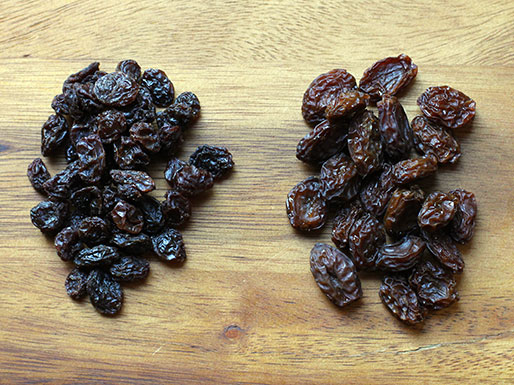
I ended up being very glad I did, because even though the process is rather obvious, the taste was something of a surprise. I have always found commercial raisins to be small and papery bits of sugar that practically dissolve on the tongue after one or two bites. However, the Red Magic seedless I dehydrated last week, for example, offered a subtler though richer sweetness and more complex flavor overall. I don’t mean to get all wine snob on you–though, admittedly, I just used writing that description as an excuse to eat a few more handfuls–but as you might expect, different varieties will net different flavor profiles.

DIY Raisins

Grape Types

Most commercial raisins are made from sultana, a.k.a. Thompson Seedless, grapes. Dehydrating your own opens up your options and is perhaps the biggest reason to do so. For those who have their own vines, another big motivator may be managing a sudden yet bountiful harvest. Either way, you will likely want to select a seedless variety, unless you’re game to de-seed them yourself (I’ve done this for other projects and will never, ever do it again) or chew through seeds in your dried fruit.

One thing I noticed when purchasing fresh grapes to dehydrate is that some are treated with sulphur dioxide as a food preservative, while the raisins in my pantry specifically say “sulfite free” (not the same thing, but related). Point being, if additives are of concern, be sure to read your labels/chat with your farmers.

DIY Raisins: Dehydrator Trays

Before You Dehydrate

The dehydration of fruits and berries with a waxy skin is more efficient if they are blanched or “checked” for about a minute in hot water so that the skin develops cracks through which moisture can better escape. I have also read that following that up by freezing the fruit for a few hours before dehydrating aids the process, but I’ve never taken it that far.

Dehydrator vs Oven (vs Sunshine)

I find that using a dehydrator is the most efficient way to make raisins at home with less chance of over drying. However, realizing that not all readers have that option, I also tried a batch in the oven at 165°F with the fan on (if you have a convection option) and the door cracked a couple of inches (I use a old wine cork wedged in over top of the oven light switch on the door). The higher temperature resulted in faster drying, but required diligent tossing and more careful babysitting.

Sun drying is also an option once the weather is offering high heat and low humidity. Even if the steamy summers here in Maryland would cooperate, I doubt the pests in my urban lot would let me get very far with this method, however, unless I also developed a screened-in drying cage that could fight off attacks by land and air. But by all means, make use of the free sunshine if you can. This method will likely require at least a few days.

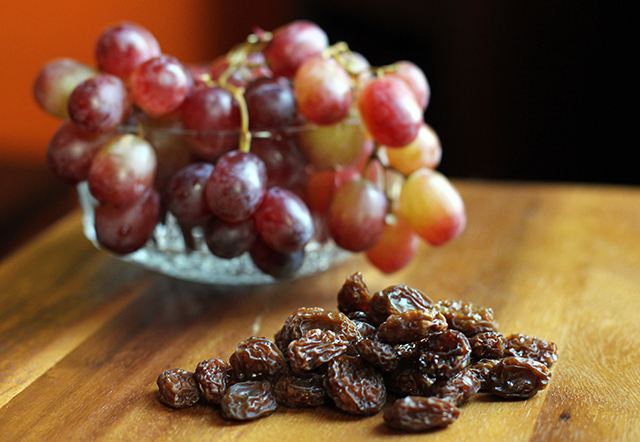
DIY Raisins vs Commercial

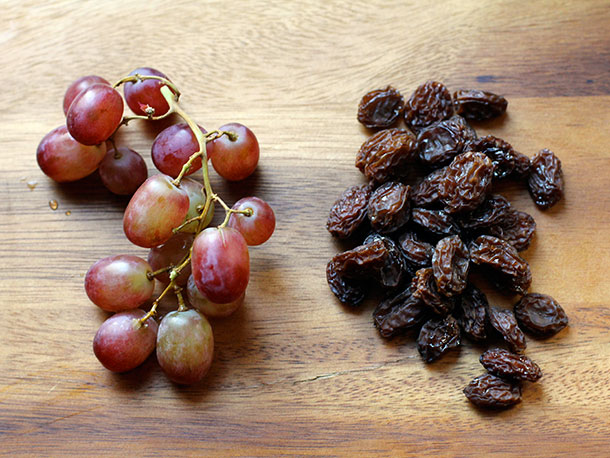
Commercial (left) vs. DIY Raisins

The Verdict

This is a DIY project I would say is all about unique taste and quality rather than cost–at least until the season hits locally. What began as two pounds of grapes (@ $5.98) reduced to approximately six ounces after drying. To put that in perspective, I can buy 20 ounces of standard commercial raisins for $3.19. Still, as a former raisin-despiser, I have now found a dried grape product so attractive to me that it seems quite worth the occasional time and expense.

DIY Raisins

DIY Raisins

Obviously, amounts are not crucial to this process. However, two pound batches are easily managed when blanching and, at least in my case, that amount neatly fills one dehydrator tray, so it makes for a useful base volume. Simply scale up as needed.

 grapes (variety of your choice)

Wash grapes and remove their stems. Discard any spoiled fruit.

Blanch grapes for one minute (30 seconds if the skin is thin) in a pot of simmering water and then immediately transfer them to an ice bath to halt cooking. Drain grapes and transfer them to drying trays.

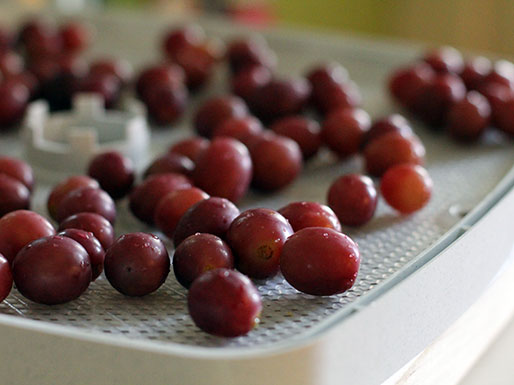
If using a dehydrator: Follow your machine’s suggested temperature guidelines (likely around 135°F). Unless the grapes are very small, the process will likely take at least 24 hours. Once the fruit has dried, allow it to cool completely before storing in an airtight container or plastic bag.

If using an oven: Adjust oven racks to upper and lower middle positions and set temperature to lowest possible setting (between 140 and 170°F if possible) and crack the door open with a wooden spoon or old wine cork. Use convection setting if available. Transfer grapes to two rimmed baking sheets lined with parchment paper and place in oven. Monitor the grapes throughout the drying process, tossing them every few hours for even drying. Once the fruit has dried, allow it to cool completely before storing in an airtight container or plastic bag.

https://wonderlandkitchen.com/2013/04/diy-raisins/

Note: Obviously, amounts are not crucial to this process. However, two pound batches are easily managed when blanching and, at least in my case, that amount neatly fills one dehydrator tray, so it makes for a useful base volume. Simply scale up as needed.

Wash grapes and remove their stems. Discard any spoiled fruit.

Blanch grapes for one minute (30 seconds if the skin is thin) in a pot of simmering water and then immediately transfer them to an ice bath to halt cooking. Drain grapes and transfer them to drying trays.

If using a dehydrator: Follow your machine’s suggested temperature guidelines (likely around 135°F). Unless the grapes are very small, the process will likely take at least 24 hours. Once the fruit has dried, allow it to cool completely before storing in an airtight container or plastic bag.

If using an oven: Adjust oven racks to upper and lower middle positions and set temperature to lowest possible setting (between 140 and 170°F if possible) and crack the door open with a wooden spoon or old wine cork. Use convection setting if available. Transfer grapes to two rimmed baking sheets lined with parchment paper and place in oven. Monitor the grapes throughout the drying process, tossing them every few hours for even drying. Once the fruit has dried, allow it to cool completely before storing in an airtight container or plastic bag.

DIY Cornmeal from Popcorn (Plus Cornbread)

DIY cornmeal

There is perhaps no recipe I’ve investigated that is as simple and yet as fraught with passionate argument regarding the “correct” way to make it as cornbread. First, you have the ostensibly North/South difference of opinion on the use of sweeteners, and then further debate among the Southerners themselves ratcheting up tensions even further. Discussions regarding the ratio of flour to cornmeal, the number of eggs, and what kind of fat needs to be in the pan can then further exacerbate hostilities. And if you’re not already using a cast iron skillet to bake yours, you best duck when those who are come near.

I mention all this at the outset because adding to this battle is not my purpose in making cornbread this week. I’ve provided a simple recipe that suits my preferences, but I want to leave all the controversy aside (and the box of Jiffy mix as well) in order to highlight the great taste provided by freshly milled cornmeal.

With all the chatter out there concerning wheat, gluten, and human nutrition, there’s been a lot of discussion in food circles regarding sprouting and soaking grains and milling flours at home, but I haven’t taken that very far. And grinding my own cornmeal was something I hadn’t even begun to consider when I first stumbled upon discussions of how great the freshly milled variety made your cornbread. As cornmeal has a habit of sitting around in my pantry, the chance to DIY this product certainly intrigued me.

Type of Corn

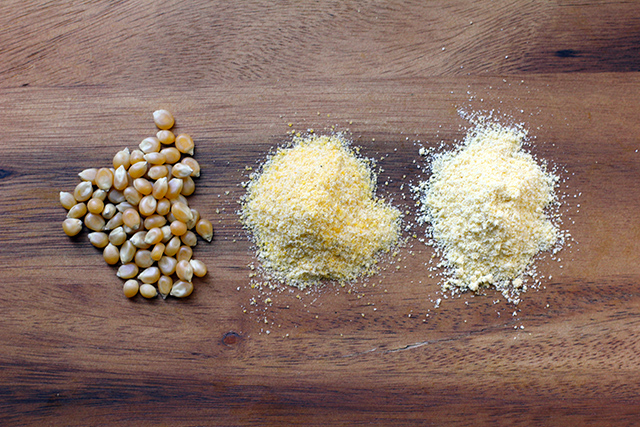
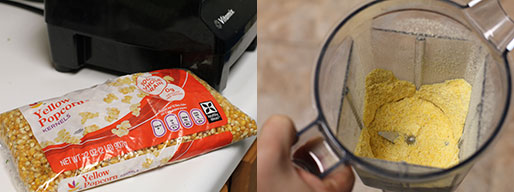
While I’ve seen a few references to drying and milling sweet corn, most cornmeal is made from the starchier field (a.k.a. dent) corn. Not having the space to grow and dry my own corn (not to mention that it’s March), the option that really lit my eyes up, however, was one I already had in my pantry: popcorn.

Equipment Needed

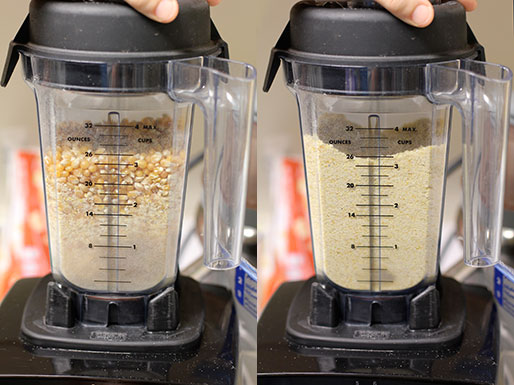
DIY cornmeal: Processing

DIY cornmeal: Processing

If you haven’t already invested in a grain mill (there are many types, from hand crank to KitchenAid attachment to sophisticated powered appliances), Vitamix benders are also powerful enough to grind dried corn into a beautiful yellow cornmeal if that’s an option for you. Even still, working in small batches is necessary so as not to overheat the meal during grinding. There are also people out there who use their coffee or spice grinders for small batches.

As a precaution, you may wish to sift the meal after it is initially ground to check for missed larger pieces, but I didn’t find this strictly necessary.

While I haven’t had the chance to try a proper grain mill yet, another tip I read frequently during my research is that if you’re having trouble grinding the corn–especially using a hand-cranked mill–try running the corn through on a very coarse setting and then grinding it a second time to get a finer grain. Less wear on your machine and yourself!

Whole Kernel vs. Refined/Degerminated

“Why not just buy cornmeal?” you may be asking yourself. Much of the conversation online surrounding growing and grinding your own corn concerns GMO and pesticide concerns. Beyond that, however, is the fact that many types of cornmeal available on grocery store shelves have been refined/degerminated. By removing the germ from the whole grain, the product will have a longer shelf life. However, that oil-rich and vitamin-packed germ is also where a lot of the nutrition lives. Grinding your own meal means you can preserve the whole grain aspect with less worry about rancidity. Simply grind meal as you need it, or store small batches in your freezer for maximum preservation.

Do you grind your own cornmeal or other grain products? What method do you use?

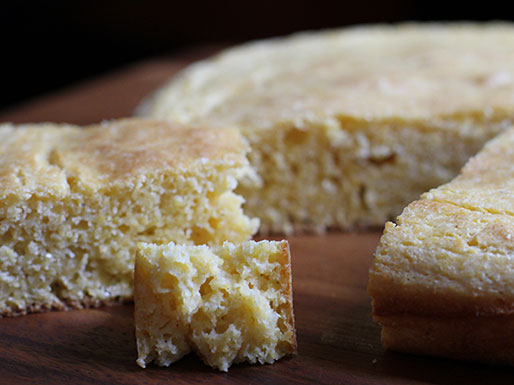
Cornbread:crumb

The Verdict

A 32-ounce bag of popcorn netted me 5 1/2 cups cornmeal, though grinding the amount needed just before use is recommended for maximum freshness. The special equipment is the real barrier to entry here–and some of it is frankly quite expensive. The richer corn flavor and overall freshness definitely provide a big push towards investing in an appliance that can get the job done. Beyond that, however, unless you’re buying in bulk, it seems that the popcorn vs cornmeal price points are negligible. I remain on the fence about adding grain milling to my regular kitchen tasks, and would love to hear more about the pros and cons from those of you who are doing it.

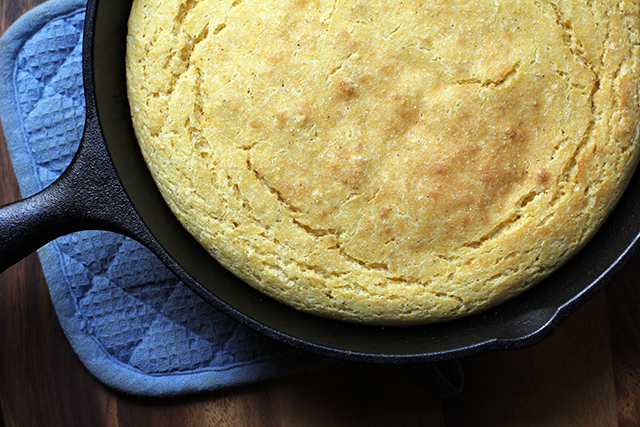
Cornbread

DIY Cornmeal Cornbread

DIY Cornmeal Cornbread

9 ounces of popcorn, ground into meal (alternatively, use 1 1/2 cups store-bought cornmeal)
1 cup AP flour
2 teaspoon baking powder
1 teaspoon salt
1 egg
2 cups buttermilk
2 tablespoon shortening, bacon drippings, or high heat oil

Place 10-inch cast iron skillet in oven on middle rack and heat to 450°F.

Meanwhile, whisk cornmeal, flour, baking powder, and salt together in a large bowl until evenly incorporated. In a medium bowl, lightly beat egg. Stir in buttermilk.

As oven nears 450°F, remove pan and add fat, allowing it to heat and coat the bottom.

Add egg and buttermilk to dry ingredients and then pour in excess fat from skillet as well, quickly mixing all ingredients together until just wetted. Pour batter into skillet and return to oven, baking 20-25 minutes, until top is just golden and edges have pulled away from the side of the pan.

Cornbread is best served warm fresh from the oven.

https://wonderlandkitchen.com/2013/03/diy-cornmeal-from-popcorn-plus-cornbread/

*
This recipe and post were created for my “DIY vs. Buy” column on Serious Eats.

DIY Tomato Powder/Paste/Instant Soup

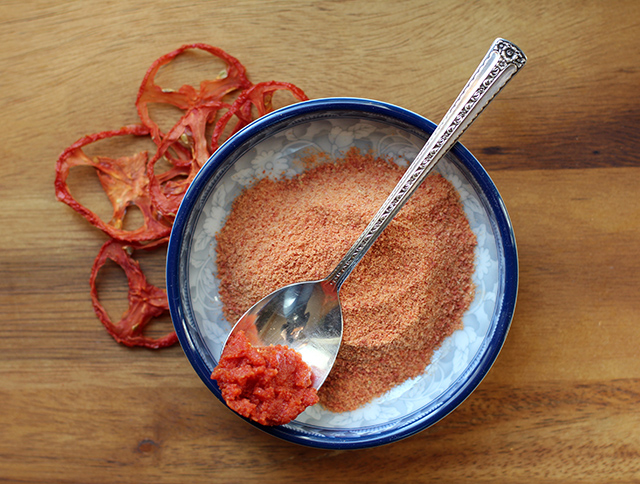
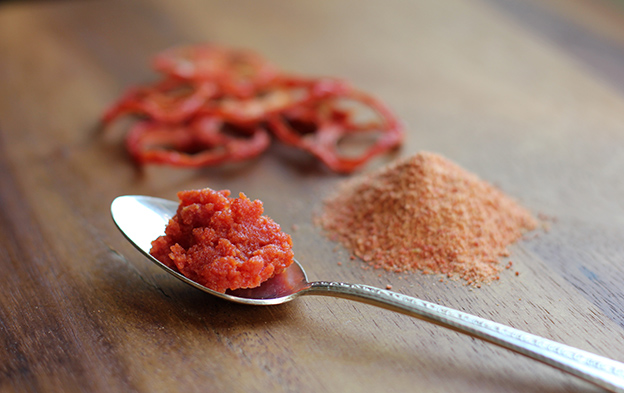
DIY Tomato Powder/Paste

Admittedly, February is probably the least sensible time for a Mid-Atlantic resident to deal with tomatoes. Still, with pretty much everyone I know battling some form of cold/flu/sinus travesty and I myself popping cough drops and drinking mugs of broth for the past couple weeks, I started daydreaming about DIY instant soups free of questionable additives and shocking sodium content. Being a vegetarian, these thoughts leaned towards vegetable-based options rather than chicken and noodles, and the dehydrator I was gifted over the holidays this year suggested all kind of possibilities.

The best course, it seemed to me at the time, would be to start with dehydrated tomato powder to which I could add other seasonings. The local grocery’s produce section offered a depressingly unripe and waxy selection of the fruit, so I settled on some decent-looking plum tomatoes, figuring I’d at least get the most flesh for my dollar that way. I swallowed the $2.29/lbs. price tag; it would have been $3.99/lbs. if I had selected organic fruit.

I cored and de-seeded (but did not peel) two pounds of tomatoes, slicing them in 1/4-inch rings and fitting about a pound per tray in my dehydrator. Unlike the garlic drying, the smell that filled the kitchen was much less overwhelming. Ten hours later, I had a lovely looking pile of perfectly crisp tomato slices, and after popping most of them in the blender I had…1/4 cup of tomato powder. In my heart I had known all along this was an August project, when tomatoes are available by the bushel for under $20. Clearly the math on this DIY project was not really going to work out at this winter rate. I would be much better off buying it.
However, the concentrated flavor of the powder was amazing and not to be wasted. I can see adding this to all kinds of soups, sauces, dips, and dressings, kneading it into bread dough, or sprinkling it on top of pizza along with some garlic powder. And for those concerned about acidic tomatoes and BPA in packaging, it’s a great way to store a large quantity of the former within a small pantry footprint and have “just add water” access to everything from tomato paste to tomato sauce and juice.

Do you use tomato powder? What are your favorite applications?

DIY Tomato Powder/Paste

Tomato Powder: The Method

Wash, core, slice, and de-seed plum tomatoes. Spray dehydrator racks lightly with oil and evenly spread out slices. They can touch but should not overlap. Dehydrate at 135°F for five hours and flip slices. Continue dehydrating until completely crisp, about five hours more.

Allow slices to cool completely and check again to make sure they are completely crisp. Then, using a blender or coffee grinder, reduce the slices to a powder. If grind is uneven, sift powder though a mesh sieve and regrind larger chunks. Store in an airtight glass container in a cool, dark place. Rehydrate portions of the powder to desired consistencies as needed.

The Verdict

I loved the tomato powder itself: versatile, storage-efficient, and delicious. However, it doesn’t make sense to DIY this project in any quantity without access to fresh local tomatoes in bulk. Until then, I will either wait or purchase powder online, where even organic options are available for about $20 per pound.

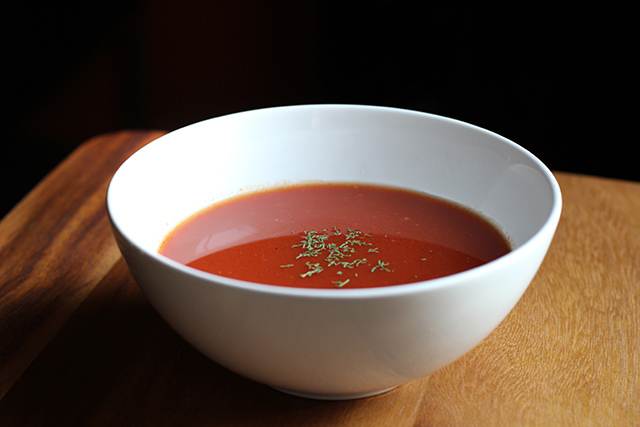
DIY Instant Tomato Bell Pepper Soup

DIY Instant Tomato Bell Pepper Soup

Note: I experimented with both instant nonfat dry milk and dry whole milk and–when powders were pre-mixed–couldn’t prevent either milk type from curdling upon heating. Non-dairy powdered coffee creamer did work, but a read through the ingredient list pretty much negates the DIY effort if keeping hydrogenated oils and artificial additives out of the soup is a motivator. However, using only the vegetable powders made for such a rich and tasty broth, I didn’t find myself missing the cream.

All of the vegetable powders and dried herbs can be made using a dehydrator at home. Diced onion and rings of de-seeded red bell pepper can be dehydrated and powdered in a similar fashion to the tomato powder above.

2 tablespoons tomato powder
1 teaspoon red bell pepper powder
1/4 teaspoon onion powder (or more to taste)
salt and pepper to taste
pinch of dried dill, parsley, or basil (optional)
1 1/4 cups boiling water

To make single-serving portions, measure vegetable powders and spices in proportions above into sealable plastic bags. When ready to serve, add 1 1/4 cups boiling water and stir until all powder is dissolved.

*

This recipe and post were created for my “DIY vs. Buy” column on Serious Eats.

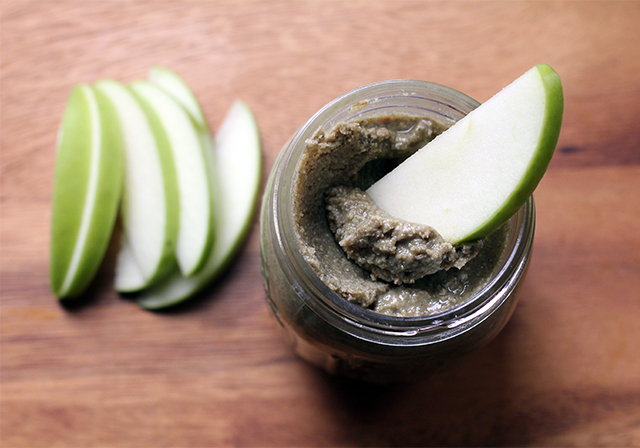
DIY Pumpkin (Pie) Seed Butter

DIY Pumpkin (Pie) Seed Butter

Between making nut butters and non-dairy milks, everywhere I look I now see how a motor and some pantry staples can result in easy-to-whip-up versions of commercial products: tahini, sunflower butter, nut/grain/coconut milks. This is how I found myself standing in the bulk aisle considering what else might make for a tasty spread or beverage. I spied the pumpkin seeds and wondered, hey, would pumpkin seed butter taste good? Is that a thing already? (It is, though it is a pricey and not necessarily readily available option.)

In a general grocery store situation, the pepitas may already be salted and roasted, so no need to add additional salt unless it’s your preference. If you have raw hauled seeds, you can toast them in the oven before processing. Of course, some people are looking to keep their diet raw, and you can use raw seeds if that suits your nutritional preferences best. However, roasting will deliver a richer flavor.

Due to the high fat content of the seeds, they can easily go rancid. Take care to purchase fresh seeds and then keep them in a sealed bag or airtight container. Seeds can be stored in the refrigerator or freezer for a longer shelf life.

January’s unrelenting grey drizzle has me in the mood for something warm and comforting, so I have seasoned this recipe with homemade pumpkin pie spice and maple syrup. You may certainly omit or reduce any spices you don’t like, and use honey or another sweetener instead or omit these things completely.

I was surprised to read comments along the lines of, “an acquired taste, but I’ll eat it because it’s healthy,” attached to some commercial versions of pumpkin seed butter. Maybe it’s because I soup mine up with a touch of sweetener and spice, but I could eat the whole jar with a spoon if no one was looking. And if there are nut allergy concerns, you may find this to be a great tasting and safe alternative (though check with your healthcare professional first).

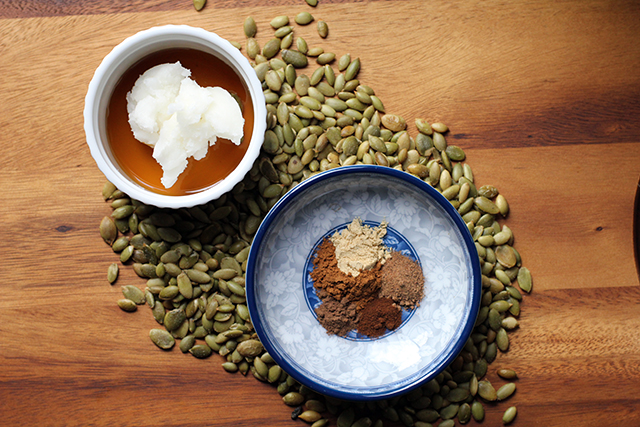
DIY Pumpkin (Pie) Seed Butter: Ingredients

DIY Pumpkin (Pie) Seed Butter
makes approximately 2 cups

Note: If you have raw hauled seeds, toast them in a 350° oven, stirring occasionally, for ten minutes or until fragrant, popping, and lightly browned. Oiling them is not necessary. Add a 1/4 teaspoon salt (or to taste) to the recipe.

3 cups roasted and salted pepitas
1/2 teaspoon ground cinnamon
1/4 teaspoon ground nutmeg
1/4 teaspoon ground ginger
1/8 teaspoon ground allspice
1/8 teaspoon ground cloves
2 teaspoons maple syrup, or to taste
2 tablespoons neutral oil of your choice, plus additional as needed

Combine all ingredients in the bowl of a food processor and process, stopping occasionally to scrap down sides, until desired consistency is reached. Add more oil by the tablespoonful as needed if the butter is too dry.

Scoop butter into a container with a tight-fitting lid and store in the refrigerator.

*

This post was shared in a blog hop hosted by the awesome Frugal Days, Sustainable Ways. The site offers tons of inspiring DIY ideas, so definitely check it out!

This recipe and post were created for my “DIY vs. Buy” column on Serious Eats.

DIY Dairy-Free Coconut Yogurt

DIY Dairy-Free Coconut Yogurt

My first attempt at dairy-free yogurt earlier this fall was a disaster. Admittedly, I was feeling a little cocky since I’d had a run of really great batches of Greek yogurt. I was so confident, in fact, that I didn’t even hunt around online ahead of time for tips. This was especially dumb since I’ve never needed to adhere to a dairy-free diet myself and was quite inexperienced. I simply dove in with my Tetra Pak of coconut milk beverage and my vegan yogurt starter. The result: a nauseatingly curdled liquid that was immediately fed to the drain in the kitchen sink.

Appropriately chastened, I started reading. There are myriad ways to make traditional yogurt, and going dairy-free only increases the number of variables. I played around with sweeteners, thickeners, and styles of coconut milk to land on the version I liked best, and used a method for incubating that works for me. Your preferences may vary, of course, and I hope you’ll share them in the comments.

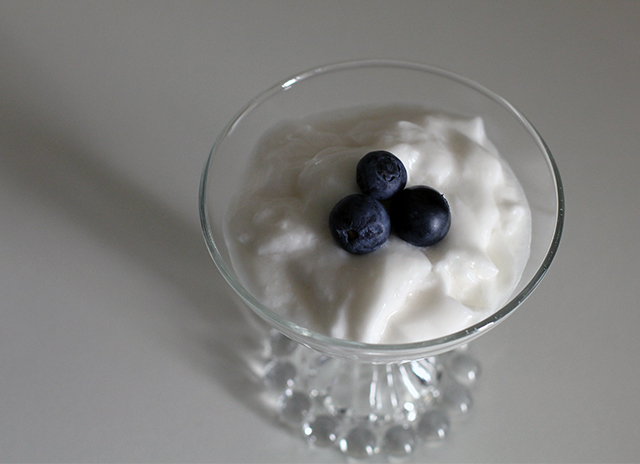
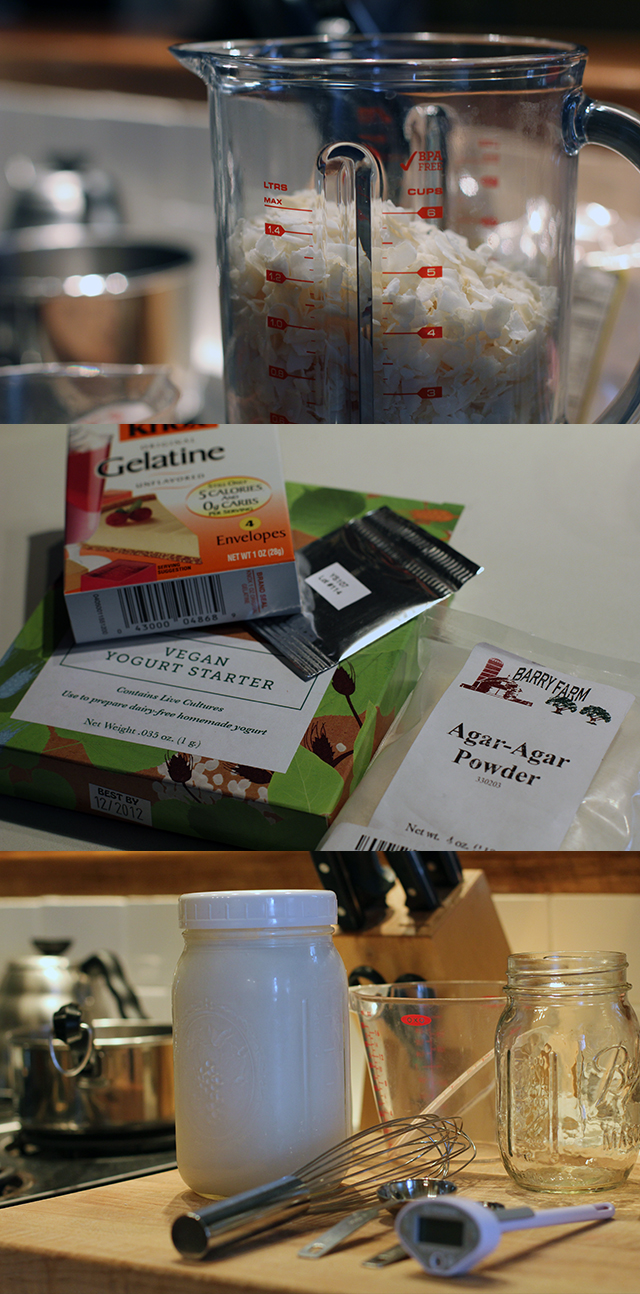
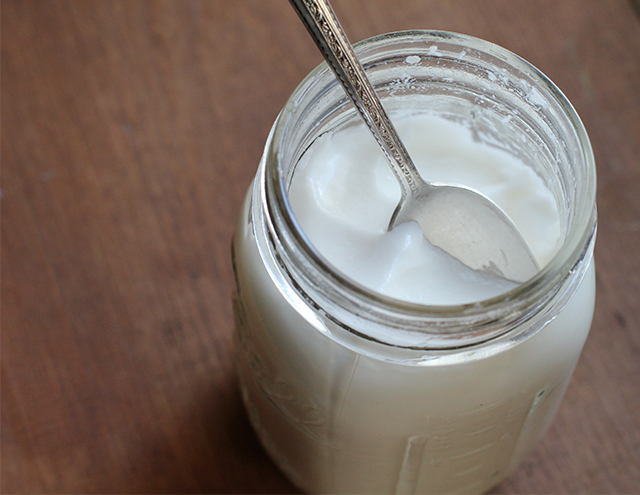
Not All Coconut Milk Is Created Equal: First off, I have found the “milk” sold in those convenient Tetra Paks–often specifically labeled as a “beverage”–to be too watered down to make a good yogurt. Canned is a viable option, and initially I thought I’d go this direction–especially when I thought the idea of “fresh” coconut milk was going to require finding a coconut supplier and a hammer. Ultimately, however, I found that using unsweetened dried coconut flakes provided a workload I could handle while still delivering exceptional taste. It also allowed me to control how much water was added to the milk. The resulting yogurt was fresh and bright, thick enough to hold a spoon but not so gelled that it broke up in my mouth like jello.

Canned: Light vs Regular Coconut Milk: Before I decided to go the (partially) DIY coconut milk route, I tried out both regular and light versions of the canned option. For the record, coconut milk has a high level of saturated fat, and there is much debate over the health risks and benefits of this food. Assessing things purely on taste, I liked the regular well enough, but found the reduced-fat option to have an odd taste, quite chalky with very little hint of actual coconut.

Since the milk was already fortified with some thickeners, I got a solid set with just the addition of 1/2 teaspoon agar agar powder dissolved into a half cup of boiling water to four cups milk. A second batch fortified with two teaspoons of gelatin with the same quantity of milk produced a thinner though tasty yogurt, similar to a kefir. However, canned milk, even full fat, still had a somewhat chalky taste to me, which is why I ultimately settled on making my own milk with coconut flakes.

Dairy-Free Coconut Yogurt: Process

Sweeteners: This is another area where I should have read before I leapt into non-dairy yogurt making. Unlike cow milk, alternatives require additional sugars in order for the cultures to have enough to eat during fermentation. With so many variables already in play, I decided to stick with traditional sugar. Honey and maple syrup also seem to be popular among cooks.

The Verdict:

I was surprised to see that even though the yogurt shelves at my local grocery have exploded in recent years, there were no non-dairy options. At the larger grocery a few miles away, I could pick up a six-ounce cup of coconut yogurt for $1.89. At this same location, I could purchase a bag of thick, high-quality unsweetened coconut flakes (more like chips) for $3.49–enough for six cups of milk (and therefor six cups of yogurt). While that’s not accounting for the other additives in the recipe, some of which require special sourcing, it’s still not close to the $15.12 it would cost to purchase the same quantity commercially. Plus, you’re controlling the ingredient list. Whether this is all ultimately worth the work involved is, of course, only something you can judge.

Coconut Yogurt: Thick and Creamy

I ordered vegan yogurt starter from Cultures for Health. Their website also offers a wealth of advice that I found extremely helpful while experimenting.

DIY Dairy-Free Coconut Yogurt
make approximately four cups

4 cups unsweetened dried coconut flakes
4 1/2 cups water, divided
2 tablespoons sugar
1/2 teaspoon agar agar powder
2 tablespoons tapioca starch
Direct-set vegan yogurt starter

Place dried coconut in blender carafe and add 4 cups just-boiled water. Allow to soak for 30 minutes and then blend on highest speed for two minutes. Set aside until cool enough to handle.

Once cooled, strain through a nut milk bag or fine sieve into bowl. Add sugar and stir to dissolve. If not ready to proceed right away, milk can be stored, covered tightly, in the refrigerator. Otherwise, continue with next step.

Place milk in a saucepan and heat over medium-low flame. Add tapioca starch and whisk until well dissolved. Meanwhile, in a second saucepan, bring 1/2 water to a boil and add agar agar powder. Whisk and simmer until well dissolved, then pour into the heated coconut milk.

Allow to cool, whisking occasionally, to 110°F (check package directions on your starter for alternate instructions/variations). Add starter, whisking again to evenly distribute, and pour milk into a glass container and incubate at 110°F using the method of your choice. (I like the cooler method discussed here.)

When incubation is complete (using the method above, mine took about seven hours), move jar to the refrigerator to chill and halt culturing, at least six hours. Yogurt is now ready to eat.

*

This recipe and post were created for my “DIY vs. Buy” column on Serious Eats.