corn » Wonderland Kitchen
Browsing Tag

corn

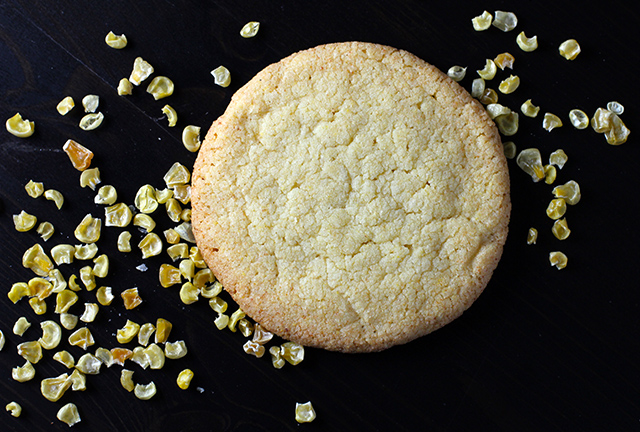
Getting Corny: Momofuku Milk Bar’s Corn Cookies

Momofuku Milk Bar's Corn Cookies

Based on the sheer number of somewhat bizarre drying experiments I’ve been running around here lately, you might have caught on that I’m a new convert to the joys home dehydration. Beyond your basic fruit snacks and carrot chips, I’ve been particularly interested in manufacturing my own DIY vegetable powders–everything from your standard garlic and onion to your more exotic tomato and red pepper.

In the course of things, I ended up dehydrating a bag of frozen sweet corn for a recipe that never materialized, so I packed the dried kernels away in a mason jar until a good use for them presented itself.

A few weeks later, however, I caught Savory Simple’s post on Momofuku Milk Bar’s Corn Cookies and was immediately seduced by the quirky taste profile the recipe suggested. I was less attracted to sourcing the unusual ingredients required. Did I really want to special order corn powder? Hmm, might my dehydrated corn step in to save the day? I committed…to thinking about it.

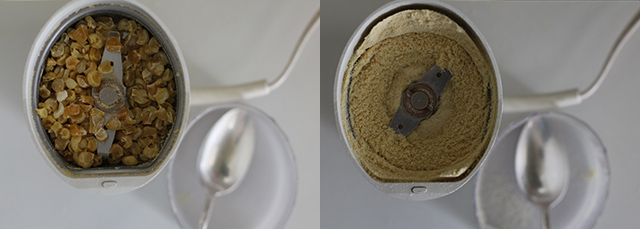
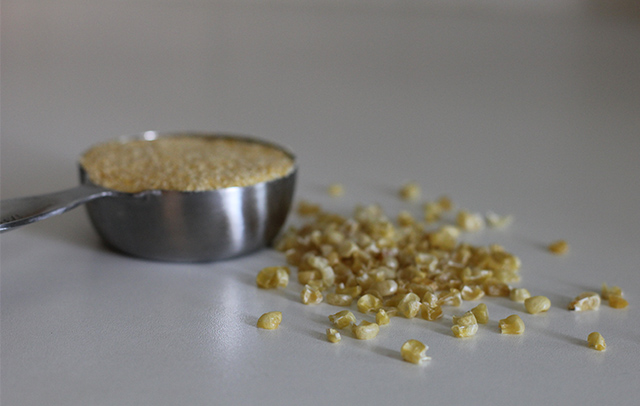
DIY corn powder and corn flour

And so the recipe went into my “to make one day” pile, and there it sat. For months. Finally, frustrated by my own inaction, I pulled out my “coffee grinder reserved for spices” and got to work. The dried sweet corn was powdered; lacking corn flour, I also blitzed some of my DIY cornmeal until the motor was near to overheating and my fingers were satisfied with the texture. I sifted for good measure. Twice.

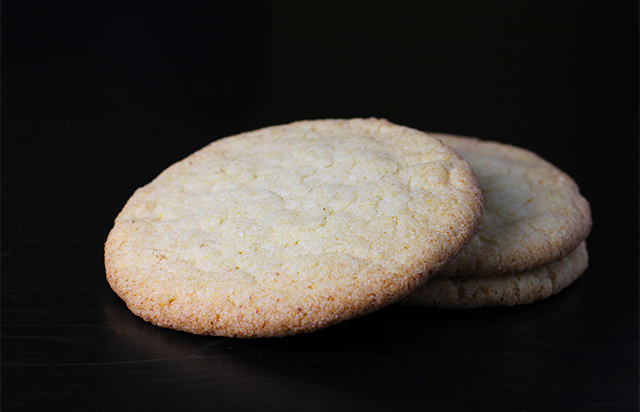
Do these cookies match the originator‘s? I actually can’t say, since for as much time as I spend in New York City, I have yet to make a pilgrimage to the Milk Bar. Perhaps I shall pop in this month, now that I have a mission. What I can say is that I made these with just what was in my pantry, and they were fantastic. The freshly powdered dehydrated sweet corn and corn flour provided a strong corn flavor that made for a particularly unique treat.

DIY Corn Powder

Corn Cookies: Pre-bake

NOTES: Before baking these, I read a recommendation to substitute bread flour for the AP to help the cookies stand up to the high butter content, controlling spreading while maintaining a chewy rather than crisp texture. It was suggested that King Arthur bread flour was what they use at the Milk Bar, and I liked the results I got this way (though I did not bake a comparison batch).

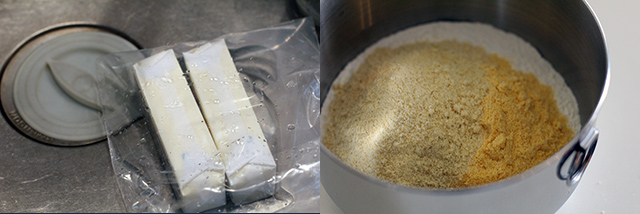
On baking day, it was cold enough in my house, and I was impatient enough to get started, that getting my butter to room temperature seemed like a battle I was destined to lose. However, I remembered a neat trick I learned (via Food in Jars) to soften butter in warm tap water. Killer kitchen tip for the poor planners in the crowd like myself!

Corn Cookies: Ingredient Prep

Momofuku Milk Bar's Corn Cookies

Momofuku Milk Bar’s Corn Cookies

1 1/3 cups (225 g) King Arthur bread flour
1/4 cup (45 g) corn flour (I ground cornmeal to a super fine level; for international readers, this is NOT corn starch)
2/3 cup (65 g) freeze-dried corn powder (I used finely ground dehydrated sweet corn kernels)
3/4 teaspoon baking powder
1/4 teaspoon baking soda
1 1/2 teaspoons kosher salt
16 tablespoons (225 g) butter, at room temperature
1 1/2 cups (300 g) sugar
1 egg

Measure dry ingredients into a mixing bowl and whisk to evenly incorporate. Set aside.

Cream butter and sugar together (medium-high for 2 to 3 minutes). Scrape down bowl, add egg, and beat for 7 minutes more.

Reduce speed to low and add dry ingredients to wet. Mix just until combined.

Portion into 15 rounds on a parchment-lined baking sheet. Flatten each cookie to about an inch thick. Cover with plastic wrap and refrigerate for at least one hour before baking–do not skip this step! Cookies baked several days later, however, were just as good.

When ready to bake, heat oven to 350°F.

Place six raw dough pucks spaced well apart on a parchment-lined cookie sheet (they will spread considerably). Bake 16 minutes, until edged have lightly browned. Allow cookies to cool and firm up before removing from pan. Store in an air-tight container.

https://wonderlandkitchen.com/2013/05/getting-corny-momofuku-milk-bars-corn-cookies/

1 1/3 cups (225 g) King Arthur bread flour
1/4 cup (45 g) corn flour (I ground cornmeal to a super fine level; for international readers, this is NOT corn starch)
2/3 cup (65 g) freeze-dried corn powder (I used finely ground dehydrated sweet corn kernels)
3/4 teaspoon baking powder
1/4 teaspoon baking soda
1 1/2 teaspoons kosher salt
16 tablespoons (225 g) butter, at room temperature
1 1/2 cups (300 g) sugar
1 egg

Measure dry ingredients into a mixing bowl and whisk to evenly incorporate. Set aside.

Cream butter and sugar together (medium-high for 2 to 3 minutes). Scrape down bowl, add egg, and beat for 7 minutes more.

Reduce speed to low and add dry ingredients to wet. Mix just until combined.

Portion into 15 rounds on a parchment-lined baking sheet. Flatten each cookie to about an inch thick. Cover with plastic wrap and refrigerate for at least one hour before baking–do not skip this step! Cookies baked several days later, however, were just as good.

When ready to bake, heat oven to 350°F.

Place six raw dough pucks spaced well apart on a parchment-lined cookie sheet (they will spread considerably). Bake 16 minutes, until edged have lightly browned. Allow cookies to cool and firm up before removing from pan. Store in an air-tight container.
DIY Cornmeal from Popcorn (Plus Cornbread)

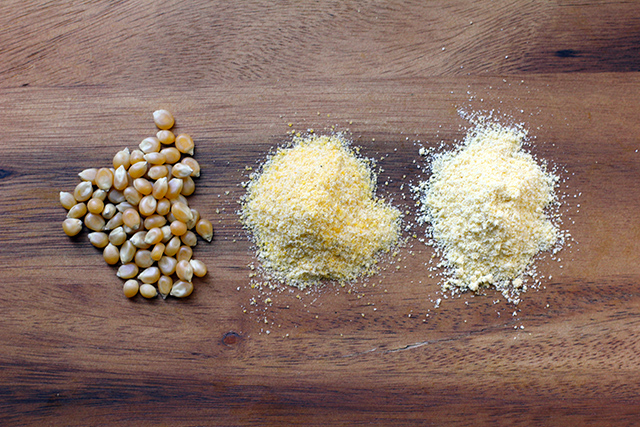
DIY cornmeal

There is perhaps no recipe I’ve investigated that is as simple and yet as fraught with passionate argument regarding the “correct” way to make it as cornbread. First, you have the ostensibly North/South difference of opinion on the use of sweeteners, and then further debate among the Southerners themselves ratcheting up tensions even further. Discussions regarding the ratio of flour to cornmeal, the number of eggs, and what kind of fat needs to be in the pan can then further exacerbate hostilities. And if you’re not already using a cast iron skillet to bake yours, you best duck when those who are come near.

I mention all this at the outset because adding to this battle is not my purpose in making cornbread this week. I’ve provided a simple recipe that suits my preferences, but I want to leave all the controversy aside (and the box of Jiffy mix as well) in order to highlight the great taste provided by freshly milled cornmeal.

With all the chatter out there concerning wheat, gluten, and human nutrition, there’s been a lot of discussion in food circles regarding sprouting and soaking grains and milling flours at home, but I haven’t taken that very far. And grinding my own cornmeal was something I hadn’t even begun to consider when I first stumbled upon discussions of how great the freshly milled variety made your cornbread. As cornmeal has a habit of sitting around in my pantry, the chance to DIY this product certainly intrigued me.

Type of Corn

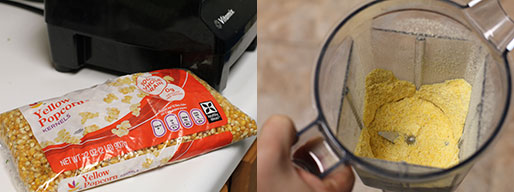
While I’ve seen a few references to drying and milling sweet corn, most cornmeal is made from the starchier field (a.k.a. dent) corn. Not having the space to grow and dry my own corn (not to mention that it’s March), the option that really lit my eyes up, however, was one I already had in my pantry: popcorn.

Equipment Needed

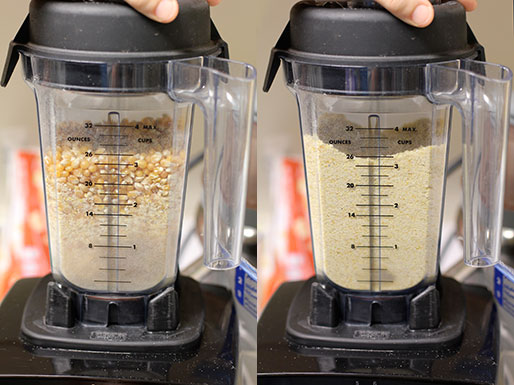
DIY cornmeal: Processing

DIY cornmeal: Processing

If you haven’t already invested in a grain mill (there are many types, from hand crank to KitchenAid attachment to sophisticated powered appliances), Vitamix benders are also powerful enough to grind dried corn into a beautiful yellow cornmeal if that’s an option for you. Even still, working in small batches is necessary so as not to overheat the meal during grinding. There are also people out there who use their coffee or spice grinders for small batches.

As a precaution, you may wish to sift the meal after it is initially ground to check for missed larger pieces, but I didn’t find this strictly necessary.

While I haven’t had the chance to try a proper grain mill yet, another tip I read frequently during my research is that if you’re having trouble grinding the corn–especially using a hand-cranked mill–try running the corn through on a very coarse setting and then grinding it a second time to get a finer grain. Less wear on your machine and yourself!

Whole Kernel vs. Refined/Degerminated

“Why not just buy cornmeal?” you may be asking yourself. Much of the conversation online surrounding growing and grinding your own corn concerns GMO and pesticide concerns. Beyond that, however, is the fact that many types of cornmeal available on grocery store shelves have been refined/degerminated. By removing the germ from the whole grain, the product will have a longer shelf life. However, that oil-rich and vitamin-packed germ is also where a lot of the nutrition lives. Grinding your own meal means you can preserve the whole grain aspect with less worry about rancidity. Simply grind meal as you need it, or store small batches in your freezer for maximum preservation.

Do you grind your own cornmeal or other grain products? What method do you use?

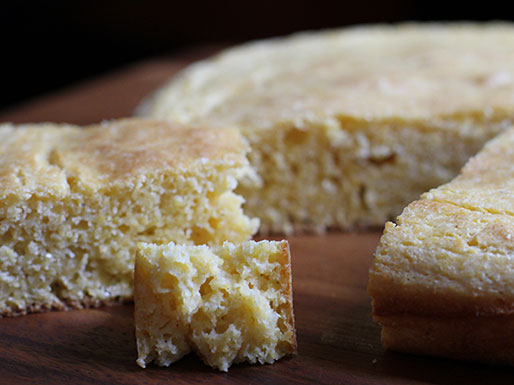
Cornbread:crumb

The Verdict

A 32-ounce bag of popcorn netted me 5 1/2 cups cornmeal, though grinding the amount needed just before use is recommended for maximum freshness. The special equipment is the real barrier to entry here–and some of it is frankly quite expensive. The richer corn flavor and overall freshness definitely provide a big push towards investing in an appliance that can get the job done. Beyond that, however, unless you’re buying in bulk, it seems that the popcorn vs cornmeal price points are negligible. I remain on the fence about adding grain milling to my regular kitchen tasks, and would love to hear more about the pros and cons from those of you who are doing it.

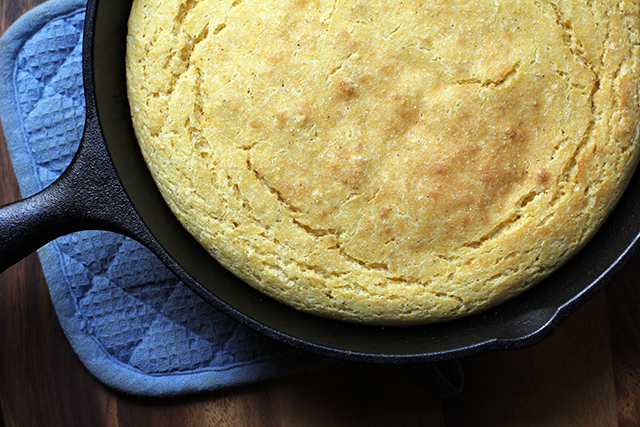
Cornbread

DIY Cornmeal Cornbread

DIY Cornmeal Cornbread

9 ounces of popcorn, ground into meal (alternatively, use 1 1/2 cups store-bought cornmeal)
1 cup AP flour
2 teaspoon baking powder
1 teaspoon salt
1 egg
2 cups buttermilk
2 tablespoon shortening, bacon drippings, or high heat oil

Place 10-inch cast iron skillet in oven on middle rack and heat to 450°F.

Meanwhile, whisk cornmeal, flour, baking powder, and salt together in a large bowl until evenly incorporated. In a medium bowl, lightly beat egg. Stir in buttermilk.

As oven nears 450°F, remove pan and add fat, allowing it to heat and coat the bottom.

Add egg and buttermilk to dry ingredients and then pour in excess fat from skillet as well, quickly mixing all ingredients together until just wetted. Pour batter into skillet and return to oven, baking 20-25 minutes, until top is just golden and edges have pulled away from the side of the pan.

Cornbread is best served warm fresh from the oven.

https://wonderlandkitchen.com/2013/03/diy-cornmeal-from-popcorn-plus-cornbread/

*
This recipe and post were created for my “DIY vs. Buy” column on Serious Eats.

Savory Summer Pie: Tomatoes and Corn and Biscuit Crust, Oh My

cornpie_top

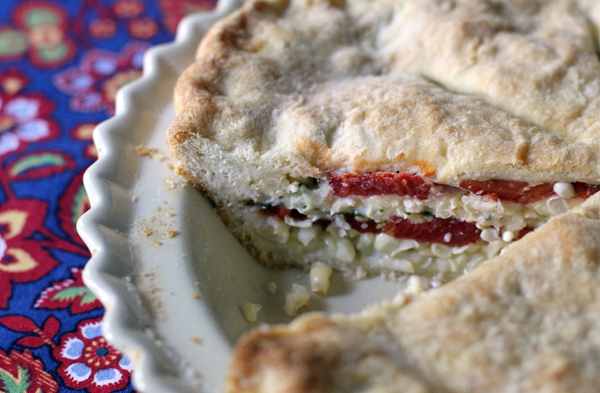
I may have grown up amid Ohio’s horizon-filling corn fields, with tomatoes piled high at every farmer’s stand we passed, but I had never tasted the Southern treat that is tomato corn pie until a few years ago. Since that revelatory time, however, it has become the dish that announces “Summer!” in our kitchen (and celebrates its bounty a few times more throughout the season).

Tomato Corn Pie

Despite all that, somehow it has never ended up detailed here in Wonderland. I think I get distracted. There’s that weekend when I arrive at the market and see that the stall at the end has a pickup bed backed in and filled with ears of corn, and that the man who’s been selling the fresh spring peas has now traded them for bushels of the reddest, ripest fruit. I get a little dizzy. Apparently, I don’t come to again until the pie is baked and eaten. Apparently, I don’t consider sharing.

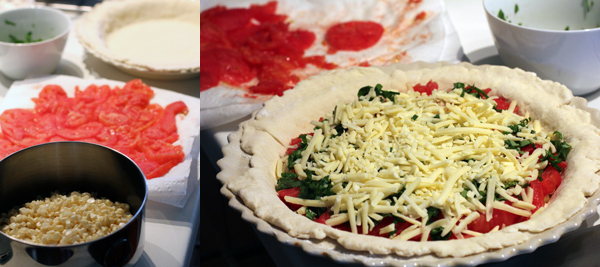
And it also has to do with the fact that a small army of writers have already blogged their way through the Gourmet recipe and posted all about how awesome this pie is, so it has always seemed silly to add to the noise about it. There are plenty of variations out there now as well: tomatoes roasted, a crust spiked with this seasoning or that one. The fact that I am extra generous with the filling–mounding up the corn and tomato slices and going extra hard with the basil–hardly seemed worth reporting.

Tomato Corn Pie

Once, however, I did read a post in which a cook expressed extreme displeasure in the finished dish. It was all wrong, she wrote, and I was weirdly crestfallen over this, that my favorite pie wasn’t universally loved. She disliked the crust (“But it’s a delicious, buttery biscuit!” I shouted at the computer screen). It was then that she really drew down on my thick slices of heaven and blamed the mayo.

Now, I have heard of these strange beasts, people who feel about mayonnaise the way others react to cilantro–with an innate disgust that deeply confuses the camp of addicted fans. Being both Team Mayo and Team Cilantro myself, I usually take a shoulder-shrugging “more for me” stance in the face of these expressed tastes. But the first tomato corn pie of 2012 has changed all that. I got home with my produce, shucked my corn, peeled and seeded and squeezed and blotted my tomatoes, chopped my herbs, whipped my mayo and lemon, shredded my cheese, and mixed the most lovely biscuit crust of my career. I assembled it all, crimping the edges and, yes, gloating already about how lovely it all was when I chanced to look over and see that the measuring cup full of the lemony mayo dressing was still sitting there, on the wrong side of my pie.

Unkind thoughts were mentally expressed. Also, I learned that you cannot, no matter how much you might desire to, pour the dressing in through the top crust vents. Just a little FYI.

So, I tossed the sauce into the ‘fridge and the pie into the oven, counted it as a lesson in humility, and tried to move on. When I took a bite of the baked pie, however, I discovered that I just might have stumbled onto something. First, for all the “mayo is gross” sayers in the crowd, this pie is tasty–not as tasty!!–but still plenty good sans the condiment. When made correctly, however, this recipe has a tendency to soak through its bottom crust no matter how vicious you get with the draining and blotting of all the sweet juices out of the tomatoes. This time, I cut and was rewarded with a perfectly platable slice–even the first piece popped right out of the dish with barely a chip in the bottom crust. I drizzled a bit of the unintentionally reserved dressing over the top like some kind of icing. I think this just might become a thing.

So make your own tomato corn pie, with or without mayo. No need to do anything but slice off the corn kernels, in my opinion, but definitely peel and seed and squeeze and blot those tomatoes.

Tomato Corn Pie

Savory Tomato Corn Pie
as seen across the internet, most traceable back to Gourmet

For the crust

2 cups all-purpose flour
1 tablespoon baking powder
1 teaspoons kosher salt
6 T cold unsalted butter
3/4 cup whole milk

For the filling

4 large, meaty tomatoes, peeled, cored and sliced crosswise, drained of their juices
3 ears of corn
3 T finely chopped basil
1 T finely chopped chives
2 cups sharp cheddar, grated
pepper
1/3 cup mayonnaise
2 T fresh lemon juice
1 T butter, melted, for brushing the top crust

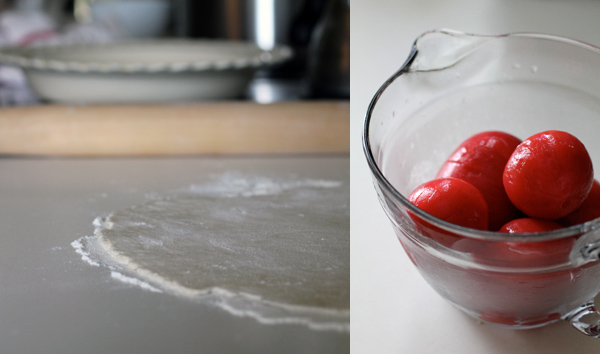
Prepare the tomatoes by cutting a shallow X in the bottom of each and dunking then in a boiling water for 10 seconds, then submerging them in ice water. The skins should easily peel off at this point, sticking only if there are imperfections in the fruit. Slice and squeeze gently, discarding liquid and seeds. I like to begin with this step so that I can lay out the slices out on paper towels and get as much drainage time as possible.

Whisk flour, baking powder, and salt together in a medium-sized bowl. Add 6 T butter in small cubes and, using with a pastry cutter or your preferred method, work the butter into the dry ingredients. When the mixture resembles a coarse meal, add the milk and mix just until all ingredients are incorporated. Divide roughly in half (I add just a touch more weight to what will become my bottom crust and wrap in plastic. I like to flatten the dough into rough discs and refrigerate until ready to roll out.

Cut the corn off the cobs and roughly chop. Prepare the cheese, whisk the mayo and lemon dressing together, and chop the herbs.

When ready to assemble the pie, heat the oven to 400F.

Unwrap one of the dough pieces and place on a well-floured counter. Flour the top of the dough as well and roll out to fit your 9-inch pie plate. Working in batches, place half the sum total of each–corn, tomato slices, herbs, and cheese–in the shell and then repeat. Finish by drizzling the mayo dressing over the filling (though you may omit this step if you absolutely must). Roll out the top crust and seal the edges. Slice vents in the top and brush with the melted butter. Bake for 30 minutes or until golden.

Tomato Corn Pie slice

Corn, Coincidentally

corn_top

I was actually eating what I was projecting would be my last tomato sandwich of the season when I came across Molly Wizenberg’s “Not a tomato sandwich” post. In what could be interpreted as summer sacrilege, she was advocating a break from the red, juicy goodness long enough to enjoy some spicy, buttery, tangy corn. As chance would have it, I, too, had a few ears of corn in the fridge that where looking for a purpose. All the cosmic signs, it seemed, were aligning.

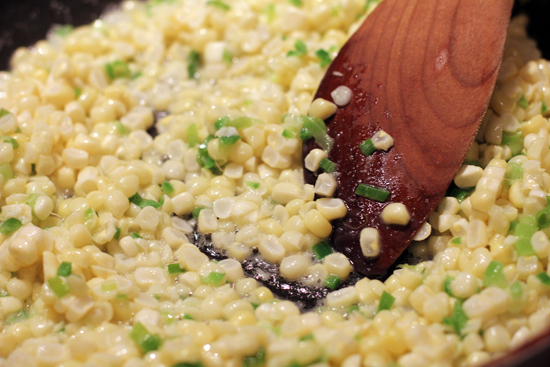
After reading through Molly’s description–particularly the idea of making one’s kitchen smell like the state fair (in a good way!)–I didn’t need all that much convincing. I am a child of Ohio, after all, and corn ranks high on my list of summer pleasures. Plus, the amount of effort (a one-pan chop and stir) suited my energy level, and the rapidly multiplying hot peppers in the garden doubled down on the idea. Fifteen minutes later, I had the most amazing bowl of jalapeño- and lime-kicked kernels, caramelized in a warm butter-based coating. I pronounced it “vegetable as decadence” and got out the big spoon.

Who even needs popcorn or dessert when this is possible?

Matthew’s Spicy Sauteed Corn
Adapted by Orangette, originally from Spilled Milk

3 T. unsalted butter
Kernels from 3-4 ears fresh corn
2 scallions, thinly sliced
1 jalapeno pepper, minced
2 T. water
Salt
1 T. lime juice (I added closer to 2 T., cause I was in the mood)

Melt the butter in a skillet over medium-high heat. When it starts to bubble, add all the vegetables and stir to coat with butter (channel Paula Deen if this part starts to makes you nervous). Allow to cook and brown about 10 minutes, stirring a few times (though you want to let it sit in the pan long enough for some parts get a little crisp and brown–it’s tastier that way). Toss in the water and stir well, scrapping any stray corn bits off the bottom of the pan. Once the water has evaporated, take the skillet off the heat, add salt and lime juice, stir and serve! Expect any corn left in the pan to be eaten immediately by other family members, so take a big serving.