breakfast » Wonderland Kitchen
Browsing Tag

breakfast

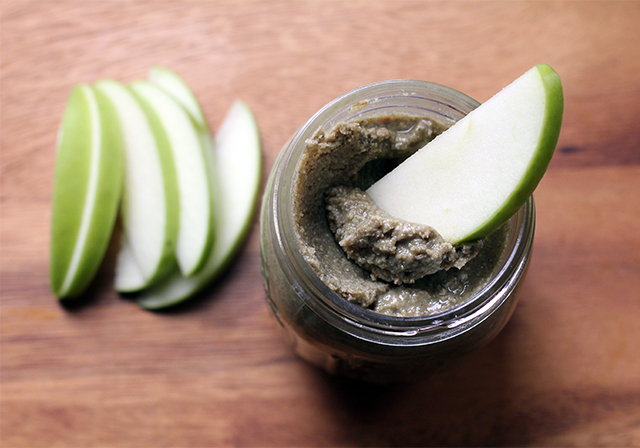
DIY Pumpkin (Pie) Seed Butter

DIY Pumpkin (Pie) Seed Butter

Between making nut butters and non-dairy milks, everywhere I look I now see how a motor and some pantry staples can result in easy-to-whip-up versions of commercial products: tahini, sunflower butter, nut/grain/coconut milks. This is how I found myself standing in the bulk aisle considering what else might make for a tasty spread or beverage. I spied the pumpkin seeds and wondered, hey, would pumpkin seed butter taste good? Is that a thing already? (It is, though it is a pricey and not necessarily readily available option.)

In a general grocery store situation, the pepitas may already be salted and roasted, so no need to add additional salt unless it’s your preference. If you have raw hauled seeds, you can toast them in the oven before processing. Of course, some people are looking to keep their diet raw, and you can use raw seeds if that suits your nutritional preferences best. However, roasting will deliver a richer flavor.

Due to the high fat content of the seeds, they can easily go rancid. Take care to purchase fresh seeds and then keep them in a sealed bag or airtight container. Seeds can be stored in the refrigerator or freezer for a longer shelf life.

January’s unrelenting grey drizzle has me in the mood for something warm and comforting, so I have seasoned this recipe with homemade pumpkin pie spice and maple syrup. You may certainly omit or reduce any spices you don’t like, and use honey or another sweetener instead or omit these things completely.

I was surprised to read comments along the lines of, “an acquired taste, but I’ll eat it because it’s healthy,” attached to some commercial versions of pumpkin seed butter. Maybe it’s because I soup mine up with a touch of sweetener and spice, but I could eat the whole jar with a spoon if no one was looking. And if there are nut allergy concerns, you may find this to be a great tasting and safe alternative (though check with your healthcare professional first).

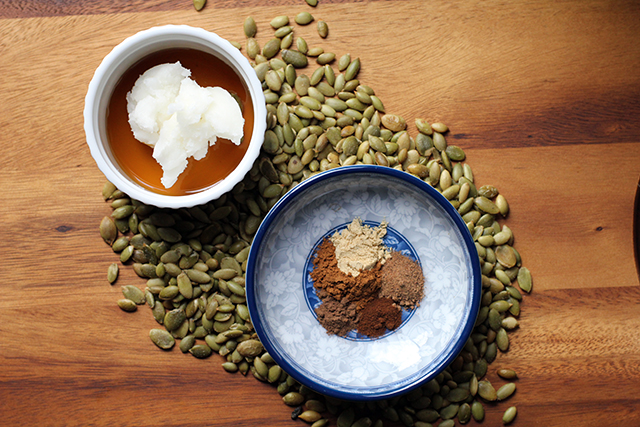
DIY Pumpkin (Pie) Seed Butter: Ingredients

DIY Pumpkin (Pie) Seed Butter
makes approximately 2 cups

Note: If you have raw hauled seeds, toast them in a 350° oven, stirring occasionally, for ten minutes or until fragrant, popping, and lightly browned. Oiling them is not necessary. Add a 1/4 teaspoon salt (or to taste) to the recipe.

3 cups roasted and salted pepitas
1/2 teaspoon ground cinnamon
1/4 teaspoon ground nutmeg
1/4 teaspoon ground ginger
1/8 teaspoon ground allspice
1/8 teaspoon ground cloves
2 teaspoons maple syrup, or to taste
2 tablespoons neutral oil of your choice, plus additional as needed

Combine all ingredients in the bowl of a food processor and process, stopping occasionally to scrap down sides, until desired consistency is reached. Add more oil by the tablespoonful as needed if the butter is too dry.

Scoop butter into a container with a tight-fitting lid and store in the refrigerator.

*

This post was shared in a blog hop hosted by the awesome Frugal Days, Sustainable Ways. The site offers tons of inspiring DIY ideas, so definitely check it out!

This recipe and post were created for my “DIY vs. Buy” column on Serious Eats.

DIY Grape-Nuts Cereal

grape-milk

Born and educated in Ohio as I was, drives made through the beautiful farmlands of nearby Amish communities or miles clocked behind their buggies on nearly empty country roads are scenes I associate with almost all the family car trips of my childhood. I fully acknowledge that it’s a lifestyle I’ve romanticized as a result, but I don’t see the harm if it leads to me watching interesting documentaries on PBS or picking up the occasional cookbook.

My recent nosing around is how I came to own Cooking from Quilt Country by Marcia Adams. It’s a volume packed with simple and hearty Amish cooking, but the first thing I really wanted to try out of the book was the recipe for what Adams referred to as Graham Nuts but most of us know as Post Grape-Nuts. Conveniently, the recipe called for two cups of buttermilk, an ingredient I had in excess after my last post.

When all was said and done, these cereal bits were tasty and characteristically molar-cracking. They were also very, very sweet and flavorful, thanks to the brown sugar, vanilla, and cinnamon. My husband dubbed them “Grape-Nuts meet Cinnamon Toast Crunch” to give you a sense of where things fell. The recipe even suggested serving the cereal with more brown sugar on top! This is awesome on the one hand—and if you are a hardworking farmhand, possibly totally acceptable—but it hardly makes for the kind of super healthy breakfast cereal I equate with the name. So I took to the internet, but found only recipes along a similar theme, some even adding butter and other oils and sweeteners. Not the direction I was looking to go.

For my version, I decided to reel things in. According to the ingredients listed on the commercial Grape-Nuts box, the cereal contained only whole grain wheat flour, malted barley flour, salt, and dried yeast, plus added vitamins and minerals. The taste was only very slightly sweet, but attractive due to its rich nutty flavor. That’s what I wanted to capture. I researched the differences between true graham flour (used in the original Amish recipe) and the varieties of whole wheat flour available on the market, and finally got a firm grasp on where wheat germ and wheat bran fit in on this product span. (If any readers sprout and/or simply mill their own flour, I’d love to hear how this recipe works for you.) I also considered alternative sweeteners that would deliver a less forward flavor punch and more of the slightly sweet malty flavor of the boxed cereal.

Graham flour

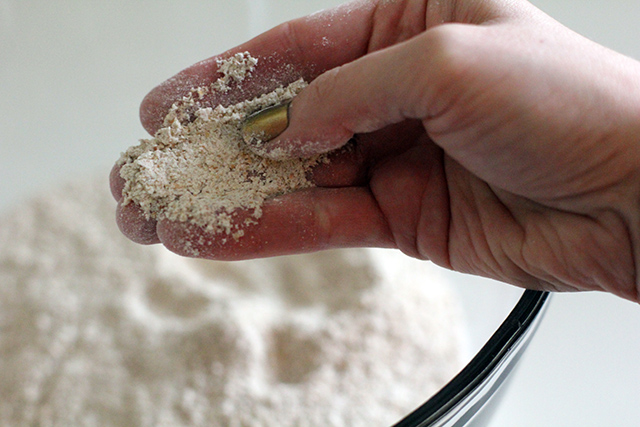
Graham flour offers a coarser grind than traditional whole wheat flour.

Knowing that if I put all my flavor eggs in the wheat basket I needed to make sure I picked a really flavorful starting flour, I decided to go with Hodgson Mill Old Fashioned Whole Wheat Flour, which is on the shelves at my local grocery store and offers a coarser graham flour grind. Depending on what’s available in your area, you could also use a more traditional whole wheat flour or supplement AP flour with appropriate proportions of wheat bran and wheat germ. I also had some barley malt syrup on hand from a recent bagel-making adventure, and discovered that this sweetened the cereal perfectly.

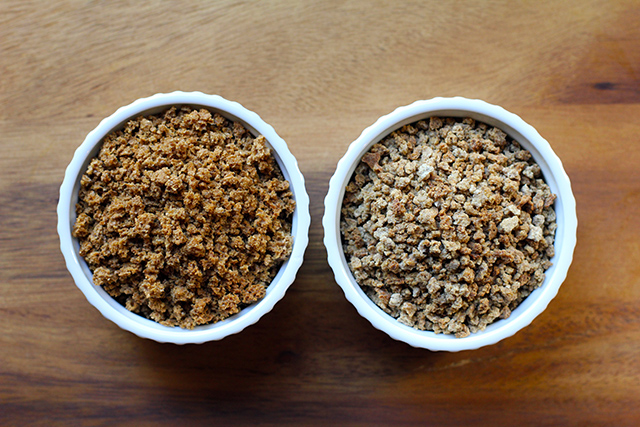
DIY Grape-Nuts: Let's compare.

DIY Grape-Nuts (right) offer plenty of crunch, yet are slightly less dense and less uniform than the commercial option.

In terms of cost, I figure you’re looking at about $2.80 in raw ingredients for seven cups/19 ounces of homemade cereal vs. $3.49 for six cups/24 ounces of the commercial version. While there is nothing challenging about this recipe, it does require some babysitting. The texture of the DIY batch is plenty crunchy, yet slightly less dense and less uniform than the commercial option.

DIY Grape-Nuts Cereal

17.5 ounces (3 1/2 cups) graham or whole wheat flour
1 teaspoon salt
1 teaspoon baking soda
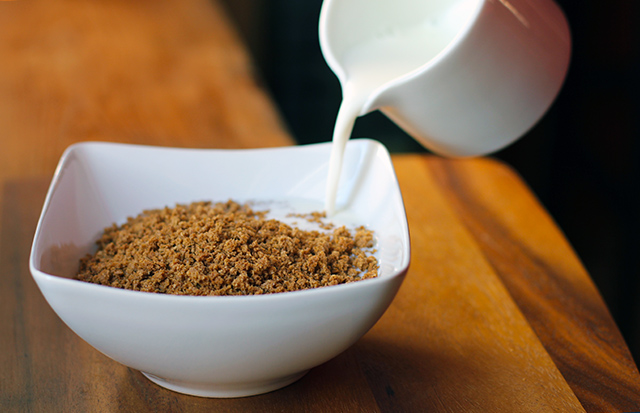
1 1/2 cups buttermilk
1/2 cup barley malt syrup (at room temperature for easier mixing)

Heat oven to 350°F. Oil a 12×16 sheet pan.

In a large mixing bowl, measure dry ingredients and whisk to combine. Add buttermilk and barley malt syrup to the bowl and mix just until all dry ingredients are evenly combined.

Scrape batter out onto the sheet pan and smooth out to the edges as evenly as possible. Bake for 20 minutes, until edges are just browning and puling away from the pan.

Loosen cake with a spatula and flip out on a cooling rack immediately. Set aside to cool about 40 minutes.

DIY Grape-Nuts Cereal: Process

Once cooled, heat oven to 275°F. Working in four or five batches, roughly break up the cake into chunks by hand and then pulse in a food processor until the bits are the desired size.

Spread the bits across two 12×16 sheet pans and bake until completely dry (about 45 minutes), stirring the cereal and rotating the pans every 15 minutes.

Once dry, turn off the oven, crack the door, and leave to cool. Store in an air-tight container.

DIY Grape-Nuts Cereal: Store in an airtight container.

*

This recipe and post were created for my “DIY vs. Buy” column on Serious Eats.

New Adventures in Wonderland & Hacking Blueberry Cereal Bars

cereal_top

“Would you tell me, please, which way I ought to go from here?”
“That depends a good deal on where you want to get to,” said the Cat.
“I don’t much care where–” said Alice.
“Then it doesn’t matter which way you go,” said the Cat.
― Lewis Carroll, Alice in Wonderland

Brian and I named Wonderland Kitchen a couple of years before the site actually launched, dreaming up the idea on a long car ride to Vermont. After listening to me consider the possibility of maybe trying to make some time to write just a little about food, and for longer than was reasonable, my husband pulled the trigger for me and made a gift of the URL. Still, I dragged the idea in and out of my mental cupboard like a stock pot for quite a while longer, considering how it looked on the stove but never lighting the gas. Then one weekend in September of 2011, we drove to Vermont again. I didn’t take it as a sign so much as the chance to turn down the volume on the day-to-day grind just long enough to really evaluate my priorities. Taking time and attention away from building the career I already had as a music journalist seemed silly, yet I couldn’t shake the desire to diversify. By the end of that trip, the first iteration of Wonderland Kitchen had been built, and it’s been a motivator in the kitchen and a creative space I’ve been able to grow in ever since.

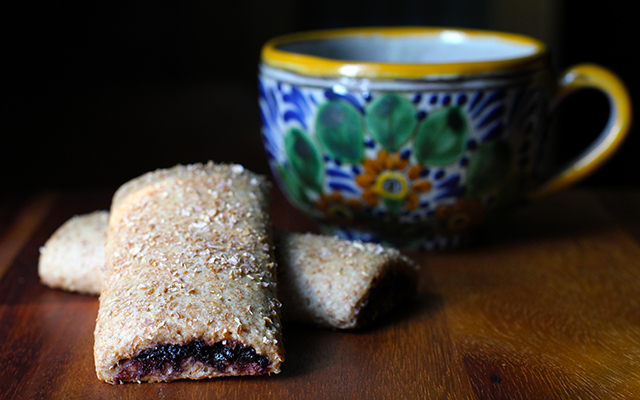
In all that time, I never really considered “where it was all going” because I was simply enjoying the ride too much to care. Yet as we mark this first year with a site upgrade thanks to Brian and the love and supportive appetites of many friends, the road keeps unspooling before us. One addition to these pages that I’m excited to debut today is that I’ll be contributing a bi-weekly column to the killer online food destination Serious Eats. For each piece, I’ll pull out my clipboard and do my DIY best to hack everything from breakfast cereals to Ho-Hos, though minus dyes, artificial flavors, and ingredients I cannot pronounce. To kick things off, I offer you a cereal bar that’s a far less sweet but much more elegant option than you’ll get in a box (recipe below, but spiffy presentation over on Serious Eats). Have a product you’d like me to take a crack at in a future column? Please let me know.

*

Who wants an unbirthday gift from Wonderland?
***Contest has closed; congrats to the winners!***

More than anything, I’m grateful to every reader for taking the time to meet up with me in this space over the past year. My awesome mother-in-law (Hi, Barbara!!) has sewn a couple lovely cloth market bags for me that I’d like to give away to celebrate. As there are only two, if you’d like one, please leave a comment below and let me know what projects you’re working on…or what ones you just might start any day now. If I only get two responses, well, everybody wins! Otherwise, I’ll use one of those neat random number generators. Please be sure to include an address in the email field that I can use to contact you and get your shipping address.

And now, here’s the first DIY vs Buy:

DIY Blueberry Cereal Bars
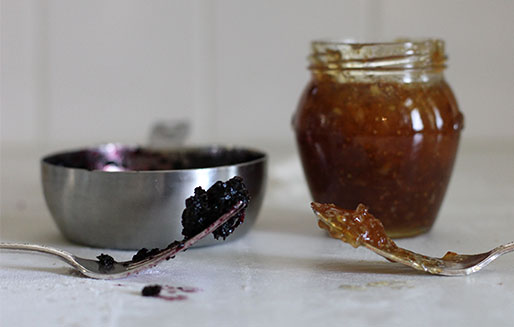
DIY Blueberry Cereal Bars: Filling

Note: If you would prefer not to make your own filling out of dried fruit, a thick fruit spread such as fig is a workable substitute. In my testing, commercial jams and preserves proved too runny when baked and would not be recommended.

makes 12 bars
1 hour active
2 1/2 hours total

For the Dough
5 ounces (1 cup) all-purpose flour
5 ounces (1 cup) whole wheat flour
1 ounces (1/4 cup) rolled oats
1/2 ounce (1/4 cup) wheat bran
2 1/2 ounces (1/3 cup packed) brown sugar
1 teaspoon baking powder
1/2 teaspoon salt
1/4 teaspoon cinnamon
4 tablespoons/1/4 cup cold unsalted butter, cubed.
2/3 cup whole milk
1 teaspoon vanilla extract

For the Filling
1 cup dried blueberries
1/2 cup water

For Assembly
1 egg white plus 1 teaspoon cold water, for wash
4 tablespoons wheat bran, for sprinkling
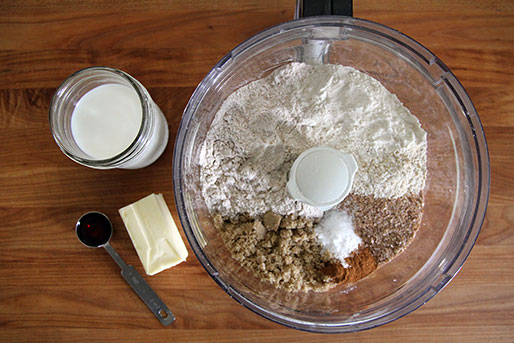
DIY Blueberry Cereal Bars: Ingredients

Measure flours, oats, wheat bran, brown sugar, baking power, salt, and cinnamon into the bowl of a food processor and pulse until ingredients are mixed and oats broken down. Add butter and pulse until pieces resembles coarse meal.

Stir vanilla into the milk and, with processor motor running, add liquids to the dry ingredients in a thin stream. Continue processing until dough comes together. Divide into two equal portions and flatten into 1/2-inch discs. Wrap each portion in plastic and refrigerate until firm enough to roll out, about two hours.
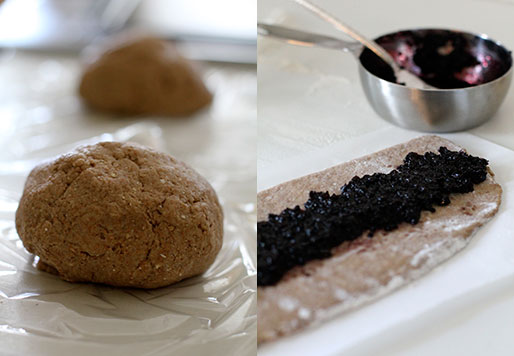
DIY Blueberry Cereal Bars: Dough

Meanwhile, make the filling. Place dried fruit and water into a small, heavy-bottomed sauce pan and bring to a boil. Reduce heat and simmer gently, covered, for 20 minutes, stirring occasionally. Transfer fruit and water to a food processor and process until broken down into a rough purée. Transfer filling to a bowl, cover, and refrigerate until needed.

When ready to assemble the bars, heat oven to 350°F with rack in the middle position.

Flour rolling surface and place one portion of the dough in the center. Flour top of dough and roll into an 8×12-inch rectangle, turning regularly to prevent sticking. Cut dough in half the long way to create two 4×12-inch sheets. To aide with filling and shaping the bars, place each strip of dough on a similarly sized piece of baking parchment before proceeding. Brush any excess flour from dough surface with a dry pastry brush.

Down the 12-inch center line of each piece of dough, spread an even 1-inch strip of filling (about 2 1/2 tablespoons). Using the edge of the parchment as an aide, fold one long side of the dough over the filling, covering it slightly more than half way. Brush a light coating of the egg wash over the remaining edge and, again using the parchment to help keep things even, fold the second dough edge so that it overlaps the first by 1/4 inch. Press gently to seal and flip the bars over so that they are seam-side down. Cut each log into three 4-inch portions.
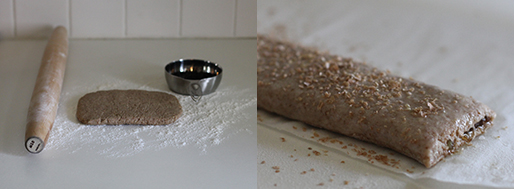
DIY Blueberry Cereal Bars: Assembly

Brush any excess flour from dough surface with a dry pastry brush. Coat each bar with a thin layer of the egg wash and sprinkle tops with wheat bran. Leave bars on parchment strips and transfer to baking sheet.

Repeat steps five through seven with remaining dough and filling. Bake bars for 16-18 minutes, until just golden. Transfer to a wire rack until cool. Store at room temperature in an air-tight container.

Pancakes with a Heart of Gold

pancake_top

There’s a restaurant here in Baltimore that Brian and I pretty much regard as an annex of our own home: Golden West Cafe. Considering the frequency with which we dine there, you’d think I’d have tried everything on their rather extensive menu, but I am a child of habit and pretty much restrict myself to two (super awesomely satisfying) dishes.

There used to be a third.

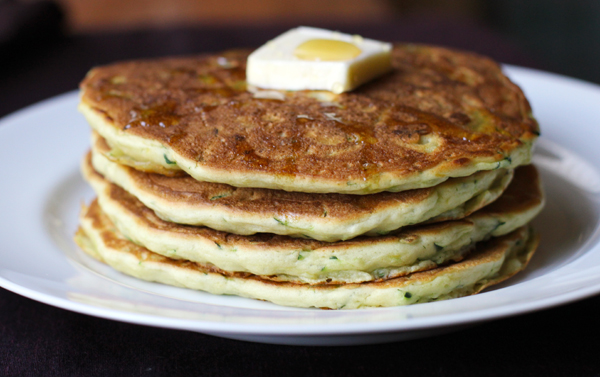
At some point, however, my beloved lemony pancakes, the ones flecked with zucchini and onion and stuffed miraculously with a slice of brie cheese in the middle, disappeared from the menu. I don’t know where they went or why they left; they didn’t leave a note.

They did make enough of an impression on me, however, to set my hands to some recipe forensics. After just a few tries and tweaks, I had my own version of those flapjacks back on my plate.

Lemon Zucchini Pancakes with a Heart of Brie

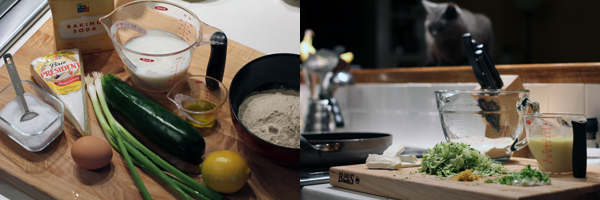
1 cup flour
1 teaspoon baking soda
1/2 teaspoon salt
1 teaspoon sugar
3/4 cup buttermilk
1 egg
1T olive oil
1 small zucchini
2 scallions, finely sliced
1 tsp. lemon zest

6 thin slices of brie

In a medium-sized bowl, sift together flour, baking soda, salt, and sugar. Set aside.

Shred zucchini and blot well with paper towels to remove as much excess moisture as possible.

Beat egg into the buttermilk and add this mixture, the oil, zucchini, scallions, and lemon zest to the dry ingredients. Whisk together until just incorporated. Allow to rest while bringing your skillet or griddle up to medium heat.

When hot, grease lightly with a little butter (I keep a paper towel nearby to spread the grease around and keep it from getting excessive). Drop batter by the scant 1/3 cup onto your cooking surface of choice; it’s somewhat thick, so you may need to spread it just a bit with your ladle, but don’t thin it out too much. You want some fluff.

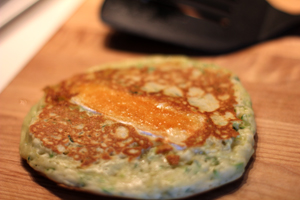
The delicious, cheesy heart of the pancake.

When dry around the edges and ready to flip, place a slice of the cheese on top of the uncooked side and turn in over in the pan. If you have a problem with the cheese melting to the skillet instead of browning and crisping, lightly re-grease the pan before you set the uncooked side down on it again.

Continue in this manner until all pancakes are made. I got six 5-inch cakes.

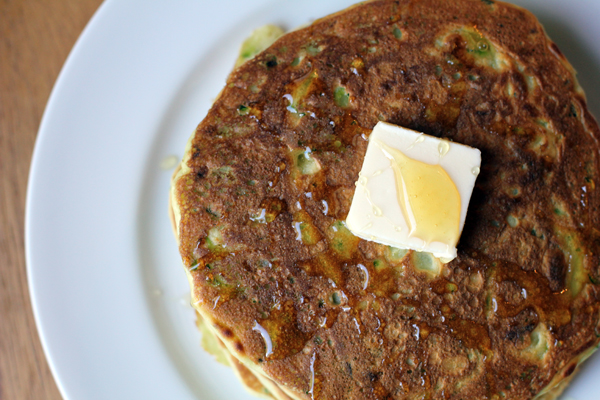
Serve hot topped with a pat of butter and a drizzle of honey.

Almost English: Sourdough Breakfast Muffins

muffin_top

More than a month ago, I ordered a sourdough starter and some English muffin rings from King Arthur Flour, and while the sourdough has subsequently been put through its paces, those eight metal rings have just been sitting in the pantry, taunting me whenever I open the door to retrieve some other item. The thing of it is, most of the English muffin recipes I’ve found need to be cooked on a griddle that I do not have, and the only pan in my arsenal that would suit can fit a grand total of two of these biscuit holders simultaneously. That seemed a recipe for frustration, no matter how you shaped it.

Meanwhile, there were recipes out there for baking them, but they weren’t for sourdough English muffins, and I was peculiarly stuck on this point. The clock was ticking down on me yesterday, my available slot for proofing and baking shrinking rapidly as my fingers Googled (you can feel the Jason Bourne-like tension here, right?) when I discovered this recipe on the King Arthur site and realized it met my desires of the moment perfectly. All-in-one-bowl mixing! Only a smidge more than an hour rising time! This morning, the fluffy little muffins fresh out of the toaster also hit my breakfast desires right on the spot, so we’re going call this one a clean win. If I had to sacrifice the cute little nooks and crannies to get here, so be it. Next time…

The griddle question, however, remains. Being vegetarian, I don’t have call to cook up sausage patties or suchlike, but I would love to dig deeper into Indian flatbreads, which also make use of a large, hot surface. Any shopping suggestions?

English muffin rings from King Arthur Flour

Sourdough Breakfast Biscuits
from King Arthur Flour

1 T instant yeast
1/2 cup warm water
1 cup sourdough starter, refreshed
2 tablespoons sugar
2 tsp. kosher salt
1/2 cup dried milk
3 cups AP flour
2 T oil
1 egg
cornmeal (for dusting)

Place yeast and water in a large bowl or stand mixer and stir to dissolve. Add all remaining ingredients (aside from the cornmeal) and knead, but hand or by hook, until a smooth dough has formed. Turn out onto a flour counter, cover with a towel, and allow to rest for 30 minutes.

After the initial bench rest, roll dough out (about 1/2 inch thick) to fit 8 3 1/2 inch English muffin rings. Cut out muffins. Place rings on the sheet and dust the inside of each circle with cornmeal. Place a round of dough inside each ring, dust the tops with cornmeal, and place a second baking sheet over top, balanced on the to of the metal rings. Allow to rise for 40 minutes.

Preheat oven to 375F. When rise is complete, bake muffins (still covered with second baking sheet) for 25 minutes or until tops are golden. Cool for 10 minutes on the sheet then remove rings and transfer to a wire rack.

pesto

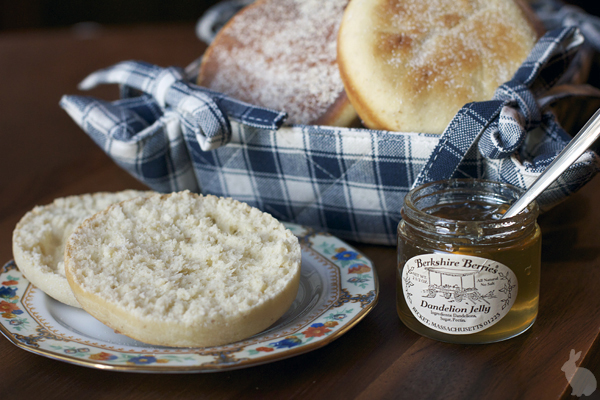
The interior will not have all the nooks and crannies of traditional English muffins, but I split one with a fork and found the interior soft and chewy and quite satisfactory all the same.

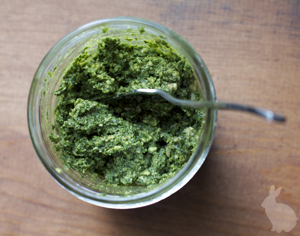
I’ve toasted and consumed two more without a complaint, topped with some kale pesto. What can I say? I have a thing for leafy green condiments.

I used this Tastespotting recipe, though I substituted a teaspoon of nutritional yeast for the cheese.

Power Up: Oatmeal with Egg Whites

oatmeal_top

My husband is a committed cyclist, and as he’s gotten more serious about his training, he’s taken additional care with his diet. This means, in part, that my full fat cooking is not always on the menu, so we have developed new ways to team cook and eat together, even when we are not eating the exact same thing. Bonding! In this guest post, he gives us a glimpse of a multi-layered dish that is sometimes second breakfast.—MS

In many cultures, food plays a central role in the social fabric. A meal is not simply a compulsory routine occurring at regular intervals throughout the day, it is a community ritual, an exercise in hierarchies, a time to forge and strengthen relationships. If you find yourself a guest in a culture with such inclinations, a willing interloper eager to partake in a nonnative feast, the stakes at the dinner table are high. Out of respect, you take care to polish your plate, which leads your host to presume you are incredibly hungry—or perhaps just a gluttonous American—and would fancy another serving immediately. To refuse an offering of seconds or thirds, even if you’ve not telegraphed an interest in more, is perceived as a wanton insult. Similarly, not finishing a portion of your meal or the extra helpings you may have unwillingly received will also be met with scorn. I’m not sure which is the greater faux pas. It’s a classic Catch-22.

Cyclists also tend to have a close relationship with food. We need it for strength. We need it to train hard and finish strong. We need it for recovery, to nourish and replenish our sacred glycogen stores. For some, food serves as a reward. I’ve done X amount of work and burned Y amount of kilojoules, so I’m entitled to Z. For others, it serves as fuel. When you eat to fuel your body, the act of eating takes on a quality that approaches the sublime. You begin to savor every bite, exploring the bouquet of tastes, textures, and sensations as they cross your palette. To devour a meal quickly would somehow be the ultimate gesture of disrespect to the sustenance you have labored to create and consume.

As an illustration of the idea that simple can be divine, I submit one of my favorite meals. On the surface it may appear fairly basic, however careful examination reveals a complex and rewarding combination of flavors. Kattouf calls it “Power Oatmeal.” I call it heaven.

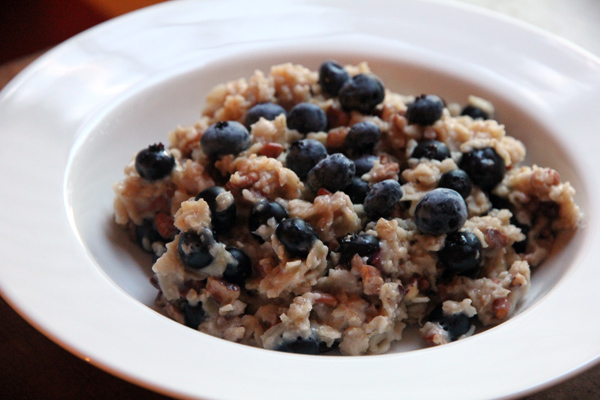
Correct me if I’m wrong, but there’s just something comforting about the texture and warmth of freshly cooked oatmeal. And if it happens to be a slightly chilly morning, one that requires slippers, the steam rising off the oatmeal adds an additional layer of nostalgia. Nestled within the oatmeal’s warm embrace you find the tartness of the blueberries balanced perfectly with the crunchy, earthy sweetness of the pecans. And though their numbers are small, the raisins provide an exciting element of surprise, strategically placed sugar-filled land mines on the bowl’s battlefield that explode on your tongue.

There is another important, but not quite as sexy, element to this meal, namely about a half a cup of protein in the form of egg whites. Rather than push the boundaries of taste by romanticizing this somewhat tasteless–albeit necessary–component, let’s just be content saying that a dash of Tabasco kicks it up a notch. A small notch, but a notch nonetheless.

Power Oatmeal with Egg Whites

1 cup water
1/2 cup oatmeal
1/2 cup blueberries
1/4 cup chopped pecans
2 tsp raisins

1/2 cup egg whites
Tabasco sauce (or similar) and pepper to taste

There’s absolutely nothing fancy or involved about making this recipe, but the return on investment is palpable. Bring 1 cup of water to boil, stir in the oatmeal and let is simmer on low heat. As the oatmeal simmers, cook your egg whites. I like to fold them into a crepe-like formation. When the oatmeal is finished, stir in the blueberries, pecans, and raisins. Add some Tabasco and pepper to the egg whites to give them some flavor and you’re ready to roll. (N.B. This is 477 calorie version of this recipe. For consumption on rest days, reduce the oatmeal to 1/4 cup, the pecans to 1/8 cup, and the the raisins to 1 tsp.)