bread » Wonderland Kitchen
Browsing Tag

bread

Let’s Get Re-Started (Sourdough Edition)

Sourdough Bread

Sourdough baking is an art. I keep reading that, over and over again, in baking instructions and supportive blog posts. But what I’m beginning to realize is that sourdough is not just an “art” in terms of its many variables, but also in how it will test you, the artist: thrill you with its vigor, slay you with its stubbornness, awe you with the perfect caramel color of its crust, yet refuse to follow whatever logic you thought you grasped about baking bread when you walked into your kitchen. Or at least that’s the line I’ve been feeding myself, since two weekends of trials have left me a little hungry for, you know, actual edible bread.

Despite my “third time’s a charm” success with those Tartine bread experiments last year, I admittedly lost interest in the labor-intensive process over the very hot summer. I revitalized my sourdough enthusiasm this winter with a brand new starter (for $6.95, it was just too tempting a creature to not tack on to my last King Arthur Flour order). It’s a vigorous little beast, but user error on my first Tartine re-try resulted in a flat loaf and a poorly cooked pizza, all on the same day. It was quite dispiriting.

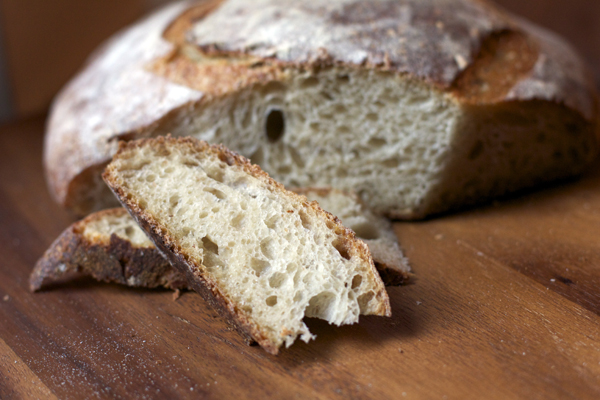
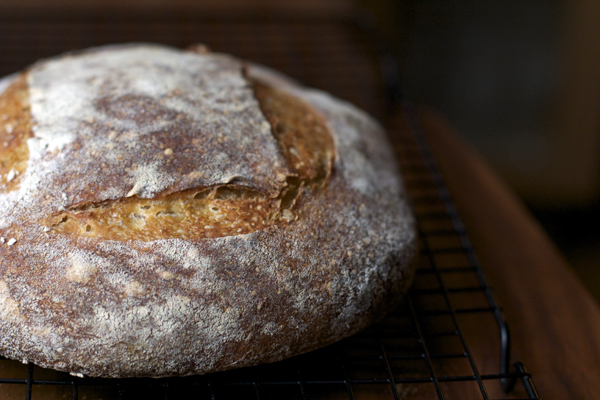
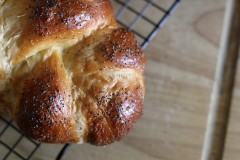
But onward and upward to true adventure, eh? I tossed the photographic evidence of my failures into that “disasters” sub-folder I’m saving for a rainy day post of hilarity, and this past weekend I gave it all another go. For this venture, I settled on the King Arthur recipe that came packaged with the starter itself, but this being art, I immediately started tweaking. I couldn’t help myself! Once again the half of the dough I relegated to pizza crust was not food blog worthy (attributable, I believe, to a too-soft dough combined with my over-heavy hand with the olive oil). The loaf of bread the recipe produced, however, deserves a turn on the Wonderland catwalk. It might not be my perfect sourdough statement–yet!–but its thick and crispy golden crust and perfectly tangy wide-holed crumb are worth passing on, even if my poor bread slashing damaged its cover-girl good looks somewhat.

That just makes it “artisan,” right? The education continues.

Sourdough Bread

Sourdough Bread: It's science!

Sourdough Bread: Preparation

Sourdough Bread
adapted from King Arthur Flour

8 oz sourdough starter
12 oz warm water
21 oz flour
1 T kosher salt
2 tsps sugar

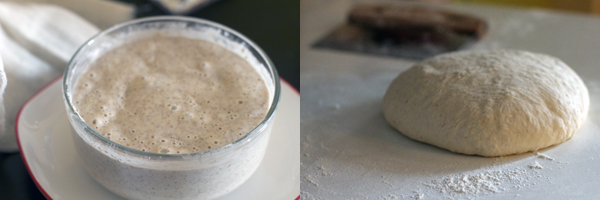
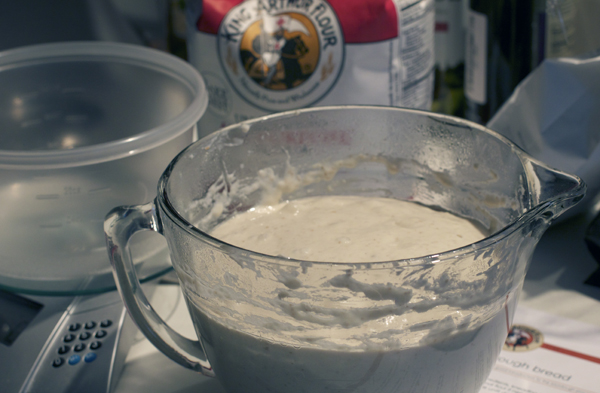
Feed your sourdough starter. After 10 hours at room temperature, remove an 8 oz portion and combine with the water and 12.75 oz of flour. Mix by hand (literally: after my Tartine training, I get my clean fingers in the dough whenever I can). Cover and let rest at a cool room temperature for 4 hours, then refrigerate for 12 hours.

When ready to proceed, remove dough from the refrigerator and knead in the salt, sugar, and enough flour to make a soft dough. I left mine a little on the wet side, but this is an art/science, like people keep typing. Experiments are needed to achieve the ideal crust/crumb/sourness/rise/etc. to suit your tastes. It is, perhaps, the ultimate story problem.

Cover and allow to rise until quite puffy (mine took 4 hours using my oven’s proofing feature). Remove the dough from the bowl and divide into two portions.

Shape each piece of dough into a round and place, top side down, in a rice-flour-dusted, cloth-lined banneton. Leave to rise an additional 2-4 hours.

When ready to bake, place a dutch oven or other appropriate covered pot in the oven and preheat to 450°F. When hot, remove the cooking vessel and (placing a circle of parchment inside to prevent sticking if desired) gently flip one portion of dough out of the basket and into the pot. Slash the top of the dough (a razor blade will work if you don’t have a lame, just be careful not to burn yourself on the hot pot), cover with the lid and return to the oven, baking for 25 minutes. Remove the lid and continue baking for an additional 20 minutes, until crust is deeply golden.

Remove and allow to cool completely on a wire rack. Repeat the process to bake your second loaf.

If On a Winter’s Night a Traveler

stew_alt

Not long ago, I enjoyed a particularly fantastic supper at Woodberry Kitchen which consisted of navy beans, torn bread, kale, turnips, and smoked red chile, all baked up in a petite cast iron pan and garnished with fresh pea shoots. It was delicious top to bottom, but those torn bread chunks studding the dish–so crisp, so well seasoned, so tasty–have haunted me ever since.

Though I have no wood-fired brick oven here at home, nor any cast iron pans for baking such a dish, I decided to try for an approximation with the ingredients I had on hand.

The stew I came up with was hearty and comforting, but it was ultimately a dish quite unlike the original, of course. It was plenty tasty, sure, but disappointment encroached at the dinner table. I had failed to capture the bread–both in texture and taste. It was good, but it wasn’t that bread. How did they do it?

So it’s back to the drawing board on that part. I’m not even sure what I’m looking for exactly–more of a crouton, perhaps? even drier and spicier than what I made?–but I’ll let you know when I find it.

Meanwhile, this is a dish that would warm and welcome any visitor arriving at your door on a cold night.

Traveler's Stew: Process

Traveler’s Stew

1 1/2 cups crowder peas, cooked
4 T olive oil, divided
1 sprig rosemary
1 small red onion, chopped
2 cups mushrooms, cubed
2 carrots, chopped
2 celery stalks, chopped
28 oz can diced San Marzano tomatoes
1/2 cup red wine
2 tsp. garam masala
1 tsp paprika
2-3 cups swiss chard, de-ribbed and chopped
salt
1 garlic clove, minced
Several slices of crusty bread, cubed (an 8-inch portion of stale baguette works especially well here)
1/4 cup parsley, chopped

Traveler's Stew: Process

In a 4 qt. oven-safe pot, heat 2 T olive oil and sizzle rosemary to infuse. Add onion and saute until softened, then stir in mushrooms and continue cooking until they release their juices. Remove and discard the rosemary and add the carrots, celery, beans, tomatoes (with their juice), wine and spices to the pot, and simmer, stirring occasionally, for 30 minutes, until the carrots have softened. Add the swiss chard, and continue cooking 10-15 minutes more, until greens are wilted and flavors well merged. Season with salt as needed.

While you wait for the greens to cook down, preheat the broiler and heat the remaining 2T olive oil in a skillet. Add the garlic to infuse the oil and then add the bread cubes, tossing to coat with the oil. Continue to toast them in the pan, stirring occasionally to prevent burning, until the cubes are golden, about 7 minutes.

When ready to serve, layer the bread on top of the stew. I decided to push the chunks down into the liquid just slightly to soak them into the tomato broth somewhat, then I placed the pot under the broiler for a few minute to recrisp the bread and actually burn it just a bit (personal preference).

Remove from oven and garnish with parsley. Serve piping hot.

Traveler's Stew

The Things We Ate (Christmas 2011 Edition)

bread_top

The Christmas week here at Wonderland Kitchen annually includes three or more solid days of feeding six adult people. Sure, we get a restaurant meal in one evening and nosh on plenty of cookies along the way, but a little cafeteria strategy keeps us from going hungry without someone spending the entire holiday in front of the stove.

This year, my plan was homemade soups and breads, rounded out with some store-bought meats and cheeses for sandwich-making, so that a variety of meal combinations could be patched together to match the widest variety of tastes and dietary requirements.

To that end, I started researching options that might make a dent in the supplies offered by my (previously!) over-stocked pantry, and we ended up with some real winners. I wasn’t planning to post these dishes, so I didn’t take the usual series of process shots, but some of the recipes I discovered were just too tasty to horde for myself.

The Breads:

I made these both pretty much exactly as outlined in the linked recipes, no real adaptation or tweaks required.

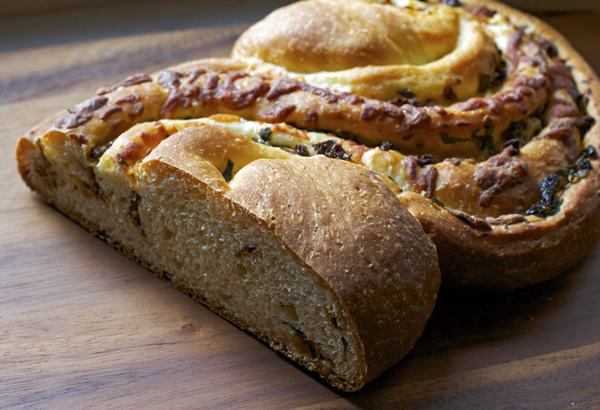
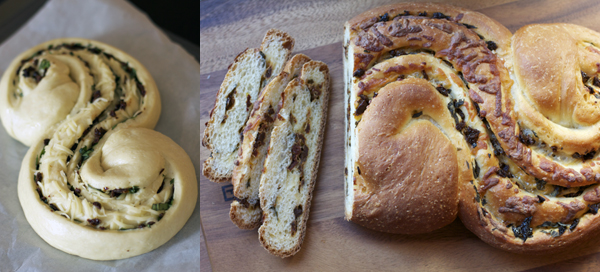
Tomato, Basil, and Garlic Filled Pane Bianco
from Dianna Wara/King Arthur Flour

Tomato, Basil, and Garlic Filled Pane Bianco

Looked like such a challenge, but it really wasn’t (so perfect for entertaining!). I admit I was skeptical about using scissors to cut open my loaf before shaping, so at first I tried using a serrated knife. That was a fail. Just use the scissors. The good people at King Arthur Flour know what they are talking about without my interventions.

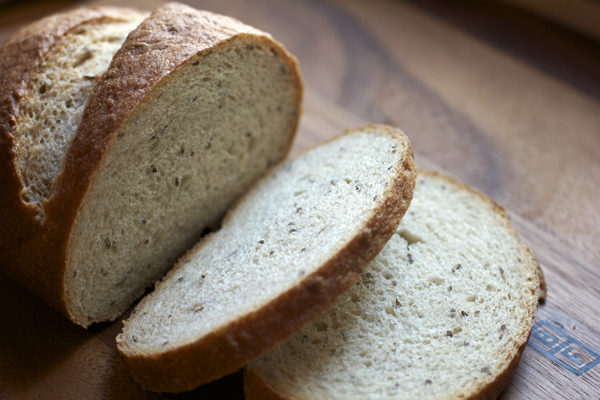
New York Deli Rye
from Smitten Kitchen/The Bread Bible

New York Deli Rye

The only switch up I employ here is to form the loaf into a batard shape and slash it deeply across four or five times. I bake it with the ice/steam method suggested.

The Soups:

(Absolutely the Best, Most Awesome) Cream of Tomato Soup (Ever!)
from Smitten Kitchen/The America’s Test Kitchen Cookbook

Cream of Tomato Soup

I skipped the brandy and the cayenne pepper, because I worried it would scare off my family, and I didn’t think the soup needed any additional salt. I immediately ate two bowls.

Gypsy Soup
from The Yellow House/Mollie Katzen’s The New Moosewood Cookbook

Gypsy Soup

This seemed like a great dish to keep warm on the back burner and feed to arriving family members after their long drives to our house. It made a huge amount, and yet it seems to have disappeared. I’ll be keeping this one in the winter rotation.

I swapped potatoes/sweet potatoes for the squash (that’s what I had), used swiss chard for the greens (my preference in most cooking cases), and mixed a spice combination of 1 tsp. hot curry, 2 tsps. garam masala, and 3 tsps. sweet Hungarian paprika (in place of the turmeric, paprika, bay leaf, and cayenne indicated in the recipe).

Kiss Me, I’m Irish (and I Baked the Soda Bread)

irish_top

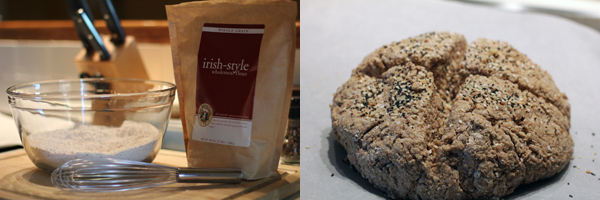
Last Christmas I was gifted a heavenly amount of King Arthur flour, and as we cruise into Christmas 2011, I can’t help but reflect on all the bread and pizza and pies it has been turned into over the past twelve months. However, a package of Irish-Style Wholemeal Flour somehow wedged itself behind some boxes in the pantry and was forgotten about completely until this past weekend. Conveniently, the back of the bag offered a tempting recipe for soda bread, but it required buttermilk. I didn’t have any, but what does fresh Irish Soda bread need more than anything? Good butter, of course. So I decided I would knock down two pins with one throw, as it were, and make my own butter while using the reserved buttermilk for the bread. That would be so cool. You can totally do that, right? Well….

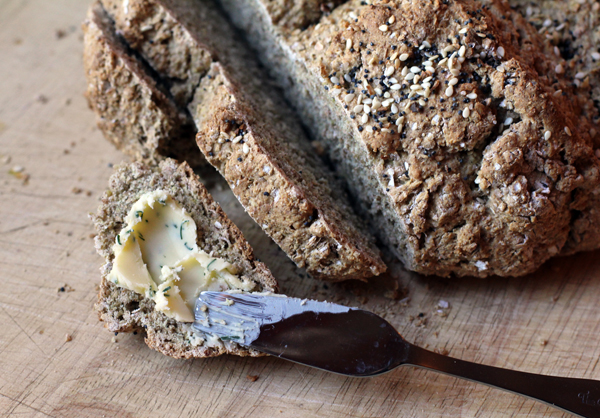
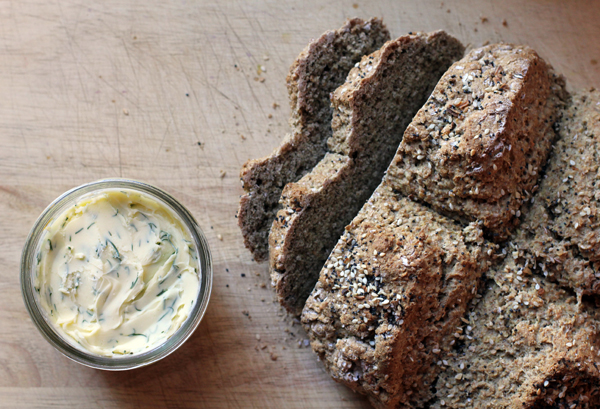
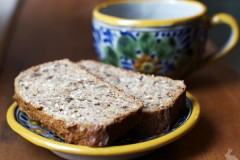
On reflection and after some further study, I realize that I made a miscalculation. As I did not gather my milk over many days in the barn before churning it, nor did I culture it (as a store-bought product would have been processed), my buttermilk was probably missing the acidic quality that you’re looking for when triggering your soda bread chemical reaction. That said, even if my bread could have been lighter and fluffier, its rough wheat character still tastes great and is quite satisfying–especially toasted and topped with a schmear of fresh dill butter.

And next time, I guess I’ll forgo the DIY heroics and just buy a bottle of buttermilk at the store like a normal person.

Irish Brown Bread

Irish Brown Bread
adapted from the package of King Arthur Irish Wheat flour

4 cups Irish-Style Wholemeal Flour (I needed a bit more, probably due to my buttermilk snafu)
2 T sugar
1 teaspoon salt
1 teaspoon baking soda
2 teaspoons baking powder
1 1/2 cups buttermilk
2 tablespoons oil

Preheat oven to 400 F and line a baking sheet with parchment.

Whisk together the flour, sugar, salt, baking soda, and baking powder to evenly incorporate. Pour the buttermilk and oil into dry ingredients and quickly stir together into a shaggy dough, kneading just a bit with your hands to pull it together into ball.

Move the prepared dough onto the baking sheet and score a deep cross into the top with a large bread knife. Sprinkle the top with a mix of sesame and poppy seed, if you like, and place in the hot oven for 40 minutes or until the top is browned and a cake tester comes out clean. Allow to cool completely on a wire rack before slicing.

Irish Brown Bread

Butter Me Up

butter_over

Homemade bread is pretty spectacular; homemade bread topped with homemade butter is…actually maybe taking the DIY homemaking a little too far?

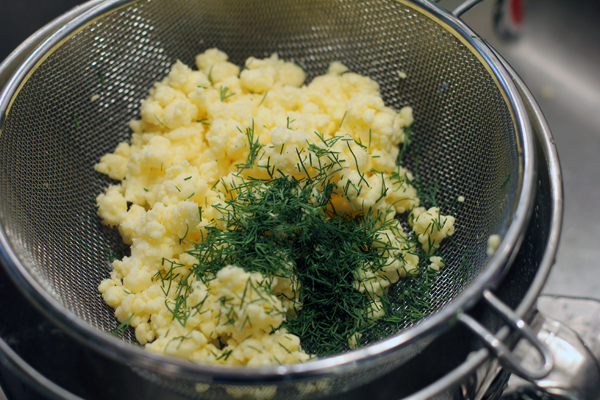
Nonsense, I say! Particularly if you, with all your baking prowess, own a stand mixer, simply affix the whisk attachment and toss a pint of heavy cream (leave it out on the counter for a bit to take the chill off) into that mixing bowl. Using the plastic bowl cover plus plastic wrap to completely cover any openings, run that baby until you break your whipped cream and the butter and buttermilk separate. Keep an eye on it so you can slow down the speed as soon as it comes apart.

homemade butter drain and flavor

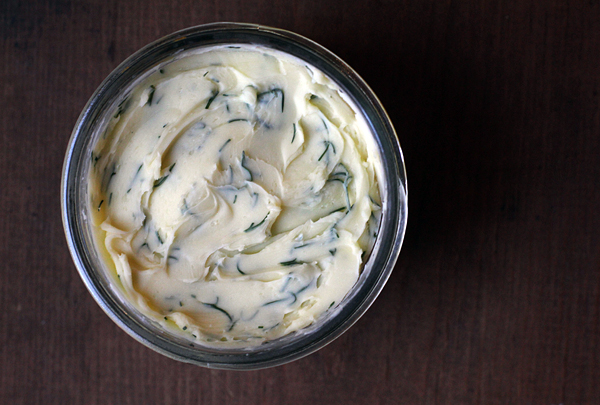
At this point, you should strain off the “buttermilk” (more on this piece of the recipe puzzle in my next post) and rinse the butter in very cold water. You will then want to knead it well between your hands to wring out as much water as possible (I also blot it a bit with a paper towel–any leftover moisture will shorten its shelf-life) and flavor it with a sprinkle of salt (for taste and as a preservative) and whatever herbs you might want to incorporate (clearly, I went a little dill happy). That’s it! Pack it down into a jar and store it in the fridge. Then take that buttermilk and bake something delicious to put it on…

PS: I hear that, if you have access to child labor, you can nix the mixer and just pour the cream into a jar with a tight fitting lid and have the kids shake the cream until it separates. Food science is cool!

A Vegetarian At Thanksgiving

bread_top

Even though I’m a vegetarian, as a fan of all things cooking and presentation, holiday meals are high priority–even ones designed around a dressed up roasted bird (or perhaps bourbon brined and fried?). Over the years as an invited guest at the feasts of others, I’ve contributed my share of wild rice and dried fruit side dishes or defaulted to pie baking duty. Considering 2011 has been my year of bread, however, for this year’s round I went looking for an appropriate holiday loaf.
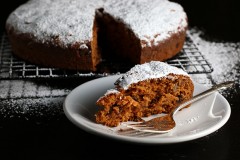
Which brings me to my second “even though,” because even though I am not Jewish, I have been addicted to braiding up dough ever since trying my hand at challah–and I haven’t even gotten to the double-decker celebration version yet!

All of this preamble gets us around to how I ended up landing on this King Arthur recipe for Holiday Pumpkin Bread and declaring it a perfect candidate. Featuring fall flavors, it’s not too sweet yet unusual enough to stand out, plus its round celebratory braid reinforces the sentiment of love and community gathered around the table for more than just an average Thursday night meal.

I found the construction of the bread to be straightforward, and even mixing the somewhat sticky dough was a snap since I just piled all the ingredients in a bowl and let my stand mixer go to work. Most of the required investment is simply in time while waiting out the two rises. A little oil on your hands and your counter space keeps the soft dough from adhering to anything while forming the circular braid, and the lovely smells of pumpkin and spice even before the baking begins are enough to keep the baker motivated. Once the rounds hit the oven, good luck keeping attracted family members from devouring them before your holiday meal. Luckily, the recipe makes two loaves.

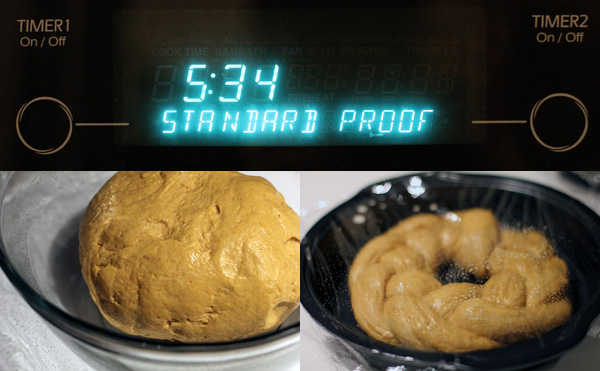
On a personal note, a nifty thing I discovered as a result of my broken oven and the paging through the instruction manual I did in an attempt to troubleshoot: this appliance is way fancier than I realized when we moved in and it even has a proofing feature! This is going to make winter bread baking–which can be a little tricky in our sometimes drafty, radiator-heated home–a lot more efficient. I bet this might work for yogurt making as well…

Spiced Pumpkin Celebration Bread
adapted from King Arthur Flour

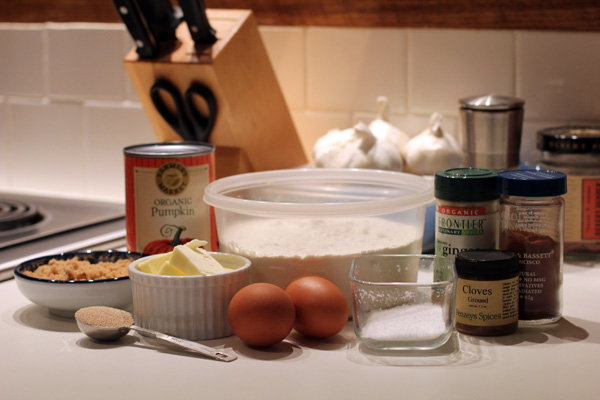
20 oz (4 3/4 cups) AP flour
1 teaspoon cinnamon
1 teaspoon ground ginger
1/4 teaspoon ground cloves
2 1/2 ounces (1/3 cup) brown sugar
1 1/2 teaspoons salt
1 tablespoon instant yeast
15-ounce can pumpkin
2 large eggs
1/4 cup melted butter

*additional egg, beaten with water as needed, for egg wash

Place all the ingredients (except for the egg wash) in a large bowl or the bowl of a stand mixer and mix and knead until smooth. The dough is somewhat sticky, but take care not to add too much additional flour so that the bread remains moist and light. Transfer to an oiled bowl, cover with plastic wrap, and allow to rise for about 90 minutes.

Once dough has puffed up (but not really doubled) lightly oil your workspace and hands and divide the dough into six even pieces. Working with three at a time, roll each into a log about 1.5 inches thick and braid, pulling the loaf into a round and joining the individual ends together. Lightly oil a 9-inch cake pan and place the braid in the center. Repeat the process with the remaining dough, then cover both with a sheet of greased plastic wrap. Allow to rise again, 60-90 minutes.

Preheat the oven to 350°F. When second rise is complete, gently remove plastic and brush each loaf with the egg wash. Bake for 30 minutes until golden (or until the center of the dough registers 190°F). Remove loaves from the pans and place on a wire rack. Cool completely before slicing.

***I’m not sure this recipe meets the requirements for Cathy Elton’s call for heart healthy T-day recipes, but at least it’s homemade so no weird additives! If you’ve come to Wonderland looking for such nutrition-conscious festive dishes, perhaps a batch of Celeriac and Lentils with Hazelnut and Mint will suit.