eat me » Wonderland Kitchen
Browsing Category

eat me

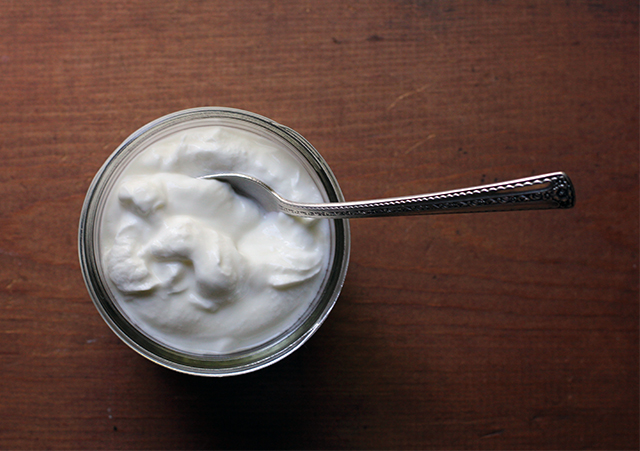
Real Deal: DIY Greek Yogurt

greek-yogurt-finished-two

I am not generally a “doing the math” kind of person. As a result, I end up economizing in weird ways. I’ll stand in a grocery store aisle agonizing over the cost/benefit of something based on price and ingredients and brand, maybe saving a dollar here with a bulk buy or spending a dollar there to get the organic option. Later that night, however, I won’t think twice about going out to dinner with my husband, making the utility of the entire exercise somewhat questionable.

When it comes to the Greek yogurt consumed in our house, however, I finally did all the math for my latest Serious Eats column, a process which left me convinced I no longer knew how to divide. I was shocked by what kind of savings I might manage in a given year if we could get off the little cups with the parchment paper tops and start making it all at home. But I was going to need a much more streamlined process than my yogurt-making appliance filled with little glass jars would allow, so the research began.

Producing yogurt at home may not be quite as simple as making ice cubes, but it’s not much more complicated than measuring liquid into containers and letting it reach or hold certain temperatures. Ultimately, if you can stir and read a thermometer, you have all the skill needed to culture your own. The process takes a lot of hands off time, however, so if you’re more accustomed to the immediate gratification of cookie baking, this may take some getting used to.

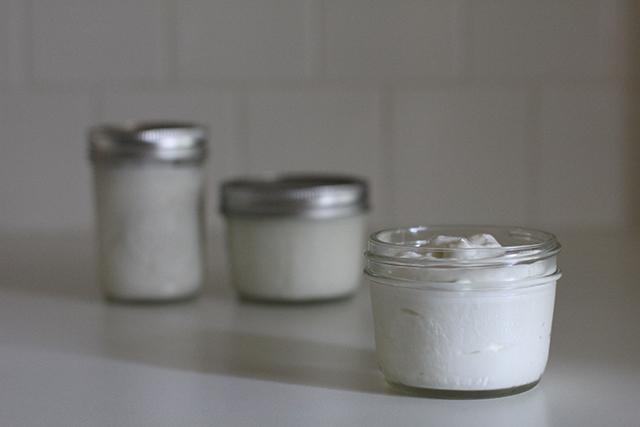
DIY Greek Yogurt: strained and portioned

A few things to consider before you begin:

  • Both the milk and the starter you select will impact the taste and consistency of the final product, and you will likely need to experiment some before you hit on your ideal ingredients. If you’re using fresh yogurt as your starter rather than freeze-dried, be sure to use a plain variety that contains live and active cultures.
  • There is more than one way to incubate at 110°F—from a simple thermos to a special appliance specific to yogurt making. I found the method below (which I first learned about here) to be both simple and consistent, but you may want to experiment and use the process you find most efficient.
  • A useful trick I picked up from Alana Chernila’s The Homemade Pantry is to incubate a small portion of the milk and starter mixture in a 1/2-pint jar alongside the two filled quart jars. Reserve this smaller portion to culture your next batch of yogurt. If using the small cooler method outlined below, you can keep this smaller jar above the water line by setting it on top of a narrow, empty 1/2-pint jar.

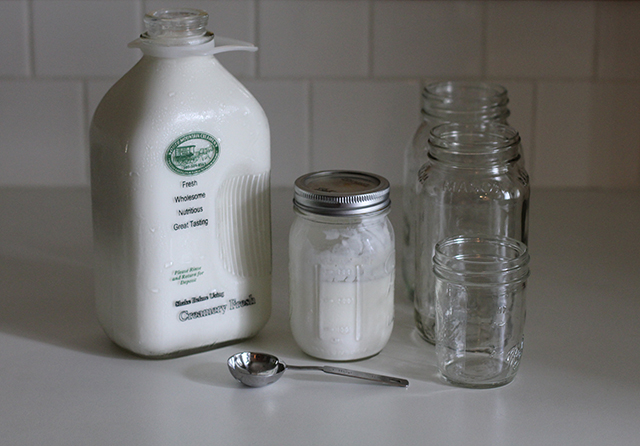
DIY Greek Yogurt: ingredients

DIY Greek Yogurt
8 cups milk
4 tablespoons plain yogurt with live and active cultures or freeze-dried yogurt starter

DIY Greek Yogurt: hot and cold

In a heavy-bottomed pot over medium heat, bring milk to 180°F, stirring regularly to prevent scorching.

Once milk has reached temperature, allow it to cool to 110°F (place pot in an ice bath to speed cooling, if desired). When milk has cooled, add yogurt to the pot and whisk thoroughly to combine.

DIY Greek Yogurt: incubation

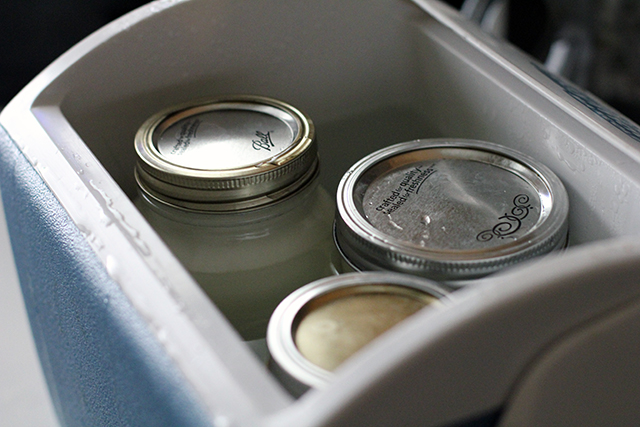
Pour milk and starter mixture into two quart-sized jars (and smaller 1/2-pint, if using) and screw on lids. Place them in a small insulated cooler and fill with 120°F water until jars are submerged nearly up to their lids. Close cooler and leave in a draft-free, undisturbed place for six hours or until desired tartness is achieved.

When incubation is complete, remove jars from water bath and place in refrigerator for at least six hours to halt culturing and set yogurt.

DIY Greek Yogurt: straining

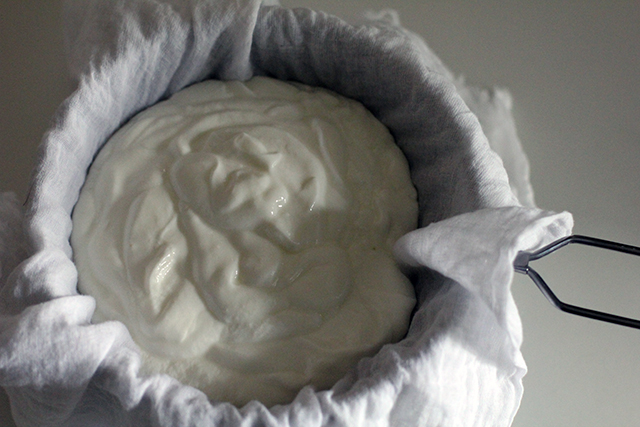
At this point, yogurt may be eaten, but to achieve a Greek-style consistency, it will need to be strained. Place a fine mesh strainer over a bowl and line it with two layers of cheese cloth. Spoon yogurt into lined strainer and allow to drain for two hours or until desired thickness is achieved.

Transfer yogurt to a storage container and refrigerate until needed. Remaining leftover whey (approximately two cups) may be reserved for another use if desired.

When Providence Provides: Cantaloup Soup

cantaloupsoup_top

This is one of those dishes that begins not with a recipe but a magical mystery tour through my refrigerator during which I play a quick game of matchmaker and the winner is dinner. It may sound contrived, but I actually find that it’s kind of entertaining and, by starting from leftovers, some of the cooking is already done before I even start. Bonus points: fresh meals are made without wasting food I’ve already invested energy into preparing.

Which bring us up to my inventory. A cold soup sounded like a grand idea on this muggy weekend, and I had a bag of frozen cantaloup I wanted to evict from my freezer. My Google research turned up one or two melon soup recipes that used ginger and lemon juice as ingredients. I had neither of these on hand, but providence provides! What I did have was a flat batch of homemade ginger beer (yeast fail!) that I refused to toss on principle, certain I could find a way to incorporate it into something at some point. And what is ginger beer but a sweetened broth of already juiced lemons and grated ginger?

It was an idea I decided to run with, and this tasty soup was ours for dinner. Done any matchmaking of your own lately?

Cantaloup Soup

Cantaloup Soup

5 cups cantaloup, fresh or frozen
1 1/2 cups strong ginger beer
1/2 cup Greek yogurt
1 tsp. salt
fresh grated nutmeg to garnish to taste

Place cantaloup in a bowl and pour over the ginger beer. Let sit at room temperature for one hour, allowing fruit to thaw (if using frozen) and beer to lose its carbonation. Add yogurt and salt and puree using an immersion blender. Chill soup completely (if you’ve used frozen fruit, soup will already be nicely chilled and can be served immediately).

Dish soup into small bowls or glasses, garnish with a few scratches of fresh nutmeg.

August’s Pleasure: Tomatoes on Toast

tomatobread_top

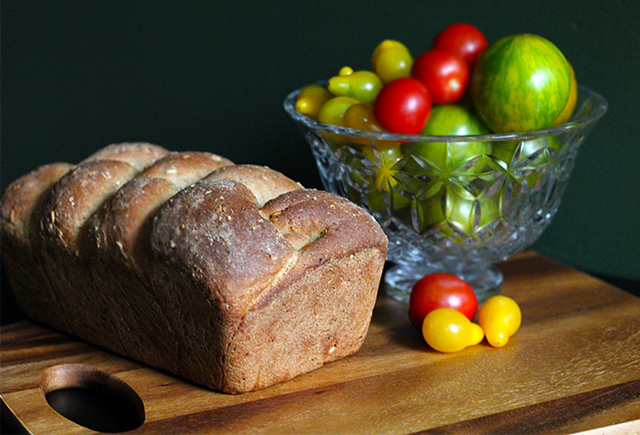
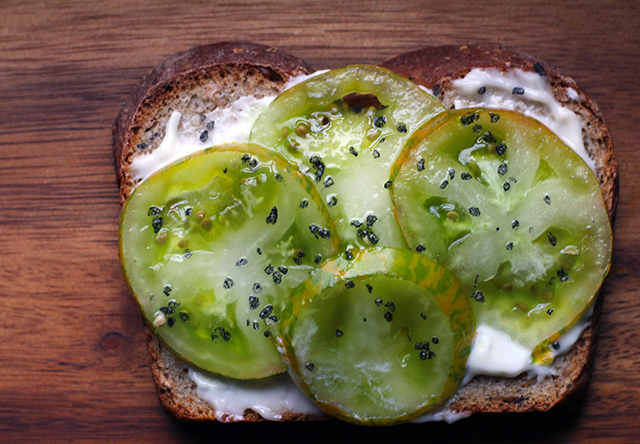
The closing weeks of August generally find me living on a steady diet of tomato sandwiches, and this year is no exception. Sometimes I pair thick slices of bright red fruit with a generous schmear of kale pesto, sometimes I go classic with some mayo and salt. I almost always toast the bread, except for when it’s the first slice off a fresh loaf and I just can’t wait that long.

Tomatoes of August

I know more and more people are giving up gluten products. I’ve cut back a bit from my carb-rich diet, but I’m still committed to bread. I do try and make my own as often as I can, however, favoring whole wheat flour and add-ins such as sunflower or caraway seeds. What I usually don’t have is a lot of time and patience for super-involved recipes (aside from the times that I do). For an everyday bread, I don’t want to heat milk or make extra dishes. I want to measure it all into the bowl of my stand mixer and just let the dough hook do the work. I want it to finish five minutes later with the bowl neat enough to just pull out the dough, spray in a touch of olive oil, and it’s set for reuse as the rising bucket.

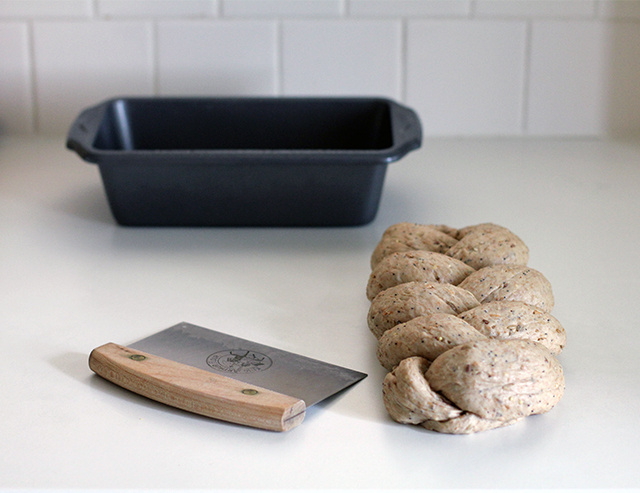
That said, I was bored with my standard recipe, and so I went cruising on the internet, as people do, for something new and exciting. I stumbled across Manly Housekeeper’s adaptation of a King Arthur recipe that sounded exactly like my kind of action. And indeed it was. On my second go, I decided to have some fun and braid it rather than rolling it into a loaf; it takes about a minute more to do but I think really adds something fun to the presentation. On the second rise, the dough expands into the edges and corners of the loaf pan, so it’s still completely suitable for sandwiches, just with a fancier top. This is definitely optional, but highly recommended. One caution I will give with this recipe is that my rising times were rapid. That may just be because of the muggy August heat of Maryland, but keep a close eye on your progress.

Harvest Grains Whole Wheat Bread

Harvest Grains Whole Wheat Bread
only slightly adapted from Manly Housekeeper’s recipe due to pantry stock

3 1/2 cups (17.5 ounces) whole wheat flour
1 1/2 tsp. instant yeast
1 1/2 tsp. salt
1 T vital wheat gluten
3/4 cup seed mix such as King Arthur’s harvest grains blend
1/4 cup wheat bran
1 1/2 cups water
3 T vegetable oil
1/4 cup maple syrup

Measure all the dry ingredients into your mixing bowl. Combine the liquid ingredients in a measuring cup or small bowl, whisk together, and add in with the dry. Mix until just combined and then let sit for 20 minutes.

When the time has passed, continue kneading by hand or by hook about five minutes, until satiny and elastic. Lightly grease your bowl with olive oil, place dough at bottom and turn several times to coat surface with oil. Cover bowl with plastic wrap and leave to rise one hour.

Turn dough out onto the counter and gently deflate. Divide dough into three equal portions and roll each into a 16-inch log. Braid together and place in a lightly greased 9 1/4 x 5 1/4 inch loaf pan. Reuse plastic wrap to loosely cover pan and let rise again until dough crowns over pan top about an inch (mine took 45 minutes, but it could require double that).

About 15 minutes before final rise is complete, heat over to 350°F with rack in the center. When dough is ready, bake uncovered for 20 minutes. Then tent bread with aluminum foil and bake 20 minutes more.

Turn loaf out of pan immediately and cool completely on a wire rack. Slice and enjoy, topped with whatever you like best (which would be tomatoes). And keep a careful eye on any suspiciously lurking pets.

Tomatoes and Toast

New Adventures in Wonderland & Hacking Blueberry Cereal Bars

cereal_top

“Would you tell me, please, which way I ought to go from here?”
“That depends a good deal on where you want to get to,” said the Cat.
“I don’t much care where–” said Alice.
“Then it doesn’t matter which way you go,” said the Cat.
― Lewis Carroll, Alice in Wonderland

Brian and I named Wonderland Kitchen a couple of years before the site actually launched, dreaming up the idea on a long car ride to Vermont. After listening to me consider the possibility of maybe trying to make some time to write just a little about food, and for longer than was reasonable, my husband pulled the trigger for me and made a gift of the URL. Still, I dragged the idea in and out of my mental cupboard like a stock pot for quite a while longer, considering how it looked on the stove but never lighting the gas. Then one weekend in September of 2011, we drove to Vermont again. I didn’t take it as a sign so much as the chance to turn down the volume on the day-to-day grind just long enough to really evaluate my priorities. Taking time and attention away from building the career I already had as a music journalist seemed silly, yet I couldn’t shake the desire to diversify. By the end of that trip, the first iteration of Wonderland Kitchen had been built, and it’s been a motivator in the kitchen and a creative space I’ve been able to grow in ever since.

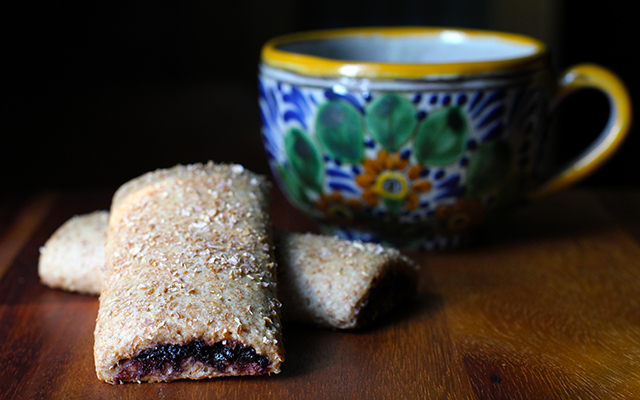
In all that time, I never really considered “where it was all going” because I was simply enjoying the ride too much to care. Yet as we mark this first year with a site upgrade thanks to Brian and the love and supportive appetites of many friends, the road keeps unspooling before us. One addition to these pages that I’m excited to debut today is that I’ll be contributing a bi-weekly column to the killer online food destination Serious Eats. For each piece, I’ll pull out my clipboard and do my DIY best to hack everything from breakfast cereals to Ho-Hos, though minus dyes, artificial flavors, and ingredients I cannot pronounce. To kick things off, I offer you a cereal bar that’s a far less sweet but much more elegant option than you’ll get in a box (recipe below, but spiffy presentation over on Serious Eats). Have a product you’d like me to take a crack at in a future column? Please let me know.

*

Who wants an unbirthday gift from Wonderland?
***Contest has closed; congrats to the winners!***

More than anything, I’m grateful to every reader for taking the time to meet up with me in this space over the past year. My awesome mother-in-law (Hi, Barbara!!) has sewn a couple lovely cloth market bags for me that I’d like to give away to celebrate. As there are only two, if you’d like one, please leave a comment below and let me know what projects you’re working on…or what ones you just might start any day now. If I only get two responses, well, everybody wins! Otherwise, I’ll use one of those neat random number generators. Please be sure to include an address in the email field that I can use to contact you and get your shipping address.

And now, here’s the first DIY vs Buy:

DIY Blueberry Cereal Bars

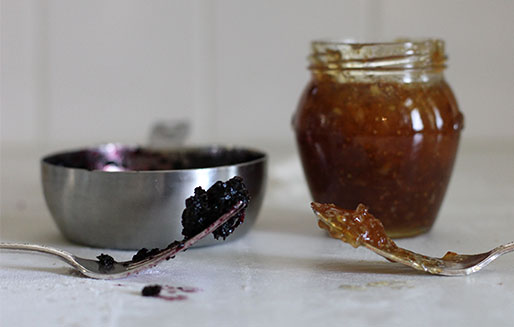
DIY Blueberry Cereal Bars: Filling

Note: If you would prefer not to make your own filling out of dried fruit, a thick fruit spread such as fig is a workable substitute. In my testing, commercial jams and preserves proved too runny when baked and would not be recommended.

makes 12 bars
1 hour active
2 1/2 hours total

For the Dough
5 ounces (1 cup) all-purpose flour
5 ounces (1 cup) whole wheat flour
1 ounces (1/4 cup) rolled oats
1/2 ounce (1/4 cup) wheat bran
2 1/2 ounces (1/3 cup packed) brown sugar
1 teaspoon baking powder
1/2 teaspoon salt
1/4 teaspoon cinnamon
4 tablespoons/1/4 cup cold unsalted butter, cubed.
2/3 cup whole milk
1 teaspoon vanilla extract

For the Filling
1 cup dried blueberries
1/2 cup water

For Assembly
1 egg white plus 1 teaspoon cold water, for wash
4 tablespoons wheat bran, for sprinkling

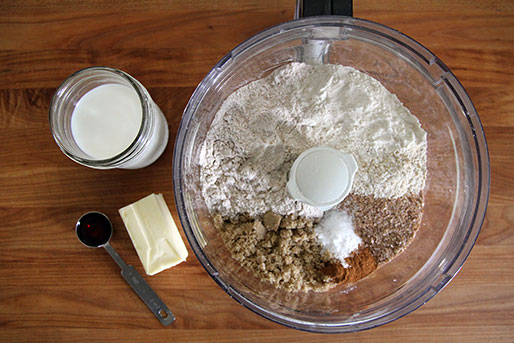
DIY Blueberry Cereal Bars: Ingredients

Measure flours, oats, wheat bran, brown sugar, baking power, salt, and cinnamon into the bowl of a food processor and pulse until ingredients are mixed and oats broken down. Add butter and pulse until pieces resembles coarse meal.

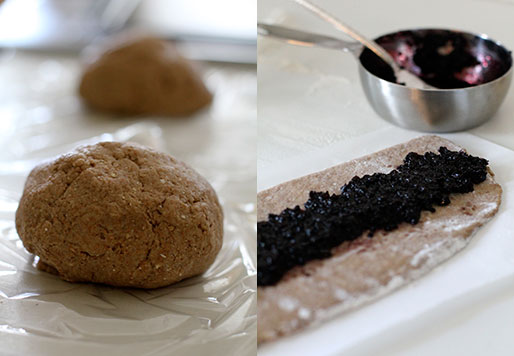
Stir vanilla into the milk and, with processor motor running, add liquids to the dry ingredients in a thin stream. Continue processing until dough comes together. Divide into two equal portions and flatten into 1/2-inch discs. Wrap each portion in plastic and refrigerate until firm enough to roll out, about two hours.

DIY Blueberry Cereal Bars: Dough

Meanwhile, make the filling. Place dried fruit and water into a small, heavy-bottomed sauce pan and bring to a boil. Reduce heat and simmer gently, covered, for 20 minutes, stirring occasionally. Transfer fruit and water to a food processor and process until broken down into a rough purée. Transfer filling to a bowl, cover, and refrigerate until needed.

When ready to assemble the bars, heat oven to 350°F with rack in the middle position.

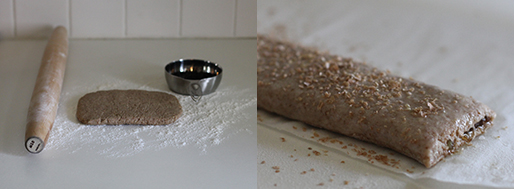
Flour rolling surface and place one portion of the dough in the center. Flour top of dough and roll into an 8×12-inch rectangle, turning regularly to prevent sticking. Cut dough in half the long way to create two 4×12-inch sheets. To aide with filling and shaping the bars, place each strip of dough on a similarly sized piece of baking parchment before proceeding. Brush any excess flour from dough surface with a dry pastry brush.

Down the 12-inch center line of each piece of dough, spread an even 1-inch strip of filling (about 2 1/2 tablespoons). Using the edge of the parchment as an aide, fold one long side of the dough over the filling, covering it slightly more than half way. Brush a light coating of the egg wash over the remaining edge and, again using the parchment to help keep things even, fold the second dough edge so that it overlaps the first by 1/4 inch. Press gently to seal and flip the bars over so that they are seam-side down. Cut each log into three 4-inch portions.

DIY Blueberry Cereal Bars: Assembly

Brush any excess flour from dough surface with a dry pastry brush. Coat each bar with a thin layer of the egg wash and sprinkle tops with wheat bran. Leave bars on parchment strips and transfer to baking sheet.

Repeat steps five through seven with remaining dough and filling. Bake bars for 16-18 minutes, until just golden. Transfer to a wire rack until cool. Store at room temperature in an air-tight container.

Summer Simple: Tomato and Cottage Cheese

tomato_side

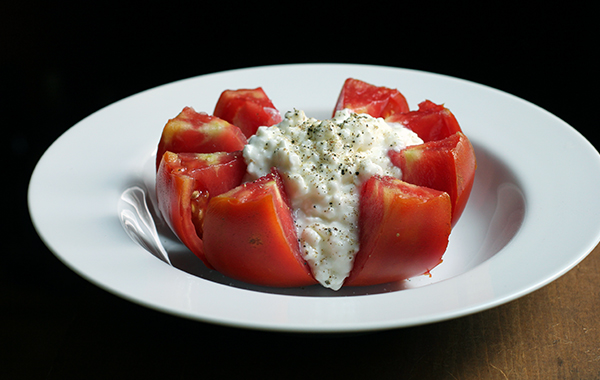
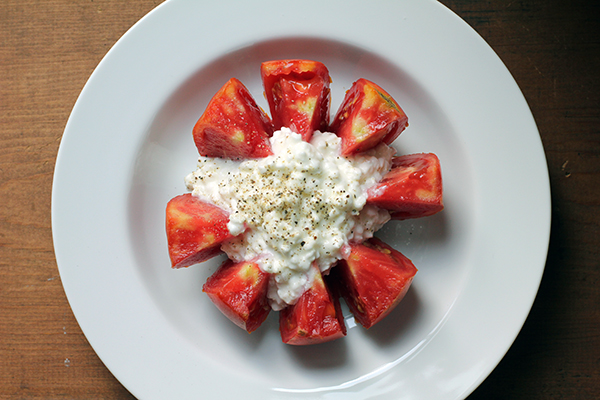
Admittedly, this is not actually a recipe, but I had completely forgotten about how much I love eating this simple summer dish. Growing up in Ohio, we had a garden overflowing with beautiful tomatoes each August, and burying them under cottage cheese often made for an easy lunch. Still, somehow the image most deeply seared onto my mind is of the ones I ate with my grandparents in the cafeteria at the Canfield Fair, line upon line of these bright red fruits stuffed and served on small paper plates, ready for the claiming. (Can you even find a fresh vegetable to eat at the fair anymore?)

Tomato with Cottage Cheese: The Cut

Tomato and Cottage Cheese

1 ripe tomato
1/2 cup cottage cheese
salt and black pepper

Core tomato and slice into wedges top to bottom without fully cutting through the fruit (leave about 1/2 inch at the bottom). Plate and nudge open wedges, sprinkling a bit of salt over top, if desired. Stuff center of tomato with cottage cheese and top with ground black pepper. A chiffonade of fresh basil or a few snips of chive would certainly not be amiss sprinkled over top of these beauties, but my family was never so fancy.

Tomato and Cottage Cheese

The Joy of (Not) Cooking: Kale Pesto

kale_over

The first days into an August that could variously be described as sticky, gritty, or just plan oppressive (same as it ever was? yes, but still), my kitchen projects are decidedly anti-cooking. In fact, I’m to the point that I will stop to consider whether bending over to lug the food processor out of its storage space is worth the effort, so you can see how things have ground to a kind of halt here in Wonderland.

Still, when your CSA haul means you have acquired not only two heads of lettuce for your nightly no-cook dinner salads but also a bunch of swiss chard and a bunch of kale–all of which needs to fit in the ‘fridge in some manner–steps must be taken.

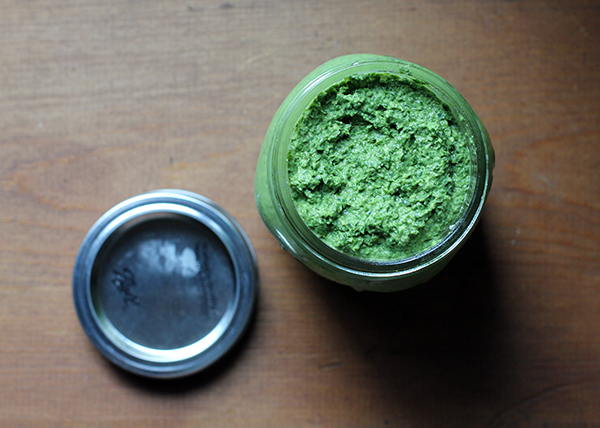
Lately, this is when kale pesto becomes very attractive. Kale may be the ultimate cliche of the super natural food blogger (seriously, click and read that), but I get exhausted just looking at it. The thought of kale chips has never inspired me to kitchen action (though I will happily eat yours!), and the idea of chewing a week’s worth of kale salads at home will force me to suggest dining out. This kale pesto, however, reduces down neatly to a pint-sized jar, ready to be smeared on pizzas and sandwiches of all kinds, to be tossed with pasta, or to serve as a dip for veggies and pita chips.

Kale Pesto

1 bunch kale, stems removed (about 6 cups–however much I have, I just pack it in)
3/4 cup walnuts (or pecans, pistachios, pine nuts, or a mix of these)
2 garlic cloves
3 T nutritional yeast
1/2 tsp. salt or to taste
juice of one lemon
1/2 cup olive oil

Place garlic cloves, nuts, nutritional yeast, and salt in the large bowl of your food processor and pulse to evenly break down nuts. Stop and pack half of the kale into the processor bowl. Drizzle the lemon juice and half of the olive oil over the kale and process until there is room enough to add the rest of the kale and remaining olive oil.

Continue processing until desired texture is achieved. Stop to scrap down the sides of the bowl as needed. Taste and add additional salt or nutritional yeast if desired. Add more oil if you need a looser consistency. I like to leave mine thick so I can spread a deep layer of it on sandwiches and then thin it in portions for use on pasta, etc.

Pack the finished pesto into a jar with a tight-fitting lid, adding a bit of additional olive oil to the top surface of the spread to prevent discoloration if you anticipate significant time between uses.