eat me » Wonderland Kitchen
Browsing Category

eat me

We’re Under Siege! (Popcorn Edition)

pop_top

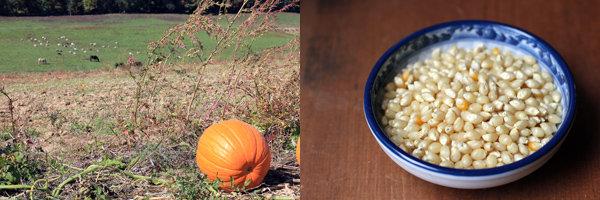
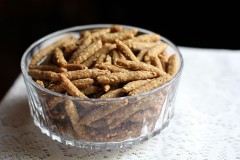
I think it was when the seventh kernel flew past my face and ricocheted off the stove top that I began to wonder if anyone was supposed to really strip down these dried cobs and actually pop this corn. I mean, they sure were cute sitting in that barrel at the pumpkin patch, and all the kids were definitely excited. But perhaps all those moms beside me knew to dispose of this old-world treat as soon as they got home. Because seriously, this was one step worse than shelling old peas.

Eventually, it either got easier or I got better at it. I worked out a system where I would clear a row up the cob and then flick out all the kernels in the row to the left with the side of my thumb. Then I’d work my way around the cob and repeat. It worked, more or less, but I’m not sure I’ll be motivated to do it again unless this turns out to be the Best. Popcorn. Ever.

Pffff. Microwave popcorn. I don’t think so. It’s way more fun to drag out the stockpot before Friday night movies knowing that you’ll have to wash a stockpot splattered in congealed oil in the cold Saturday morning light. Am I right?

So, no one probably needs a “recipe” for stovetop popcorn, though it occurs to me that I’d need instructions for using a microwave to do it, so I don’t want to be a snot either. I netted about 2/3 cup of kernels, so I poured about 4 T of cooking oil and the corn in my 8 qt. stock pot and heated over medium. I keep the lid vented just a crack and shake the kennels around every so often to avoid burning. In “a watched pot never boils” fashion, it may seem to take a while until you hear that first pop, but you should watch it and eventually things will take off. Once the percussive fun subsides, remove from heat and toss the light and airy popped kernels with seasonings of your choice.

I used to be pretty faithful to a salt/sugar mix, but this being Maryland, I was inspired to try some Old Bay seasoning and salt this time. I didn’t feel like my seasonings were sticking well and I didn’t feel like melting butter, so when I spied that can of olive oil spray on the counter, I went to town like it was a can of Aqua-Net on prom night. Problem solved. It wasn’t the best popcorn ever, but it sure was an experience–with unpopped souvenir kernels now hidden in unlikely places all over the kitchen.

Dirty Little Secret

potato_top

Considering how often those with the most vehemently expressed opinions end up being exposed for blatant hypocrisy, this may be a small matter in the grand scheme, but I am a girl with a confession. Despite my claims that processed foods are the devil, I secretly eat instant mashed potatoes when no one else is looking. I just can’t help myself!

This little habit of fast and furious carb consumption tends to come to a head when Brian is off on tour and I forget to make proper meals for myself until my body demands to be fed immediately. However, when those friendly pleas for starch started growling around the other day, I took a few minutes to look in the fridge, Google a bit, and come up with a dish that was at least marginally more well balanced before I hit the pantry. In the end, I managed to get a handful of mushrooms and that bunch of swiss chard out of the crisper drawer and into the pot as well.

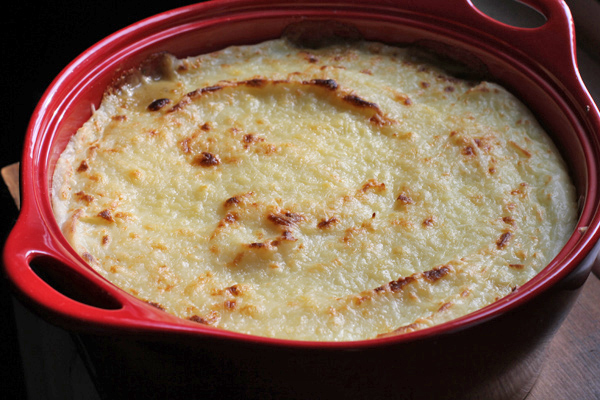
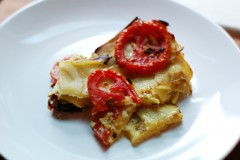
This is not an elegant or especially attractive side dish, but if it’s just you and the family on a cool fall night, it sure is a tasty one. Add a piece of smoked salmon and it is a full feast for familiars.

Layered Mashed Potato, Mushroom, and Swiss Chard Casserole
heavily(!) adapted from Eating Well

(Every single ingredient in this casserole can be included in the amount that suits your preference. In the end, you’re only baking it to heat the dish through and melt the cheese, so just make adjustments to the cooking times as needed.)

Layered Mashed Potato, Mushroom, and Swiss Chard Casserole Ingredients

6-8 cups instant mashed potatoes, prepared according to package instructions
1 large egg plus 1 large egg white, beaten

1 tablespoon extra-virgin olive oil
1 small white onion, chopped
2 cloves garlic, minced
1 pint mushrooms (I used shitaki), chopped
1 bunch swiss chard, deribbed and chopped
1 cup vegetable broth
2 tablespoons all-purpose flour
1 teaspoon thyme
Cheese of the amount and variety to suit your taste (I used about cup of a shredded Italian blend I had left over from pizza making)

Prepare mashed potatoes. Set aside.

Preheat oven to 375°F.

In a non-stick skillet, heat oil and sauté the onion until softened and translucent. Add the garlic and mushrooms, and cook until mushrooms release their juices, about 10 minutes. Add thyme and pepper to the pan.

Whisk broth and flour together and add this liquid and the swiss chard to the pan. Cover and allow greens to wilt, about five minutes, then remove lid and toss the vegetables until greens are cooked through and broth has thickened. Remove from heat. Taste for seasoning and adjust as needed, considering you will also be adding cheese (so mind the salt—I needed no salt aside from what was in the broth and cheese already).

Stir the egg/egg white mixture into the potatoes. In a 3-quart casserole dish of your choosing, place half the potatoes, topped by half the cheese and then all of the sautéed vegetables. Continue with the remaining potatoes and top with cheese.

Bake in the oven for 20 minutes, and then switch to broil and brown the top. Watch carefully as the cheese can shift from browned to burned quickly if not well monitored.

I can’t say this is a health food, but at least I get an automatic serving of greens every time I cave and eat more of the leftovers!

Power Up: Oatmeal with Egg Whites

oatmeal_top

My husband is a committed cyclist, and as he’s gotten more serious about his training, he’s taken additional care with his diet. This means, in part, that my full fat cooking is not always on the menu, so we have developed new ways to team cook and eat together, even when we are not eating the exact same thing. Bonding! In this guest post, he gives us a glimpse of a multi-layered dish that is sometimes second breakfast.—MS

In many cultures, food plays a central role in the social fabric. A meal is not simply a compulsory routine occurring at regular intervals throughout the day, it is a community ritual, an exercise in hierarchies, a time to forge and strengthen relationships. If you find yourself a guest in a culture with such inclinations, a willing interloper eager to partake in a nonnative feast, the stakes at the dinner table are high. Out of respect, you take care to polish your plate, which leads your host to presume you are incredibly hungry—or perhaps just a gluttonous American—and would fancy another serving immediately. To refuse an offering of seconds or thirds, even if you’ve not telegraphed an interest in more, is perceived as a wanton insult. Similarly, not finishing a portion of your meal or the extra helpings you may have unwillingly received will also be met with scorn. I’m not sure which is the greater faux pas. It’s a classic Catch-22.

Cyclists also tend to have a close relationship with food. We need it for strength. We need it to train hard and finish strong. We need it for recovery, to nourish and replenish our sacred glycogen stores. For some, food serves as a reward. I’ve done X amount of work and burned Y amount of kilojoules, so I’m entitled to Z. For others, it serves as fuel. When you eat to fuel your body, the act of eating takes on a quality that approaches the sublime. You begin to savor every bite, exploring the bouquet of tastes, textures, and sensations as they cross your palette. To devour a meal quickly would somehow be the ultimate gesture of disrespect to the sustenance you have labored to create and consume.

As an illustration of the idea that simple can be divine, I submit one of my favorite meals. On the surface it may appear fairly basic, however careful examination reveals a complex and rewarding combination of flavors. Kattouf calls it “Power Oatmeal.” I call it heaven.

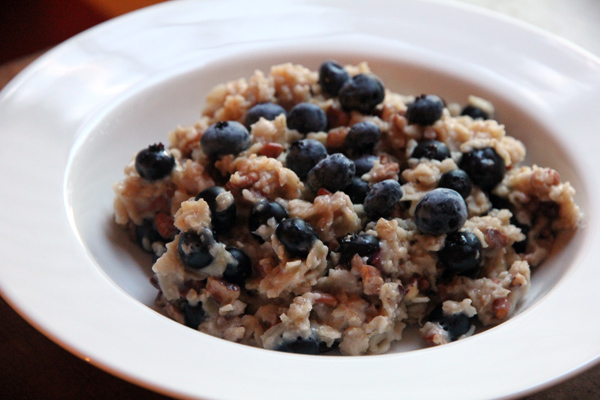
Correct me if I’m wrong, but there’s just something comforting about the texture and warmth of freshly cooked oatmeal. And if it happens to be a slightly chilly morning, one that requires slippers, the steam rising off the oatmeal adds an additional layer of nostalgia. Nestled within the oatmeal’s warm embrace you find the tartness of the blueberries balanced perfectly with the crunchy, earthy sweetness of the pecans. And though their numbers are small, the raisins provide an exciting element of surprise, strategically placed sugar-filled land mines on the bowl’s battlefield that explode on your tongue.

There is another important, but not quite as sexy, element to this meal, namely about a half a cup of protein in the form of egg whites. Rather than push the boundaries of taste by romanticizing this somewhat tasteless–albeit necessary–component, let’s just be content saying that a dash of Tabasco kicks it up a notch. A small notch, but a notch nonetheless.

Power Oatmeal with Egg Whites

1 cup water
1/2 cup oatmeal
1/2 cup blueberries
1/4 cup chopped pecans
2 tsp raisins

1/2 cup egg whites
Tabasco sauce (or similar) and pepper to taste

There’s absolutely nothing fancy or involved about making this recipe, but the return on investment is palpable. Bring 1 cup of water to boil, stir in the oatmeal and let is simmer on low heat. As the oatmeal simmers, cook your egg whites. I like to fold them into a crepe-like formation. When the oatmeal is finished, stir in the blueberries, pecans, and raisins. Add some Tabasco and pepper to the egg whites to give them some flavor and you’re ready to roll. (N.B. This is 477 calorie version of this recipe. For consumption on rest days, reduce the oatmeal to 1/4 cup, the pecans to 1/8 cup, and the the raisins to 1 tsp.)

Hey Honey, It’s Your Birthday*

cake_top2

In embarrassing Libra fashion, I must have changed my mind w/r/t the type of cake I wanted to make for the now annual Libra birthday party at least five times. Last year’s entry was a hit, so I was feeling the follow-up pressure, it’s true. But more than that, there’s also finally a full-on fall chill in the air, so I wanted something more rich and comforting than sharply sugary.

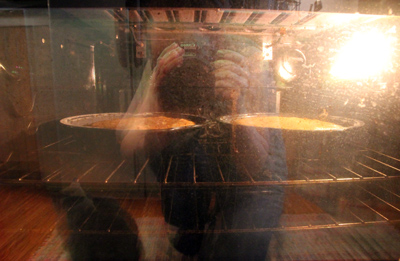
Kitten and I wait for the cake to bake. Which one will it be?

Still, the options were myriad. First, there was the red wine and chocolate idea, then the bundt cake thought, a browse or two through the photos on Tastespotting, a passing fancy with Baked’s White Out cake (which I thought might compliment Rebecca’s trial of the salty chocolate and caramel one) but just reading about the icing made my teeth hurt. Whether deemed too sweet or not fancy enough for a celebration, nothing felt like it would fit comfortably in with a casual evening house party in October.

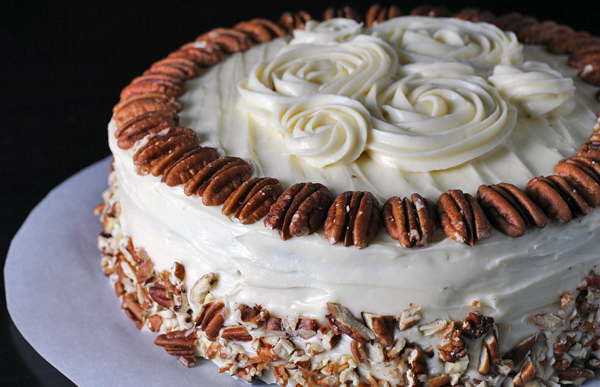
Then I remembered that cream cheese and maple syrup frosting, and landed pretty quickly on this pumpkin cake. Seems the David Leite recipe has already done a do-se-do or two around the internet, but it’s definitely worth another dance.

*For all those who grew up with Captain Zoom’s birthday message from the moon, a nostalgia ride can be found here.

Pumpkin Cake with Maple Cream Cheese Frosting
as seen on Leite’s Culinaria

To make the cake

1 stick unsalted butter, at room temperature, plus more for the pans
1 cup firmly packed dark-brown sugar
1/3 cup granulated sugar
2 cups cake flour, plus more for the pans
2 teaspoons baking powder
1 teaspoon baking soda
1 teaspoon ground cinnamon
1 teaspoon ground ginger
1/2 teaspoon ground nutmeg
1/8 teaspoon ground cloves
1/2 teaspoon salt
1/4 teaspoon freshly ground black pepper
2 large eggs
1/2 cup buttermilk mixed with 1 teaspoon vanilla
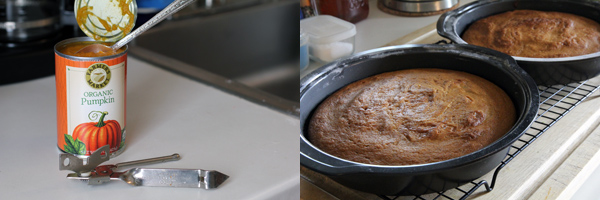
1 1/4 cups canned solid-pack pumpkin

Bring butter and eggs up to room temperature.

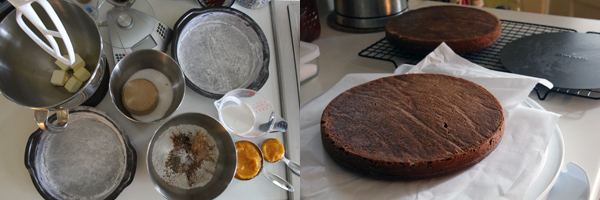
Preheat the oven to 350°. You’ll need two cake pans (8-inch if you have them, but 9-inch won’t ruin your cake). Butter each pan, line the base with parchment paper, butter that surface, and flour the entire interior of both pans.

Measure out the sugars into one bowl, and the remaining dry ingredients into another. Run a whisk around each bowl to evenly incorporate.

Beat the butter and sugars together on medium speed until fluffy.

Add the eggs, one at a time, scraping down the sides (and bottom! I had some sugar that got stuck there) of the mixing bowl after each addition. Alternate adding the flour and milk mixtures, beginning and ending with the flour. Beat in the pumpkin until smooth. Divide the batter equally between the pans.

Bake the cakes until a toothpick inserted into the center comes out clean, about 30 minutes. Cool the cakes on racks in the pans for 10 minutes, then remove, peel off parchment, and allow to cool completely.

To make the frosting

16 ounces cream cheese, softened
1 stick unsalted butter, at room temperature
2 cups confectioners’ sugar
1/4 cup pure maple syrup

Pecans, toasted and roughly chopped, to garnish

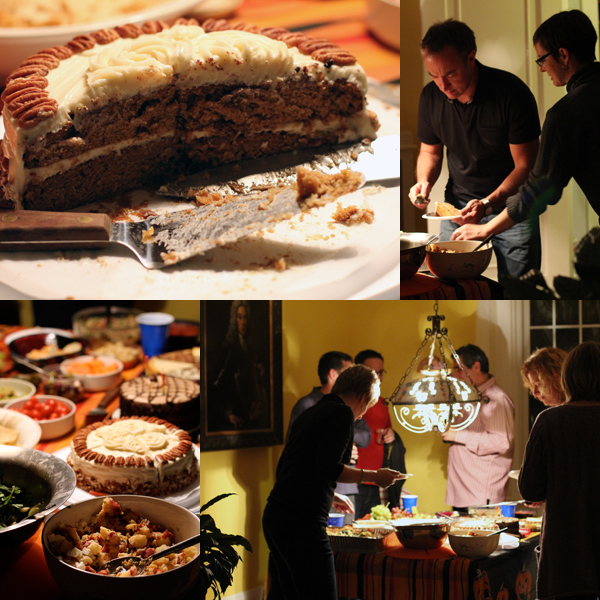
Beat all the ingredients (minus the pecans) on medium until fluffy. Place bottom layer of cake on serving plate or stand, frost the top, and place the remaining cake on top. Continue frosting the sides and top, garnish with nuts and remaining icing (rosettes are actually really easy to do), and refrigerate the cake for 30 minutes to allow the frosting to set.

Enjoy!

Making the Connections

pasta_top

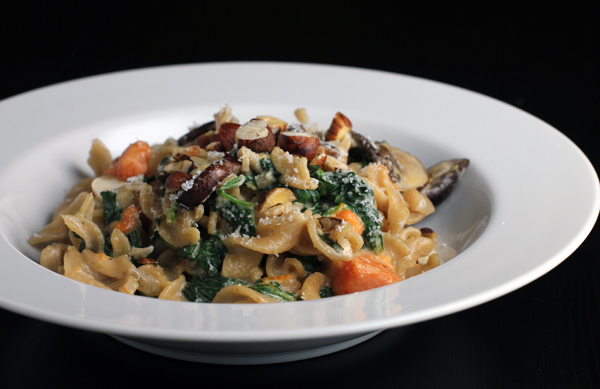
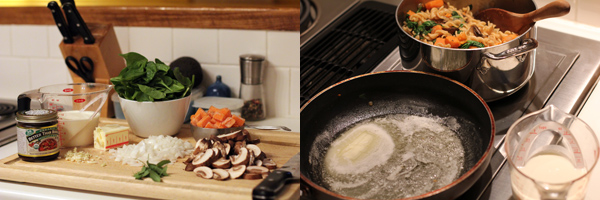
I opened the refrigerator in search of dinner last night and was confronted by leftover portions of ingredients that seemed anxious to be combined together into one epic dish. Seasonal produce conveniently seems to work that way, doesn’t it? As I pulled various items out onto the counter–half an onion, some mushrooms, half a box of spinach–a dish started to materialize in my mind. The freezer coughed up half a bag of frozen sweet potato cubes and the pantry matched that with half a pound of whole wheat pasta. I was itching to stir.

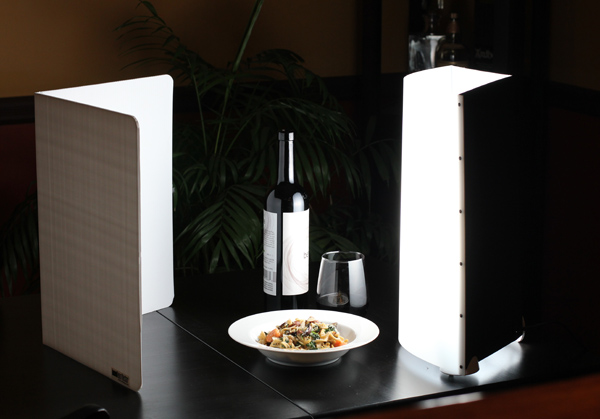
I should pause here to point out that while I’m no slave to a recipe or a measuring spoon, when I try to cook completely without a net, well, result may vary. But I was feeling bold, plus I was home alone, so I just kept crashing forward. The cat looked worried, but I figured I could cook the various pieces and then pull the dish together with a little cream and butter. In the end, I was mostly hoping it looked good enough for me to plate it and try out my new photo lighting system.

Though I was nagged by the thought that this impulse I was following was completely ignoring some essential thing that I would only realize once the meal was prepared and I tried to actually eat it, no drama ensued. I just ended up with a nice autumn pasta dish that effectively consumed all my leftovers into something classy. Mission accomplished.

Considering how the dish was made, there are obviously no hard and fast ingredients or proportions. However, this was my approach:

Autumn Pasta with Mushrooms, Sweet Potatoes, and Greens

1 T olive oil
1/2 cup chopped white onion
2 garlic cloves, minced
1 pint cremini mushrooms, sliced
1 cup frozen sweet potato cubes
4 cups spinach or leafy greens of your choice
1/2 cup vegetable broth

1/2 lb. whole wheat pasta

4 T butter
1 cup heavy cream
2 tsp chopped sage
1/4 cup parmesan cheese, freshly grated
salt and pepper to taste

Heat olive oil over medium heat and sauté onion until softened and translucent. Add garlic and mushrooms and continue cooking until mushrooms release their juices. Add sweet potatoes, greens, and broth to the pan and, without stirring, place lid over top and allow vegetables to steam for six minutes. At this point, the greens should have begun to wilt and the potatoes to soften. Toss the vegetables and continue cooking until potatoes are tender.

Meanwhile, in a large pot, cook pasta according to package directions. When complete, drain and return to pot, adding the cooked vegetables and any cooking liquid in the pan. Stir to prevent pasta from sticking together.

In your (now empty) saute pan, melt the butter and add the sage, cooking for a minute or two. Add the cream and cheese and stir until melted and heated through. Return pasta and vegetables to the pan and toss to coat with the sauce and rewarm the pasta. Season with salt and pepper to taste as needed. Garnish with a few chopped nuts (I had a few toasted hazelnuts on hand–leftover, of course) and enjoy.

A Peck of Pickled Peppers

pickle_top

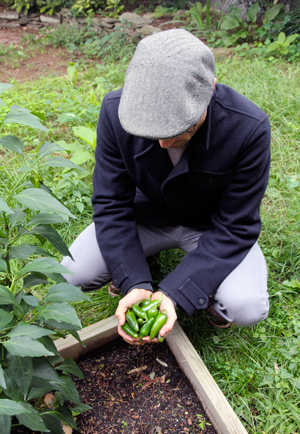
Okay, not a peck, just a jar. Still, when Brian stripped down our one and only jalapeño plant and laid out all those bright green peppers on the kitchen counter, I was a little stumped. I had flashbacks to when my dad would proudly arrive in the kitchen carrying four or five baseball bat-sized zucchinis that had been hiding in our backyard garden. My mother would take one look at him and his harvest and order them all back outside. She wanted nothing to do with any of it. When Brian said he was looking forward to seeing what I was going to do with so many jalapeños, I was tempted to follow her example.

These peppers had been on the hot side of their variety (at least when compared with the half-rotting ones I tend to find in grocery stores), which was lovely when the harvest was coming in only a few at a time. This end-of-the-season bumper crop, however, was a little harder to wrap my mind around. We were just on our way out of town, so I pushed them all into a bag and hid them in the crisper drawer–a hot problem for another day.

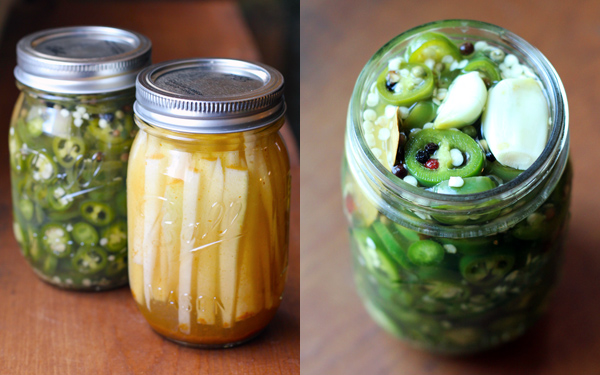
Back home after a week on the road, the peppers demanded my attention. Preservation seemed the name of the game at this point, but frozen peppers never seem to work out for me (their texture is ruined by the freezing process, and I tend to forget to use them in situations where that might not matter). Having just finished the last of six jars of pickled green beans, however, this seemed a method our family was capable of putting to good use.

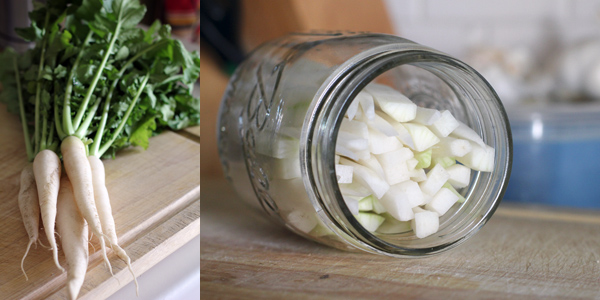
In addition, this week’s new-to-my-kitchen vegetable is the daikon. One of my favorite Waverly farmers was selling off bunches of them for a buck, so it seemed I had little to lose on the investment. Raw salads and slaws being low on my list as we cruise into the cooler fall temperatures, I decided pickling these was a good storage plan as well.

Pickled Jalapeño Peppers
from The Purple Foodie

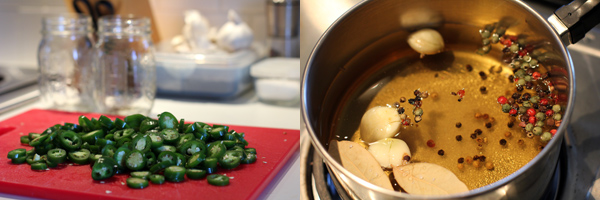
330 g sliced jalapeños (I was a little shy on this weight once I’d sorted out a few bad specimens, so I just sliced and filled a sterilized pint jar and called it enough snacking heat for the household)
1 cup apple cider vinegar
1 cup water
1 T peppercorns
2 bay leaves
3 cloves of garlic, lightly crushed
2 T kosher salt
1 T sugar

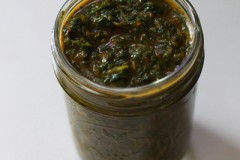
Wash and slice the jalapeños–carefully. Wear gloves and mind what you touch. I have had pepper-burned hands and do not recommend it (though if you do find yourself injured, pushing your fingers into some yogurt seems to help). Pack the pile of peppers (sorry, couldn’t help myself) into a sterilized jar or jars, as best suits your needs.

The Purple Foodie passes on a pickling tip in her recipe that she learned from Michael Ruhlman’s blog for determining how much liquid you’ll need in advance: once you pack the vegetables into the jar, cover with water. Pour it back off into a measuring cup. Discard half the water and replace the missing volume with your chosen vinegar for a perfectly measured 50/50 mix.

Once you have determined the amount of liquid you will need, add that and the remaining ingredients to a pan and simmer for 5 minutes. Pour this mixture back over the peppers, screw on the lids, and refrigerate for a few days (or as long as you can wait). This batch should keep a couple of months.

Pickled Daikon
variation on the Momofuku Vinegar Pickle base recipe

There are many cooks on the internet who are preparing a carrot/daikon pickle for banh mi sandwiches. That wasn’t really what I was after, so I decided to start with a basic rice wine pickle recipe and add my own spices.

1 bunch daikon, washed, peeled, and cut into thin sticks to fit your jar (I used a pint, and these proportions worked well.)
1 cup boiling water
1/2 cup rice wine vinegar
3 T sugar
1 T kosher salt
1 tsp. vindaloo seasoning or spices of your choice

Pack the prepared daikon sticks into a sterilized pint jar. Combine the remaining ingredients and pour this mixture over the daikon, screw on the lid, and let sit in the refrigerator for a few days before using.