diy » Wonderland Kitchen
Browsing Category

diy

DIY Oyster Crackers In Your Soup

crackers_top

When I was a kid, the retired couple next door took on the role of surrogate grandparents/babysitters. Their kitchen was where I learned to make a pie crust, their garden was where I saw my first swiss chard in the wild, and their family room was where I caught up on every Matlock and Murder She Wrote episode ever produced. In my memories, there were always great snacks on offer at their house, but even more than the just-baked elderberry pie and sugar cookies, I remember the evenings we spent with a big bag of oyster crackers and a tub of butter. Yes, buttered crackers were what most impressed my seven-year-old self, and I still think back to those cozy, murder-mystery evenings whenever I see a bag.

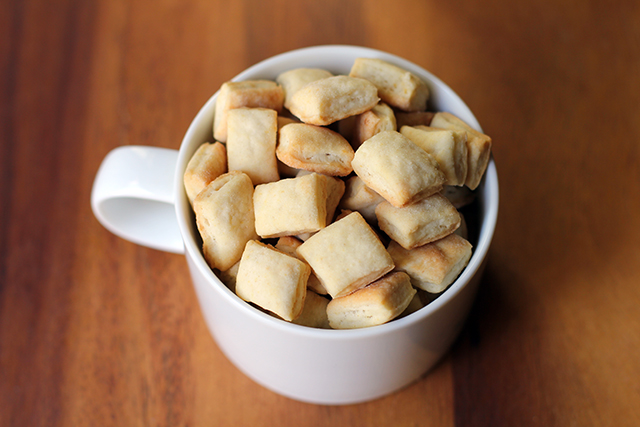
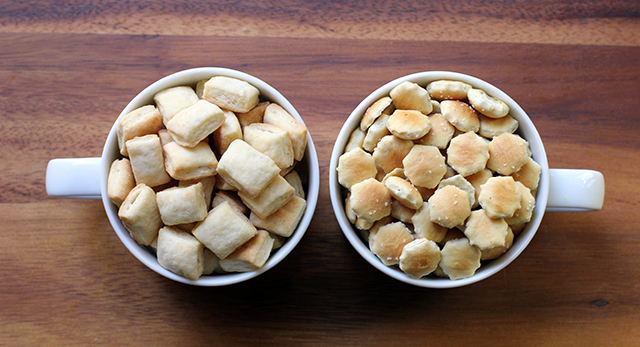
Whenever I actually taste the crackers in those bags these days, however, I wonder if it’s my palette or their production values that have shifted. I don’t remember them giving off the impression of…tissue paper quite so much, dissolving on the tongue like a communion wafer. So this version of the iconic cracker is just a little bit more solid, a little richer, a little butterier–it will stand up to but not overpower your soup.

Now, I know what I said about DIY projects and getting the perfect shape, but I think those sesame sticks taught me an important lesson. While there may be cooks out there who can produce a bag’s worth of perfectly shaped and smiling goldfish crackers, I now know that I am not one of them. So while I understand that oyster crackers are often hexagon-shaped, after considering how to produce so many small bites with some degree of efficiency, I decided that rectangles were cute enough. (Approximate) uniformity would be the key to my cracker geometry. Once they poofed up in the oven, I didn’t miss those stop signs of carbohydrate one bit.

DIY Oyster Crackers: The comparison

This is a no-stress side project that could easily be done while your soup is simmering. That said, it gets flour all over the counter and you have to cut dough into small pieces, possibly negating the laid-back, one-pot cooking that is often what makes soup so attractive (to me, at least). As far as economic comparison, I bought a 12-ounce bag for a dollar, so I’m not even going to try and talk cost savings. Ingredient-wise, this homemade version swaps in butter for the palm, canola, and soybean oils in my grocery’s house brand. Beyond that, however, rather than coat the surface of the crackers with an envelope of salad dressing mix, this is an excellent opportunity to make your own signature flavor with seasonings such as dried herbs or black pepper mixed right into the dough. Being a Baltimorean now, I added a teaspoon of Old Bay, and the spike of flavor and heat it brought to crackers seemed to be an especially appropriate pairing with the falling temperatures.

DIY Oyster Crackers
makes about 2 cups

5 ounces (1 cup) AP flour
1 teaspoon kosher salt
1 teaspoon sugar
1 teaspoon baking powder
1 teaspoon (or to taste) Old Bay or seasoning of your choice (optional)
2 tablespoons cold unsalted butter, cubed
1/3 cup cold water, additional as needed

Measure dry ingredients into a mixing bowl and whisk to combine. Next, using a pastry cutter, work butter into the dry ingredients. Finally, add the water and lightly knead the dough just until all ingredients are incorporated. Add additional water by the tablespoon, if needed.

Form dough into a ball, set it on a lightly floured rolling surface, and cover with the overturned mixing bowl. Allow to rest for 15 minutes. Heat oven to 375°F.

When rest is complete, roll dough out on a well floured surface until about 1/8-inch thick. Cut dough into squares or rectangles (or circles, if you’re really willing to put some time into it) that are about 1/2-inch wide. Transfer to a parchment-lined baking sheet and space the shapes out as much as possible.

Bake for about 15 minutes, until crackers are showing color around the bottom edges. Turn oven off and crack the door open about eight inches. Leave crackers inside to cool and continue to crisp, about 30 minutes.

*

This recipe was created for my “DIY vs. Buy” column on Serious Eats.

Choosy Moms Choose DIY (Peanut Butter Edition)

pb_top

Why don’t you just buy it?

Many DIY kitchen projects elicit this reaction, especially once the labor investment is revealed. Even if making your own means the removal of various chemicals, colorings, and preservatives, if it takes you five hours to crack out a bag of perfectly shaped and smiling goldfish crackers, is this a practical application of your time?

There are plenty of DIY projects that aren’t quite so involved, of course. Mayo. Salad dressing. Nut butters also fall into this category, the “recipe” being little more than “put ingredients in food processor and turn on.” Disappointed? I thought not. Even so, you may still be wondering: With so many peanut butter options already fighting for space on grocery store shelves, does it even matter if it takes 15 minutes rather than 15 hours to produce? Why…don’t you just buy it? I’m glad you asked.

Safety: The main reason I even thought to post about DIY-ing your own nut butters was due to the recall of yet another batch of contaminated peanut butter. I put so many more complicated condiments in jars here in Wonderland, it seemed silly not to add this no-brainer to the list.

Control: Peanut butter is one thing, but what about Cashew Almond Butter, or Hazelnut Cocoa Butter? When you DIY, you control type, quality, and quantity of the nuts and oils that go into each and every jar. Salt and sweeteners can be added to suit your tastes and nutrition goals, as well. Now things really start to get interesting.

Cost: When I did the math for Serious Eats, the supplies I was using didn’t dramatically result in cost savings until (perversely) the price comparison climbed into the really pure, “the only thing in that jar is peanuts” kind of $5.99, oil on top spread. To get a pure product and not have to try and figure out how to get the oil reincorporated is worth the homemade time investment as far as I’m concerned, though I did get some colorful tips on how to mix things up.

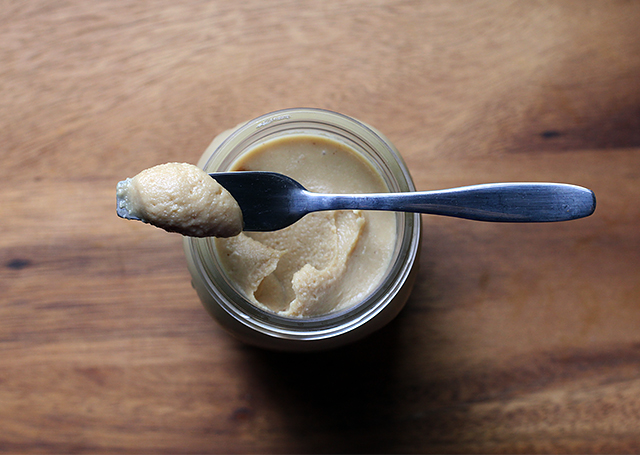
While considering what type of oil to include in my own DIY version, I wanted to find something that wouldn’t come with environmental concerns and yet still produced an excellent taste and texture. In my experience, using a small amount of coconut oil and then immediately transferring the finished product to the refrigerator results in a butter that holds together without getting oily on top or dry on the bottom before I use it up. I like its texture as well, because it spreads smoothly when totally cold, but isn’t runny on the knife.

DIY Simple Peanut Butter

16 ounces roasted unsalted peanuts
1 tablespoon coconut oil (be sure to use refined oil if a hint of coconut flavor would bother you)
1/2 teaspoon salt or to taste
Honey, agave, or other sweetener to taste (optional)

Place nuts, oil, salt, and sweetener (if using) in the bowl of food processor. Process until nuts break down, stopping occasionally to scrape the sides of the bowl as needed. My food processor likes to fling all the nuts to the sides of the bowl and out of reach of the blades, so I have to invest more time than I’d like scraping them back off until things get going. Using enough nuts to mostly fill up the processor bowl helps alleviate this issue.

DIY Peanut Butter: Processing

Continue to process until peanut butter reaches desired smoothness. Taste and adjust salt and sweetener as needed.

Due to the heat of the processing, the butter should pour easily into a clean container but will achieve a firm yet creamy consistency after chilling. Cover with a tight-fitting lid and store in the refrigerator to prevent separation. (I like Mason jars for this, of course, and am really loving the plastic storage lids)

*

This recipe was created for my “DIY vs. Buy” column on Serious Eats.
Real Deal: DIY Sesame Sticks

ss_top

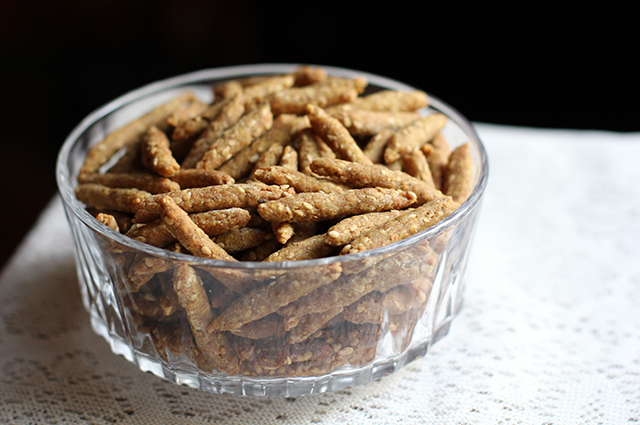
No trip to the bulk bin area of the supermarket is ever quite complete to me without bagging a few scoops out of the sesame stick container. After so much barley and millet and quinoa has been piled up in my cart, something a little fun and snappy just seems to be in order. I had never even considered making them for myself at home as a result–the whole point of the exercise was that it was a treat–but they seemed like a simple enough thing to whip up in the kitchen once I started to think about it.

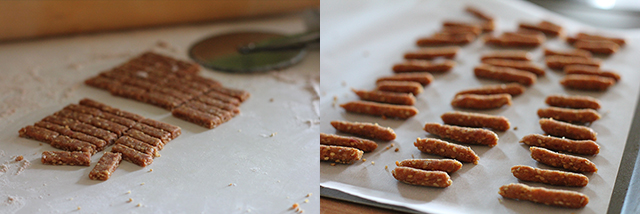
And, at the end of the day, they can be more or less a one-bowl-and-stir creation. The shaping is where I got hung up. At first, I thought I could get a dough that would just flow out of the wide nozzle of a pastry gun, but that was a fool’s game. A rolled out and neatly sliced dough was quite tasty when baked up, but the straight-edged rectangles visually said “cracker” to me more than “fun snack!” They just weren’t the little snakes of sesame that my brain recognized and loved. So I picked up a piece of the raw cut dough, rolled it quickly just three times between my palms, and there is was. By the time I had a whole sheet, however, I wondered how much I really cared about the shape. What was so wrong with rectangles, my back protested. So shape them however your tastes demand. Uniformity for even baking is the important thing.

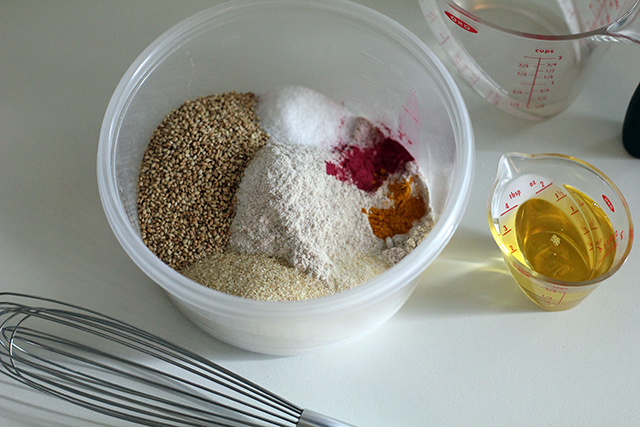
Sesame Sticks: Ingredients

DIY Sesame Sticks
makes about 3 cups

1 cup (5 ounces) whole wheat flour
1/2 cup (2 ounces) toasted sesame seeds
1/4 cup (1 1/2 ounces) cup fine cracked wheat
1/4 teaspoon turmeric
1/4 teaspoon beet root powder
1 teaspoon garlic powder or to taste
1 teaspoon kosher salt or to taste
4 tablespoons vegetable oil
6 tablespoons water

Combine flour, sesame seeds, cracked wheat, turmeric, beet powder, garlic powder, and salt in a medium bowl and whisk thoroughly to combine. In a small bowl, combine water and oil. Stir wet ingredients into dry ingredients. Combine thoroughly, kneading any remaining bits into the dough by hand.

Divide dough in half and wrap each in plastic, flattening into inch-thick squares. Refrigerate for 30 minutes to allow dough to firm up before rolling.

Once dough has chilled, heat oven to 350°F. On a lightly floured surface, roll out dough to 1/8-inch thickness and, using a knife or pizza wheel, cut into small rectangles (approximately 1/4-inch by 3/4-inch). Alternately, roll and cut dough to your desired shape. Uniformity is more important than size to assure even baking.

Sesame Sticks: Shaping

Leave the pieces as they are or roll each one quickly between your palms to form thin rods. Place on parchment-lined baking sheet.

Bake for ten minutes, then flip or roll the pieces around on the sheet so that the bottoms don’t brown. Continue baking 5-8 minutes more, until sticks are crisp but not browning. Remove from oven and cool completely. Store in an airtight container.

*

This recipe was created for my “DIY vs. Buy” column on Serious Eats.
DIY Garlic Powder (No Vampires Edition)

garlocpowder_featured

It was when I last went looking for our shaker of garlic powder that I was finally motivated to clean out the pantry. After rummaging around for a bit, I discovered it well-hidden in obscurity at the very back of the shelf, its label dusty and faded, its contents distressingly clumpy. Truth be told, that garlic powder had been in my husband’s life longer than I had. Tossing it into the waste bin, I had more fear that its sudden absence would inspire vampire infestation than that I’d miss it in the kitchen. Which is to say, I did not expect my life to change one bit.

Clearly, garlic powder is not a spice rack item I think much about. However, though it’s a seasoning that inspires an eyebrow-raising level of animosity in some quarters, I don’t have any snobbery about using it. I had just kind of forgotten about it. It had slipped out of my life along with those batches of Chex Mix and slices of garlic bread toasted under the broiler that had flavored my childhood.

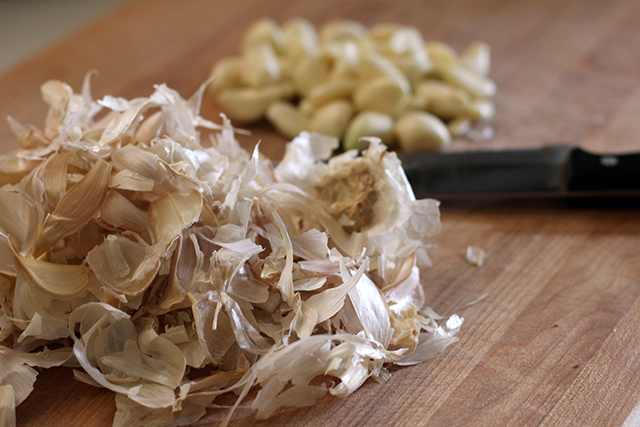
DIY Garlic Powder: peelings

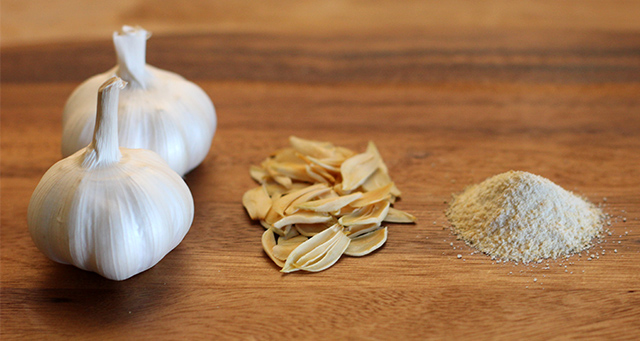
Having just discovered the “dehydrate” setting on my oven, I figured why not try making a batch of my own? I did the math for this week’s Serious Eats column, but if you don’t care much about that part, know that in the end I had a small jar of powerfully attractive powder. It’ll be much easier to remember to use this stuff.

DIY Garlic Powder

This process also works for onions, and I took the opportunity to do a tray of each simultaneously without damaging the flavor of either. Out of one 13-ounce white onion (chopped fine), I was able to produce 1/2 cup of dried flakes, which reduced to 3 tablespoons of onion powder. It’s a very small amount, but it has a very sweet taste–like a fried onion ring.

Be prepared for your house to fill with the strong scent of garlic during the dehydration period.

2 garlic bulbs (about 5 oz.), cloves separated and peeled

DIY Garlic Powder: drying

Slice garlic very thinly and spread out in a single layer on a dehydrator tray. Alternatively, you can use drying racks or a parchment-lined baking sheet in your oven (convention setting if you have one) with the door cracked open (I found that an old wine cork works well for this purpose).

Dehydrate at 130°F, stirring and turning slices every few hours until garlic is fully dry. When dehydration is complete, the garlic chips will snap in half rather than bend. This could take nine or more hours, depending on the thickness of your slices and the vagaries of your appliance.

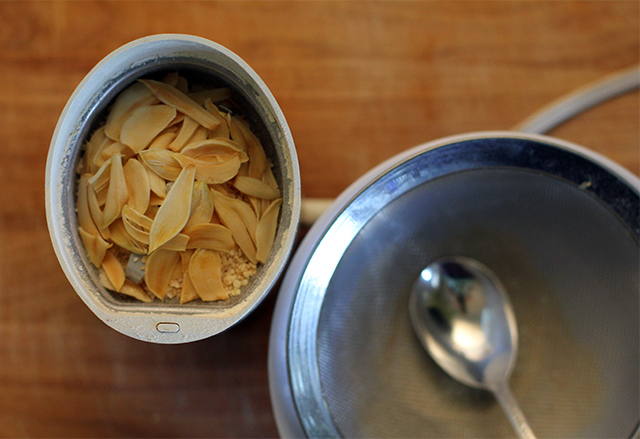
DIY Garlic Powder: grinding

Allow garlic to cool completely and then grind to desired consistency (I use a coffee grinder that I reserve for spices). If you want to make sure that the powder is fairly even and fine, pass the ground garlic through a mesh strainer, catching the larger bits for a second pass through the grinder. Store finished powder in an airtight container in a cool, dark place. Makes approximately 2 oz.

Real Deal: DIY Greek Yogurt

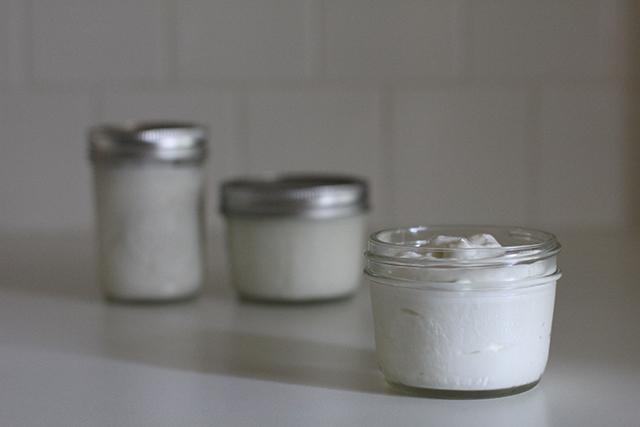
greek-yogurt-finished-two

I am not generally a “doing the math” kind of person. As a result, I end up economizing in weird ways. I’ll stand in a grocery store aisle agonizing over the cost/benefit of something based on price and ingredients and brand, maybe saving a dollar here with a bulk buy or spending a dollar there to get the organic option. Later that night, however, I won’t think twice about going out to dinner with my husband, making the utility of the entire exercise somewhat questionable.

When it comes to the Greek yogurt consumed in our house, however, I finally did all the math for my latest Serious Eats column, a process which left me convinced I no longer knew how to divide. I was shocked by what kind of savings I might manage in a given year if we could get off the little cups with the parchment paper tops and start making it all at home. But I was going to need a much more streamlined process than my yogurt-making appliance filled with little glass jars would allow, so the research began.

Producing yogurt at home may not be quite as simple as making ice cubes, but it’s not much more complicated than measuring liquid into containers and letting it reach or hold certain temperatures. Ultimately, if you can stir and read a thermometer, you have all the skill needed to culture your own. The process takes a lot of hands off time, however, so if you’re more accustomed to the immediate gratification of cookie baking, this may take some getting used to.

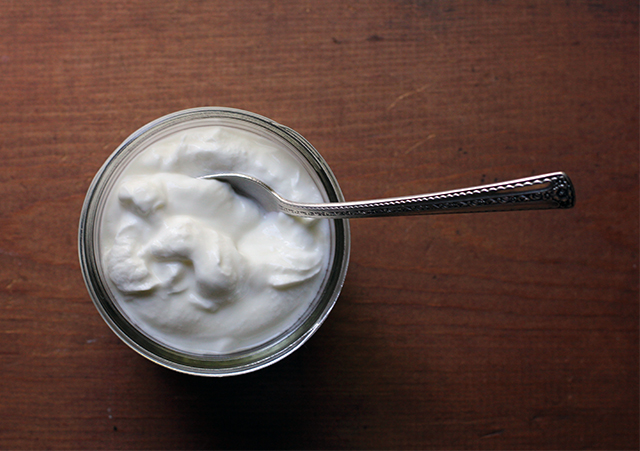
DIY Greek Yogurt: strained and portioned

A few things to consider before you begin:

  • Both the milk and the starter you select will impact the taste and consistency of the final product, and you will likely need to experiment some before you hit on your ideal ingredients. If you’re using fresh yogurt as your starter rather than freeze-dried, be sure to use a plain variety that contains live and active cultures.
  • There is more than one way to incubate at 110°F—from a simple thermos to a special appliance specific to yogurt making. I found the method below (which I first learned about here) to be both simple and consistent, but you may want to experiment and use the process you find most efficient.
  • A useful trick I picked up from Alana Chernila’s The Homemade Pantry is to incubate a small portion of the milk and starter mixture in a 1/2-pint jar alongside the two filled quart jars. Reserve this smaller portion to culture your next batch of yogurt. If using the small cooler method outlined below, you can keep this smaller jar above the water line by setting it on top of a narrow, empty 1/2-pint jar.

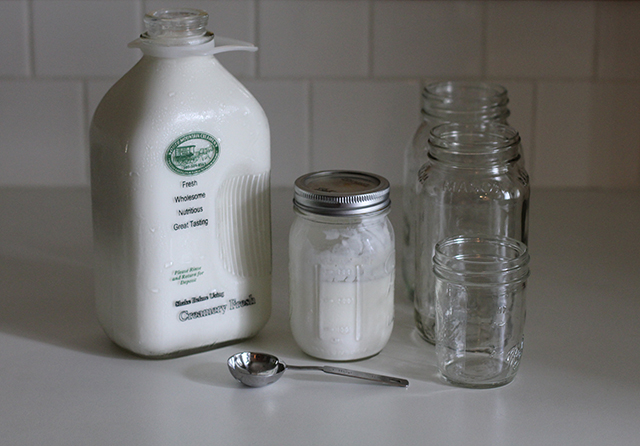
DIY Greek Yogurt: ingredients

DIY Greek Yogurt
8 cups milk
4 tablespoons plain yogurt with live and active cultures or freeze-dried yogurt starter

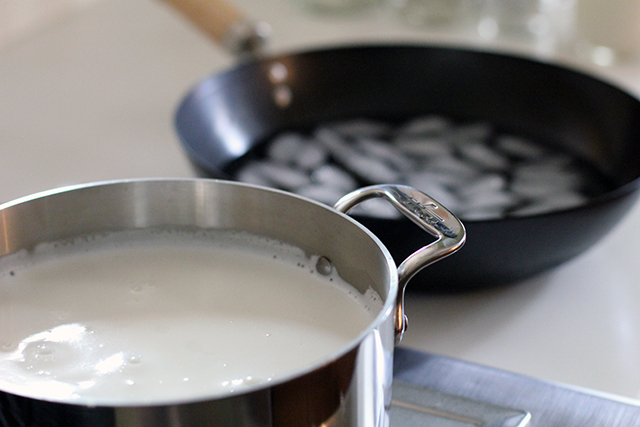
DIY Greek Yogurt: hot and cold

In a heavy-bottomed pot over medium heat, bring milk to 180°F, stirring regularly to prevent scorching.

Once milk has reached temperature, allow it to cool to 110°F (place pot in an ice bath to speed cooling, if desired). When milk has cooled, add yogurt to the pot and whisk thoroughly to combine.

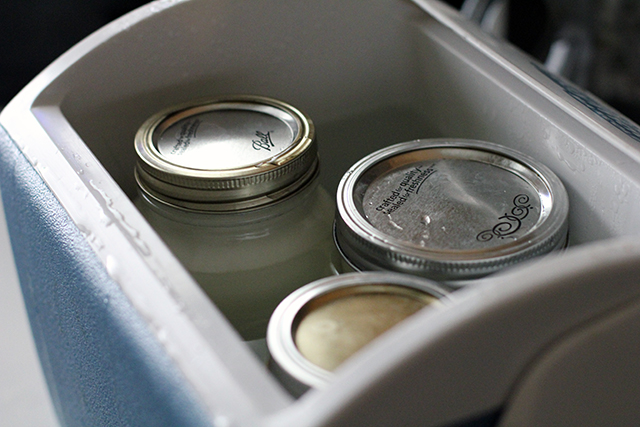
DIY Greek Yogurt: incubation

Pour milk and starter mixture into two quart-sized jars (and smaller 1/2-pint, if using) and screw on lids. Place them in a small insulated cooler and fill with 120°F water until jars are submerged nearly up to their lids. Close cooler and leave in a draft-free, undisturbed place for six hours or until desired tartness is achieved.

When incubation is complete, remove jars from water bath and place in refrigerator for at least six hours to halt culturing and set yogurt.

DIY Greek Yogurt: straining

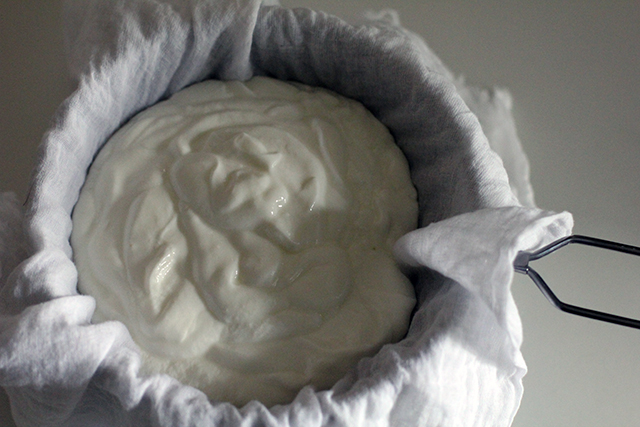
At this point, yogurt may be eaten, but to achieve a Greek-style consistency, it will need to be strained. Place a fine mesh strainer over a bowl and line it with two layers of cheese cloth. Spoon yogurt into lined strainer and allow to drain for two hours or until desired thickness is achieved.

Transfer yogurt to a storage container and refrigerate until needed. Remaining leftover whey (approximately two cups) may be reserved for another use if desired.

New Adventures in Wonderland & Hacking Blueberry Cereal Bars

cereal_top

“Would you tell me, please, which way I ought to go from here?”
“That depends a good deal on where you want to get to,” said the Cat.
“I don’t much care where–” said Alice.
“Then it doesn’t matter which way you go,” said the Cat.
― Lewis Carroll, Alice in Wonderland

Brian and I named Wonderland Kitchen a couple of years before the site actually launched, dreaming up the idea on a long car ride to Vermont. After listening to me consider the possibility of maybe trying to make some time to write just a little about food, and for longer than was reasonable, my husband pulled the trigger for me and made a gift of the URL. Still, I dragged the idea in and out of my mental cupboard like a stock pot for quite a while longer, considering how it looked on the stove but never lighting the gas. Then one weekend in September of 2011, we drove to Vermont again. I didn’t take it as a sign so much as the chance to turn down the volume on the day-to-day grind just long enough to really evaluate my priorities. Taking time and attention away from building the career I already had as a music journalist seemed silly, yet I couldn’t shake the desire to diversify. By the end of that trip, the first iteration of Wonderland Kitchen had been built, and it’s been a motivator in the kitchen and a creative space I’ve been able to grow in ever since.

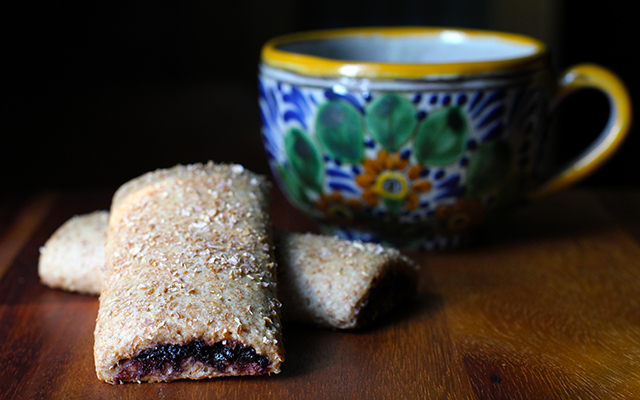
In all that time, I never really considered “where it was all going” because I was simply enjoying the ride too much to care. Yet as we mark this first year with a site upgrade thanks to Brian and the love and supportive appetites of many friends, the road keeps unspooling before us. One addition to these pages that I’m excited to debut today is that I’ll be contributing a bi-weekly column to the killer online food destination Serious Eats. For each piece, I’ll pull out my clipboard and do my DIY best to hack everything from breakfast cereals to Ho-Hos, though minus dyes, artificial flavors, and ingredients I cannot pronounce. To kick things off, I offer you a cereal bar that’s a far less sweet but much more elegant option than you’ll get in a box (recipe below, but spiffy presentation over on Serious Eats). Have a product you’d like me to take a crack at in a future column? Please let me know.

*

Who wants an unbirthday gift from Wonderland?
***Contest has closed; congrats to the winners!***

More than anything, I’m grateful to every reader for taking the time to meet up with me in this space over the past year. My awesome mother-in-law (Hi, Barbara!!) has sewn a couple lovely cloth market bags for me that I’d like to give away to celebrate. As there are only two, if you’d like one, please leave a comment below and let me know what projects you’re working on…or what ones you just might start any day now. If I only get two responses, well, everybody wins! Otherwise, I’ll use one of those neat random number generators. Please be sure to include an address in the email field that I can use to contact you and get your shipping address.

And now, here’s the first DIY vs Buy:

DIY Blueberry Cereal Bars

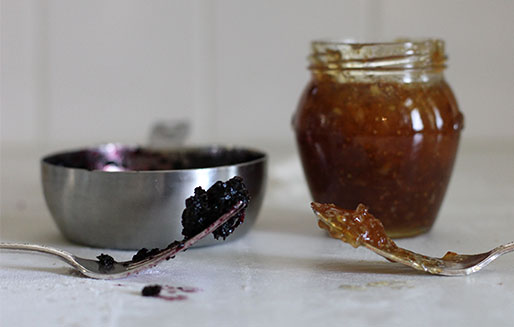
DIY Blueberry Cereal Bars: Filling

Note: If you would prefer not to make your own filling out of dried fruit, a thick fruit spread such as fig is a workable substitute. In my testing, commercial jams and preserves proved too runny when baked and would not be recommended.

makes 12 bars
1 hour active
2 1/2 hours total

For the Dough
5 ounces (1 cup) all-purpose flour
5 ounces (1 cup) whole wheat flour
1 ounces (1/4 cup) rolled oats
1/2 ounce (1/4 cup) wheat bran
2 1/2 ounces (1/3 cup packed) brown sugar
1 teaspoon baking powder
1/2 teaspoon salt
1/4 teaspoon cinnamon
4 tablespoons/1/4 cup cold unsalted butter, cubed.
2/3 cup whole milk
1 teaspoon vanilla extract

For the Filling
1 cup dried blueberries
1/2 cup water

For Assembly
1 egg white plus 1 teaspoon cold water, for wash
4 tablespoons wheat bran, for sprinkling

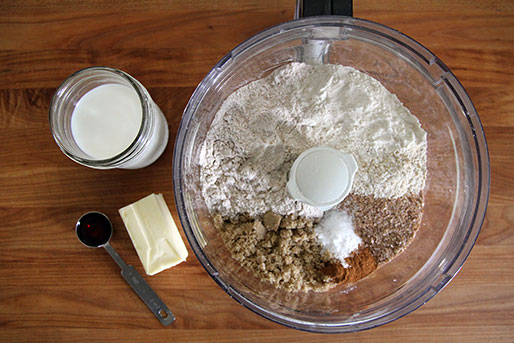
DIY Blueberry Cereal Bars: Ingredients

Measure flours, oats, wheat bran, brown sugar, baking power, salt, and cinnamon into the bowl of a food processor and pulse until ingredients are mixed and oats broken down. Add butter and pulse until pieces resembles coarse meal.

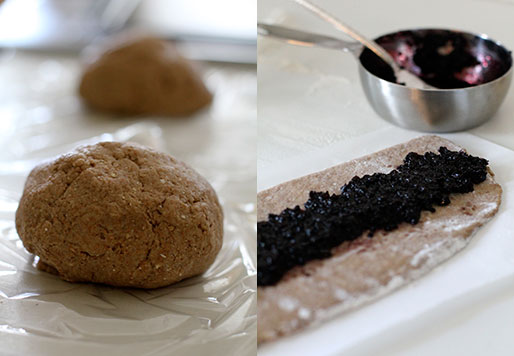
Stir vanilla into the milk and, with processor motor running, add liquids to the dry ingredients in a thin stream. Continue processing until dough comes together. Divide into two equal portions and flatten into 1/2-inch discs. Wrap each portion in plastic and refrigerate until firm enough to roll out, about two hours.

DIY Blueberry Cereal Bars: Dough

Meanwhile, make the filling. Place dried fruit and water into a small, heavy-bottomed sauce pan and bring to a boil. Reduce heat and simmer gently, covered, for 20 minutes, stirring occasionally. Transfer fruit and water to a food processor and process until broken down into a rough purée. Transfer filling to a bowl, cover, and refrigerate until needed.

When ready to assemble the bars, heat oven to 350°F with rack in the middle position.

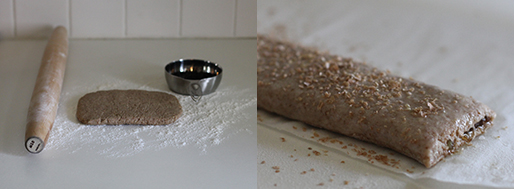
Flour rolling surface and place one portion of the dough in the center. Flour top of dough and roll into an 8×12-inch rectangle, turning regularly to prevent sticking. Cut dough in half the long way to create two 4×12-inch sheets. To aide with filling and shaping the bars, place each strip of dough on a similarly sized piece of baking parchment before proceeding. Brush any excess flour from dough surface with a dry pastry brush.

Down the 12-inch center line of each piece of dough, spread an even 1-inch strip of filling (about 2 1/2 tablespoons). Using the edge of the parchment as an aide, fold one long side of the dough over the filling, covering it slightly more than half way. Brush a light coating of the egg wash over the remaining edge and, again using the parchment to help keep things even, fold the second dough edge so that it overlaps the first by 1/4 inch. Press gently to seal and flip the bars over so that they are seam-side down. Cut each log into three 4-inch portions.

DIY Blueberry Cereal Bars: Assembly

Brush any excess flour from dough surface with a dry pastry brush. Coat each bar with a thin layer of the egg wash and sprinkle tops with wheat bran. Leave bars on parchment strips and transfer to baking sheet.

Repeat steps five through seven with remaining dough and filling. Bake bars for 16-18 minutes, until just golden. Transfer to a wire rack until cool. Store at room temperature in an air-tight container.