dairy » Wonderland Kitchen
Browsing Category

dairy

DIY Cultured Buttermilk

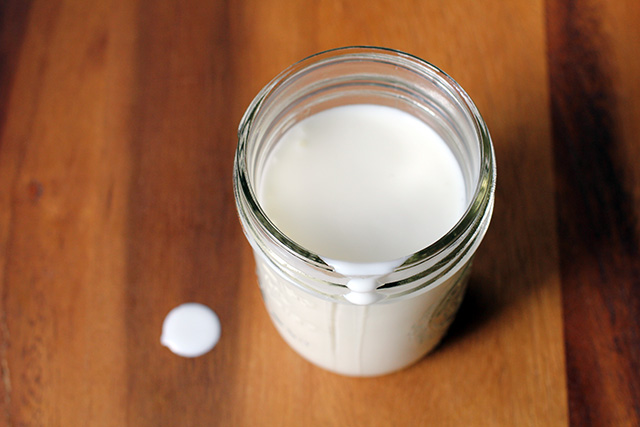
DIY Buttermilk

The first time I used a stand mixer to whisk my own butter out of heavy cream, I thought I could spread the results on my bread and bake with them, too, since I also then had just enough of what I thought was buttermilk left over to make a loaf of Irish soda bread. How neatly economical! However, I quickly discovered that what we mean when we say “buttermilk” today is a bit muddled, and that the thin white liquid that remained behind in my bowl after the butter was made was quite different from the type of buttermilk the recipe assumed I was using.

In 2012, when you purchase buttermilk from your local dairy or grocery (that is, if you can even find it—I often discover a carton or two wedged somewhere near the 7,000 flavors of fake coffee creamer) it’s a cultured dairy product that has a tart and slightly sour taste. It is often called for in baking (the acidity activates baking soda), is used to make dressings and sauces, or can simply be drunk by the glassful (though you won’t catch me doing that). Depending on what type of milk was cultured, it could be a creamy full-fat or 2% version (similar to a thin yogurt), or a thinner skim option. Label reading may reveal the addition of other thickeners—especially in the no-fat versions—such as tapioca starch, guar gum, locust bean gum, carrageenan, and/or carob bean gum.

Back in the day, however, buttermilk was a different beast. Based on my reading, it seems the story is this: Raw milk was not churned right away since a certain volume of cream would need to be collected and the milk and cream needed time to sit and separate. Bacteria naturally found in the milk would multiply, the milk would sour, and the “buttermilk” that was left behind after churning was, as a result, not the same as what is left after DIY-ing your own butter from pasteurized and homogenized milk. And neither of these versions is the same as the cultured buttermilk sold commercially at your local grocery today.

To DIY cultured buttermilk, you need a starter that contains the living bacteria required to ferment new batches—similar to making yogurt. If you have access to raw milk, you can start your own buttermilk culture, but you can also purchase freeze-dried starters (either to establish a mother culture or of the direct-set, one-time-use variety) or simply use store-bought buttermilk to culture more milk. You need to make sure the cultures are still active, however. When testing these various options, I didn’t have a problem using my local store-bought option as a starter, but the fresh buttermilk from a local dairy and the freeze-dried starter produced a quicker clabbering and a significantly better tasting buttermilk, in my opinion.

DIY Buttermilk

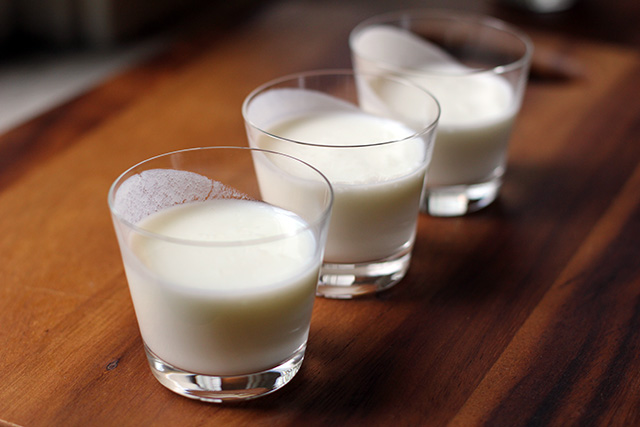
Whole vs 2% vs Skim: As you might expect, the buttermilk gets increasingly thick and creamy as you move from skim (left above) up to whole. Tasting it straight, the tartness of the whole-milk version is balanced by the rich, yogurt-like creaminess of the full fat milk, and that is somewhat true for the 2% version as well. The skim is very tart, thin, and less balanced to me, and I cannot see drinking this or recommending it for use in salad dressing unless personal taste or nutritional concerns make it preferable. For baking applications or in soups, however, any of these could be used.

As an additional experiment, I couldn’t resist attempting to culture some modern “buttermilk” after making butter (sort of the reverse process of old fashioned buttermilk) just to see what I might get. The result was as thin as the skim milk version, but the taste was much more drinkable, the tartness of the beverage balanced in this case not by a creaminess but by a buttery fattiness that seems to still infuse the milk. Just as old fashioned buttermilk is often noted to have contained a few bits of stray butter left behind after churning, the same could be found here. With a little salt, I could almost see sipping it. Almost.

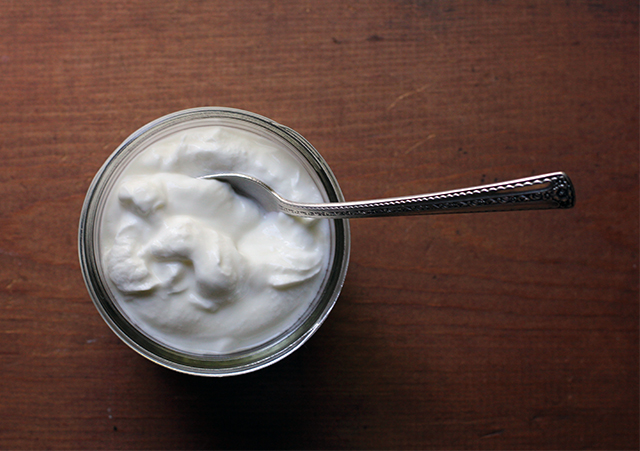
And honestly, with so many jars full of buttermilk, in the end I also figured I might as well make my first batch of crème fraîche. This could be a new addiction.

A word on culturing temperature: Keeping the milk at the required warm room temperature is a challenge in my house now that the colder weather has set in. If the kitchen is warm from a marathon of weekend cooking, it’s not so hard to find a cozy 76°F corner for the bacteria to do their thing, but otherwise I have to get creative. Some cooks have recommended placing jars on top of the fridge or on some other warm appliance or high shelf in the house. I found a kitchen cabinet that runs warmer than the rest of the room due to location and had good luck (if slower clabbering times) at about 70°F there.

The Verdict

I was already a buttermilk fan, not only for baking but also for exceptional homemade salad dressings, but I don’t use enough dairy to make purchasing large volumes of different types worth while. By culturing my own buttermilk, I can have a small yet steady (and additive-free) supply to meet my needs, and use the rest of my weekly whole milk purchase to make yogurt, cheese, or just to lighten my coffee. You can make larger (or smaller) volumes as needed. I use a ratio of one tablespoon starter for every cup milk with reliable results. Unless your culture was not designed to be perpetuated (some freeze-dried options fall into this category), you can reserve a bit of each batch to culture the next. Some recipes indicate that you should pasteurize your milk first or at least warm it to 76°F. I added my starter directly to the cold milk and didn’t have any issues (or extra dishes to do).

DIY Cultured Buttermilk

2 tablespoons buttermilk (store-bought or activated dried starter)
2 cups milk (whole, 2%, or skim, depending on your nutritional needs and preferences)

In a mason jar or other glass container, thoroughly mix the starter and milk. Cover with a coffee filter or piece of cheese cloth (do not seal tightly with a lid) and leave to culture out of drafts at a warm room temperature (between 70-78°F is recommended) until milk has clabbered (10-24 hours).

To test if the milk has thickened, tip the jar slightly. It should move away from the wall of the jar as a single mass. Just as with yogurt making, once the milk sets, it will get more tart the longer you allow the culturing to continue.

Refrigerate to halt culturing for at least six hours. Stir before using.

*

This recipe and post was created for my “DIY vs. Buy” column on Serious Eats.

Real Deal: DIY Greek Yogurt

greek-yogurt-finished-two

I am not generally a “doing the math” kind of person. As a result, I end up economizing in weird ways. I’ll stand in a grocery store aisle agonizing over the cost/benefit of something based on price and ingredients and brand, maybe saving a dollar here with a bulk buy or spending a dollar there to get the organic option. Later that night, however, I won’t think twice about going out to dinner with my husband, making the utility of the entire exercise somewhat questionable.

When it comes to the Greek yogurt consumed in our house, however, I finally did all the math for my latest Serious Eats column, a process which left me convinced I no longer knew how to divide. I was shocked by what kind of savings I might manage in a given year if we could get off the little cups with the parchment paper tops and start making it all at home. But I was going to need a much more streamlined process than my yogurt-making appliance filled with little glass jars would allow, so the research began.

Producing yogurt at home may not be quite as simple as making ice cubes, but it’s not much more complicated than measuring liquid into containers and letting it reach or hold certain temperatures. Ultimately, if you can stir and read a thermometer, you have all the skill needed to culture your own. The process takes a lot of hands off time, however, so if you’re more accustomed to the immediate gratification of cookie baking, this may take some getting used to.

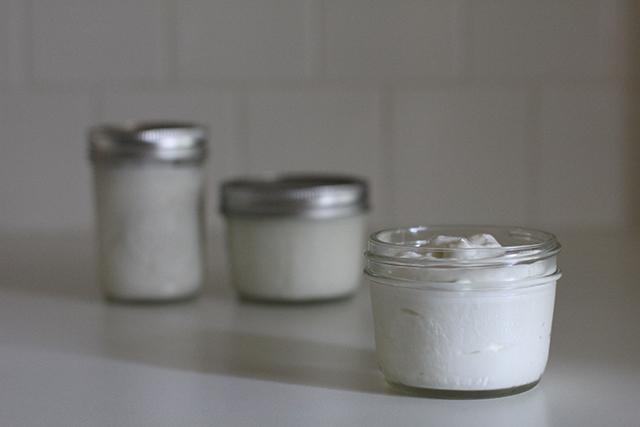
DIY Greek Yogurt: strained and portioned

A few things to consider before you begin:

  • Both the milk and the starter you select will impact the taste and consistency of the final product, and you will likely need to experiment some before you hit on your ideal ingredients. If you’re using fresh yogurt as your starter rather than freeze-dried, be sure to use a plain variety that contains live and active cultures.
  • There is more than one way to incubate at 110°F—from a simple thermos to a special appliance specific to yogurt making. I found the method below (which I first learned about here) to be both simple and consistent, but you may want to experiment and use the process you find most efficient.
  • A useful trick I picked up from Alana Chernila’s The Homemade Pantry is to incubate a small portion of the milk and starter mixture in a 1/2-pint jar alongside the two filled quart jars. Reserve this smaller portion to culture your next batch of yogurt. If using the small cooler method outlined below, you can keep this smaller jar above the water line by setting it on top of a narrow, empty 1/2-pint jar.

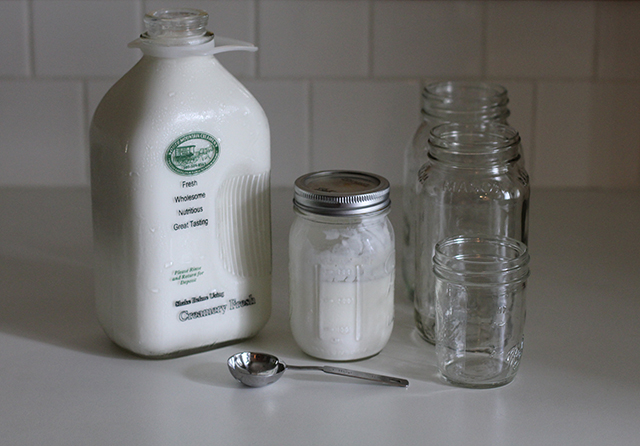
DIY Greek Yogurt: ingredients

DIY Greek Yogurt
8 cups milk
4 tablespoons plain yogurt with live and active cultures or freeze-dried yogurt starter

DIY Greek Yogurt: hot and cold

In a heavy-bottomed pot over medium heat, bring milk to 180°F, stirring regularly to prevent scorching.

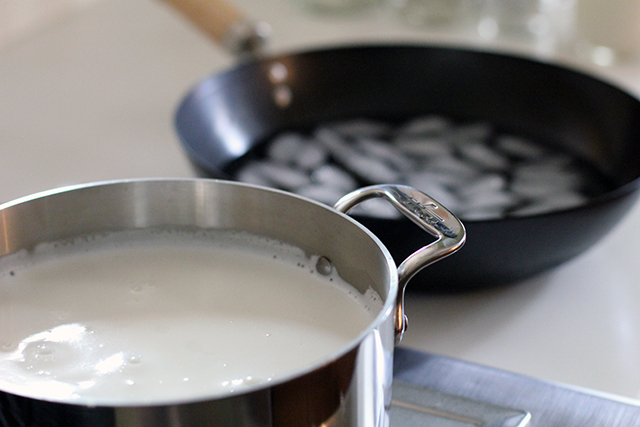
Once milk has reached temperature, allow it to cool to 110°F (place pot in an ice bath to speed cooling, if desired). When milk has cooled, add yogurt to the pot and whisk thoroughly to combine.

DIY Greek Yogurt: incubation

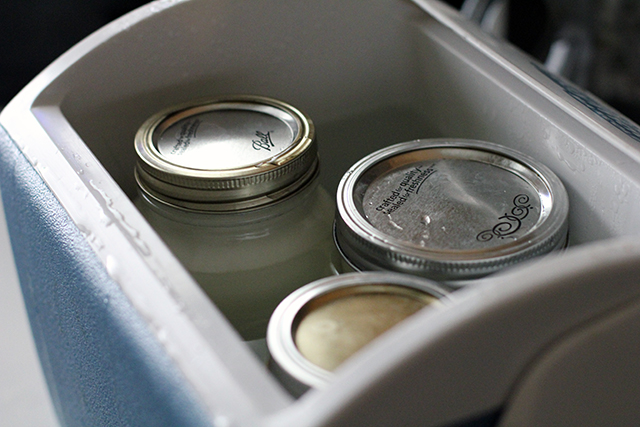
Pour milk and starter mixture into two quart-sized jars (and smaller 1/2-pint, if using) and screw on lids. Place them in a small insulated cooler and fill with 120°F water until jars are submerged nearly up to their lids. Close cooler and leave in a draft-free, undisturbed place for six hours or until desired tartness is achieved.

When incubation is complete, remove jars from water bath and place in refrigerator for at least six hours to halt culturing and set yogurt.

DIY Greek Yogurt: straining

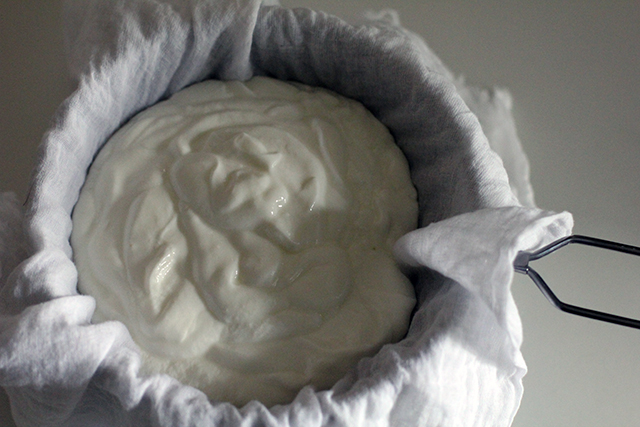
At this point, yogurt may be eaten, but to achieve a Greek-style consistency, it will need to be strained. Place a fine mesh strainer over a bowl and line it with two layers of cheese cloth. Spoon yogurt into lined strainer and allow to drain for two hours or until desired thickness is achieved.

Transfer yogurt to a storage container and refrigerate until needed. Remaining leftover whey (approximately two cups) may be reserved for another use if desired.

Summer Simple: Tomato and Cottage Cheese

tomato_side

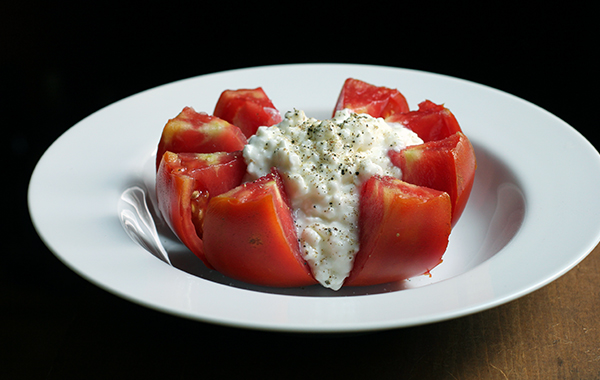
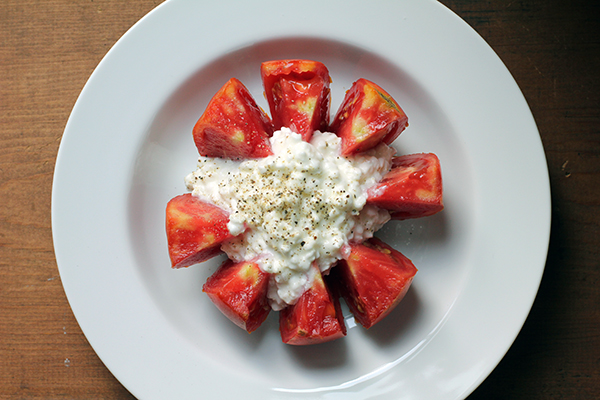
Admittedly, this is not actually a recipe, but I had completely forgotten about how much I love eating this simple summer dish. Growing up in Ohio, we had a garden overflowing with beautiful tomatoes each August, and burying them under cottage cheese often made for an easy lunch. Still, somehow the image most deeply seared onto my mind is of the ones I ate with my grandparents in the cafeteria at the Canfield Fair, line upon line of these bright red fruits stuffed and served on small paper plates, ready for the claiming. (Can you even find a fresh vegetable to eat at the fair anymore?)

Tomato with Cottage Cheese: The Cut

Tomato and Cottage Cheese

1 ripe tomato
1/2 cup cottage cheese
salt and black pepper

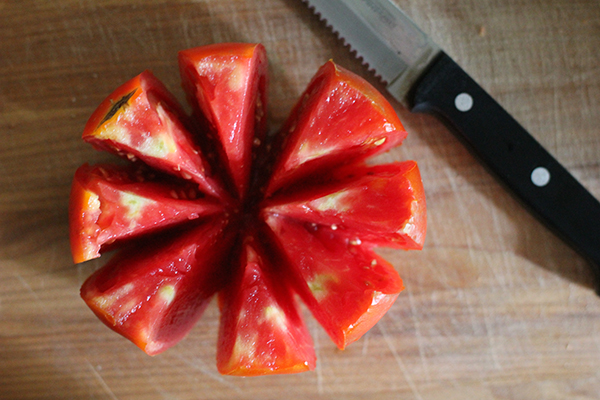
Core tomato and slice into wedges top to bottom without fully cutting through the fruit (leave about 1/2 inch at the bottom). Plate and nudge open wedges, sprinkling a bit of salt over top, if desired. Stuff center of tomato with cottage cheese and top with ground black pepper. A chiffonade of fresh basil or a few snips of chive would certainly not be amiss sprinkled over top of these beauties, but my family was never so fancy.

Tomato and Cottage Cheese

Homesick for Life on the Road: Mutter Paneer

mutterpaneer

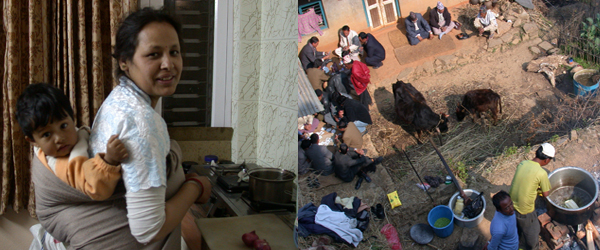
Making paneer reminds me of the brief time I spent in Nepal. Not of the streets I walked and the music I was there to study, but the many quiet hours I spent in the kitchen with the family who had taken me in, cooking alongside the “sister” who had adopted me into her household, welcoming me with an infectious smile and a cup of tea. I miss watching Hindi soap operas with her to this day, and I didn’t understand of word of them (so that’s saying something).

Our kitchen corner (left) and a view down onto wedding feast preparations (right). When cooking for 50, I guess it's easier to work outside.

Aside from your basic college survival budget cooking (lots of rice and beans and steamed carrots, in my case) I was not all that sophisticated when it came to food prep at that point in my life, and it showed painfully in this sparely equipped, two-burner kitchen. By the time I left a few months later, however, I could make curries and dals and chaats and momos…well, if not like a pro, then at least like an over-enthused novice. Paneer was another of these new delicacies, the construction of which was introduced to me in Kathmandu, though I’ve only made it a few times more in the ensuing decade.

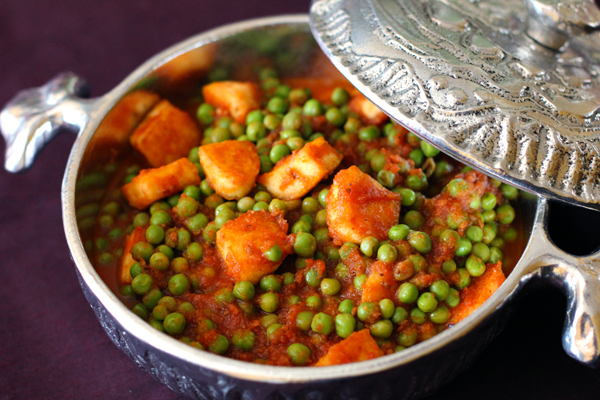
On my last trip to NYC, however, I grabbed a bite at a little Indian lunch counter where the food was as divine as the shop was covert. The mutter paneer spoke to me through the glass. It was so tasty that once I got home I found myself fixated on the taste of it and the desire to revisit that simple cheese making process. It got me a little homesick for life on the road (if that’s possible), but the resulting dish itself was so tasty I consoled myself with quite a few spoonfuls before the paratha was even off the griddle (no recipe for those here, because I cheat and buy frozen).

*The lovely aluminum serving dish pictured above is from Don Drumm’s studio.

For the paneer

1/2 gallon whole milk
3-5 T lemon juice (best to have more than enough squeezed and ready before you start)
1 piece fine cheesecloth

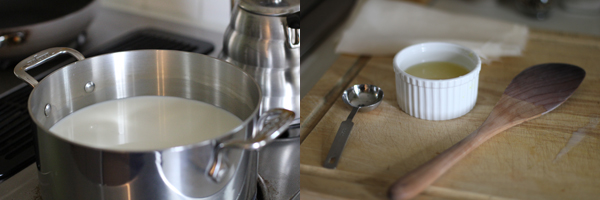
In a heavy-bottomed pot, bring the milk up to a gentle boil. Add lemon juice, a tablespoon at a time, stirring after each addition, until milk separates. Remove from heat.

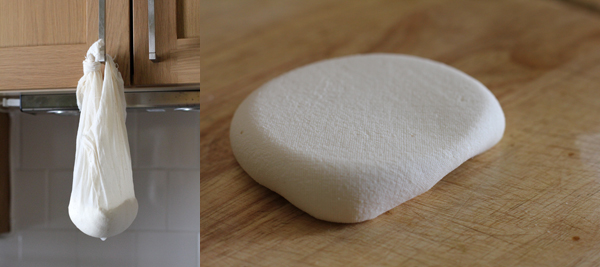
Line a sieve with the cheesecloth and pour the curds and whey through to separate them. Rise the curds under cold water then drain well, gathering the curds together into a ball. Twist the cheesecloth together and gently squeeze to remove some of the excess water, then leave to hang for 30 minutes. To further press the curds into a more solid cheese that can be cubed and fried for dishes such as the one below, twist the cheesecloth closed gently but securely and place on a counter or cutting board with a weight on top to further press out liquid (I use my marble cheese board). Check the cheese after an hour and continue pressing until it has reached the desired texture (if it becomes too dry it will crumble, so take care). Use right away or wrap well and refrigerate.

For more beautiful instructions than mine, see this tutorial.

For the mutter paneer
Adapted from Manjula’s Kitchen

3 T olive oil, plus more as needed
paneer (see recipe above), cubed

1 T ginger, chopped
2 cups canned tomatoes
1 tsp. cumin seeds
2 bay leaves
1/2 inch of cinnamon stick
Pinch of asafetida

Here I must admit that I went a little cross-culture crazy and omitted the remaining spices, instead using a few spoonfuls of that amazingly delicious berbere paste I made a little while ago. However, recognizing that you probably won’t have that on hand, the original recipe indicates:

1 T coriander powder
1/2 tsp. turmeric
1/2 tsp. chili powder
1/2 tsp. paprika
1 tsp. salt or to taste

16 oz. frozen peas

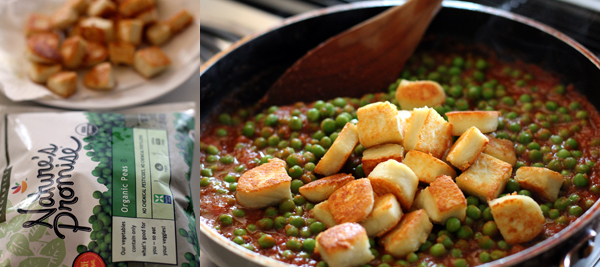
Heat enough of the olive oil to thickly coat the bottom of your skillet and fry the paneer cubes. When they are golden brown, spoon them out onto a plate lined with paper towels to soak up excess oil and set aside.

Puree the tomatoes and ginger together.

Add a little more oil to your skillet if needed and, when hot once again, add the cumin seeds, bay leaves, cinnamon stick, and asafetida. Stir and fry for a few seconds, then pour in the tomato and ginger mixture, plus remaining spices. Once the sauce begins to sputter, reduce the heat and allow to reduce a bit.

Add peas, stirring to combine. Cover and continue cooking until peas are tender. Toss in the paneer and heat the dish through, adding salt as needed.

Serve with flatbread or over rice.

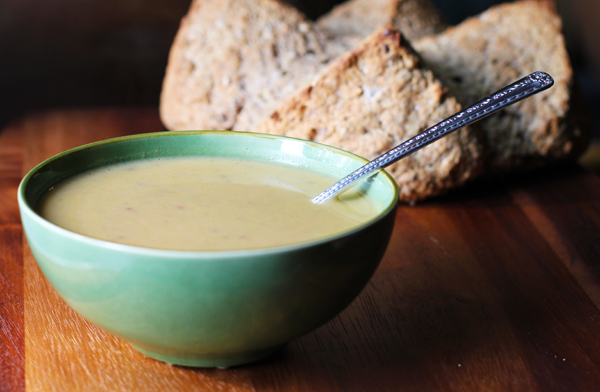
A Pot o’ Gold: Saint Patrick Irish Cheddar Soup

cheddarsoup_top

When it comes to culinary heritage, I claim the closest affinity with the Slavs thanks to the maternal side of my family tree. With a name like Molly Marie Sheridan, I don’t feel too obnoxious trying to get in on a little of that luck of the Irish as well, however, especially on St. Patrick’s Day. Exercising an American flexibility when it comes to culture is useful like that.

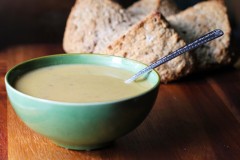
My celebration of the day here in Baltimore is a far cry from the festivities put on at my last address. Instead, this year I went the monastic route and turned to my copy of Twelve Months of Monastery Soups, pulling out a recipe for Saint Patrick Irish Cheddar Soup from the “March” chapter. Despite the name, at first I hesitated, not generally being a fan of dishes that hide their vegetables under cheese. But if it was good enough for the monks, surely it should be good enough for me, no? Plus, I had buttermilk in the fridge that was crying out to be turned into a fresh soda bread as accompaniment, so ahead full steam I charged.

Saint Patrick Irish Cheddar Soup recipe

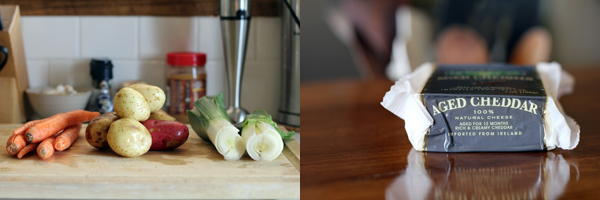
Vegetable sizes being so variable, I added more carrot and potato than the recipe called for but which seemed to suite the 6 cups of broth. Having taken no religious vows, I also got crazy and doubled all the seasonings aside from the salt, which I omitted entirely (the strategic penance of a once-Catholic?). The cheese and broth seemed to provide plenty of taste-popping sodium on their own.

Saint Patrick Irish Cheddar Soup ingredients

As I swallowed my first taste of the finished pot, the memories of every terrible bowl of broccoli cheddar soup I had ever eaten melted away–a Saint Patrick’s Day culinary conversion.

Saint Patrick Irish Cheddar Soup
based on a recipe from Twelve Months of Monastery Soups

2 leeks, sliced
6 small potatoes, cubed
6 thin carrots, sliced
4 T butter
6 cups vegetable broth
2 garlic cloves, minced
1/2 tsp. ground thyme
1/2 tsp. ground sage
1 cup milk
5 oz. grated Kerrygold Irish Cheddar cheese
salt and pepper to taste (like I said, mine needed no additional salt, so be sure to taste before adding)

Saint Patrick Irish Cheddar Soup ingredients

Melt butter in a stock pot. Add vegetables and saute for several minutes. Then add broth, garlic, and seasoning, and bring mixture to a boil. Reduce heat and simmer until vegetables are tender and flavors merged, about 30 minutes.

Remove pot from heat and puree.

Add milk and cheese and continue stirring until cheese has melted. The soup should still be plenty hot enough to do so, but return to heat if necessary, taking care not to allow it to boil.

Serve hot with a hearty bread. This one is excellent and speedy, if a suggestion is needed.

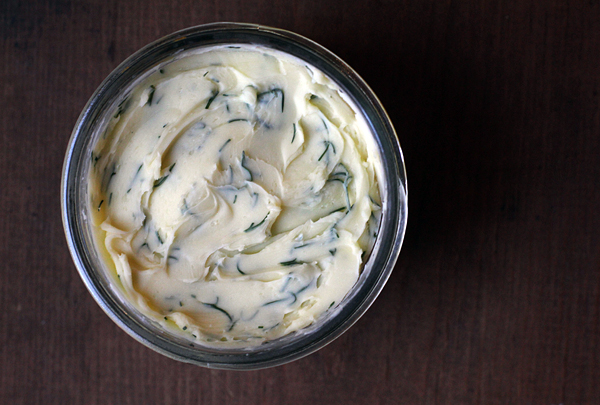
Butter Me Up

butter_over

Homemade bread is pretty spectacular; homemade bread topped with homemade butter is…actually maybe taking the DIY homemaking a little too far?

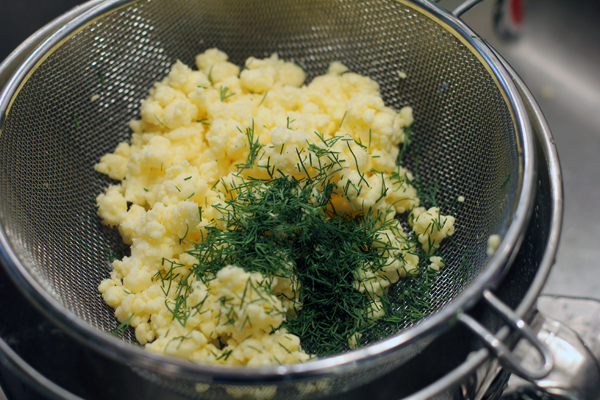
Nonsense, I say! Particularly if you, with all your baking prowess, own a stand mixer, simply affix the whisk attachment and toss a pint of heavy cream (leave it out on the counter for a bit to take the chill off) into that mixing bowl. Using the plastic bowl cover plus plastic wrap to completely cover any openings, run that baby until you break your whipped cream and the butter and buttermilk separate. Keep an eye on it so you can slow down the speed as soon as it comes apart.

homemade butter drain and flavor

At this point, you should strain off the “buttermilk” (more on this piece of the recipe puzzle in my next post) and rinse the butter in very cold water. You will then want to knead it well between your hands to wring out as much water as possible (I also blot it a bit with a paper towel–any leftover moisture will shorten its shelf-life) and flavor it with a sprinkle of salt (for taste and as a preservative) and whatever herbs you might want to incorporate (clearly, I went a little dill happy). That’s it! Pack it down into a jar and store it in the fridge. Then take that buttermilk and bake something delicious to put it on…

PS: I hear that, if you have access to child labor, you can nix the mixer and just pour the cream into a jar with a tight fitting lid and have the kids shake the cream until it separates. Food science is cool!