When I was a kid, the retired couple next door took on the role of surrogate grandparents/babysitters. Their kitchen was where I learned to make a pie crust, their garden was where I saw my first swiss chard in the wild, and their family room was where I caught up on every Matlock and Murder She Wrote episode ever produced. In my memories, there were always great snacks on offer at their house, but even more than the just-baked elderberry pie and sugar cookies, I remember the evenings we spent with a big bag of oyster crackers and a tub of butter. Yes, buttered crackers were what most impressed my seven-year-old self, and I still think back to those cozy, murder-mystery evenings whenever I see a bag.
Whenever I actually taste the crackers in those bags these days, however, I wonder if it’s my palette or their production values that have shifted. I don’t remember them giving off the impression of…tissue paper quite so much, dissolving on the tongue like a communion wafer. So this version of the iconic cracker is just a little bit more solid, a little richer, a little butterier–it will stand up to but not overpower your soup.
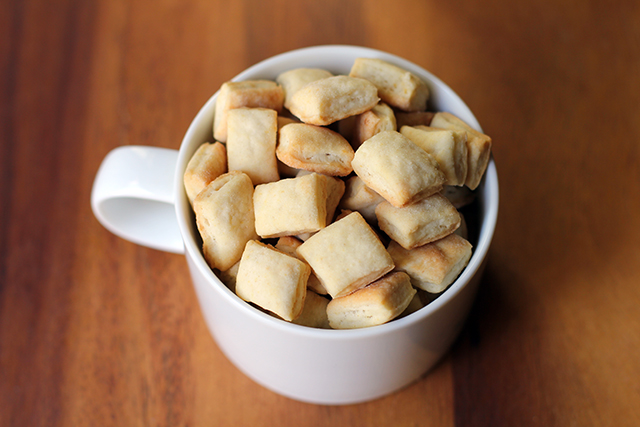
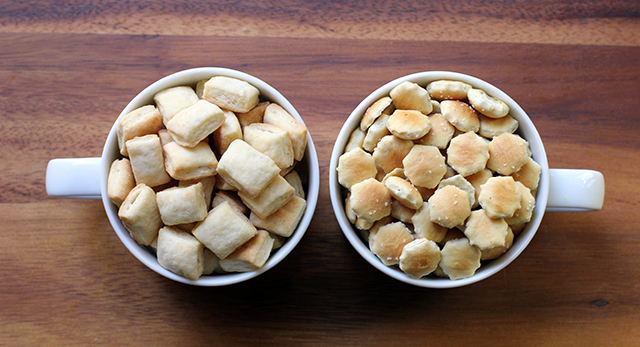
Now, I know what I said about DIY projects and getting the perfect shape, but I think those sesame sticks taught me an important lesson. While there may be cooks out there who can produce a bag’s worth of perfectly shaped and smiling goldfish crackers, I now know that I am not one of them. So while I understand that oyster crackers are often hexagon-shaped, after considering how to produce so many small bites with some degree of efficiency, I decided that rectangles were cute enough. (Approximate) uniformity would be the key to my cracker geometry. Once they poofed up in the oven, I didn’t miss those stop signs of carbohydrate one bit.
This is a no-stress side project that could easily be done while your soup is simmering. That said, it gets flour all over the counter and you have to cut dough into small pieces, possibly negating the laid-back, one-pot cooking that is often what makes soup so attractive (to me, at least). As far as economic comparison, I bought a 12-ounce bag for a dollar, so I’m not even going to try and talk cost savings. Ingredient-wise, this homemade version swaps in butter for the palm, canola, and soybean oils in my grocery’s house brand. Beyond that, however, rather than coat the surface of the crackers with an envelope of salad dressing mix, this is an excellent opportunity to make your own signature flavor with seasonings such as dried herbs or black pepper mixed right into the dough. Being a Baltimorean now, I added a teaspoon of Old Bay, and the spike of flavor and heat it brought to crackers seemed to be an especially appropriate pairing with the falling temperatures.
DIY Oyster Crackers
makes about 2 cups
5 ounces (1 cup) AP flour
1 teaspoon kosher salt
1 teaspoon sugar
1 teaspoon baking powder
1 teaspoon (or to taste) Old Bay or seasoning of your choice (optional)
2 tablespoons cold unsalted butter, cubed
1/3 cup cold water, additional as needed
Measure dry ingredients into a mixing bowl and whisk to combine. Next, using a pastry cutter, work butter into the dry ingredients. Finally, add the water and lightly knead the dough just until all ingredients are incorporated. Add additional water by the tablespoon, if needed.
Form dough into a ball, set it on a lightly floured rolling surface, and cover with the overturned mixing bowl. Allow to rest for 15 minutes. Heat oven to 375°F.
When rest is complete, roll dough out on a well floured surface until about 1/8-inch thick. Cut dough into squares or rectangles (or circles, if you’re really willing to put some time into it) that are about 1/2-inch wide. Transfer to a parchment-lined baking sheet and space the shapes out as much as possible.
Bake for about 15 minutes, until crackers are showing color around the bottom edges. Turn oven off and crack the door open about eight inches. Leave crackers inside to cool and continue to crisp, about 30 minutes.
*
This recipe was created for my “DIY vs. Buy” column on Serious Eats.

