Wonderland Kitchen - 3/6 - 2013 Archives
Browsing Archive

2013

A Bittersweet Sip: DIY Tonic Water

DIY Tonic Water

I’m not sure I fully understood what tonic water actually was until my friend Alex explained why she loved it. I vaguely recalled accidentally ordering this somewhat bitter carbonated beverage in a restaurant as a teenager, but beyond that I hadn’t given it much consideration. The G&T had never been my drink.

Still, with such an enthusiastic recommendation as Alex’s filed away, I couldn’t resist picking up a liter on my next grocery run. I felt a little silly buying soda when I had my own private supply of bubbly at home, but tonic water had bonus ingredients: namely, high fructose corn syrup and quinine. I suppose it’s just a little of that “grass is always greener” human flaw, but I found myself increasingly attracted to the tonic’s bite. My own homemade fizzy water was starting to taste a little flat.

Commercial Tonic Water

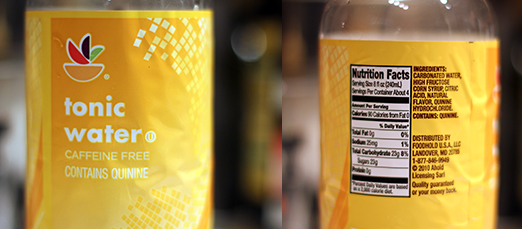
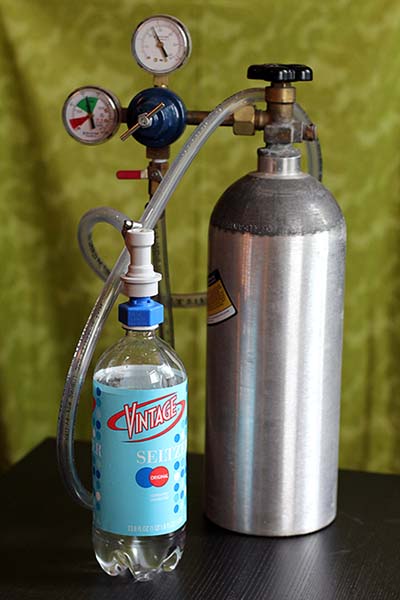
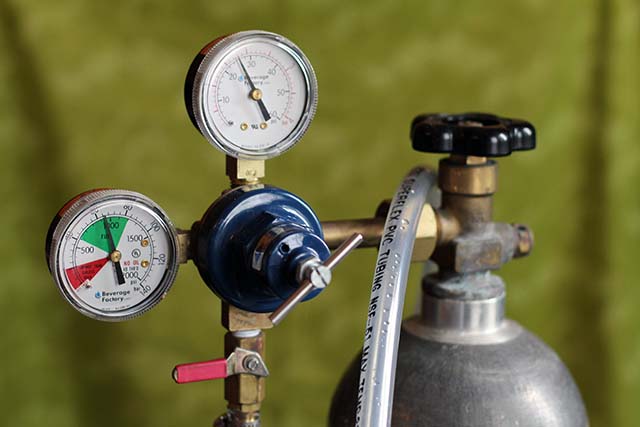
Spiting my evolving addiction to tonic water was the aforementioned supply of straight up CO2 carbonation that I had installed in my kitchen specifically to avoid those plastic bottles in the recycling bin, as well as the uber sweetness of the commercial drink. Serve me savory any day, but you can keep the candy and soda pop for yourself. Surely someone had already figured out how to DIY the tonic side of the sparkling water shelf? Of course they had. And I just happened to have the cinchona bark and citric acid the recipe required in my pantry! (See previous cheese making and Wicked Witch of the West posts for details.)

DIY Tonic Water Ingredients

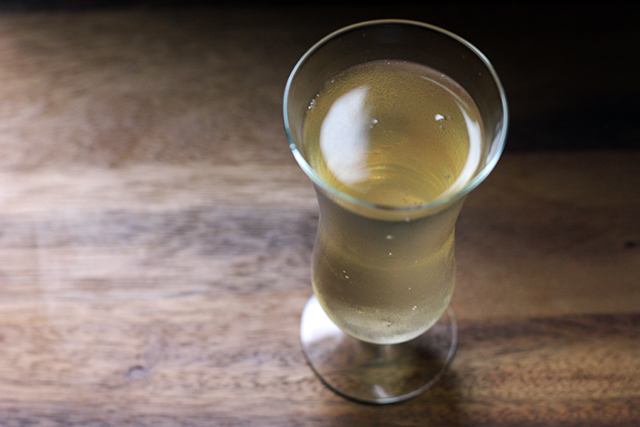
Having already enjoyed the results of Jeffrey Morgenthaler’s ginger beer on several occasions, I settled on his recipe for my first tonic outing and was not disappointed. The gist is that you make a syrup which you can then mix with seltzer for a superior–dare I say artisanal? I do not–sparkling beverage. If you’re of a mind, you may also add gin.

I had some cardamon seeds and juniper berries in the pantry as well, so I opted to toss a bit of those into the mix. There’s a lot of room for experimentation here, however, so you should feel free to shape each batch to suit your own taste preferences. In the unlikely event that the over-sized mosquitoes that have taken up residence in my backyard are carrying malaria, this tonic probably won’t help one bit, but it sure is delicious.

DIY Tonic Water Syrup

DIY Tonic Water Syrup
Half of Jeffrey Morgenthaler’s recipe with the addition of juniper and cardamon

Note: To make a gin and tonic cocktail, Morgenthaler suggests a 3/4 ounce of syrup, 1 1/2 ounces of gin and 2 ounces of soda over ice. To enjoy a glass of tonic solo, I found that just a few tablespoons flavored a cup nicely without becoming too sweet of a drink. Obviously, you should feel free to follow your own tastes.

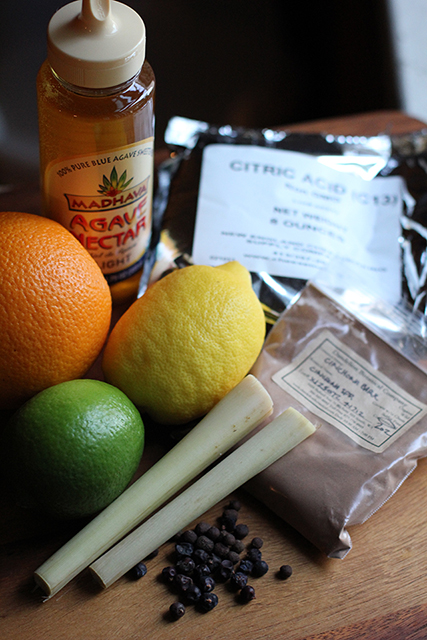
zest and juice of 1/2 a lemon
zest and juice of 1/2 a lime
zest and juice of 1/2 an orange
1/2 cup chopped lemon grass
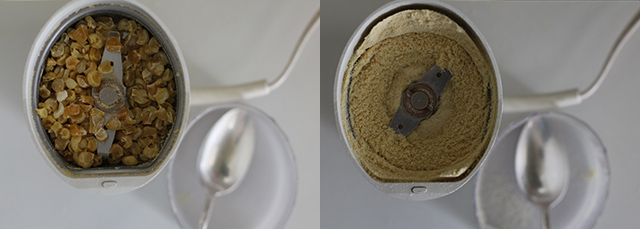
1/8 cup powdered cinchona bark**
1/8 cup citric acid
1/8 teaspoon kosher salt
6 allspice berries
10 juniper berries
4 cardamon seeds
2 cups water
11 ounces light agave syrup

Place all ingredients except for the agave in a sauce pan and bring to a full boil. Reduce heat to low, cover, and simmer for 20 minutes.

Strain the mixture. I used a two-step process that involved a fine mesh tea basket and then a Chemex coffee filter set inside a large funnel (it took about 30 minutes to strain through) and found that to work very well.

DIY Tonic Water: Second Strain

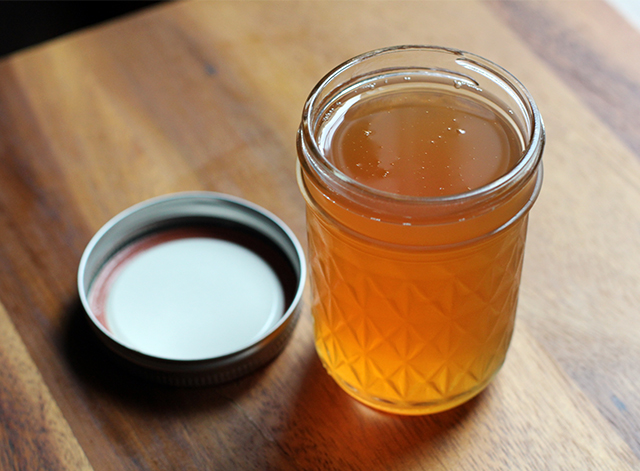
Transfer to a glass container and add agave syrup to the warm liquid (reheat if necessary). Stir until fully combined. Allow to cool and store in the refrigerator until needed.

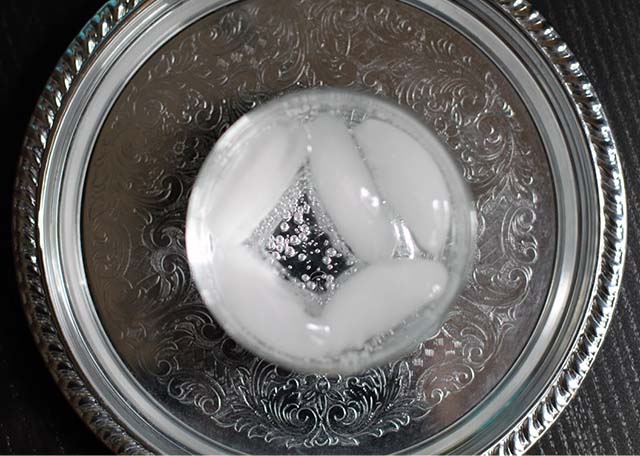
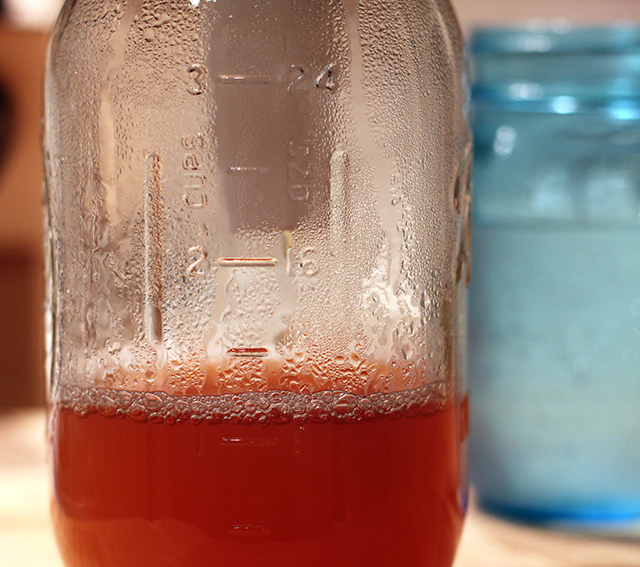
To serve, add to seltzer water one tablespoon at a time until desired strength is achieved. I find three tablespoons per cup strikes an ideal balance.

**If you need a mail order source, I’ve been really impressed with the products from the Dandelion Botanical Company.

DIY Tonic Water

Life Gets Curiouser Indeed: In which we join Facebook

Wonderland on Facebook

In an attempt to join the 21st century, Wonderland Kitchen has finally joined Facebook. Please pardon my learning curve.

If you have any tips, suggestions, or timeless traditions to pass my way, I will be in your debt. Seriously, I feel like the kid whose parents moved her to a new high school in the middle of junior year. Lend me your friendship?

DIY Summer Seltzer Season

DIY Seltzer from Wonderland Kitchen

With a holiday weekend on the horizon and rising temperatures (at least in the Mid-Atlantic) hinting at the swamp, I mean, summer ahead, it seemed like a prime time to revisit the seltzer maker I built for the kitchen almost three (yikes!) years back. If you’re the tl;dr type, the sum up is that it still rocks. You may proceed to the directions to construct your very own.

To be clear, I in no way invented this mad scientist contraption. Rather, at a time when the family recycling bin was overflowing with plastic one-liter bottles–my legs sore from carting them home and my stomach clenching over the packaging waste–I started digging around to see what my make-at-home options might be. Even back then, the SodaStream was a thing. But it was an expensive thing, with what seemed to be a high ongoing fee for the specialty CO2 cylinders it required. However, as with many problems, if you’re willing to get a little weird, the internet will provide. That’s how I ended up with this:

DIY Seltzer from Wonderland Kitchen

Truth be told, I’m not sure if I would have proceeded were it not for the fact that my dad has sold welding and gas supplies since I was a kid. (One of my favorite toys looked something like this mask, which probably explains more than a few things about me.) As a result, none of the necessary items were all that foreign to my eye and, while I admittedly carbonated my first bottle in the backyard a safe distance from the house just in case anything exploded, I was reasonably confident that I knew what I was doing. I asked my dad if this all seemed okay. He was also reasonably confident. The internet said it would be fine. And it was! Many, many bottles later, I haven’t had a single mishap.

DIY Seltzer from Wonderland Kitchen


To build the carbonation machine, you will need:

  • 5lb CO2 cylinder, or a size to suit your needs (if you know beer brewers, ask around and see if anyone if looking to get rid of one cheap)
  • Dual gauge regulator that can be set to deliver 20-50 psi
  • Flexible polyethylene tubing (4ft), 2 hose clamps, and a gas ball lock quick disconnect (now conveniently sold by Amazon as a single item)
  • Carbonater cap

NOTE: I tried assembling my own carbonater cap out of a tire stem as suggested (also by the internet), but could not get rid of the “just purchased from AutoZone!” smell, no matter what I washed or soaked it in. Possibly not a big deal in the long run, but the $12 carbonater cap I purchased has made scentless work of it for years and seems to have earned its keep just fine.

DIY Seltzer from Wonderland Kitchen

You will also need to upcycle at least one plastic bottle in very good condition. I steal new bottles from friends’ recycling bins when they are not looking in order to replace my bottles every few months, but you’ll definitely want to swap them out if you notice any visible wear.

Now, I’ve never used a SodaStream myself, but I’m willing to bet the look of the machine and the process of making the fizzy water is a little classier. Still, I have to say, with one of these babies in the kitchen, it’s automatic house party conversation material!

DIY Seltzer from Wonderland Kitchen

To carbonate water:

Fill the plastic bottle with water 7/8 full (I go to the top of where the label is) and chill. Very cold water is important for better CO2 absorption.

When cold, squeeze air out of the bottle and screw on carbonater cap.

DIY Seltzer from Wonderland Kitchen

Attach quick disconnect to the carbonater cap. Check to make sure the output valve on your regulator is completely closed. Turn on the gas and check/adjust the psi to suit your needs. I do mine at about 25 psi, but others go higher.

Holding tightly to your bottle in one hand, slowly open the output valve. The bottle will fill with gas. Shake the bottle vigorously for about 10-20 seconds.

Shut off the CO2 and close the output valve. Disconnect the bottle from the hose and refrigerate for at least several hours before removing the carbonater cap. (Unless, of course, you are looking to demonstrate a volcano eruption for the kids!)

The Verdict

The total cost of the unit, if all pieces are purchased brand new via Amazon, is $134.66. Plus you need to fill the tank. Locally, that cost me $15. I admit that the grand total can be something of a shock, but ask around and you just might be able to get some of these things for much cheaper.

Research indicates that I should be able to get about 280 one-liter bottles per tank. We have definitely had our runs of two-bottle-a-day consumption, and then a month without a single bottle made, but after what I swear are hundreds of bottles, we’re still on the same tank. I carbonate at a lower psi, so perhaps that bridges the gap. In any event, I’m cruising in on three years of stress-free, last-minute, in-home seltzer. I consider that a real coup, and a conversation piece to boot!

DIY Seltzer from Wonderland Kitchen

DIY Soy Milk

DIY Soy Milk

During my vegan yogurt experiments, I read a lot about making coconut, almond, and rice milks at home and sorted out my own preferred methods. (Key ingredient across the board? A nylon straining bag.) Now, whenever I find myself standing in front of those Tetra Pak boxed beverages at the grocery, I consider for a second if it’s worth it for me to DIY it at home; even in the chaos of an average week, it usually is.

The one experiment I’ve avoided is soy milk. Basically, I’ve come across headlines espousing the “evils of soy” just often enough to shy away from using it as one of my alternative milk ingredients. I had no nutritional research to back up this decision; rather, it was strictly a case of “Well, I haven’t read anything bad about almonds this week. Let’s just use those!”

Still, I have long been curious about making my own tofu or vegan cheese, so when I came across a bag of soybeans at the Asian market I love exploring, I decided to finally try out boiling up a batch of my own soy milk on the “all things in moderation” philosophy. (And once you start looking, I think there may be just as many articles espousing the “many benefits of soy!”…so, I can only encourage you to make your own judgment call.)

Early research on methods led me quickly to some stunning soy milk makers, an appliance I had never seen before but one that might interest high-volume producers of any type of alternative milk. In my house, a blender and an efficient hand straining method get the job done simply and quickly enough.

DIY Soy Milk: Before and after soaking the beans

DIY Soy Milk: Before and after soaking the beans

Similar to my experience with rice milk that didn’t taste like commercial rice milk, there were plenty of posts lamenting that DIY versions of soy milk just didn’t match what the family was used to from the store. I read a lot about how to avoid a bitter, beany-tasting soy milk (hot water when blending, cooking after straining), and picked up a tip to add a couple tablespoons of oats to the blender to make a creamer product. I didn’t remove all the skins before blending nor did I soak the beans in water fortified with baking soda, though these are also variations out there. Like many of these DIY projects, personal preferences will lead you to your own best practices.

When I first removed the lid off the blender carafe after pureeing the soaked raw beans, I worried over the smell–something about it had a character that had me flashing back to the days I spent oil panting in the ’90s. The milk will also have a raw, beany taste at this stage. (It reminded me of eating a pea or green bean seed right out of the garden.) However, after cooking, the milk will be rich and tasty. I ended up thinning it a bit to get the consistency I was after–an extra benefit to DIYing your own. When I do it again, I will take more care to source a certifiably organic, non-GMO bean.

DIY Soy Milk: Ready for blending

DIY Soy Milk: Ready for blending

If you’re concerned about wasting the pulp (often referred to as okara ), worry not! This byproduct has recipe applications all its own. The skin that can form on the milk when cooking (yuba) also has myriad culinary uses.

Do you make soy milk in some other fashion? Tips and tricks that you’ve picked up that will improve results? I hope you’ll share them in the comments!

DIY Soy Milk

DIY Soy Milk

1 cup dried soybeans
4 cups water just off the boil (plus additional for thinning milk to desired consistency)
2 tablespoons old fashioned rolled oats
1/8 kosher salt
sweetener and/or flavorings such as vanilla or almond extract (optional)

Rinse soybeans, drain, and soak in a generous amount of filtered water overnight. Drain and rinse again, removing any floating loose skins. Drain well and transfer beans to blender.

Add oats and boiled water to beans and secure lid. Puree thoroughly, being cautious that lid remains tightly closed.

Strain puree through a nylon nut milk bag into a 4 qt. pot. (I also tried straining the milk through a cheese cloth-lined strainer, but this was much more difficult to manage in my experience.) Bring the milk up to a gentle simmer, skimming off any foam or skin that forms. Continue to cook, stirring regularly, for about 20 minutes. Add salt and any sweeteners or flavorings desired. Taste and adjust flavorings as needed.

Fresh soy milk can be enjoyed as a warm beverage. Otherwise, transfer it to a glass container with a lid and allow to cool. Refrigerate to store.

https://wonderlandkitchen.com/2013/05/diy-soy-milk/

Baa, Baa, Black Sheep: The Maryland Sheep and Wool Festival

Maryland Sheep and Wool Festival

For as much as I love appreciating the work of people with serious farming experience and thriving businesses, I also grasp that I am not one of them. Realistically, I probably never will be (though I reserve the right to backyard garden and daydream). Regardless, no number of dollars spent at five-star department stores will magically hide that knowledge gap.

However, I take no shame in appreciating the efforts of others. On an average weekend, that’s just a trip to the farmers’ market, but last Sunday the neighbors and I piled in the car to check out the vendors and animals at the annual Maryland Sheep and Wool Festival.

Maryland Sheep and Wool Festival

Maryland Sheep and Wool Festival

Thankfully, it was a beautiful, light jacket kind of day (when it’s 85°F, it’s really hard for me to get enthusiastic about yarn and knitting projects), and we spent five hours exploring the amazing wares for sale and appreciating the many varieties of sheep and goats (and cooing over the babies).

Maryland Sheep and Wool Festival

Maryland Sheep and Wool Festival

I was particularly taken by the beautiful wood in the looms, spindles, and even the furniture for sale (so much so that I failed to snap a picture). It was definitely a day of DIY inspiration. I’m going to try and learn some basic spinning skills this year and perhaps make some purchases next time.

Getting Corny: Momofuku Milk Bar’s Corn Cookies

Momofuku Milk Bar's Corn Cookies

Based on the sheer number of somewhat bizarre drying experiments I’ve been running around here lately, you might have caught on that I’m a new convert to the joys home dehydration. Beyond your basic fruit snacks and carrot chips, I’ve been particularly interested in manufacturing my own DIY vegetable powders–everything from your standard garlic and onion to your more exotic tomato and red pepper.

In the course of things, I ended up dehydrating a bag of frozen sweet corn for a recipe that never materialized, so I packed the dried kernels away in a mason jar until a good use for them presented itself.

A few weeks later, however, I caught Savory Simple’s post on Momofuku Milk Bar’s Corn Cookies and was immediately seduced by the quirky taste profile the recipe suggested. I was less attracted to sourcing the unusual ingredients required. Did I really want to special order corn powder? Hmm, might my dehydrated corn step in to save the day? I committed…to thinking about it.

DIY corn powder and corn flour

And so the recipe went into my “to make one day” pile, and there it sat. For months. Finally, frustrated by my own inaction, I pulled out my “coffee grinder reserved for spices” and got to work. The dried sweet corn was powdered; lacking corn flour, I also blitzed some of my DIY cornmeal until the motor was near to overheating and my fingers were satisfied with the texture. I sifted for good measure. Twice.

Do these cookies match the originator‘s? I actually can’t say, since for as much time as I spend in New York City, I have yet to make a pilgrimage to the Milk Bar. Perhaps I shall pop in this month, now that I have a mission. What I can say is that I made these with just what was in my pantry, and they were fantastic. The freshly powdered dehydrated sweet corn and corn flour provided a strong corn flavor that made for a particularly unique treat.

DIY Corn Powder

Corn Cookies: Pre-bake

NOTES: Before baking these, I read a recommendation to substitute bread flour for the AP to help the cookies stand up to the high butter content, controlling spreading while maintaining a chewy rather than crisp texture. It was suggested that King Arthur bread flour was what they use at the Milk Bar, and I liked the results I got this way (though I did not bake a comparison batch).

On baking day, it was cold enough in my house, and I was impatient enough to get started, that getting my butter to room temperature seemed like a battle I was destined to lose. However, I remembered a neat trick I learned (via Food in Jars) to soften butter in warm tap water. Killer kitchen tip for the poor planners in the crowd like myself!

Corn Cookies: Ingredient Prep

Momofuku Milk Bar's Corn Cookies

Momofuku Milk Bar’s Corn Cookies

1 1/3 cups (225 g) King Arthur bread flour
1/4 cup (45 g) corn flour (I ground cornmeal to a super fine level; for international readers, this is NOT corn starch)
2/3 cup (65 g) freeze-dried corn powder (I used finely ground dehydrated sweet corn kernels)
3/4 teaspoon baking powder
1/4 teaspoon baking soda
1 1/2 teaspoons kosher salt
16 tablespoons (225 g) butter, at room temperature
1 1/2 cups (300 g) sugar
1 egg

Measure dry ingredients into a mixing bowl and whisk to evenly incorporate. Set aside.

Cream butter and sugar together (medium-high for 2 to 3 minutes). Scrape down bowl, add egg, and beat for 7 minutes more.

Reduce speed to low and add dry ingredients to wet. Mix just until combined.

Portion into 15 rounds on a parchment-lined baking sheet. Flatten each cookie to about an inch thick. Cover with plastic wrap and refrigerate for at least one hour before baking–do not skip this step! Cookies baked several days later, however, were just as good.

When ready to bake, heat oven to 350°F.

Place six raw dough pucks spaced well apart on a parchment-lined cookie sheet (they will spread considerably). Bake 16 minutes, until edged have lightly browned. Allow cookies to cool and firm up before removing from pan. Store in an air-tight container.

https://wonderlandkitchen.com/2013/05/getting-corny-momofuku-milk-bars-corn-cookies/

1 1/3 cups (225 g) King Arthur bread flour
1/4 cup (45 g) corn flour (I ground cornmeal to a super fine level; for international readers, this is NOT corn starch)
2/3 cup (65 g) freeze-dried corn powder (I used finely ground dehydrated sweet corn kernels)
3/4 teaspoon baking powder
1/4 teaspoon baking soda
1 1/2 teaspoons kosher salt
16 tablespoons (225 g) butter, at room temperature
1 1/2 cups (300 g) sugar
1 egg

Measure dry ingredients into a mixing bowl and whisk to evenly incorporate. Set aside.

Cream butter and sugar together (medium-high for 2 to 3 minutes). Scrape down bowl, add egg, and beat for 7 minutes more.

Reduce speed to low and add dry ingredients to wet. Mix just until combined.

Portion into 15 rounds on a parchment-lined baking sheet. Flatten each cookie to about an inch thick. Cover with plastic wrap and refrigerate for at least one hour before baking–do not skip this step! Cookies baked several days later, however, were just as good.

When ready to bake, heat oven to 350°F.

Place six raw dough pucks spaced well apart on a parchment-lined cookie sheet (they will spread considerably). Bake 16 minutes, until edged have lightly browned. Allow cookies to cool and firm up before removing from pan. Store in an air-tight container.