Wonderland Kitchen - 2013 Archives
Browsing Archive

2013

Cable Me: Quick Knit Winter Hat and Fingerless Glove Patterns

Cabled Winter Hat and Fingerless Gloves

I cut off all my hair a few weeks ago. Four days later, Jennifer Lawrence did the same, saving me from some measure of social scrutiny (well, almost). However, I had not accounted for the fact that it was winter and my ears felt like they were about to freeze right off my head whenever I left the house.

Being me, rather than just going to the store and purchasing some ear muffs, I found some awesome yarn and a pattern and began knitting with a vengeance. When I was done with a hat large enough to fit my admittedly plus-sized brain pan, I clearly had enough yardage left over for my favorite style gloves. So I found a second pattern and just kept going…and going…and going until I realized I actually only almost had enough yardage for gloves. In reality, I was short a thumb. Five measly ten-stitch rows.

Chunky Cabled Fingerless Gloves

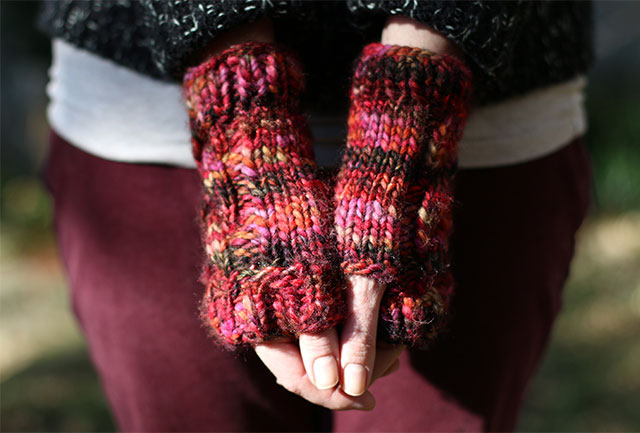
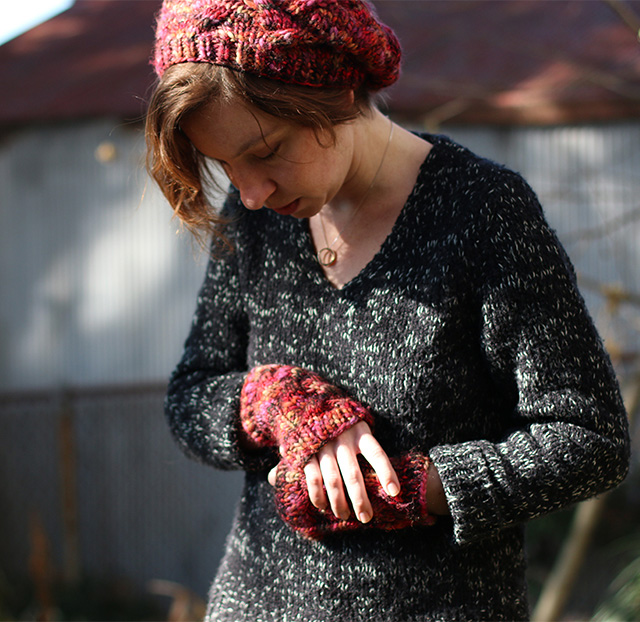
If you, too, are looking for a nifty hat-and-fingerless-glove winter warmer set, I love how these came out. I used a very bulky Berroco Borealis in Vik (108 yards to the hank), which resulted in a cap that might be a little loose on my more delicately headed sisters, but worked out quite well for me.

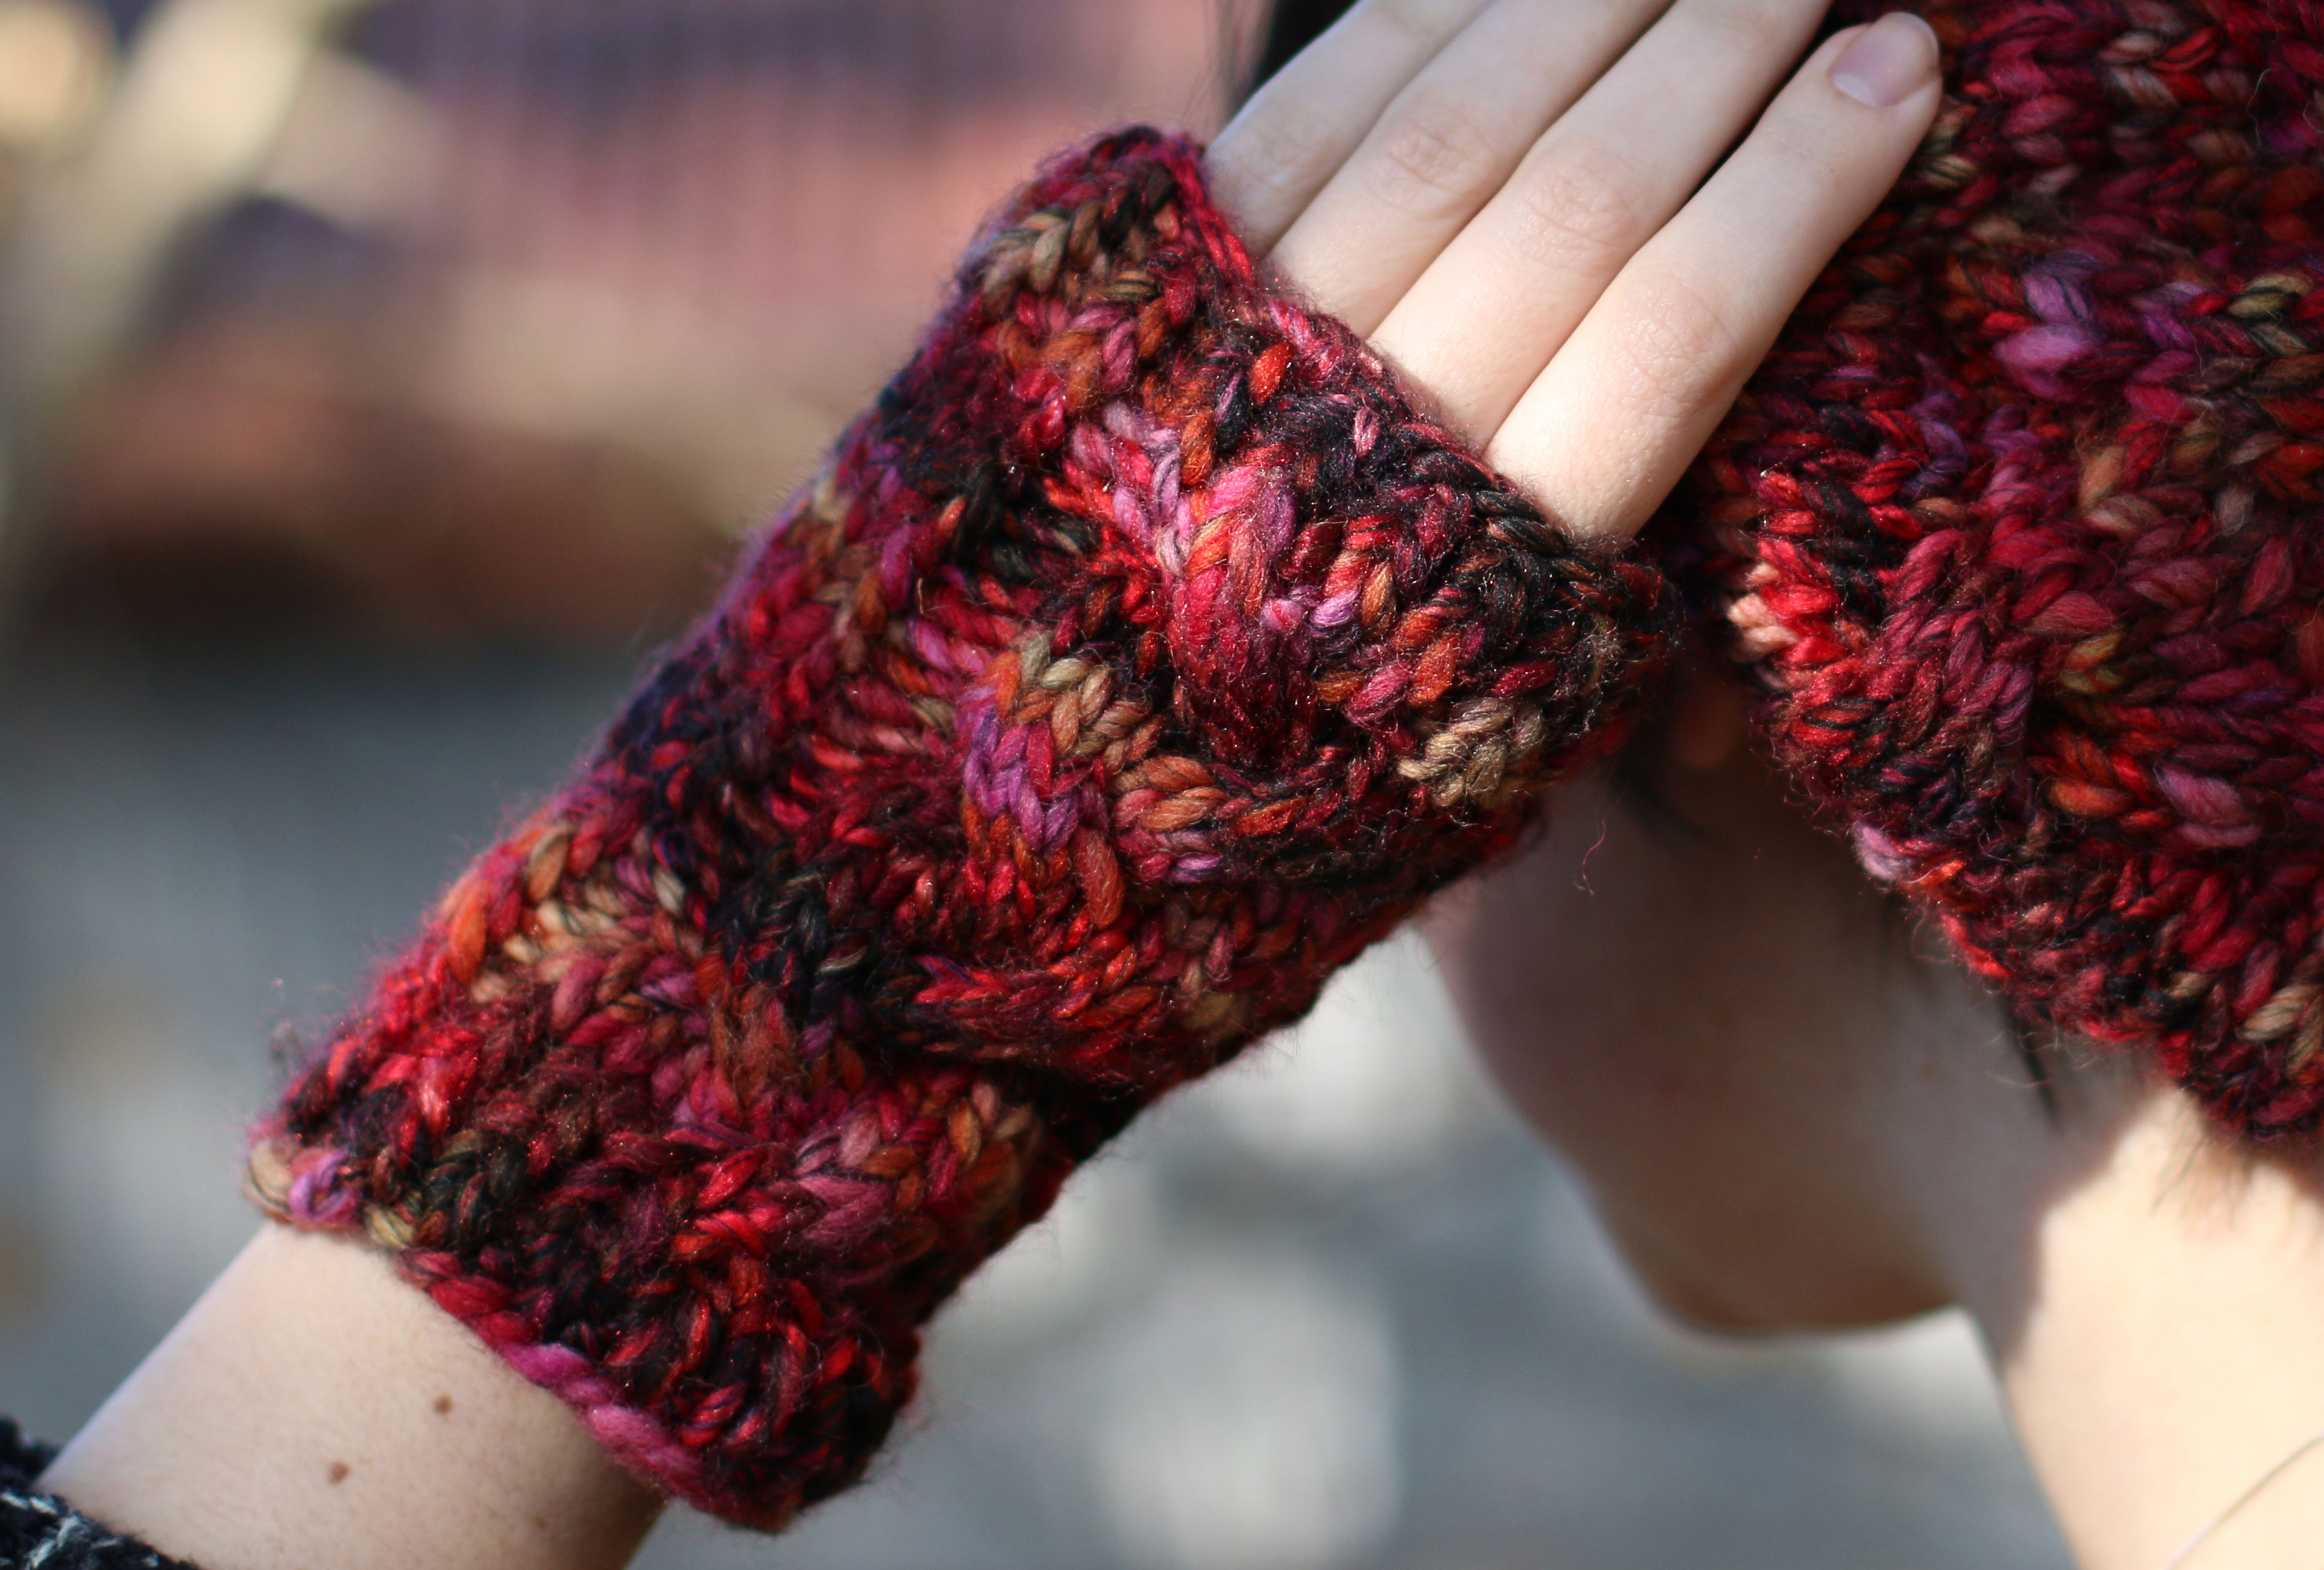
If you’ve never done any cabling before, fear not: this was my first time and possibly the easiest new stitch I’ve learned. It made the project look more sophisticated than many of my previous DIY efforts but I didn’t have to sweat the process. The gloves are done on the same size double points as the hat, so if you’re buying supplies, that will keep the project budget at least moderately in check. The gloves have a cable pattern up the back that’s a close match to the hat and makes it all feel like family.

Cabled Winter Hat and Fingerless Gloves

Chunky Cabled Fingerless Gloves

If I had known in advance that I’d have such a small yardage issue, I could have easily dropped a row or two from the hat pattern to make up for it, but alas. My awesome local yarn shop sympathetically offered me a surprise discount on my 3rd hank and now I have enough for a couple of extra gift glove pairs. This is the first knitting project I’ve ever finished and been anxious to cast on another right away. So if you need me I’ll be spending the rest of the holiday weekend with warm ears and a fully belly of leftovers, counting stitches and watching bad TV.

Patterns:

Raise a Glass: Cocktails for the Holiday Season

Holiday Cocktail Round-Up

While dashing in and out of hotel lobbies and swank bars with He Spoke Style as we shot a holiday campaign video for Banana Republic (see end of post), I got a little nostalgic for the excellent cocktail recipes he created for Wonderland Kitchen last winter. (I can’t be the only one already excitedly anticipating the Christmas tree even as I plan my Thanksgiving dinner. But I know, I know, I’ll tamp it down.) With the colder temperatures and celebratory parties upon us again, however, it seemed like the perfect time to revisit a few of these warming cocktails.

What drinks will you be sharing with your guests this holiday season?

First Taste of Autumn: The Cylburn

cylburn_top

Fall Tequila Cocktail: The French Intervention

frenchintervention_top

In the Russet Gold of This Vain Hour

russet_640

Rye and Maple Thanksgiving Cocktail: Poor Sap

Rye and Maple Thanksgiving Cocktail: Poor Sap

Scotch Cocktail: The Lamplighter

Scotch Cocktail: The Lamplighter Cocktail

A Cocktail for the Rest of Us: St. Festivus Flip

Festivus Cocktail: St. Festivus Flip

Mixing Islay: The Coal Fire Cocktail

The Coal Fire Cocktail - Wonderland Kitchen

Before It Was Yarn: Cuddling the Animals at the Maryland Alpaca Festival

Alpacas at the Maryland Alpacas and Fleece Festival

A damp and foggy morning could not dissuade my neighbor and I from heading to the Howard County Fairgrounds to check out the Maryland Alpacas and Fleece Festival. While I was successful in not drooling (too much!) on the amazing fibers for sale, it was impossible not to fall in love with the adorable alpacas penned in between many of the vendors. One owner very generously spent time chatting with us about the growth of his business. If I was still a kid, I would definitely be pulling on your sleeve and telling you all about how I wanted to raise alpacas when I grew up; being an adult, I’m having some trouble not doing the same thing.

I mean, can you resist these eyes?

Alpacas at the Maryland Alpacas and Fleece Festival

Alpacas at the Maryland Alpacas and Fleece Festival

Alpaca with baby at the Maryland Alpacas and Fleece Festival

Alpacas at the Maryland Alpacas and Fleece Festival

Vendors at the Maryland Alpacas and Fleece Festival

Fleece for sale.

Vendors at the Maryland Alpacas and Fleece Festival

Vendors at the Maryland Alpacas and Fleece Festival

Angora rabbit demonstration at the Maryland Alpacas and Fleece Festival

Angora rabbit demonstration

Flax spinning at the Maryland Alpacas and Fleece Festival

Flax spinning demonstration

Just Like Candy: #DIY Mixed Peel

DIY Mixed Peel at Wonderland Kitchen

On days like today, Google makes me cry for both confusingly uplifting reasons as well as the terrifying visions of the future its actions conjure in my head. But while this best-indie-movie plot line and/or Kafka tale develops, Google’s search engine reliably solves my problems. The latest: What the hell is mixed peel?

I went hunting with the goal of making this Alice in Wonderland-related Looking Glass cake. However, mixed peel not being an ingredient stocked at my local grocery, before the baking could begin it seemed I would need to DIY a key ingredient. The internet to the rescue, I was in business with a pile of citrus and a Googled recipe.

DIY Mixed Peel at Wonderland Kitchen

DIY Mixed Peel at Wonderland Kitchen

DIY Mixed Peel at Wonderland Kitchen

This is one of those super easy but several-day DIY projects that annoy the spontaneous among us. So make it now and then surprise yourself when you want to bake hot cross buns for Easter! (Note to self: Bake hot cross buns for Easter this year.) If you have the patience to cut up citrus peel and the skill to boil water, you are already pretty much done. Holiday goodies will definitely be kicked up a notch this season. (So yes, family, prepare for Wonderland fruit cakes this Christmas.) Anyway…

DIY Mixed Peel at Wonderland Kitchen

DIY Mixed Peel
Recipe via Best Recipes, desire due to The Alice in Wonderland Cookbook: A Culinary Diversion by John Fisher

Note: The original recipe calls for less fruit. I lived dangerously and added an extra lemon and one more orange. I was well pleased with the result, but be advised.

1 grapefruit
2 oranges
2 lemons
(or citrus combo of your choosing)
1 1/2 cups sugar

Peel citrus fruit, including as much of the pith as possible. Slice peels into approximately 1/4-inch pieces.

Place prepared citrus peel in a sauce pan and just cover with water. Bring to a boil and simmer for ten minutes. Drain and repeat, this time reserving 1/2 cup of the simmering liquid before draining.

Return boiled peel, 1/2 cup reserved liquid, 1/2 cup fresh water, and 1 cup sugar to sauce pan and stir to dissolve sugar while bringing to a boil. Remove from heat, cover, and let sit overnight (mine sat about 18 hours). The following day, add an additional 1/2 cup sugar and bring to a boil. Simmer for 15 minutes and then drain citrus peel thoroughly.

Line a baking sheet with parchment and spread out peel pieces to dry, tossing occasionally to prevent clumping. When peels are no longer wet (probably another 24 hours), place in a container with a tight-fitting lid and store in the refrigerator (or the freezer for a longer shelf life). According to my reading, prepared peels will withstand at least a month in the fridge.

Mad Hatter Tea Party: Not Too Dry Tea Biscuits

Not Too Dry Tea Biscuits

You may have noticed something of an overarching theme in this site’s construction, but while Alice in Wonderland comes up here and there, I have yet to post any recipes for roasting Jabberwocky or to offer any advice on adding pepper to soups.

That being said, when I came across this now out-of-print cookbook riffing on the classic tale, it seemed like a match I surely could not ignore. It was easier to ignore it once I caught the triple-digit price tag on existing copies, however. Still, even while I waited for a version more within my budget, there were a few treats from the book posted online, so I decided to see where that rabbit hole would lead.

Not Too Dry Tea Biscuits: Tray

Whether you’re plotting a grand tea party for six or it’s just you and your cat, the recipe for these Very Dry Tea Biscuits is simple enough to whip up any time. No worries. As long as you don’t over-bake them, they are not too dry at all, neither are they terribly sweet, though bright hints of lemon and the rich scent of nutmeg accent them beautifully. This recipe turned out about 40 two-inch biscuits for me, and they store perfectly in the freezer. I like having them on hand to pull out at a moments notice when curious guests suddenly arrive and are in need of snacks.

Now that I’ve had a taste of Wonderland cooking, I must admit that roasting Jabberwocky sounds kind of intriguing. Maybe we’ll have to follow this white rabbit a bit more often.

Not Too Dry Tea Biscuits: Process

Not Too Dry Tea Biscuits
from The Alice in Wonderland Cookbook: A Culinary Diversion by John Fisher

1 stick butter, room temperature
1/3 cup sugar
1 egg, lightly beaten
8 ounces flour
2 teaspoons lemon zest
a pinch of salt
a very generous scratch of nutmeg
2 tablespoons milk, as needed

Heat oven to 325°F

In a medium bowl, measure out flour. Add lemon zest, salt, and nutmeg and whisk to combine.

Cream together butter and sugar until light and fluffy. Scrape down the sides of the bowl, add egg, and continue mixing until incorporated. By hand, stir in mixture of flour, lemon zest, salt, and nutmeg. If dough remains too dry, add just enough milk to pull it together.

Roll out dough on lightly floured counter and cut out desired shapes. Place each biscuit on a parchment covered cookie sheet (you can squeeze them fairly close–they will not spread much) and prick each with a fork. Bake 14-16 minutes, or until lightly browned.

Cool completely on a wire rack. Store tightly covered (in the freezer for an even longer shelf life).

Pumpkin Carving in Wonderland: The Cheshire Cat

Pumpkin Carving in Wonderland: The Cheshire Cat

“Oh, you can’t help that,” said the cat. “We’re all mad here.”

To be clear, this bit of on-brand pumpkin carving is not a design of my own invention, but I liked how it came out so much I wanted to share the results. If you, too, are a fan of Lewis Carroll and would like a mischievous kitten of your own to keep you company during this spooky season, the pattern is here. For those who lack the patience to actually cut out and trace the design onto the squash of their choosing (stares at shoes), it’s also very friendly to freehand sketchers.

The Cheshire Cat-Lit Up

Now, when I was a kid my dad would make me an ingenious pumpkin carving tool of his own invention out of a piece of saw blade screwed into a stump of dowel rod. (Well, I think it was his own invention. My dad and I “invented” a lot of things it turned out later others were already on to, but that never let the air out of our tires!) Anyway, this petite saw-knife was a brilliant way to slice out detailed designs with minimal blood, sweat, and tears. The cheap plastic Pumpkin Masters Pumpkin Carving Kit I spotted on sale at Rite Aid for $2 made it through the job this year (though barely) but I do recommend sourcing a blade with a little more nuance than a steak knife (my otherwise normal default). I don’t know what they are feeding the pumpkins in the patch this year, but they are beasts–thick walled and not messing around.

The neighborhood pumpkin carving contest broke up before all the monsters were complete, but I think Wonderland’s Cheshire Cat is at least still a contender. Now, when is It’s the Great Pumpkin, Charlie Brown going to be broadcast this year?

UPDATE!: Dad has unearthed our original, ground-breaking precision pumpkin carving tool!

pumpkin carving precision tool