Wonderland Kitchen - September 2011 Archives
Browsing Archive

September, 2011

Along Came a Spider (Curds and Whey Edition)

yogurtcheese_top

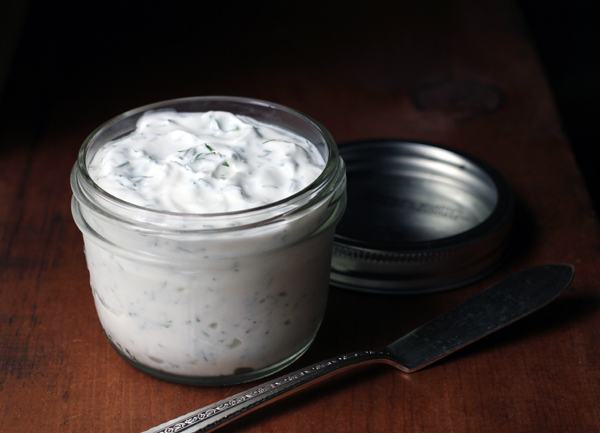
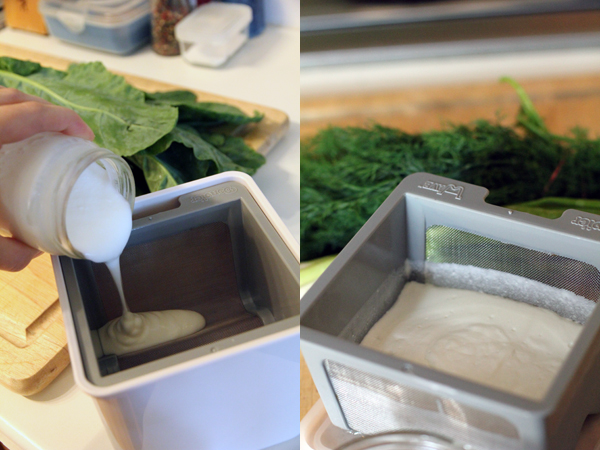
Sometimes, a girl comes home from the market, decides what to do with her purchased produce and dairy, and discovers she doesn’t need a large quantity of yogurt, but rather a solid dollop of sour cream. No problem. Just grab a strainer (I have a semi-fancy one that sits in a container with a lid over top) and make yogurt cheese. You can accomplish the same straining with a few layers of cheese cloth over a bowl, but I’ve never attempted that method.

Okay, back to making the cheese.

Nothing irks me like coming home from the market and discovering I have almost the right ingredients, but not quite. Draining enough whey out of my homemade yogurt to make an acceptable sour cream or cream cheese substitute (or even just to get a nice Greek yogurt consistency when a batch comes out a little runny) offers that satisfying “Ha! Take that, life!” self-sufficiency that I so enjoy in the kitchen. Not to mention that it saves me from making an additional trip to the grocery.

So, when there are enough of those little glass jars of yogurt taking up shelf space, I pull out two while I’m still putting things away, pour the yogurt into the strainer, pop on the lid, and leave it to drain in the fridge–anywhere from a few hours to a day or two, depending on the consistency I’m going for and how soon it’s needed. The whey collects in the bottom container and you can just pour that off or conserve for some other use.

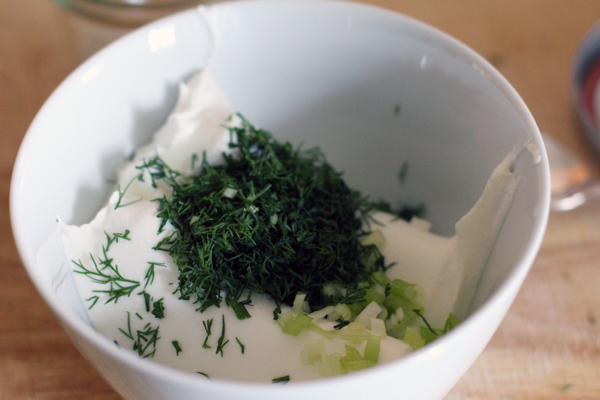
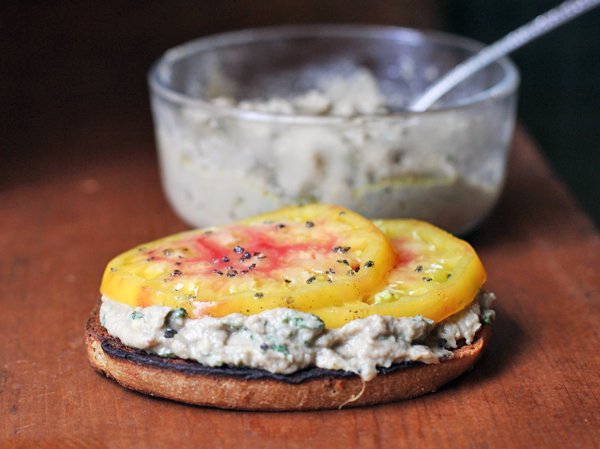
Some weeks it seems that my commitment to making my own yogurt is much stronger than my desire to actually eat it, but a fresh dish of yogurt cheese usually turns that around. This week I left a batch for a full 48 hours (okay, yes, I forgot all about it) and had a nice, thick base to work with. I added a pinch of salt, a chopped scallion, and a good dose of dill, and stirred it up into a spread that makes for a perfect savory toast topping. What would you add?

I think our porch spider got a whiff of my curds and whey…

Evening, with Eggplant

egg_top

Or why I will never make baba ghanoush the old way again. Let me explain.

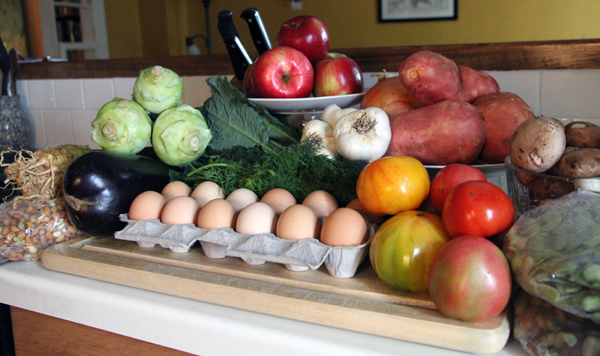
Inspired by last week’s post-market triumph over the eggplant, I picked up another one this Saturday (along with a pile of vegetables we will figure out what to do with as the week progresses–stay tuned!). As regular readers know, last week was the episode in which I discovered that the key to delicious eggplant was burning it to a crisp under the broiler for almost an hour (I can’t even imagine how much better this gets if you have a gas range and can actually light it up over a flame). Thanks, Yotam Ottolenghi! I owe you one. And it seems I am not alone.

This week, I turned again to the source of past glories, seeking new triumphs: Ottolenghi’s Plenty. I know! An actual paper cookbook! Offline cooking is a little odd for me, seeing as I am traditionally leashed to Epicurious and fellow bloggers for inspiration, but it’s working so I’m stirring with the flow. I promise to stop quoting Ottolenghi soon, but meanwhile I can’t seem to help myself. The food is vegetarian (a major point in this kitchen!), unfussy yet interesting and, most importantly, delicious. Real cookbooks: previously only collecting dust, now equally splattered with cooking oil. Somehow, this feels like progress.

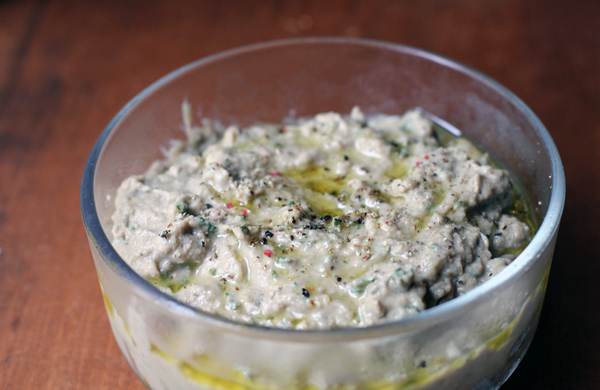
So, back to the baba. “Burnt eggplant with tahini” is not much more than that, but somehow the proportions of the makings, not to mention the chance to get that bottle of pomegranate molasses out of the fridge and back into action, made this scrape-together-and-stir dish extra fetching. Look out, next cocktail party! Here we come.

Burnt Eggplant with Tahini

Adapted from Plenty by Yotam Ottlenghi

1 large eggplant
1/3 cup tahini
*1T to 1/4 cup water
1 T pomegranate molasses
2 T lemon juice
2 garlic cloves, crushed and mashed with a little salt
3 T chopped parsley
salt and pepper, to taste
**handful of pomegranate seeds
olive oil to finish

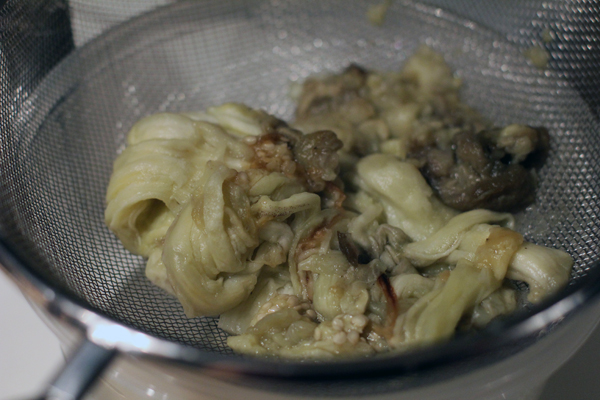
Broil eggplant for 45 minutes to 1 hour (depending on size), turning half way through, until flesh is well charred. Cut open and removed flesh into a sieve to drain.*

In a wide bowl, mix eggplant with tahini, water, pomegranate molasses, lemon juice, garlic, parsley, salt, and pepper. Mash and stir (a dinner fork worked will for me), adding additional pomegranate molasses, lemon juice, and/or garlic as needed to suit your tastes (I got in at least one additional glug of molasses** before all was said and done).

If you want to do it up fancy, you can spread the dip into a dish and top with a drizzle of olive oil, a sprinkle of pomegranate seeds, and a few parsley leaves. If it’s for personal use, just exercise restraint and try not to eat the entire bowl with your mixing spoon.

*There’s some business about draining the eggplant flesh after roasting, but then you add in a 1/4 cup water afterwards. While there may be good reason for this in/out process, I simply drained briefly and then only added a splash of water. Any more and the texture risked unpleasantness, so exercise caution.

**If this dish was for a cocktail party, I would have sprung for the fresh pomegranate seeds to sprinkle over the top, but as it was just me and my crackers, I simply added an extra splash of the molasses. A less photogenic dish, admittedly, but it won’t be around long enough for anyone to complain about it.

Thoughts on a Celeriac

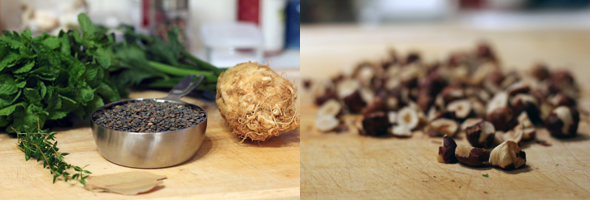
lentil_600

I have always wanted to buy a celeriac, but I never had a reason.

Still, when swiss chard, more swiss chard (not that I have anything against an additional bunch of awesome swiss chard!), or a bulb of fresh, organic celeriac presented itself as a shopping decision two weeks in a row at my CSA stand, I could not resist temptation. Luckily my copy of Yotam Ottlenghi’s Plenty had not one but two recipes for this knotty little root vegetable, and I had all the makings for one of them. Good thing since, based on recent dinners, the husband was beginning to think that our vegetable drawer was producing an infinite swiss chard supply of its own volition.

Though I was disappointed to weight my “one small celeriac” and discover that it was significantly smaller than the small 1.5 lbs. vegetable indicated in the recipe, I recovered as soon as the cooking was done and the eating began. Celeriac is a type of celery, as you might have suspected, but in this case it’s the root bulb that is its most attractive feature. To me it conjures a parsnip/potato/celery cross in taste, but it’s significantly less starchy than your typical Yukon. I found it to be quite wonderful, and will be keeping an eye out for more of these little hobbit treats at this weekend’s market. Apparently, they store well!

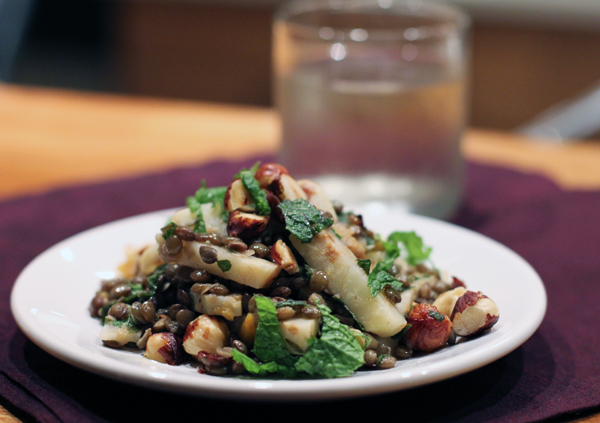
The variety of textures alongside the amazing tastes are what really make this dish a standout in my mind. In addition to the loveliness of celeriac, the lentils keep their shape and marry very well with the herbs, vinegar, and oils. The hazelnuts add richness and crunch, while the mint keeps things just on this side of summer. This seems to be one of those dishes that just keeps getting better as it marinates in the fridge, so do not fear the leftovers. Even at room temperature, this would serve as a phenomenal picnic or brunch dish without its features getting muted.

Celeriac and Lentils with Hazelnut and Mint

From Plenty by Yotam Ottlenghi

1/3 cup whole hazelnuts
1 cup French green lentils
3 cups water
2 bay leaves
4 thyme springs
1.5 lbs. celeriac bulb, peeled and cubed
4 T olive oil
3 T hazelnut oil
3 T red wine vinegar
4 T chopped fresh mint
salt and pepper

Roast the hazelnuts in a 275˚F oven for 15 minutes. Cool and roughly chop.

Combine rinsed lentils, water, bay leaves, and thyme in a saucepan. Bring to a boil and then simmer for 15 minutes or until lentils are al dente. You definitely want them to retain their shape. Drain.

While the lentils cook, bring a second pan of well-salted water to a boil and cook the celeriac for 8-10 minutes, until just fork-tender. Drain.

As soon as the lentils are drained, pour them into a large bowl and stir in the red wine vinegar, the olive oil, and 2T of the hazelnut oil, salt and pepper. Add in the cooked celeriac and half the mint and hazelnuts and toss. Adjust the seasonings as needed. Plate, using the reserved mint, nuts, and a drizzle of hazelnut oil to garnish.

Put Down the Hipstamatic

sandt-e1316534591220

I’m probably more than a little late to this game, but thanks to a post I read yesterday, I was introduced to tumblr photo blogs such as My Parents Were Awesome and Dads are the Original Hipsters. You can easily lose an afternoon reading these captions.

Immediately, photographs of my own awesome, original hipster parents came to mind.

Dad, with PBR, trucker hat, and cigarette, in 1977. The fact that this is my dad made it difficult to keep a straight face while living in Williamsburg, Brooklyn, in 1999.

Though it’s memories of the picture below that have always made watching Donna and Eric in “That ’70s Show” special. Yes, dad is wearing the same outfit. He probably still has it hanging in his closet. It’s a family trait.

Corn, Coincidentally

corn_top

I was actually eating what I was projecting would be my last tomato sandwich of the season when I came across Molly Wizenberg’s “Not a tomato sandwich” post. In what could be interpreted as summer sacrilege, she was advocating a break from the red, juicy goodness long enough to enjoy some spicy, buttery, tangy corn. As chance would have it, I, too, had a few ears of corn in the fridge that where looking for a purpose. All the cosmic signs, it seemed, were aligning.

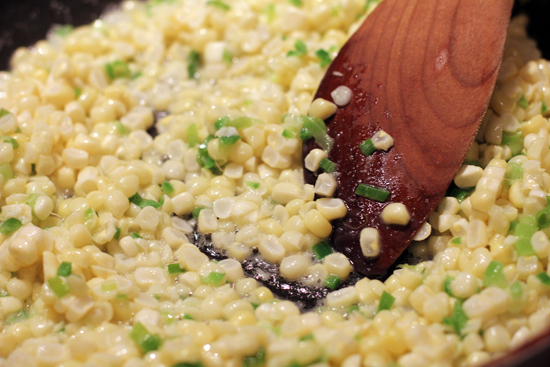
After reading through Molly’s description–particularly the idea of making one’s kitchen smell like the state fair (in a good way!)–I didn’t need all that much convincing. I am a child of Ohio, after all, and corn ranks high on my list of summer pleasures. Plus, the amount of effort (a one-pan chop and stir) suited my energy level, and the rapidly multiplying hot peppers in the garden doubled down on the idea. Fifteen minutes later, I had the most amazing bowl of jalapeño- and lime-kicked kernels, caramelized in a warm butter-based coating. I pronounced it “vegetable as decadence” and got out the big spoon.

Who even needs popcorn or dessert when this is possible?

Matthew’s Spicy Sauteed Corn
Adapted by Orangette, originally from Spilled Milk

3 T. unsalted butter
Kernels from 3-4 ears fresh corn
2 scallions, thinly sliced
1 jalapeno pepper, minced
2 T. water
Salt
1 T. lime juice (I added closer to 2 T., cause I was in the mood)

Melt the butter in a skillet over medium-high heat. When it starts to bubble, add all the vegetables and stir to coat with butter (channel Paula Deen if this part starts to makes you nervous). Allow to cook and brown about 10 minutes, stirring a few times (though you want to let it sit in the pan long enough for some parts get a little crisp and brown–it’s tastier that way). Toss in the water and stir well, scrapping any stray corn bits off the bottom of the pan. Once the water has evaporated, take the skillet off the heat, add salt and lime juice, stir and serve! Expect any corn left in the pan to be eaten immediately by other family members, so take a big serving.

Falling Back Into Soup

soup_top

Crisp temperatures required that I actually dig proper shoes out of the closet before hitting the farmer’s market this weekend. Suddenly sweet potatoes and squash sounded appetizing. Weird how nature works like that. Summer, it seems, is saying her farewells.

When I got my weekly produce haul home and out on the counter, I spent fifteen minutes dreaming up multiple, complex culinary projects that would suit a blog post here before I stumbled on Yotam Ottlenghi’s recipe for Broiled Vegetable Soup and realized I had the exact combination of veggies needed for this single, elegantly simple dish. It was irresistible. Some people play sudoku; I get a little jolt of dopamine when I read through an ingredient list and realize I have just enough of this and that and that other thing to make it work out perfectly.
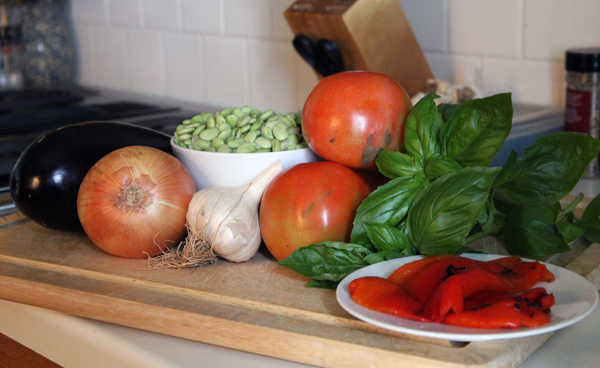
Aside: the eggplant is a vegetable that I want to love unreservedly, but that I frequently despise because I have cooked it poorly. No more! When prepping it for soups and spreads, the “hour under the broiler” method Ottlenghi suggests will be my new go-to. Doing so chars the outside to a crisp so that you then literally crack it open to scoop out the beautifully cooked meat inside.
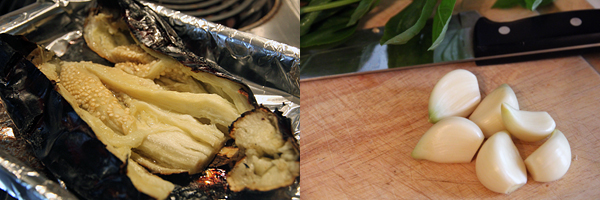
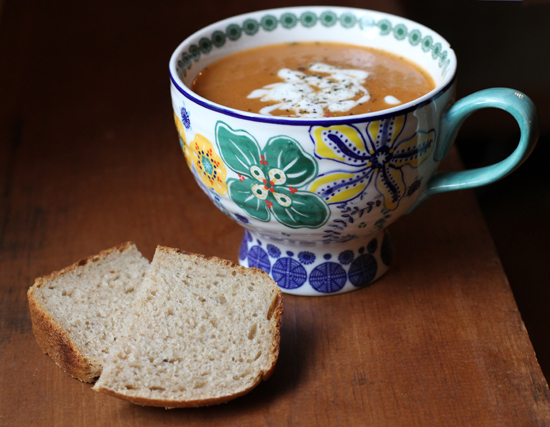
Okay, back to the soup. While I said I had just enough of everything, my available ratio of nightshades definitely favored the tomato, so unsurprisingly my soup led with that on the palate. Still, the rich and smokey eggplant on the base and the fresh basil on the top notes make this soup a stand out. My real coup here, however, was that I had scored a bag of fresh lima beans, so no canned mush in my ladle. The resulting bowl was a perfect match to the season.

You cannot (or at least I certainly will not) have soup without bread, however, and I had just seen a recipe I wanted to try out that used left over dill pickle juice as part of the liquid. You might have noticed that I’ve been making a few pickles here and there this summer, so I have spare dill-spiked brine all over the place. It seemed a similar-enough thing when I started, but I began to change my mind as I worked. I think the sweet, less vinegar-y commercial dill pickle juice that was suggested in the recipe would have suited this project fantastically, but my homemade pickling leftovers were a little too pungent. Still, it got me out of my rye bread rut, so all was not lost. And it makes great toast!

Broiled Vegetable Soup

From Plenty by Yotam Ottlenghi

3 medium eggplants
2 red bell peppers, stems and seeds removed (I used 2 roasted red peppers out of jar on hand)
3 medium tomatoes
2 red onions, diced
2 T olive oil
3/4 basil leaves, torn
2 oregano springs, leaves only
10 garlic cloves
1 qt vegetable stock (I had less eggplant and only ended up needing 3 cups to get a good consistency soup)
salt and pepper
4 cups cooked lima beans (fresh, if you have them)
yogurt or lemon to garnish

The best part of this recipe is the taste that the broiling of the vegetables gets out of them (or at least that’s what Ottlenghi writes and, after sampling, I would have to agree). Set the broiler on high. Prick the eggplant a few times with a fork and place in a foil-lined pan. Broil for 30 minutes.

At the 30 minute mark, turn the eggplant over with tongs and add the 2 peppers to the pan. Broil for 15 more minutes, turning the peppers half way through.

Place the tomatoes in a second foil-lined pan and at the 45 minute mark, add them to the oven on a rack beneath the already broiling vegetables. Broil for an additional 15 minutes, and then remove all vegetables from the oven, wrapping the peppers in foil. Once the peppers are cool enough to handle, peel them and roughly chop. Scoop out the flesh of the eggplant, leaving the charred skin behind.

In a stock pot , saute the onion in the olive oil on low for 20 minutes, until soft and golden (I started this when I put my tomatoes in the oven and the timing worked out well). To this pot then add the scooped eggplant, tomatoes, peppers, garlic, stock, oregano, half the basil, salt and peppers and simmer for 15 minutes. Blend until smooth and add cooked lima beans, reheating as needed. Adjust seasoning to taste and serve topped with yogurt or lemon and the remaining basil leaves. A slice of freshly baked bread on the side won’t do you wrong, either.