
During my vegan yogurt experiments, I read a lot about making coconut, almond, and rice milks at home and sorted out my own preferred methods. (Key ingredient across the board? A nylon straining bag.) Now, whenever I find myself standing in front of those Tetra Pak boxed beverages at the grocery, I consider for a second if it’s worth it for me to DIY it at home; even in the chaos of an average week, it usually is.
The one experiment I’ve avoided is soy milk. Basically, I’ve come across headlines espousing the “evils of soy” just often enough to shy away from using it as one of my alternative milk ingredients. I had no nutritional research to back up this decision; rather, it was strictly a case of “Well, I haven’t read anything bad about almonds this week. Let’s just use those!”
Still, I have long been curious about making my own tofu or vegan cheese, so when I came across a bag of soybeans at the Asian market I love exploring, I decided to finally try out boiling up a batch of my own soy milk on the “all things in moderation” philosophy. (And once you start looking, I think there may be just as many articles espousing the “many benefits of soy!”…so, I can only encourage you to make your own judgment call.)
Early research on methods led me quickly to some stunning soy milk makers, an appliance I had never seen before but one that might interest high-volume producers of any type of alternative milk. In my house, a blender and an efficient hand straining method get the job done simply and quickly enough.
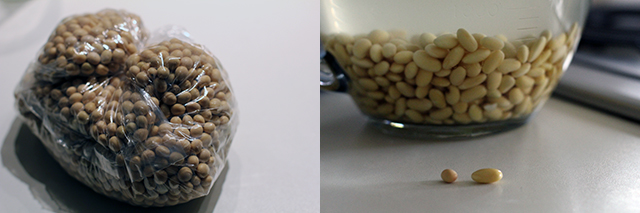
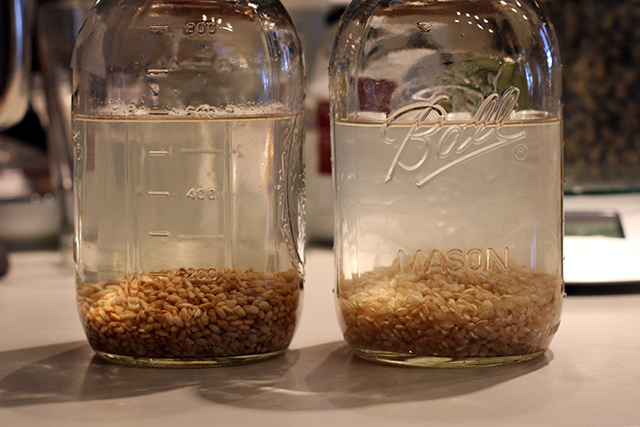
DIY Soy Milk: Before and after soaking the beans
Similar to my experience with rice milk that didn’t taste like commercial rice milk, there were plenty of posts lamenting that DIY versions of soy milk just didn’t match what the family was used to from the store. I read a lot about how to avoid a bitter, beany-tasting soy milk (hot water when blending, cooking after straining), and picked up a tip to add a couple tablespoons of oats to the blender to make a creamer product. I didn’t remove all the skins before blending nor did I soak the beans in water fortified with baking soda, though these are also variations out there. Like many of these DIY projects, personal preferences will lead you to your own best practices.
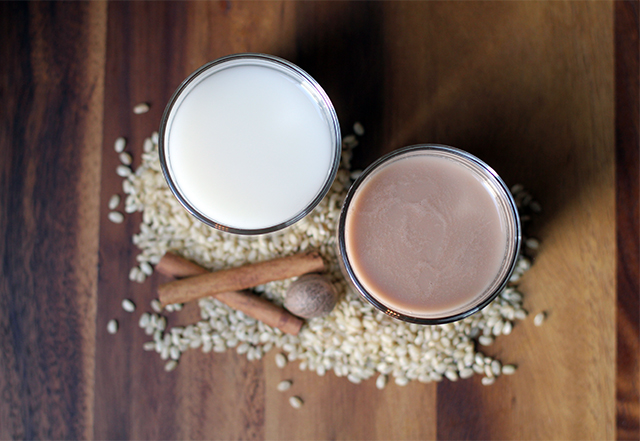
When I first removed the lid off the blender carafe after pureeing the soaked raw beans, I worried over the smell–something about it had a character that had me flashing back to the days I spent oil panting in the ’90s. The milk will also have a raw, beany taste at this stage. (It reminded me of eating a pea or green bean seed right out of the garden.) However, after cooking, the milk will be rich and tasty. I ended up thinning it a bit to get the consistency I was after–an extra benefit to DIYing your own. When I do it again, I will take more care to source a certifiably organic, non-GMO bean.
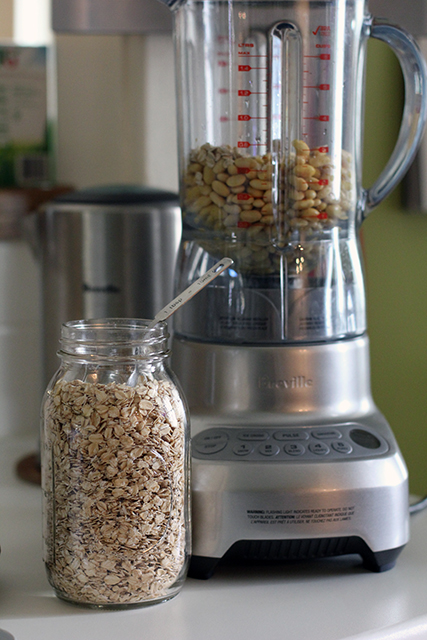
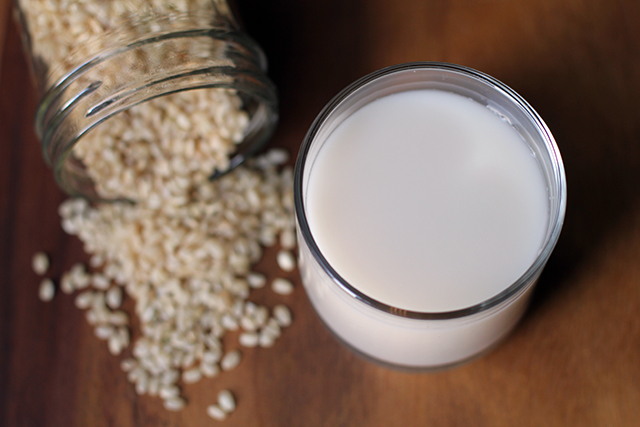
DIY Soy Milk: Ready for blending
If you’re concerned about wasting the pulp (often referred to as okara ), worry not! This byproduct has recipe applications all its own. The skin that can form on the milk when cooking (yuba) also has myriad culinary uses.
Do you make soy milk in some other fashion? Tips and tricks that you’ve picked up that will improve results? I hope you’ll share them in the comments!

Rinse soybeans, drain, and soak in a generous amount of filtered water overnight. Drain and rinse again, removing any floating loose skins. Drain well and transfer beans to blender.
Add oats and boiled water to beans and secure lid. Puree thoroughly, being cautious that lid remains tightly closed.
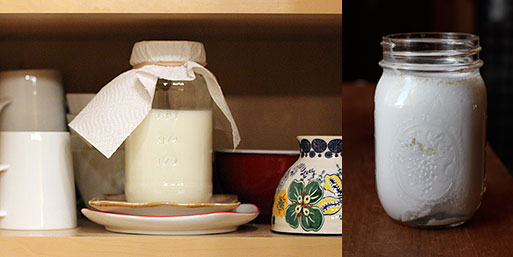
Strain puree through a nylon nut milk bag into a 4 qt. pot. (I also tried straining the milk through a cheese cloth-lined strainer, but this was much more difficult to manage in my experience.) Bring the milk up to a gentle simmer, skimming off any foam or skin that forms. Continue to cook, stirring regularly, for about 20 minutes. Add salt and any sweeteners or flavorings desired. Taste and adjust flavorings as needed.
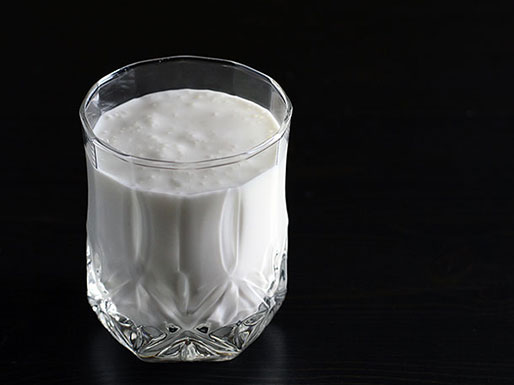
Fresh soy milk can be enjoyed as a warm beverage. Otherwise, transfer it to a glass container with a lid and allow to cool. Refrigerate to store.


")


