cornmeal » Wonderland Kitchen
Browsing Tag

cornmeal

Pioneer Days: In The Country Kitchen for Salt-Rising Bread

salt-rising bread

A little more than a year ago, I attempted an old-world recipe from Della Lutes’s completely charming cook book-meets-memoir The Country Kitchen (Little, Brown, and Company, 1936). A few months ago I then passed that book on to a friend, and we got to talking about another interesting recipe referenced in the text for salt-rising bread.

Or actually, almost a recipe, as far as contemporary expectations go. While Lutes quotes the rough method, she comes up just short enough on detail that I was hesitant to try it out. But I had something she did not: the internet.

And of course, the crowd provides. After reading up on the unique smells and the finicky challenges of this bread, I took a minute to gauge my sanity and then plowed ahead. I mean, I do all kinds of weird projects here in Wonderland, so why not? To hedge my bets, I went with the very thorough King Arthur guidelines provided in this post, and I was not disappointed!

salt-rising bread: steps

Interesting points and some things to keep in mind:

Even though it’s called salt-rising, there’s actually not that much salt in the recipe. But there is no added commercial yeast. More details for the curious on the history and the name can be found here and more discussion can be had here.

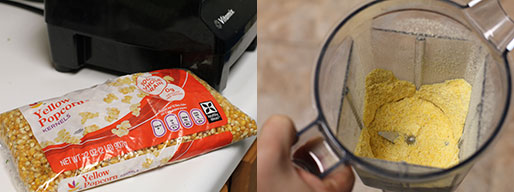
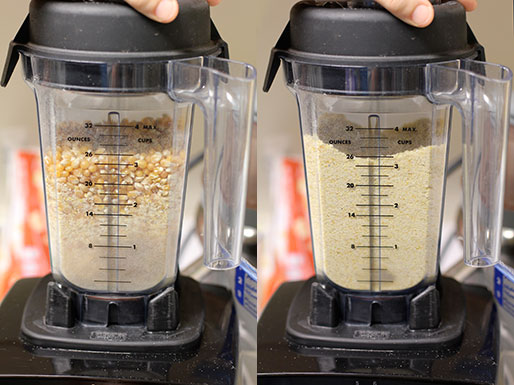
Some other recipes use potatoes instead of cornmeal, or some combination. Others caution to only use whole grain cornmeal, which I did. (You can buy this—just check your package—or make your own!)

Everything they say about the smells the various stages of this dough emit are true and yet it’s just kind of weird, not stomach convulsingly terrible—to my nose at least. I’m also accustomed to strange cheeses and various fermentation projects, however, so perhaps I’ve simply built up a tolerance.

Most challenging part: You will need a method to keep the dough warm enough—between 90°F and 100°F according to the recipe I followed (though others go as low as 80°F). My oven offers a proofing setting at around 95°F, so I was golden and the development of the dough seemed to proceed on schedule, but your results may vary depending on what you can rig up. You will at least know if things are amiss at each stage, so it won’t just be a big surprise at the very end.

While I started this recipe just before I went to bed one night and didn’t end up with a loaf of bread until the following evening, the actual skills needed and dishes used/mess made are quite minimal, so this recipe is mostly a question of patience to my mind.

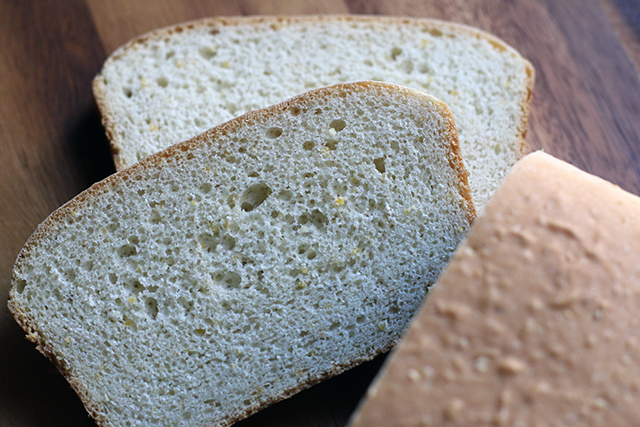
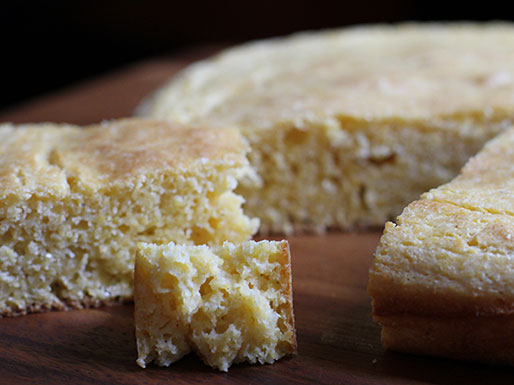
And the results are really interesting. The produced loaf has a fairly dense, dry crumb that stores well and makes for excellent toast (really the only way to eat it, in my opinion). Toasting perfects the inherent cheesy, nutty flavors in the dough that people note and that seem to be the nostalgic pull for many.

salt-rising bread

Salt-Rising Bread
As seen on King Arthur Flour, but the recipe’s providence goes back quite a bit further. For some additional process pictures and hand holding, I definitely recommend a read through KAF’s related blog post as well–just don’t panic!

Stage One

1/4 cup milk
2 tablespoons cornmeal
1 teaspoon sugar

Stage Two

1 cup hot water (120°F to 130°F)
1/2 teaspoon salt
1/2 teaspoon baking soda
1/2 teaspoon sugar
1 1/2 cups AP flour

Complete the Dough

4 tablespoons butter, softened
1/2 teaspoon salt
2 1/4 AP flour

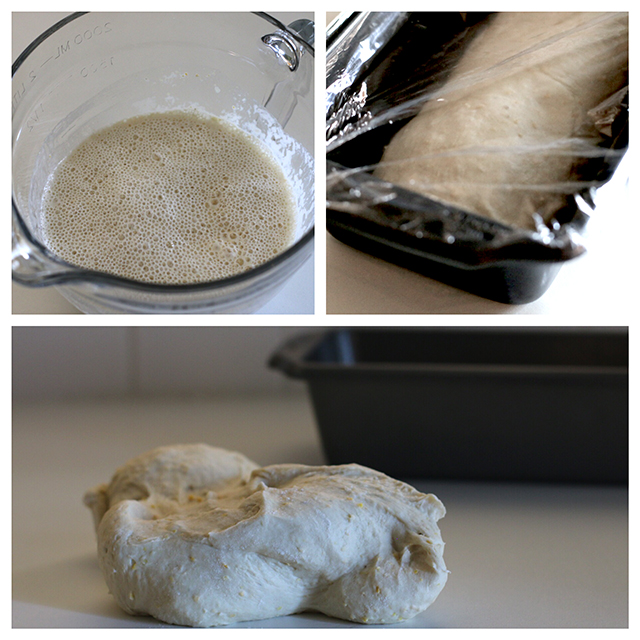
Stage One: Scald the milk and cool to lukewarm. In a glass container large enough to allow for expansion (I used an 8-cup glass measure for stages one and two), combine the milk, cornmeal, and sugar. Whisk to combine until no lumps remain.

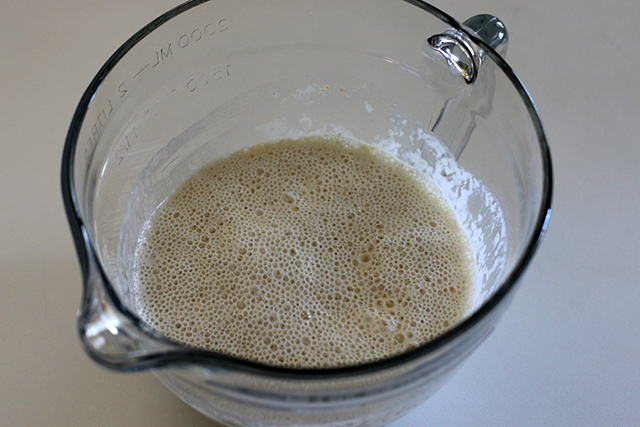
Cover with plastic wrap and let rest in a warm place (between 90°F and 100°F) for 8 to 12 hours. At the end of this stage, you should see some bubbles/foam on the surface and notice a slight smell. If not, you will need to start over (or abandon this project–no shame).

Stage Two: Combine the hot water, salt, baking soda, sugar, and flour and then stir this mixture into Stage One until evenly incorporated. Cover the bowl again and return to your warm place for two to four hours, until the starter has doubled and is quite bubbly and pungent. (The measuring cup makes this even easier to gauge; mine took about 3 hours.) Here again, if you don’t get the results described, you will need to begin again. If action just seems slow, try a warmer spot for a couple hours more.

salt-rising bread: bubbles

Complete the Dough: Transfer starter to a large bowl or stand mixer and add remaining ingredients. Knead until smooth.

salt-rising bread: dough

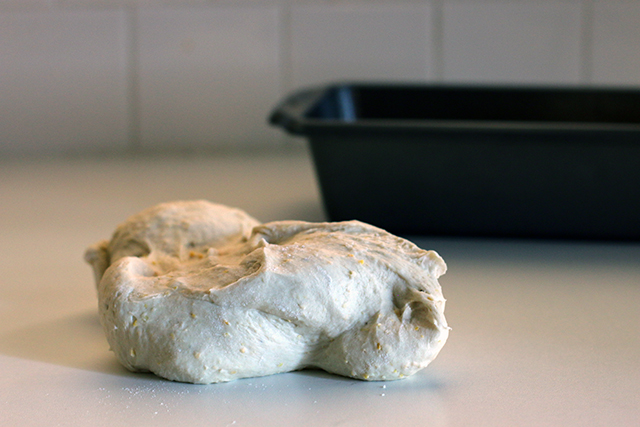
Form dough into a log and place in a greased loaf pan (8 1/2″ x 4 1/2” is recommended, but I used my 9” x 5” without issue). Cover again and return to the warm place until it crowns over the edge of the pan. The edges will round but the surface of the loaf may be relatively flat. This is expected.

Near the end of the rising time, heat the oven to 350°F. Bake for 40 minutes, until nicely browned.

Cool for 5 minutes in the pan then turn out onto a wire rack and cool completely before slicing. Stores well in plastic for about a week.

DIY Cornmeal from Popcorn (Plus Cornbread)

DIY cornmeal

There is perhaps no recipe I’ve investigated that is as simple and yet as fraught with passionate argument regarding the “correct” way to make it as cornbread. First, you have the ostensibly North/South difference of opinion on the use of sweeteners, and then further debate among the Southerners themselves ratcheting up tensions even further. Discussions regarding the ratio of flour to cornmeal, the number of eggs, and what kind of fat needs to be in the pan can then further exacerbate hostilities. And if you’re not already using a cast iron skillet to bake yours, you best duck when those who are come near.

I mention all this at the outset because adding to this battle is not my purpose in making cornbread this week. I’ve provided a simple recipe that suits my preferences, but I want to leave all the controversy aside (and the box of Jiffy mix as well) in order to highlight the great taste provided by freshly milled cornmeal.

With all the chatter out there concerning wheat, gluten, and human nutrition, there’s been a lot of discussion in food circles regarding sprouting and soaking grains and milling flours at home, but I haven’t taken that very far. And grinding my own cornmeal was something I hadn’t even begun to consider when I first stumbled upon discussions of how great the freshly milled variety made your cornbread. As cornmeal has a habit of sitting around in my pantry, the chance to DIY this product certainly intrigued me.

Type of Corn

While I’ve seen a few references to drying and milling sweet corn, most cornmeal is made from the starchier field (a.k.a. dent) corn. Not having the space to grow and dry my own corn (not to mention that it’s March), the option that really lit my eyes up, however, was one I already had in my pantry: popcorn.

Equipment Needed

DIY cornmeal: Processing

DIY cornmeal: Processing

If you haven’t already invested in a grain mill (there are many types, from hand crank to KitchenAid attachment to sophisticated powered appliances), Vitamix benders are also powerful enough to grind dried corn into a beautiful yellow cornmeal if that’s an option for you. Even still, working in small batches is necessary so as not to overheat the meal during grinding. There are also people out there who use their coffee or spice grinders for small batches.

As a precaution, you may wish to sift the meal after it is initially ground to check for missed larger pieces, but I didn’t find this strictly necessary.

While I haven’t had the chance to try a proper grain mill yet, another tip I read frequently during my research is that if you’re having trouble grinding the corn–especially using a hand-cranked mill–try running the corn through on a very coarse setting and then grinding it a second time to get a finer grain. Less wear on your machine and yourself!

Whole Kernel vs. Refined/Degerminated

“Why not just buy cornmeal?” you may be asking yourself. Much of the conversation online surrounding growing and grinding your own corn concerns GMO and pesticide concerns. Beyond that, however, is the fact that many types of cornmeal available on grocery store shelves have been refined/degerminated. By removing the germ from the whole grain, the product will have a longer shelf life. However, that oil-rich and vitamin-packed germ is also where a lot of the nutrition lives. Grinding your own meal means you can preserve the whole grain aspect with less worry about rancidity. Simply grind meal as you need it, or store small batches in your freezer for maximum preservation.

Do you grind your own cornmeal or other grain products? What method do you use?

Cornbread:crumb

The Verdict

A 32-ounce bag of popcorn netted me 5 1/2 cups cornmeal, though grinding the amount needed just before use is recommended for maximum freshness. The special equipment is the real barrier to entry here–and some of it is frankly quite expensive. The richer corn flavor and overall freshness definitely provide a big push towards investing in an appliance that can get the job done. Beyond that, however, unless you’re buying in bulk, it seems that the popcorn vs cornmeal price points are negligible. I remain on the fence about adding grain milling to my regular kitchen tasks, and would love to hear more about the pros and cons from those of you who are doing it.

Cornbread

DIY Cornmeal Cornbread

DIY Cornmeal Cornbread

9 ounces of popcorn, ground into meal (alternatively, use 1 1/2 cups store-bought cornmeal)
1 cup AP flour
2 teaspoon baking powder
1 teaspoon salt
1 egg
2 cups buttermilk
2 tablespoon shortening, bacon drippings, or high heat oil

Place 10-inch cast iron skillet in oven on middle rack and heat to 450°F.

Meanwhile, whisk cornmeal, flour, baking powder, and salt together in a large bowl until evenly incorporated. In a medium bowl, lightly beat egg. Stir in buttermilk.

As oven nears 450°F, remove pan and add fat, allowing it to heat and coat the bottom.

Add egg and buttermilk to dry ingredients and then pour in excess fat from skillet as well, quickly mixing all ingredients together until just wetted. Pour batter into skillet and return to oven, baking 20-25 minutes, until top is just golden and edges have pulled away from the side of the pan.

Cornbread is best served warm fresh from the oven.

https://wonderlandkitchen.com/2013/03/diy-cornmeal-from-popcorn-plus-cornbread/

*
This recipe and post were created for my “DIY vs. Buy” column on Serious Eats.