Christmas » Wonderland Kitchen
Browsing Tag

Christmas

Happy Holidays To All!

santa

We’ll be cooking up a storm in Wonderland Kitchen over the next few days, but taking a break from the internet to commune with friends and family. See you all in the new year!

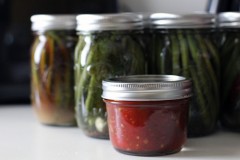
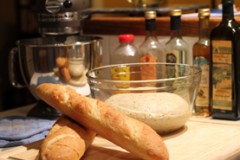
2011 was the year of bread. 2012? I’m thinking we’re gonna need more jars….

There’s Nothing To Eat (Holiday Prep Edition)

brussels

In the days running up to Christmas, my mother would traditionally take masking tape and affix dire “Do Not Eat!!” warnings to all of the food she had prepped and packed into the refrigerator. Then, she would express exasperation when my father and I would complain that we were starving. What were we talking about? She had been cooking for days!

Now that I find myself in my mother’s shoes, I can completely empathize. There is perhaps nothing more vexing than being tired and hungry and elbow deep in fancy food preparations, and realizing you’re at a complete loss as far as how to subsist until the festivities begin (unless you just keep sneaking cookies out of the freezer!). With that in mind, I actually planned (just a little!) this year and made up some quick items that I knew would reheat well and fuel me throughout the week while I took care of other business. Here are a few ideas.

How are you feeding your house before the holiday?

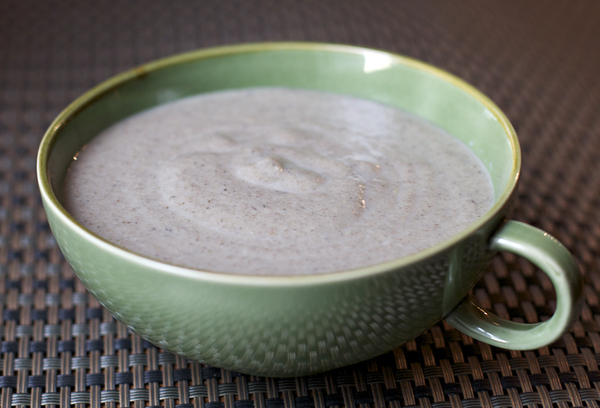
cream of mushroom soup

Cream of Mushroom Soup
Adapted for health and speed from this stellar Balthazar Cream of Mushroom Soup recipe. The full fat/fresh herb version is even tastier, as you might imagine, but I was going for convenience as much as gourmet points this round.

.5 ounces dried mushrooms
3-4 T olive oil
1 large onion, chopped
3 garlic cloves, minced
2 tsp. Herbs de Provence, crushed
1 pound mixed mushrooms, cleaned and roughly sliced (I used a 50/50 mix of shitake and portobello from my farmers market stand)
3 cups stock
1/2-1 cup milk
1 T unsalted butter
salt and pepper to taste

mushroom_row

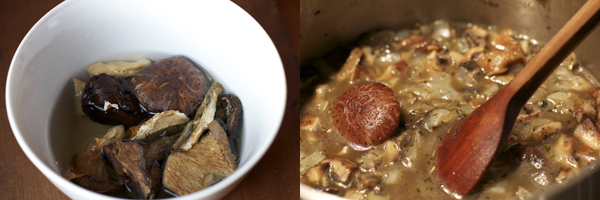
Soak the dried mushrooms in a cup of warm water to reconstitute.

Heat the olive oil in a soup pot and sauté the onion, garlic, and dried herbs until softened. Raise the heat and add the mushrooms, stirring occasionally as they give off their juices. After about 10 minutes, add the stock, the dried mushrooms, and their soaking liquid (strain liquid through a coffee filter to remove sediment if needed). Lower heat and simmer for 30 minutes, then add milk, butter, salt, and pepper to taste, and puree until smooth.

Adjust seasonings and thin with additional milk or broth as needed.

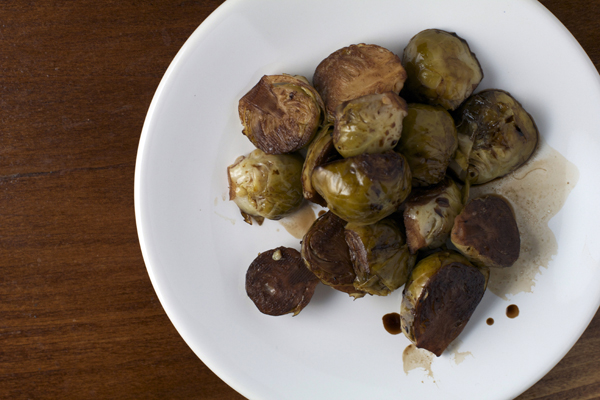
Brussels Sprouts

Baked Brussels Sprouts in Balsamic Vinegar

Preheat your oven to 425°F.

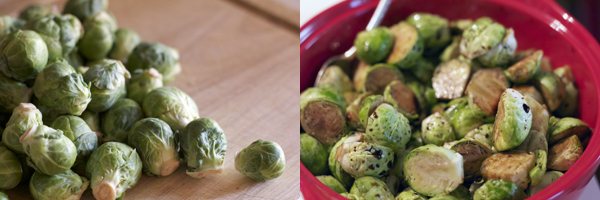
Clean and halve the Brussels sprouts and place them in a casserole dish (for a softer, more steamed version) or on a roasting pan (for a crisper, more caramelized version). Sprinkle generously with Balsamic vinegar and a few glugs of good olive oil, plus salt and pepper to your taste. Toss well to coat (and cover, if using a casserole) and place in the oven. Re-toss every 15 minutes or so to re-coat vegetables with dressing and to assess doneness. Mine take about 40 minutes in the casserole, less if using a the roasting pan (you want to achieve caramelized sprouts, not burnt little cabbages, but even a pretty toasted Brussels sprout is tasty!).

sweet potatoes

Hasselback Sweet Potatoes

Honestly, I wasn’t sure this would work, but I had seen white potatoes roasted in this fashion and they were so pretty that I really wanted to try them out. In the interest of time, I simply peeled and sliced the sweet potatoes, coated them with olive oil, and sprinkled each with salt and some of the Vindaloo seasoning that I had on hand. They went into the oven with the sprouts outlined above at 425°F for about 45 minutes. They came out tasty but a little dry. Next time, I think I’ll make a juicy stuffing like this one.

Christmas Mead for Wassailing

mead_top

I’ve worn a paper crown at Medieval Times and been to a Renaissance fair joust or two, but the Maryland Renaissance Festival takes the mutton leg for village size and patron dress-up commitment. A couple of summers ago while browsing the artisan wares, I spied a kit for “short mead” that I couldn’t resist after reading the tag line “if you can boil water, you can make mead in 7-14 days with this kit, two pounds of honey, and a gallon of spring water!” It was food science! It was $9! What was there to lose?

I brewed that batch and was hooked. Unlike the strawberry wine that I had made earlier in the summer, this was relatively little investment for a nice return–an effervescent fermented drink that was light and sweet and endlessly variable, depending on the type of honey and tea you used to spice it up. It wasn’t complex, it wasn’t refined, but it sure was tasty.

I’ve produced a few more versions since that first batch—all interesting, all drinkable–and the mulling spices I currently have on hand in the pantry seemed to demand that a Christmas mead be made. I bottled it on the early side (eight days) so it’s retained its honey sweetness, with distinct cinnamon and orange notes. I think it’s going to make for a lovely glass to raise around the tree next week.

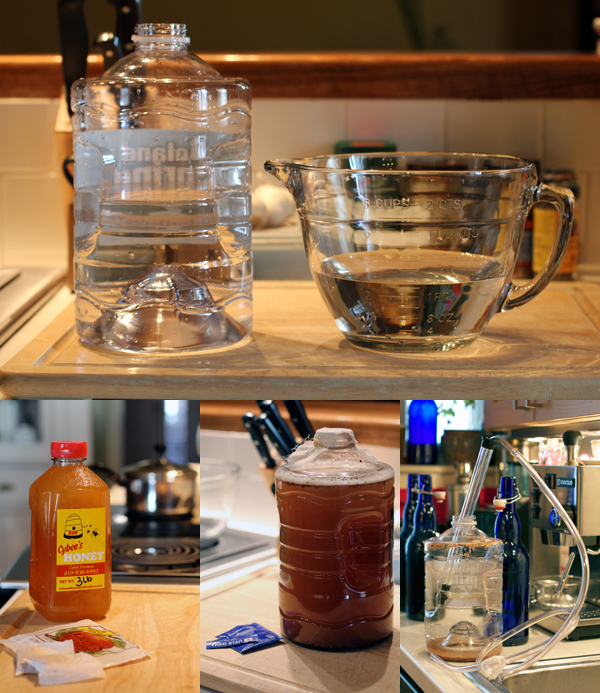
Christmas Mead: process

Christmas Mead
based on the Ambrosia Farm Short Mead Kit

1 gallon spring water
2 lbs. honey
tea to flavor (the combos are endless and should be adapted to your taste, but I cut open 6 mulling spice tea bags for this venture)
5 grams champagne yeast
square of cheese cloth and rubber band to cap

Open the spring water and pour off 4 cups of the contents and discard. Pour out an additional 3 cups and place in a sauce pan. Recap the water jug.

Place the sealed honey jar and gallon jug of water in the sink and fill with hot water to warm the ingredients.

Meanwhile, bring the water in the sauce pan to a boil and simmer the tea for 10 minutes, covered with a lid. Remove pan from heat and allow to cool.

Once water and honey have warmed, remove the containers from their bath and pour the 2 lbs of honey into the gallon jug. Recap, and shake to mix thoroughly. Once tea has cooled slightly, add it (including all the lose tea) to the gallon jug as well.

When the temperature of the jug contents has been reduced to warm bathwater, sprinkle the yeast across the top of the liquid (do not mix) and cover the top of the jug with a square of cheesecloth secured with the rubber band. Do not recap! The brew must be allowed to breath. Place the jug somewhere dark but at least 70 degrees (I have an upstairs closet I like to use for this) and allow it to ferment for one week. At that point, you can begin tasting your brew; sweetness will lessen by the day.

When it has achieved the desired balance, bottle (pour off the liquid and leave the sediment behind in the jug) and store. This mead requires refrigeration, as the yeast remains active. If left capped under pressure in the refrigerator, it will pick up a pleasant carbonation. Uncap the mead if it must be left out at room temperature for any reason.

The Cowboy and the Lady (New Christmas Cookie Edition, Part 2)

cookie_top

So, as I was saying, Christmas 2011 is crying out for some new sweet treats, and I’m endeavoring to deliver. My first pitch was a peanut butter filled chocolate cookie, and though it had something of a utilitarian, PTA-meeting vibe to me, what it lacked in flash it more than covered for in tastiness. I had admittedly baked with skepticism, but I snacked with gusto.

As a counterweight to that, I selected a chocolate mint sandwich cookie which brought new meaning to the idea of multi-step baking. No step was difficult, but the devil was definitely in the details. Dried fruit needed to be chopped, dough needed to be chilled, rolled, and cut into identical squares. Chocolates were unwrapped and two different types melted–individually! There was baking and sandwiching and icing and drizzling. And finally, there was a house full of amazing, minty, chocolatey smells and a plate full of pretty cookies. They sure looked fancy; they tasted great. But I was so tired that all I really wanted to do was curl up under a blanket with a hot mug of coffee and a couple more of the peanut butter filled ones.

Chocolate Mint Cookie Sandwiches

Chocolate Mint Cookie Sandwiches
adapted from 1 Dough, 100 Cookies

2 1/4 cups AP flour
1/2 cup unsweetened cocoa powder*
1/3 cup dried cranberries, finely chopped *
pinch salt
1 cup butter, softened
3/4 cup sugar
1 egg yolk
2 tsp. vanilla extract

15 after-dinner mints**
4 oz semisweet chocolate pieces
2 oz white chocolate pieces ***

In a medium bowl, whisk together flour, cocoa powder, cranberry pieces, and salt. Set aside.

In the bowl of a stand mixer, cream the butter and sugar, then add egg yolk and vanilla and mix well. Add dry ingredients and mix until just combined. Divide dough in half, wrap each piece in plastic, and refrigerate for one hour.

Once dough has chilled, preheat oven to 375°F and line two baking sheets with parchment.

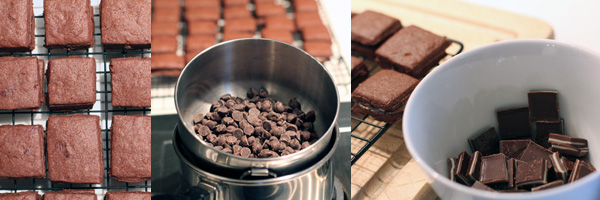
Roll out and cut each piece of dough into 15 2.5″ squares (for a total of 30). I made 1.5″ squares and simply ended up with quite a few additional cookies. Bake each sheet for about 10 minutes (until cookies are firm). As soon as you remove them from the oven, top half the squares with a mint and cover with remaining cookies, pressing lightly. Transfer to a wire rack and allow to cool completely. Your kitchen will now smell amazing, attracting the attention of family members and pets, so monitor your cookies with care!

Chocolate Mint Cookie Sandwiches

When cookies have cooled, melt the semisweet chocolate pieces in a bowl over a pot of simmering water. Allow to cool and drizzle over the sandwiches. Once the semisweet chocolate has set, repeat the process with the white chocolate. Enjoy the fancy sweets.

*I tossed these two ingredients in my small food processor and whirled them around for a minute. It made quick work of the chopping, and the powder kept the dried fruit pieces from sticking together in a clump.

**I used Andes chocolate mints, but made smaller cookies so I broke 28 of them in half. The left over pieces I just tossed in with the semisweet chocolate when I melted it for the glaze.

***My white chocolate was very dry when melted. A small amount of vegetable oil thinned it to a drizzle-able consistency.

Comfort and Joy! (New Christmas Cookie Edition)

cookies_top

I was bored with Christmas baking, and I hadn’t even started yet. Let me back up.

On Friday, my mom called to ask how my Christmas preparations were coming along. I gazed out my window at the Halloween pumpkin still decomposing on my front porch and refused to assume her plan-ahead, Martha Stewart decorating drive.

I don’t like to pack my holiday celebrations too tightly, and I was still working off Thanksgiving dinner, thankyouverymuch. Still, an examination of the calendar did indicate that perhaps some hustle on my part was in order. While I wasn’t ready to make a public lawn statement quite yet, I figured that some baking might help ease me into the spirit of the season. When I turned to my usual Christmas cookie contenders, however–the peanut butter blossoms, the pecan tarts, the Hungarian half-moons–they were all so perfect and lovely and…uninspiring somehow. I decided that I needed to break tradition: Christmas 2011 needed a new cookie.

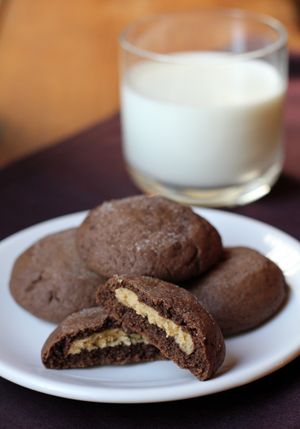
Thus began the epic Googling. (What? I’m a girl who likes her research!) In the end I settled on two experiments. This is the first, the “cozier” and less fussy of the duo. A friend came back from a block party raving about them a few weeks ago and even though they are laid back, they sure are tasty. I think what sold me is how they are kind of like a Buckeye–a peanut butter ball wrapped in chocolate; what’s not to love?–but (bonus!) in this version they also function as cookies. I was not disappointed.

Cooks all over blogland have gone to town on this recipe (which appears to have originated in an issue of Better Homes and Gardens), so whatever version you need, you can probably find one to suit (the vegans, in particular, have done a range of adaptions). I went with this posting by Culinary in the Country, mostly just because I liked his cookie flattening technique and the fact that he, too, whisks his dry ingredients.
Peanut Butter Filled Chocolate Cookies
Recipe from Culinary in the Country; adapted from Better Homes and Gardens

Dough:
1 1/2 cups all-purpose flour
1/2 cup unsweetened cocoa powder
1/2 teaspoon baking soda
1/4 teaspoon salt
1/2 cup unsalted butter, softened
1/2 cup granulated sugar
1/2 cup packed brown sugar
1/4 cup peanut butter
1 large egg
1 T milk
1 teaspoon vanilla

Filling:
3/4 cup sifted powdered sugar
1/2 cup peanut butter
pinch salt

For assembly:
a few tablespoons granulated sugar

Measure flour, cocoa powder, baking soda, and salt into a medium bowl and whisk to combine.

In a large bowl or stand mixer, cream butter, sugars, and peanut butter until smooth. Add the egg, milk, and vanilla, and continue mixing until well combined. Add dry ingredients and mix just until combined.

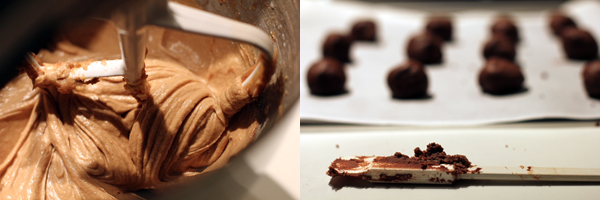
Cover two baking sheet with parchment and divide dough into 32 pieces. (I only got 29 and wasn’t disappointed with their size, so use your own judgement.) Quickly shape into balls.

Preheat oven to 350°F.

In a medium bowl or stand mixer, mix powdered sugar, peanut butter, and salt until smooth. Divide into enough pieces to fill your chocolate balls. I found the filling coherent and malleable enough to roll it out into a log, so I did that and simply divided it evenly with a butter knife rather than guess on individual balls, as the original recipe suggested.

Flatten each chocolate ball in the palm of your hand and top with a piece of the peanut butter filling. Fold chocolate dough as evenly as possible around the peanut butter and shape back into a ball before placing it on the baking sheet again. My “round” ball cookies always come out slightly flat, which in this case actually worked in my favor (see next step).

Lightly flatten each cookie with the bottom of a glass dipped in granulated sugar. You might need to get it a little greasy first to get the sugar to stick.

Bake cookies one sheet at a time until the surface of the cookies begins to crack slightly, about 8 minutes. Allow cookies to cool for 1 minute on the baking sheet, then transfer to wire rack and cool completely.

The Things We Ate (Christmas Edition)

flourxmas

I was drafting a list of recipes that we tried out over the last week of entertaining to email to the moms, and I thought we might get a conversation going here about the tasty things we ate this holiday. If nothing else, having an index assembled will save some Googling when the next batch of house guests rolls into town and it’s time to plan another menu.

Here are some things we enjoyed in Baltimore:

Chestnut and Celery Soup
A perfect way to use up the the extra 2.5 cups of roasted and peeled chestnuts you might have left over after making these cookies if you had a really good batch of nuts like I did.

Butternut Squash Soup
I never have Calvados on hand, but I have never gone wrong substituting a bit of bourbon or cognac.

Red Pepper Bean Dip
Be sure to drain out all packing liquid well or it can get a little soupy.

Walnut Pesto on Toasts
I triple the sun-dried tomatoes.

Marinated Salmon with Pepper Crust
We served it on a bed of sautéed swiss chard. B handled the meat-cooking honors with panache.

Roasted Mushrooms
Best for a casual affair where no one will get uncomfortable if you lean over with your dinner roll and drag it around in the buttery, caper-loaded sauce.

The Best Waffles
I added a pinch of nutmeg, cinnamon, and vanilla extract to the batter. Then, when all was said and done, I accidentally stashed my mom’s waffle iron out of sight when she wasn’t looking and she headed home without it. Sorry!

Rye Bread

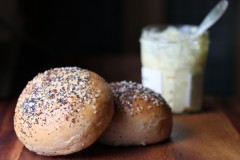
Best, most professional looking and tasting bread I have managed to make at home to date. The bar is set on this one.

Nutty Granola
Makes for a great breakfast or between-meal snack with some yogurt and/or whatever fruit is around.

Popovers
These are already insanely impressive, but they are even tastier served with a bit of butter mixed with a drip of maple syrup.

…and too many cookies to count! Mom brought Lebkuchen this year and it was a holiday highlight for sure.

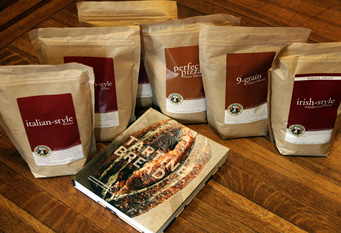
Based on the generosity of my family, it looks like I’ll be spending 2011 covered in flour. I can’t wait to get started.