eat me » Wonderland Kitchen
Browsing Category

eat me

Of Vegan Cheese, Paleo Pizza, and the Best Laid Plans

Vegan Cheese

I had grand plans this past week, but you know what they say about plans. Instead, life events have me reflecting on everything I still don’t know, as well as everything I want to get much better at. Some of these skills are basic: Listen more, talk less. That kind of thing. Maybe I need to meditate; maybe I just need to pay attention.

Ultimately, however, I’m reminded how much education requires not just doing, but doing again. I actually pulled out my violin the other day, mostly to look it over and make sure the wood was handling the stress of radiator winters and high humidity summers as gracefully as possible. I thought about putting on the new strings I had ordered, but ended up just closing the case. Still, the message from the past was clear: once upon a time, I dedicated years to perfecting what I offered the world. I don’t do that any more and it bothers me. Even more perplexing: I’m not sure where I’d pour that dedication, even if I manged to dredge it up.

JCPenney sewing machine

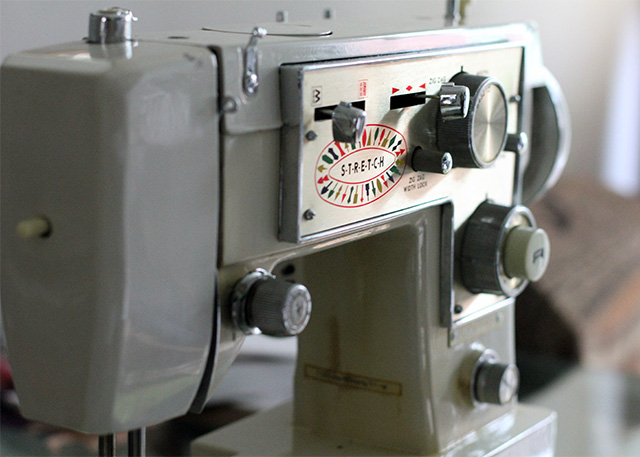
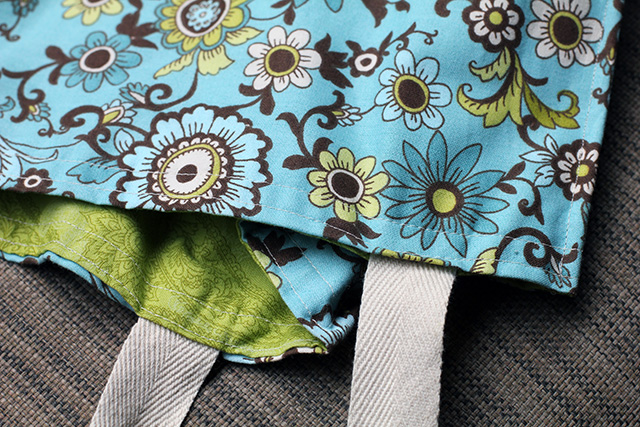
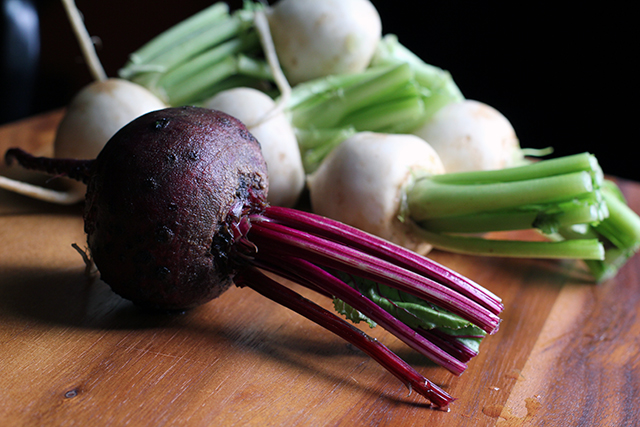
So meanwhile, I will learn and I will practice. Next to my violin was my sewing machine, so I decided I might as well begin there. It was my mom’s–a beast of a thing, metal, from JC Penney, that I adopted when she gave it up. It took me three tries before I remembered how to wind a bobbin and thread the thing correctly. (Helpfully, I have found a chart explaining tension that will not require me to actually read the user manual!) But after an hour and some serious eyebrow scrunching, I had a new tote bag for the market! If the stitching was a little uneven, well, I will use large kale leaves as a distraction. The pattern is both easy and lovely, available from Craft Buds here.

Market Tote Bag

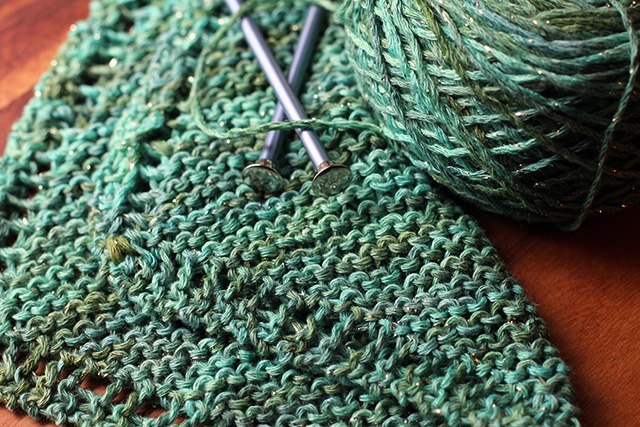
I’ve also been trying to spend less time at my desk staring at a blinking cursor (I have nothing to say, and I am saying it) and a lot more outside, chatting with the neighbors and making faces at their baby, getting filthy and mosquito bit in the garden, sitting on the porch with the cat patiently observing the passersby. So it was that I picked up this simple dishcloth pattern to mindlessly work in the evenings. Mindless knitting actually leads to concentrated thinking in other areas, I find–my own kind of mandala. After I finished a handful of rows, I realized I was looking at the same pattern my Aunt Helen would knit when we camped up at the lake in the ’80s. Seekers (of nostalgia or introspection or just a simple washcloth pattern) can find this one featured in an Artful Homemaking post here.

Knitted dishcloth

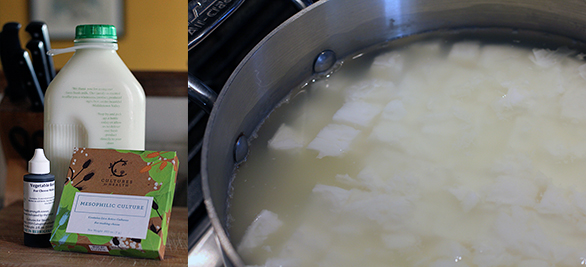
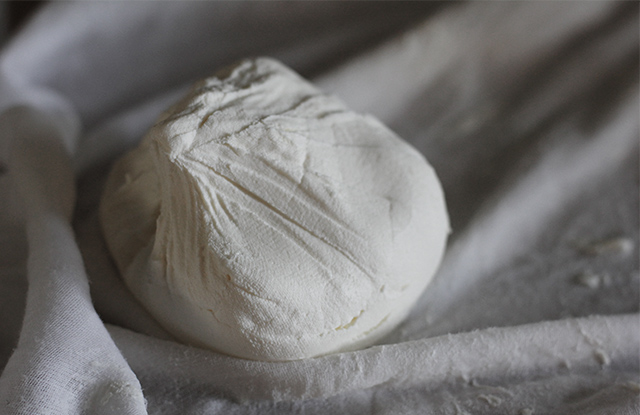
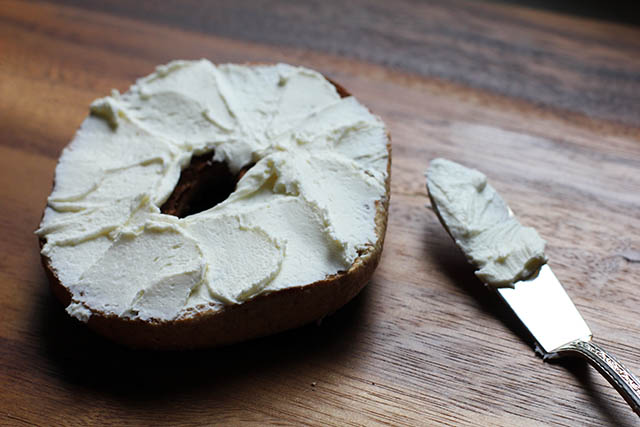
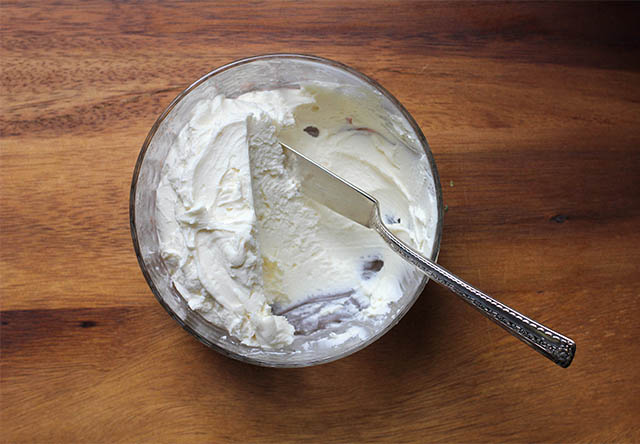
At the end of the day, I can tell you that vegan cheese is not the answer you think it will be. Part of the aforementioned grand plan–before the freezer broke and things started to slide–was a cauliflower crusted pizza with vegan cheese. Gluten free! Non-dairy! Paleo! (I think?–So hot right now.) I mentioned this to my mom, and she just laughed (at me? with me?). I considered how far I had moved from anything she would ever consider making in her own kitchen. That wasn’t necessarily a good or bad place to be, but it was something I thought warranted some personal consideration. The pizza ended up going into the oven with real cheese, though that was still a bridge too far for my cauliflower-despising spouse. And the vegan cheese attempt was…interesting. At first, I thought it simply wasn’t for me, but I let it stick around in the fridge for a bit and finally decided it was definitely odd but strangely addictive. Much like the cauliflower crust pizza, it was about managing expectation, trying something a little crazy, and then just going with it. So I’m going to practice that.

Vegan Cheese

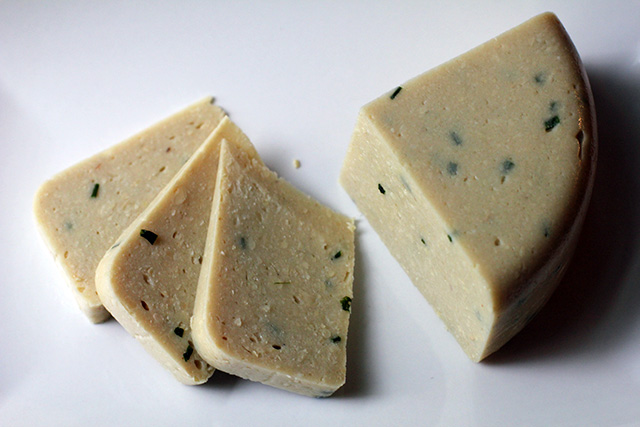
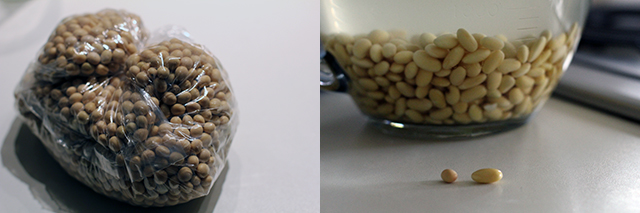
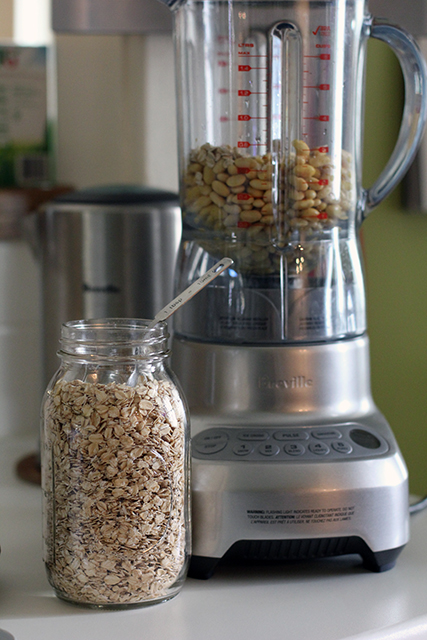
Well, the sentiment at least. Not the vegan cheese making; that’s definitely not my calling. If you want to try it for yourself, the recipe is here. (A proportionally smaller–but plenty big–and agar powder vs flake version of this one.)

Bon Attempt*: Dishes to Try (and Try Again)

Pickled Turnips

So, things have been going in Wonderland Kitchen, they just haven’t been going “OMG, I totally have to tell you about this ah-maze-ing cookie recipe I just invented” great. That, or they’ve been going “this other person’s recipe is awesome and I posted about it last year” (so repeat as needed).

I’ve also been doing a good bit of cooking for real people beyond my husband (or unintentionally for my cat, when my back is turned, the little sneak!). It seemed rude to stick a lens in a guest’s face during an 8 a.m. breakfast, but in hindsight I’m feeling less shy, so beware future visitors!

Anyway, this being Sunday, I thought perhaps a little confession time was in order–air the laundry and wipe off the counters for the week ahead–and so in no particular order, some recipe takeaways for when the CSA first slams back into the rotation and houseguests make last minute visits. What have you been cooking as we slide into summer?

A Reminder that You Can Pickle For Tomorrow What You Can’t Consume Today

Turnips with Beet

Since the crisper drawer was already bursting with greens, I picked up a couple bunches of these white turnips and pickled them according to David Lebovitz’s recipe. Here I thought I was innovating, but hardly! I did however get distracted and ended up with an overly salted and garlic-y finished product. Will have to try this one again, because the beet slices resulted in an amazing brine. And I do have a soft spot for pink food.

A Reminder to Prep Guest Breakfasts Ahead of Time

Granola and Refrigerator Oats

I’ve posted about this Little Blue Hen granola before, which I like especially because it includes an abundance of nuts and seeds with nary a spec of dried fruit in sight (though I’ll cop to offering the guests a handful of DIY raisins at their discretion, because come on). I also like to make little cups of refrigerator oats before heading to bed (I substitute kefir for the milk and yogurt) and then just pass out the jars and spoons in the a.m. Haven’t had an unfinished portion yet.

A Reminder to be Brave with Your Summer Soups

Spring Asparagus and Broccoli Soup

I have been having a lot of luck lately with those “use up five things from the in-house stock” on the fly dinners, and this has been especially helpful now that there’s a lot more produce around. As we crawl towards the end of the week and another pick-up looms, sometimes the stuff just needs to be used up. That’s how I ended up with asparagus, broccoli, and spring onions in a soup pot, simmered with just enough veggie broth to cover, and then pureed with the last of the dill and the remaining 1/4 cup of cream in the bottle. A light spring soup, tasty both hot and cold.

A Reminder to Double the Doctor Kracker Knock-Offs

DIY Seeded Crispbread

Fair warning that these are very crisp crackers, but they are just like the ones that come eight to a box in the grocery. If your family is as addicted to them as mine, you have come to the right place for the knock-off recipe. But be sure to hide a few for your own eating: this was the lone piece of cracker left in the bag when I went back to take a picture and have a snack.

A Reminder to Not Burn Your Hand When Baking Life-Changing Bread

My New Roots: Life Changing Bread

This is the pre-baked look of My New Roots’ much-discussed Life-Changing Bread. The first loaf I made with really beautiful Bob’s Red Mill oats and specially purchased hazelnuts and thought it was a neat breakfast item but not necessarily life changing. The second time I was way more chill about it, just used the walnuts and the somewhat crappier instant oats I dug out of the pantry, and also tossed in all the seeds left behind in the bag of the above-mentioned seeded crackers. Aside from the accidental seering of the back of my hand on the oven while flipping the bread over, I’m enjoying the second batch even more. I keep it sliced and frozen and simply defrost a piece each morning in the toaster.

A Reminder That Not All Baking Need Exhaust Your Patience

Joy the Baker: Sweet Berry Lime Cake

Short version: I needed a cake for company, and I had about an hour to make it happen. Joy the Baker to the rescue!

A Reminder That Sometimes the “Failures” Are Still Pretty Tasty

Tomato Basil Popovers

I always have excellent results with this King Arthur popover recipe, so I used that as the base when–for some reason–I started dreaming of breakfast treats flavored with tomato. My first effort included 1 tablespoon tomato powder, 1 teaspoon onion powder, a handful of chopped basil, and about 1/4 cup Parmesan cheese. They were good, but not quite what I’m looking for just yet and I lost most of my usual pop (I’m guessing the weight of the cheese didn’t help). A work in progress.

A Reminder That Not All Failures are Failures If You Adjust the Frame

Cottage Cheese Fail

I got it into my head after the cream cheese making that DIY cottage cheese would be no. big. deal. I researched a few available recipes and thought things were going pretty well, but my curds didn’t survive the straining process. I’m guessing I didn’t cook my curds long enough. Proper looking curds or no, the cheese still tasted fantastic and I used it like a rich ricotta on toast and pizzas with much success. The curd skills will come another day. There were also fresh peas at the market, which meant it was time again for smoky tahini peas!

Peas and Cheese Crostini

*With apologies to Bon Appétempt, whose kitchen antics are funny and whose dishes look awesome. However, as I have never eaten at her house, it’s her blog name that I’m particularly enamored with–so much so that I felt only minor guilt in kinda stealing it for the title of this post! That acknowledged and confessed, onward into the kitchen…

Ripe Strawberries, Ripe!: Strawberries and Cream Cake

Strawberries and Cream Cake

I’m not really much of a fruit person, but when there were strawberries–strawberries everywhere–it felt shameful to walk away from the farmers market empty handed.

So it was that I ended up with about a pound of perfectly ripe fruit and no practical application in sight. What I did happen to have was a pint of gloriously rich heavy cream, which led pretty quickly to baking motivation, a sentiment efficiently fueled by a fear that this lovely fruit would be left to spoil as the busy week wore on. Add in our great neighbors willing to share an evening on the front porch, provide the Prosecco, and supply the plates and napkins, and a party was in process before the dessert was completely situated on the cake stand.

After reading through the comments, I decide to pour my cake batter into two pans rather than split a single layer after baking, which sped the cooking time up considerably (about 17 minutes total) and cut down on the mess. The next time I try this recipe, however, I think I’ll stick to one and see if that alters the texture favorably. This cake is firm and heavy–a bonus if your berries are very, very juicy, but mine were of the smaller and tarter variety. I think splitting the cake before baking may have only made the density more of a challenge and I found the crumb to be a shade drier than preferable. Could have all simply been a matter of user error on the part of the infrequent baker, admittedly. I’ve never claimed to be much of a Martha Stewart. More of a Mr. Wizard, if we’re frank about it.

 Strawberries and Cream Cake: Assembly

But I doubt I’ll ever be able to top the look of this cake when assembled. I had never heard of mixing in a bit of plain gelatin with the whipping cream to help it maintain its form, but that is a take away I will not soon forget. Even a couple days later, a lone leftover piece still held up well in the fridge.

And of course, I couldn’t help but belt out “Ripe strawberries, ripe!” from the iconic street scene in the musical Oliver Twist while hulling the fruit to fill this cake. My sincere apologies to all those within ear shot.

Strawberries and Cream Cake
from Martha Stewart

1 1/2 cups all-purpose flour
2 teaspoons baking powder
1/2 teaspoon salt
1/2 cup unsalted butter, room temperature
3/4 cup sugar, plus more to sweeten berries
2 large eggs plus 2 large egg yolks
1/2 teaspoon vanilla extract
1/2 cup whole milk
1 pound strawberries, hulled and sliced
1 teaspoon unflavored gelatin
1 1/2 cups heavy cream

Butter two 8-inch cake pans and line the bottoms with circles of parchment. Butter the top of the paper and thoroughly flour the pans.

Heat the oven to 350°F.

Mix the sliced berries with the desired amount of sugar and toss gently to coat. Set aside.

In a medium bowl, measure flour, baking powder, and salt. Whisk to combine.

Using an electric or stand mixer at medium speed, cream butter and 1/2 cup sugar until light and fluffy. Scrape down sides of bowl and add eggs and yolks, one at a time, mixing thoroughly between each addition. Beat in vanilla. Reduce speed to low and add in the flour mixture (in three parts) and the milk (in two parts), alternating between the two and mixing just until combined. Divide batter between the two pans and smooth the surface.

Bake about 17 minutes. The edges of the cakes should be deeply golden and a cake tester inserted into the center should come out clean. Cool ten minutes in the pans before turning out on a wire rack to cool completely.

When ready to assemble the cake, prepare the whipped topping. In a small sauce pan add two tablespoons cold water and sprinkle gelatin over top. Heat on low just until gelatin dissolves and then allow to cool down.

Beat the cream with 1/4 cup sugar until soft peaks hold. With mixer running, drizzle in cooled (but still liquid) gelatin and continue beating until cream is once again holding soft peaks.

Place bottom layer of cooled cake on serving plate. Top with half the strawberries (I had fewer berries, so went with the slight variation you see pictured) and half the whipped cream. Top with the second layer of cake and the rest of the cream. Chill for at least one hour to allow cream to firm up and berry juices to penetrate the cake. Remove from refrigerator and top with remaining strawberries 15 minutes before serving.

DIY Soy Milk

DIY Soy Milk

During my vegan yogurt experiments, I read a lot about making coconut, almond, and rice milks at home and sorted out my own preferred methods. (Key ingredient across the board? A nylon straining bag.) Now, whenever I find myself standing in front of those Tetra Pak boxed beverages at the grocery, I consider for a second if it’s worth it for me to DIY it at home; even in the chaos of an average week, it usually is.

The one experiment I’ve avoided is soy milk. Basically, I’ve come across headlines espousing the “evils of soy” just often enough to shy away from using it as one of my alternative milk ingredients. I had no nutritional research to back up this decision; rather, it was strictly a case of “Well, I haven’t read anything bad about almonds this week. Let’s just use those!”

Still, I have long been curious about making my own tofu or vegan cheese, so when I came across a bag of soybeans at the Asian market I love exploring, I decided to finally try out boiling up a batch of my own soy milk on the “all things in moderation” philosophy. (And once you start looking, I think there may be just as many articles espousing the “many benefits of soy!”…so, I can only encourage you to make your own judgment call.)

Early research on methods led me quickly to some stunning soy milk makers, an appliance I had never seen before but one that might interest high-volume producers of any type of alternative milk. In my house, a blender and an efficient hand straining method get the job done simply and quickly enough.

DIY Soy Milk: Before and after soaking the beans

DIY Soy Milk: Before and after soaking the beans

Similar to my experience with rice milk that didn’t taste like commercial rice milk, there were plenty of posts lamenting that DIY versions of soy milk just didn’t match what the family was used to from the store. I read a lot about how to avoid a bitter, beany-tasting soy milk (hot water when blending, cooking after straining), and picked up a tip to add a couple tablespoons of oats to the blender to make a creamer product. I didn’t remove all the skins before blending nor did I soak the beans in water fortified with baking soda, though these are also variations out there. Like many of these DIY projects, personal preferences will lead you to your own best practices.

When I first removed the lid off the blender carafe after pureeing the soaked raw beans, I worried over the smell–something about it had a character that had me flashing back to the days I spent oil panting in the ’90s. The milk will also have a raw, beany taste at this stage. (It reminded me of eating a pea or green bean seed right out of the garden.) However, after cooking, the milk will be rich and tasty. I ended up thinning it a bit to get the consistency I was after–an extra benefit to DIYing your own. When I do it again, I will take more care to source a certifiably organic, non-GMO bean.

DIY Soy Milk: Ready for blending

DIY Soy Milk: Ready for blending

If you’re concerned about wasting the pulp (often referred to as okara ), worry not! This byproduct has recipe applications all its own. The skin that can form on the milk when cooking (yuba) also has myriad culinary uses.

Do you make soy milk in some other fashion? Tips and tricks that you’ve picked up that will improve results? I hope you’ll share them in the comments!

DIY Soy Milk

DIY Soy Milk

1 cup dried soybeans
4 cups water just off the boil (plus additional for thinning milk to desired consistency)
2 tablespoons old fashioned rolled oats
1/8 kosher salt
sweetener and/or flavorings such as vanilla or almond extract (optional)

Rinse soybeans, drain, and soak in a generous amount of filtered water overnight. Drain and rinse again, removing any floating loose skins. Drain well and transfer beans to blender.

Add oats and boiled water to beans and secure lid. Puree thoroughly, being cautious that lid remains tightly closed.

Strain puree through a nylon nut milk bag into a 4 qt. pot. (I also tried straining the milk through a cheese cloth-lined strainer, but this was much more difficult to manage in my experience.) Bring the milk up to a gentle simmer, skimming off any foam or skin that forms. Continue to cook, stirring regularly, for about 20 minutes. Add salt and any sweeteners or flavorings desired. Taste and adjust flavorings as needed.

Fresh soy milk can be enjoyed as a warm beverage. Otherwise, transfer it to a glass container with a lid and allow to cool. Refrigerate to store.

https://wonderlandkitchen.com/2013/05/diy-soy-milk/

Getting Corny: Momofuku Milk Bar’s Corn Cookies

Momofuku Milk Bar's Corn Cookies

Based on the sheer number of somewhat bizarre drying experiments I’ve been running around here lately, you might have caught on that I’m a new convert to the joys home dehydration. Beyond your basic fruit snacks and carrot chips, I’ve been particularly interested in manufacturing my own DIY vegetable powders–everything from your standard garlic and onion to your more exotic tomato and red pepper.

In the course of things, I ended up dehydrating a bag of frozen sweet corn for a recipe that never materialized, so I packed the dried kernels away in a mason jar until a good use for them presented itself.

A few weeks later, however, I caught Savory Simple’s post on Momofuku Milk Bar’s Corn Cookies and was immediately seduced by the quirky taste profile the recipe suggested. I was less attracted to sourcing the unusual ingredients required. Did I really want to special order corn powder? Hmm, might my dehydrated corn step in to save the day? I committed…to thinking about it.

DIY corn powder and corn flour

And so the recipe went into my “to make one day” pile, and there it sat. For months. Finally, frustrated by my own inaction, I pulled out my “coffee grinder reserved for spices” and got to work. The dried sweet corn was powdered; lacking corn flour, I also blitzed some of my DIY cornmeal until the motor was near to overheating and my fingers were satisfied with the texture. I sifted for good measure. Twice.

Do these cookies match the originator‘s? I actually can’t say, since for as much time as I spend in New York City, I have yet to make a pilgrimage to the Milk Bar. Perhaps I shall pop in this month, now that I have a mission. What I can say is that I made these with just what was in my pantry, and they were fantastic. The freshly powdered dehydrated sweet corn and corn flour provided a strong corn flavor that made for a particularly unique treat.

DIY Corn Powder

Corn Cookies: Pre-bake

NOTES: Before baking these, I read a recommendation to substitute bread flour for the AP to help the cookies stand up to the high butter content, controlling spreading while maintaining a chewy rather than crisp texture. It was suggested that King Arthur bread flour was what they use at the Milk Bar, and I liked the results I got this way (though I did not bake a comparison batch).

On baking day, it was cold enough in my house, and I was impatient enough to get started, that getting my butter to room temperature seemed like a battle I was destined to lose. However, I remembered a neat trick I learned (via Food in Jars) to soften butter in warm tap water. Killer kitchen tip for the poor planners in the crowd like myself!

Corn Cookies: Ingredient Prep

Momofuku Milk Bar's Corn Cookies

Momofuku Milk Bar’s Corn Cookies

1 1/3 cups (225 g) King Arthur bread flour
1/4 cup (45 g) corn flour (I ground cornmeal to a super fine level; for international readers, this is NOT corn starch)
2/3 cup (65 g) freeze-dried corn powder (I used finely ground dehydrated sweet corn kernels)
3/4 teaspoon baking powder
1/4 teaspoon baking soda
1 1/2 teaspoons kosher salt
16 tablespoons (225 g) butter, at room temperature
1 1/2 cups (300 g) sugar
1 egg

Measure dry ingredients into a mixing bowl and whisk to evenly incorporate. Set aside.

Cream butter and sugar together (medium-high for 2 to 3 minutes). Scrape down bowl, add egg, and beat for 7 minutes more.

Reduce speed to low and add dry ingredients to wet. Mix just until combined.

Portion into 15 rounds on a parchment-lined baking sheet. Flatten each cookie to about an inch thick. Cover with plastic wrap and refrigerate for at least one hour before baking–do not skip this step! Cookies baked several days later, however, were just as good.

When ready to bake, heat oven to 350°F.

Place six raw dough pucks spaced well apart on a parchment-lined cookie sheet (they will spread considerably). Bake 16 minutes, until edged have lightly browned. Allow cookies to cool and firm up before removing from pan. Store in an air-tight container.

https://wonderlandkitchen.com/2013/05/getting-corny-momofuku-milk-bars-corn-cookies/

1 1/3 cups (225 g) King Arthur bread flour
1/4 cup (45 g) corn flour (I ground cornmeal to a super fine level; for international readers, this is NOT corn starch)
2/3 cup (65 g) freeze-dried corn powder (I used finely ground dehydrated sweet corn kernels)
3/4 teaspoon baking powder
1/4 teaspoon baking soda
1 1/2 teaspoons kosher salt
16 tablespoons (225 g) butter, at room temperature
1 1/2 cups (300 g) sugar
1 egg

Measure dry ingredients into a mixing bowl and whisk to evenly incorporate. Set aside.

Cream butter and sugar together (medium-high for 2 to 3 minutes). Scrape down bowl, add egg, and beat for 7 minutes more.

Reduce speed to low and add dry ingredients to wet. Mix just until combined.

Portion into 15 rounds on a parchment-lined baking sheet. Flatten each cookie to about an inch thick. Cover with plastic wrap and refrigerate for at least one hour before baking–do not skip this step! Cookies baked several days later, however, were just as good.

When ready to bake, heat oven to 350°F.

Place six raw dough pucks spaced well apart on a parchment-lined cookie sheet (they will spread considerably). Bake 16 minutes, until edged have lightly browned. Allow cookies to cool and firm up before removing from pan. Store in an air-tight container.

Better Than a Silver Packet: DIY Cream Cheese

DIY Cream Cheese

The deeper I dig into DIYing basic household foods such as rice milk or nut butters, the weirder I sometimes feel about sharing those processes here. Sure, a recipe for homemade cereal bars might come in handy, but a lot of these typical grocery store items–from tahini to garlic powder–end up being pretty simple to produce from scratch in the average kitchen when all is said and done. So perhaps you might think of these posts as more of a Pinterest board of reminders or inspirations when it starts to feel like everything you buy has soy lecithin and whey derivatives added. Sure, you can toss readymade items into your shopping basket as needed, but if you have a few minutes and don’t like the ingredient list on a given product, you can probably whip up your own with a few pantry staples.

For as easy as culturing buttermilk or kefir turned out to be, cream cheese was not a project I was expecting to be so simple. I couldn’t have been more wrong. Yogurt making is almost challenging in comparison.

Pasteurized vs. Ultra Pasteurized

Almost all the articles I’ve read on cheese making have stressed that you cannot use ultra pasteurized milk or cream (the structure of the milk proteins have been damaged). However, I find it increasingly difficult to acquire dairy that is not ultra pasteurized when shopping at a standard grocery store. The organic milk is especially bad in this regard. Apparently people paying big money for these products do not want them to spoil quickly, a concern that supersedes other considerations. And while I love using the rich fresh-from-the-cow, non-homogenized, lightly pasteurized milk I can get from the local dairy at the farmers market, that’s not always practical logistically (only obtainable on Saturday) or financially ($4 per half gallon). Many people will violently advocate for raw milk, whatever it takes to get your hands on it. I haven’t tried it, but I have made other substitutions–the cheap (probably just?) pasteurized whole milk and ultra pasteurized cream available–and still produced a tasty cream cheese.

DIY Cream Cheese: Strained

This Is Not Your KRAFT Philadelphia Cream Cheese

Philly cream cheese is surely the standard most people (Americans, at least) will be judging any cream cheese against, and in my experience this is not that–and that’s a good thing. No matter how long I let my cheese drain, there is a shiny, spackle-like consistency to commercial cream cheese that I have not produced here. This cheese is richer and more buttery, slightly softer but not in any way runny. When adding in flavorings such as maple syrup or dill and salt and whipping briskly with a fork to incorporate, I am able to produce a lovely spread that contains no Xanthan Gum, and/or Carob Bean Gum, and/or Guar Gum, no preservatives, and no “natural flavor”. Seven days later, it still tastes fantastic.

The Verdict

I seriously doubt I will ever buy commercial cream cheese again. There is definitely a cost consideration here in terms of both the dairy and the special ingredients, but I think the taste and quality make it worth the investment (and might even encourage me to eat less and savor more). This cream cheese made me want to bake a dozen everything bagels and invite the neighbors over for brunch….At least until I remembered that my bagel baking, unlike my cream cheese making, is still a work in progress.

DIY Cream Cheese: Thick and Rich

DIY Cream Cheese

Makes: 13 ounces of cream cheese and two cups of whey

DIY Cream Cheese

for tips and supplies, see Cultures for Health

Cream cheese starter cultures containing both the starter culture and rennet are available.

While culturing the cheese with buttermilk rather than a mesophilic starter is riskier due to variations in the active cultures present, I found that the taste of the resulting cream cheese was just slightly more tangy and very attractive.

2 cups heavy cream
2 cups whole milk
1 drop liquid vegetable rennet dissolved in 2 tablespoons water
1/8 tsp. (one packet) mesophilic starter culture OR 1 ounce buttermilk
1/4 teaspoon salt or other flavorings (optional)

In a pot (with a fitted lid for later steps), heat milk and cream to 75°F, stirring regularly.

Remove pot from stove and add the buttermilk OR sprinkle the mesophilic starter culture over the surface of the milk and allow to dissolve for two minutes. Stir gently. Add diluted rennet mixture and combine using an up and down motion with your spoon under the surface of the milk just until evenly incorporated. Cover pot with lid, wrap in a few kitchen towels, and place in a warm location (70°F-75°F) to incubate, about 14 hours.

When cheese is ready to be drained, it will resemble yogurt. Spoon into a strainer lined with a piece of butter muslin. Clip the corners of the muslin together and allow to drain over a bowl (cupboard handles and safety pins can come in handy here) until desired firmness is reached, 7-10 hours.

Mix in a 1/4 teaspoon salt or other flavorings as desired. Transfer to a container with a tight-fitting lid and refrigerate.

https://wonderlandkitchen.com/2013/04/better-than-a-silver-packet-diy-cream-cheese/

NOTE: Produces 13 ounces of cream cheese and two cups of whey.

Cream cheese starter cultures containing both the starter culture and rennet are available.

While culturing the cheese with buttermilk rather than a mesophilic starter is riskier due to variations in the active cultures present, I found that the taste of the resulting cream cheese was just slightly more tangy and very attractive.

2 cups heavy cream
2 cups whole milk
1 drop liquid vegetable rennet dissolved in 2 tablespoons water
1/8 tsp. (one packet) mesophilic starter culture OR 1 ounce buttermilk
1/4 teaspoon salt or other flavorings (optional)

In a pot (with a fitted lid for later steps), heat milk to 75°F, stirring regularly.

Remove pot from stove and add the buttermilk OR sprinkle the mesophilic starter culture over the surface of the milk and allow to dissolve for two minutes. Stir gently. Add diluted rennet mixture and combine using an up and down motion with your spoon under the surface of the milk just until evenly incorporated. Cover pot with lid, wrap in a few kitchen towels, and place in a warm location (70°F-75°F) to incubate, about 14 hours.

When cheese is ready to be drained, it will resemble yogurt. Spoon into a strainer lined with a piece of butter muslin. Clip the corners of the muslin together and allow to drain over a bowl (cupboard handles and safety pins can come in handy here) until desired firmness is reached, 7-10 hours.

Mix in a 1/4 teaspoon salt or other flavorings as desired. Transfer to a container with a tight-fitting lid and refrigerate.DIY Cream Cheese: Savor It!