jars »» Wonderland Kitchen
Search results for

jars

Things in Jars

tom_top

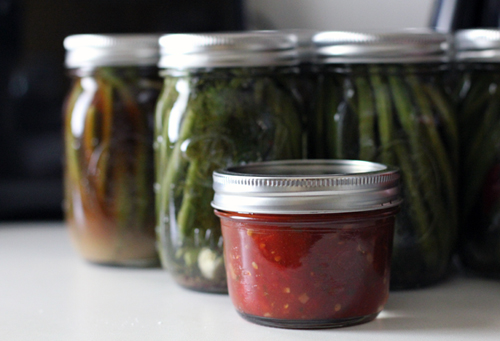
Maybe it’s the crisping of the morning air telling me the end of the harvest is creeping up on us, but I couldn’t resist an urge to stuff things into glass jars this weekend. I made up a batch of yogurt with my market milk and, in response to family demand, did up a final round of my usual pickled green beans, plus a wasabi (!) version. Now every time I open the fridge, I’m tempted to open a jar and taste one for “readiness”.

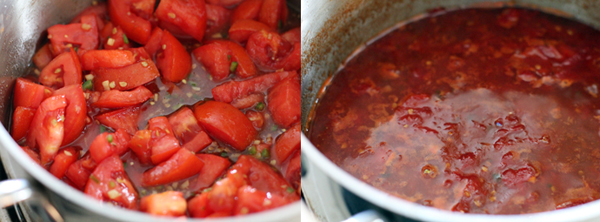
This week the market also boasted mounds of apples, $10 a basket full, though since I’m not generally a sweets person, fruit preservation is not high on my list of priorities. However, I have had a craving for tomato jam ever since I tried it out at Woodberry Kitchen a few weeks ago. This unstrained version which I found in the NYTimes via the Wednesday Chef seemed like it would suit perfectly. Aside from some occasional stirring during its 90-minute cook time, it took pretty much no effort until I got a little sloppy pouring the hot liquid from the very hot pan into the small containers. Lesson learned.


Product review: It’s so amazingly spicy (thank you, garden jalapeno!) and sweet and tomato-y, this is a condiment that’s bound to go fast. Used as a pizza topping last night and a scrambled egg dresser-upper this a.m., I have already seriously dented the jar.

I may have to rethink sharing.

Sweet and Spicy Tomato Jam

From the New York Times

1.5 lbs ripe Roma tomatoes, cored and coarsely chopped
1 cup sugar
2 tablespoons lime juice
1 tablespoon grated or minced ginger
1 teaspoon ground cumin
1/4 teaspoon ground cinnamon
1/8 teaspoon ground cloves
1 teaspoon salt
1 jalapeno or other peppers, stemmed, seeded and minced, or red pepper flakes or cayenne to taste.

Assembly could not be simpler. Place all ingredients in a pot, stir, and bring to a boil. Don’t worry that there’s not much liquid–that will self-correct quickly as soon as the tomatoes start cooking. Reduce heat and simmer, stirring on occasion and breaking up tomato chunks with the back of your spoon, for about 90 minutes (adjust timing as consistency dictates–you’re going for a thick jam). Cool and pour into containers for storage. Makes about 1 pint.

Natural Woman: DIY Moisturizer

DIY moisturizer

I tend to approach health and food trends with an open-minded skepticism. Sure, I’ll try oil pulling or short-term juicing since it’s pretty obvious it won’t kill me, and I even did a stretch of “clean eating” that nixed all the dairy, gluten, caffeine, and alcohol from my life for 30 days. But I’m not a doctor or a nutritionist, so I try not to do anything too weird without a good reason and a decent amount of research. I don’t want to live in a world without butter and avocados and coconut oil, but I can stick to moderation and food that doesn’t come in a box for the most part.

For all that care, however, what I hadn’t done is put much thought into what touched my skin. I’m no cover girl, but still it seems kind of silly to put so much thought into what goes into my mouth and then turn around and smear things on my body without reading the labels. And as with food, once you start reading labels things get questionable pretty quickly.

So without being a zealot about it, I’ve started playing around with cosmetic alternatives that, even if I wouldn’t literally eat them, are a little closer to the ground. To be clear, this doesn’t necessarily make them a good idea, and I would strongly caution every reader to use your own common sense when experimenting. For example, most of the DIY deodorant recipes I’ve come across have a significant level of baking soda in them which painfully irritates my skin. Just because you make something in your kitchen does not mean that it’s a safe(r) alternative to commercial products.

Rainbow Henna

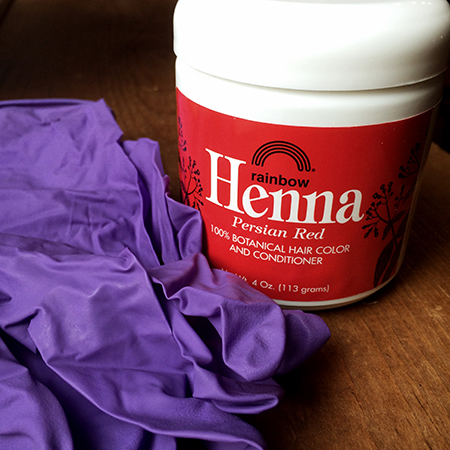
Dying my hair with my usual drugstore box of color seemed ill advised if I was getting serious about chemicals on my skin, so I tried out this henna which I found at Whole Foods. Mountain Rose Herbs also sells henna in a variety of tones.

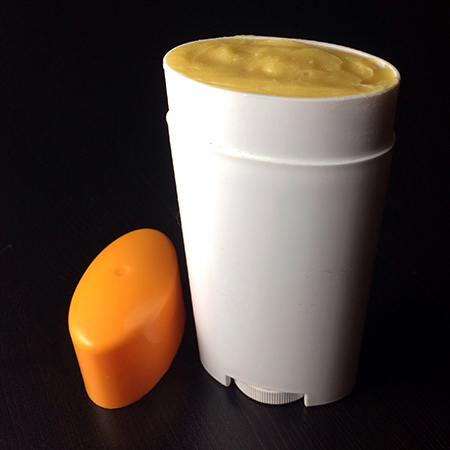
DIY deoderant

I’m still looking for the recipe that works for me. This (going even lighter on the soda, but not omitting it completely which removes effectiveness, I found) is the last one I tried. Closer, but not quite.

DIY cosmetics

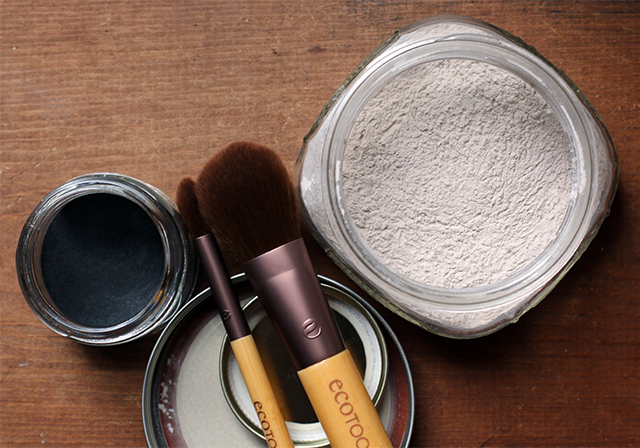
Most of the products I’ve tried take only a few minutes to assemble and package and, once you’ve stocked a few key ingredients, are fairly cheap to make. Mix arrowroot and white kaolin clay with a bit of cocoa to make a respectable face powder, mix it with a bit of activated charcoal and you get an attractive smokey eyeshadow. Cracking out a small army of lip glosses tinted with alkanet (way better than beet powder!) was child’s play; my attempt to mix activated charcoal into a similar base to get a decent eyeliner was slightly less successful, but definitely educational!

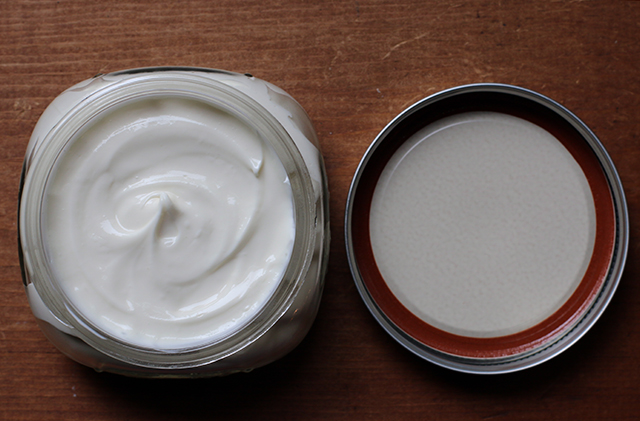
Of all the products I’ve attempted, however, none has felt as sophisticated as the moisturizer I made from a recipe designed by Rosemary Gladstar. For those in the crowd who have made mayonnaise, this project was a similar level of difficulty. The key to successful emulsion seems to be patience. Make sure your oils have cooled to room temperature! (I took this another step and set my glass measuring cup of waters in a bowl of hot water to warm it up some while I waited.) Result: beautiful cream right out of the gate! While this moisturizer does seem to take a few extra seconds to absorb fully into the skin than commercial products, when used sparingly on the face and generously elsewhere, it leaves my skin feeling satiny and in no way greasy. My destroyed winter hands are especially happy.

Do you have any DIY cosmetic tips or tricks to pass my way? Anything you’d like to learn to DIY at home?

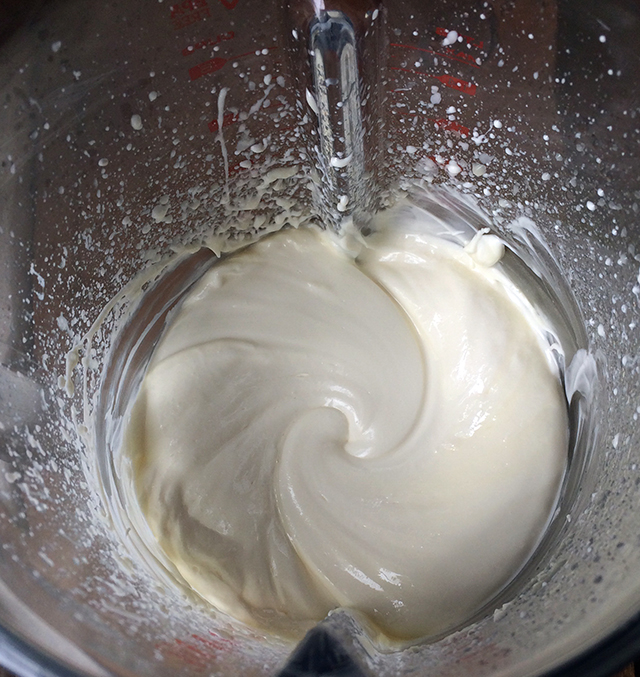
Blending moisturizer

Rosemary’s Perfect Cream
The original recipe as found in Herbal Recipes for Vibrant Health offers various substitution options, so do check that if you want more ideas. This is the breakdown I followed.

2/3 cup distilled water, room temperature
1/3 cup aloe vera gel
2 drops lavender essential oil

1/4 apricot oil (w/vitamin E added)
1/2 cup sweet almond oil
1/6 cup coconut oil
1/6 cup cocoa butter
.8 ounces grated beeswax

Combine the water, aloe, and essential oil in a glass measuring cup. Set aside.

Measure the oils, cocoa butter, and beeswax into a double boiler (I suspend a metal bowl over a small sauce pan filled with about an inch of boiling water) and heat gently until melted. Transfer melted liquid to your blender’s carafe and allow to cool to room temperature, stirring occasionally to gauge progress. (As I mentioned above, I also took the chill off my winter room temperature waters by setting the glass measuring cup in a bowl of hot water. I’m not sure this was strictly necessary, but it didn’t seem like it would hurt my chances for success.)

When oils have reached the desired temperature, secure lid and turn on blender at highest setting. Add the water/aloe mixture through the top access hole in a slow and steady stream. When 3/4 of the water has been added, monitor the cream in the blender. At a certain point, it will thicken and pull above the blades, no longer accepting more liquid. Stir by hand to make sure all oils and water are incorporated evenly and transfer to storage jars.

Cream will thicken as it sets. Store covered in a cool location.

UPDATE: Even only using the cream with clean hands post-shower, eventually my cream did spoil before it was completely used up. Making smaller batches and sharing with friends helps, but I found that there is a shelf life to observe here.

Bon Attempt*: Dishes to Try (and Try Again)

Pickled Turnips

So, things have been going in Wonderland Kitchen, they just haven’t been going “OMG, I totally have to tell you about this ah-maze-ing cookie recipe I just invented” great. That, or they’ve been going “this other person’s recipe is awesome and I posted about it last year” (so repeat as needed).

I’ve also been doing a good bit of cooking for real people beyond my husband (or unintentionally for my cat, when my back is turned, the little sneak!). It seemed rude to stick a lens in a guest’s face during an 8 a.m. breakfast, but in hindsight I’m feeling less shy, so beware future visitors!

Anyway, this being Sunday, I thought perhaps a little confession time was in order–air the laundry and wipe off the counters for the week ahead–and so in no particular order, some recipe takeaways for when the CSA first slams back into the rotation and houseguests make last minute visits. What have you been cooking as we slide into summer?

A Reminder that You Can Pickle For Tomorrow What You Can’t Consume Today

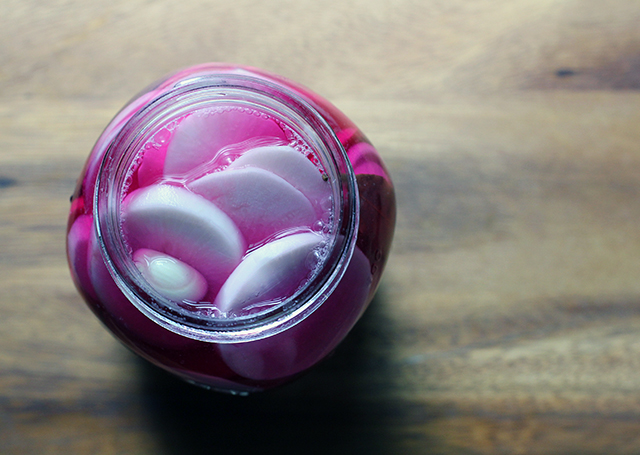
Turnips with Beet

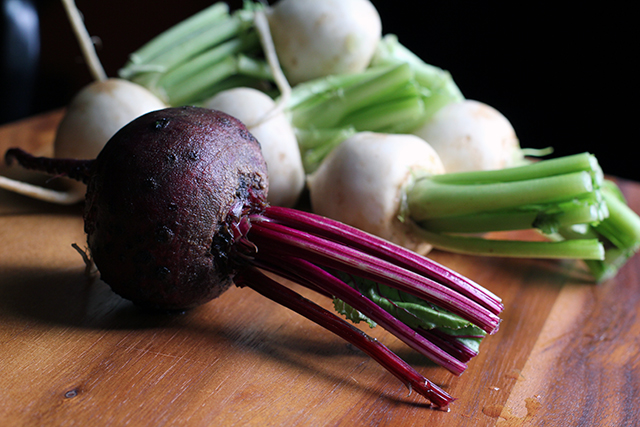
Since the crisper drawer was already bursting with greens, I picked up a couple bunches of these white turnips and pickled them according to David Lebovitz’s recipe. Here I thought I was innovating, but hardly! I did however get distracted and ended up with an overly salted and garlic-y finished product. Will have to try this one again, because the beet slices resulted in an amazing brine. And I do have a soft spot for pink food.

A Reminder to Prep Guest Breakfasts Ahead of Time

Granola and Refrigerator Oats

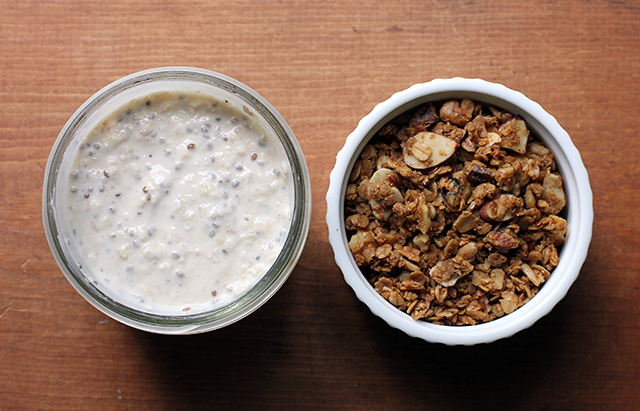
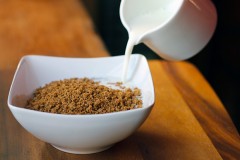
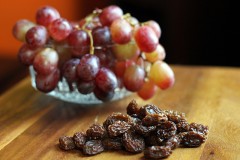
I’ve posted about this Little Blue Hen granola before, which I like especially because it includes an abundance of nuts and seeds with nary a spec of dried fruit in sight (though I’ll cop to offering the guests a handful of DIY raisins at their discretion, because come on). I also like to make little cups of refrigerator oats before heading to bed (I substitute kefir for the milk and yogurt) and then just pass out the jars and spoons in the a.m. Haven’t had an unfinished portion yet.

A Reminder to be Brave with Your Summer Soups

Spring Asparagus and Broccoli Soup

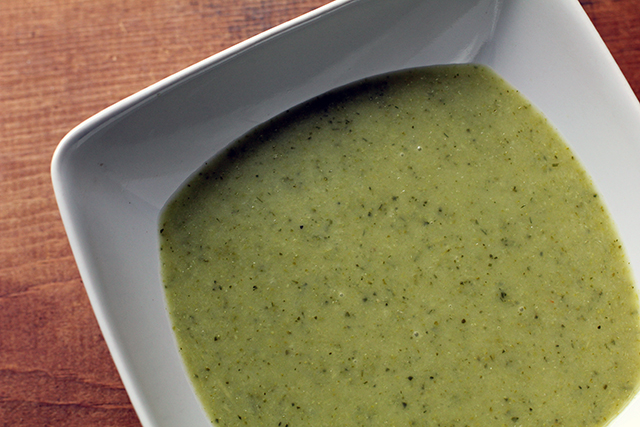
I have been having a lot of luck lately with those “use up five things from the in-house stock” on the fly dinners, and this has been especially helpful now that there’s a lot more produce around. As we crawl towards the end of the week and another pick-up looms, sometimes the stuff just needs to be used up. That’s how I ended up with asparagus, broccoli, and spring onions in a soup pot, simmered with just enough veggie broth to cover, and then pureed with the last of the dill and the remaining 1/4 cup of cream in the bottle. A light spring soup, tasty both hot and cold.

A Reminder to Double the Doctor Kracker Knock-Offs

DIY Seeded Crispbread

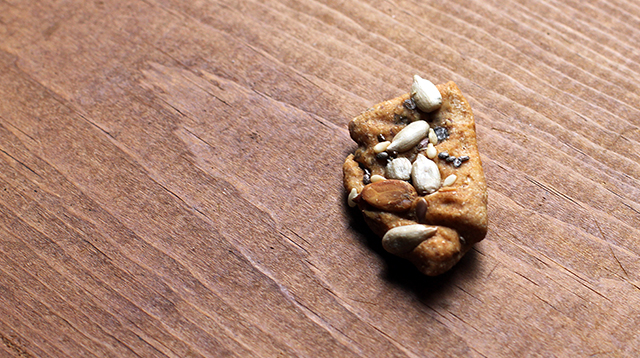
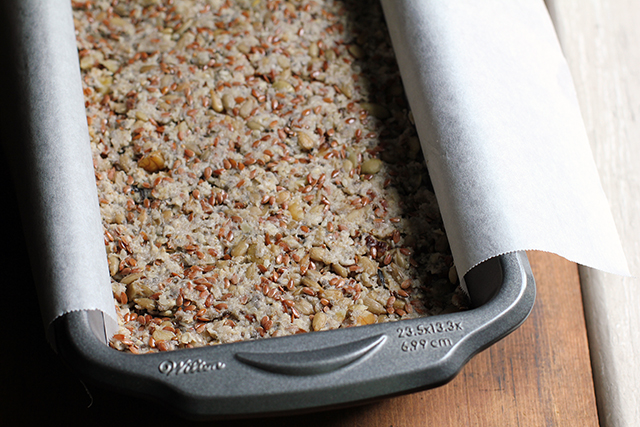
Fair warning that these are very crisp crackers, but they are just like the ones that come eight to a box in the grocery. If your family is as addicted to them as mine, you have come to the right place for the knock-off recipe. But be sure to hide a few for your own eating: this was the lone piece of cracker left in the bag when I went back to take a picture and have a snack.

A Reminder to Not Burn Your Hand When Baking Life-Changing Bread

My New Roots: Life Changing Bread

This is the pre-baked look of My New Roots’ much-discussed Life-Changing Bread. The first loaf I made with really beautiful Bob’s Red Mill oats and specially purchased hazelnuts and thought it was a neat breakfast item but not necessarily life changing. The second time I was way more chill about it, just used the walnuts and the somewhat crappier instant oats I dug out of the pantry, and also tossed in all the seeds left behind in the bag of the above-mentioned seeded crackers. Aside from the accidental seering of the back of my hand on the oven while flipping the bread over, I’m enjoying the second batch even more. I keep it sliced and frozen and simply defrost a piece each morning in the toaster.

A Reminder That Not All Baking Need Exhaust Your Patience

Joy the Baker: Sweet Berry Lime Cake

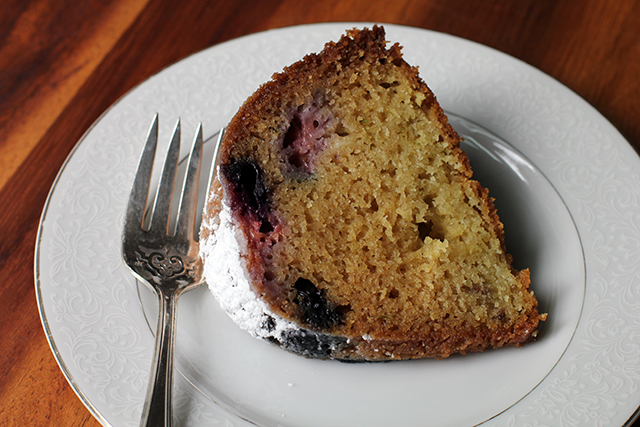
Short version: I needed a cake for company, and I had about an hour to make it happen. Joy the Baker to the rescue!

A Reminder That Sometimes the “Failures” Are Still Pretty Tasty

Tomato Basil Popovers

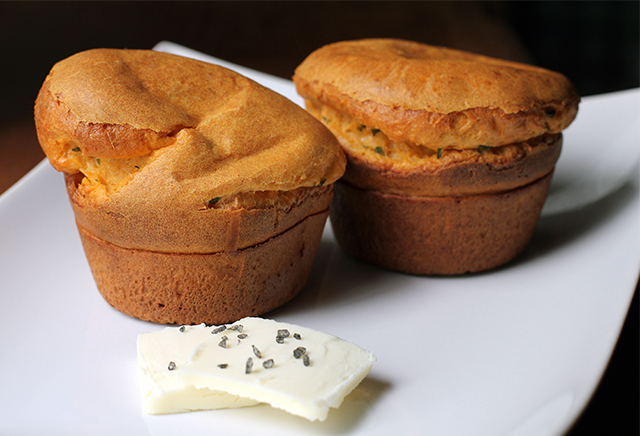
I always have excellent results with this King Arthur popover recipe, so I used that as the base when–for some reason–I started dreaming of breakfast treats flavored with tomato. My first effort included 1 tablespoon tomato powder, 1 teaspoon onion powder, a handful of chopped basil, and about 1/4 cup Parmesan cheese. They were good, but not quite what I’m looking for just yet and I lost most of my usual pop (I’m guessing the weight of the cheese didn’t help). A work in progress.

A Reminder That Not All Failures are Failures If You Adjust the Frame

Cottage Cheese Fail

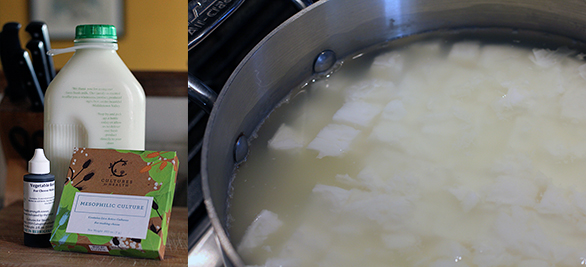
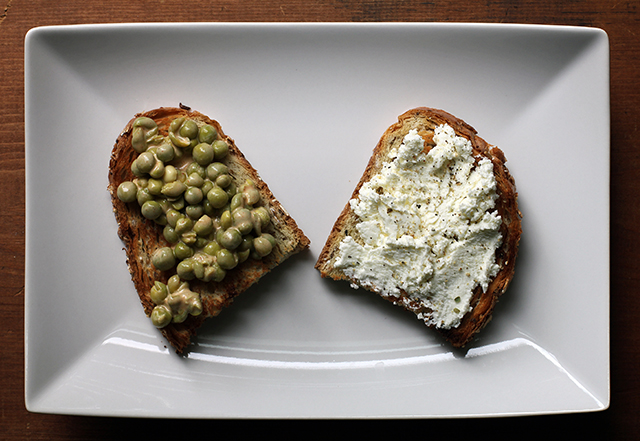
I got it into my head after the cream cheese making that DIY cottage cheese would be no. big. deal. I researched a few available recipes and thought things were going pretty well, but my curds didn’t survive the straining process. I’m guessing I didn’t cook my curds long enough. Proper looking curds or no, the cheese still tasted fantastic and I used it like a rich ricotta on toast and pizzas with much success. The curd skills will come another day. There were also fresh peas at the market, which meant it was time again for smoky tahini peas!

Peas and Cheese Crostini

*With apologies to Bon Appétempt, whose kitchen antics are funny and whose dishes look awesome. However, as I have never eaten at her house, it’s her blog name that I’m particularly enamored with–so much so that I felt only minor guilt in kinda stealing it for the title of this post! That acknowledged and confessed, onward into the kitchen…

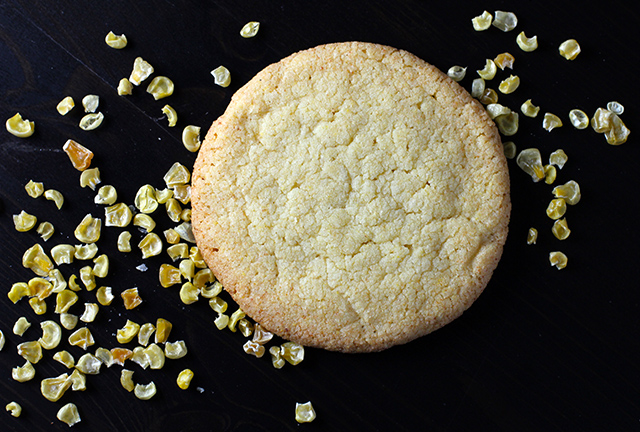
Getting Corny: Momofuku Milk Bar’s Corn Cookies

Momofuku Milk Bar's Corn Cookies

Based on the sheer number of somewhat bizarre drying experiments I’ve been running around here lately, you might have caught on that I’m a new convert to the joys home dehydration. Beyond your basic fruit snacks and carrot chips, I’ve been particularly interested in manufacturing my own DIY vegetable powders–everything from your standard garlic and onion to your more exotic tomato and red pepper.

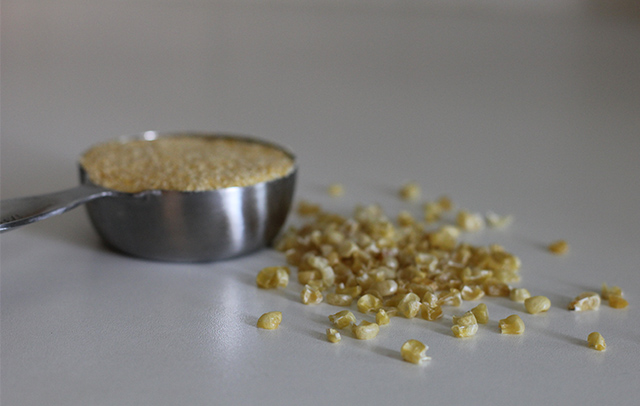
In the course of things, I ended up dehydrating a bag of frozen sweet corn for a recipe that never materialized, so I packed the dried kernels away in a mason jar until a good use for them presented itself.

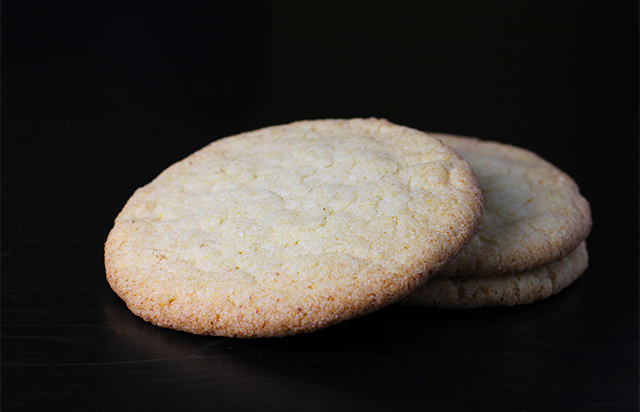
A few weeks later, however, I caught Savory Simple’s post on Momofuku Milk Bar’s Corn Cookies and was immediately seduced by the quirky taste profile the recipe suggested. I was less attracted to sourcing the unusual ingredients required. Did I really want to special order corn powder? Hmm, might my dehydrated corn step in to save the day? I committed…to thinking about it.

DIY corn powder and corn flour

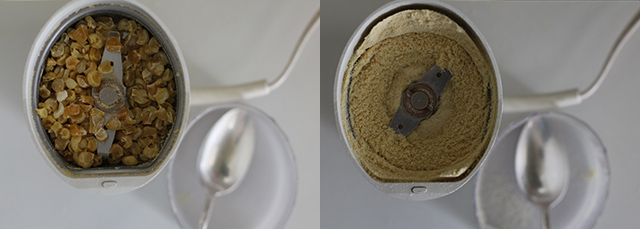
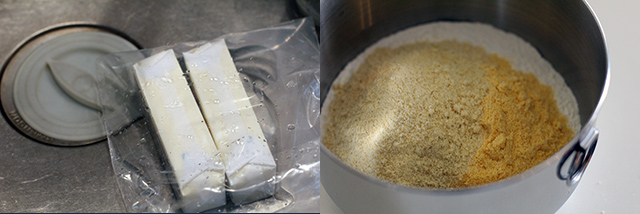
And so the recipe went into my “to make one day” pile, and there it sat. For months. Finally, frustrated by my own inaction, I pulled out my “coffee grinder reserved for spices” and got to work. The dried sweet corn was powdered; lacking corn flour, I also blitzed some of my DIY cornmeal until the motor was near to overheating and my fingers were satisfied with the texture. I sifted for good measure. Twice.

Do these cookies match the originator‘s? I actually can’t say, since for as much time as I spend in New York City, I have yet to make a pilgrimage to the Milk Bar. Perhaps I shall pop in this month, now that I have a mission. What I can say is that I made these with just what was in my pantry, and they were fantastic. The freshly powdered dehydrated sweet corn and corn flour provided a strong corn flavor that made for a particularly unique treat.

DIY Corn Powder

Corn Cookies: Pre-bake

NOTES: Before baking these, I read a recommendation to substitute bread flour for the AP to help the cookies stand up to the high butter content, controlling spreading while maintaining a chewy rather than crisp texture. It was suggested that King Arthur bread flour was what they use at the Milk Bar, and I liked the results I got this way (though I did not bake a comparison batch).

On baking day, it was cold enough in my house, and I was impatient enough to get started, that getting my butter to room temperature seemed like a battle I was destined to lose. However, I remembered a neat trick I learned (via Food in Jars) to soften butter in warm tap water. Killer kitchen tip for the poor planners in the crowd like myself!

Corn Cookies: Ingredient Prep

Momofuku Milk Bar's Corn Cookies

Momofuku Milk Bar’s Corn Cookies

1 1/3 cups (225 g) King Arthur bread flour
1/4 cup (45 g) corn flour (I ground cornmeal to a super fine level; for international readers, this is NOT corn starch)
2/3 cup (65 g) freeze-dried corn powder (I used finely ground dehydrated sweet corn kernels)
3/4 teaspoon baking powder
1/4 teaspoon baking soda
1 1/2 teaspoons kosher salt
16 tablespoons (225 g) butter, at room temperature
1 1/2 cups (300 g) sugar
1 egg

Measure dry ingredients into a mixing bowl and whisk to evenly incorporate. Set aside.

Cream butter and sugar together (medium-high for 2 to 3 minutes). Scrape down bowl, add egg, and beat for 7 minutes more.

Reduce speed to low and add dry ingredients to wet. Mix just until combined.

Portion into 15 rounds on a parchment-lined baking sheet. Flatten each cookie to about an inch thick. Cover with plastic wrap and refrigerate for at least one hour before baking–do not skip this step! Cookies baked several days later, however, were just as good.

When ready to bake, heat oven to 350°F.

Place six raw dough pucks spaced well apart on a parchment-lined cookie sheet (they will spread considerably). Bake 16 minutes, until edged have lightly browned. Allow cookies to cool and firm up before removing from pan. Store in an air-tight container.

https://wonderlandkitchen.com/2013/05/getting-corny-momofuku-milk-bars-corn-cookies/

1 1/3 cups (225 g) King Arthur bread flour
1/4 cup (45 g) corn flour (I ground cornmeal to a super fine level; for international readers, this is NOT corn starch)
2/3 cup (65 g) freeze-dried corn powder (I used finely ground dehydrated sweet corn kernels)
3/4 teaspoon baking powder
1/4 teaspoon baking soda
1 1/2 teaspoons kosher salt
16 tablespoons (225 g) butter, at room temperature
1 1/2 cups (300 g) sugar
1 egg

Measure dry ingredients into a mixing bowl and whisk to evenly incorporate. Set aside.

Cream butter and sugar together (medium-high for 2 to 3 minutes). Scrape down bowl, add egg, and beat for 7 minutes more.

Reduce speed to low and add dry ingredients to wet. Mix just until combined.

Portion into 15 rounds on a parchment-lined baking sheet. Flatten each cookie to about an inch thick. Cover with plastic wrap and refrigerate for at least one hour before baking–do not skip this step! Cookies baked several days later, however, were just as good.

When ready to bake, heat oven to 350°F.

Place six raw dough pucks spaced well apart on a parchment-lined cookie sheet (they will spread considerably). Bake 16 minutes, until edged have lightly browned. Allow cookies to cool and firm up before removing from pan. Store in an air-tight container.

DIY Cultured Buttermilk

DIY Buttermilk

The first time I used a stand mixer to whisk my own butter out of heavy cream, I thought I could spread the results on my bread and bake with them, too, since I also then had just enough of what I thought was buttermilk left over to make a loaf of Irish soda bread. How neatly economical! However, I quickly discovered that what we mean when we say “buttermilk” today is a bit muddled, and that the thin white liquid that remained behind in my bowl after the butter was made was quite different from the type of buttermilk the recipe assumed I was using.

In 2012, when you purchase buttermilk from your local dairy or grocery (that is, if you can even find it—I often discover a carton or two wedged somewhere near the 7,000 flavors of fake coffee creamer) it’s a cultured dairy product that has a tart and slightly sour taste. It is often called for in baking (the acidity activates baking soda), is used to make dressings and sauces, or can simply be drunk by the glassful (though you won’t catch me doing that). Depending on what type of milk was cultured, it could be a creamy full-fat or 2% version (similar to a thin yogurt), or a thinner skim option. Label reading may reveal the addition of other thickeners—especially in the no-fat versions—such as tapioca starch, guar gum, locust bean gum, carrageenan, and/or carob bean gum.

Back in the day, however, buttermilk was a different beast. Based on my reading, it seems the story is this: Raw milk was not churned right away since a certain volume of cream would need to be collected and the milk and cream needed time to sit and separate. Bacteria naturally found in the milk would multiply, the milk would sour, and the “buttermilk” that was left behind after churning was, as a result, not the same as what is left after DIY-ing your own butter from pasteurized and homogenized milk. And neither of these versions is the same as the cultured buttermilk sold commercially at your local grocery today.

To DIY cultured buttermilk, you need a starter that contains the living bacteria required to ferment new batches—similar to making yogurt. If you have access to raw milk, you can start your own buttermilk culture, but you can also purchase freeze-dried starters (either to establish a mother culture or of the direct-set, one-time-use variety) or simply use store-bought buttermilk to culture more milk. You need to make sure the cultures are still active, however. When testing these various options, I didn’t have a problem using my local store-bought option as a starter, but the fresh buttermilk from a local dairy and the freeze-dried starter produced a quicker clabbering and a significantly better tasting buttermilk, in my opinion.
DIY Buttermilk

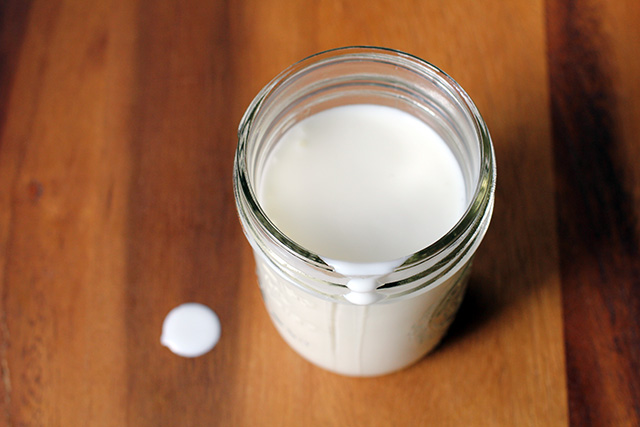
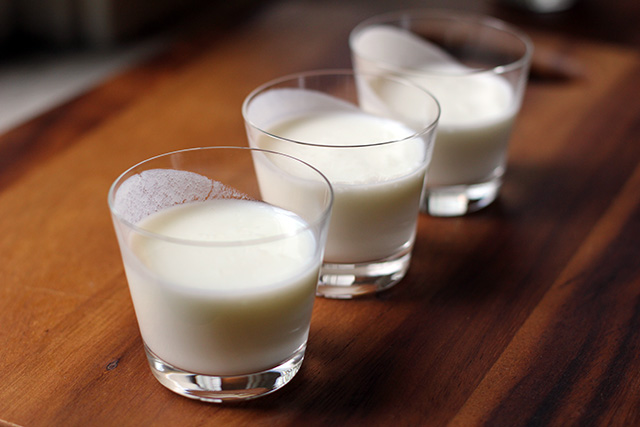
Whole vs 2% vs Skim: As you might expect, the buttermilk gets increasingly thick and creamy as you move from skim (left above) up to whole. Tasting it straight, the tartness of the whole-milk version is balanced by the rich, yogurt-like creaminess of the full fat milk, and that is somewhat true for the 2% version as well. The skim is very tart, thin, and less balanced to me, and I cannot see drinking this or recommending it for use in salad dressing unless personal taste or nutritional concerns make it preferable. For baking applications or in soups, however, any of these could be used.

As an additional experiment, I couldn’t resist attempting to culture some modern “buttermilk” after making butter (sort of the reverse process of old fashioned buttermilk) just to see what I might get. The result was as thin as the skim milk version, but the taste was much more drinkable, the tartness of the beverage balanced in this case not by a creaminess but by a buttery fattiness that seems to still infuse the milk. Just as old fashioned buttermilk is often noted to have contained a few bits of stray butter left behind after churning, the same could be found here. With a little salt, I could almost see sipping it. Almost.

And honestly, with so many jars full of buttermilk, in the end I also figured I might as well make my first batch of crème fraîche. This could be a new addiction.

A word on culturing temperature: Keeping the milk at the required warm room temperature is a challenge in my house now that the colder weather has set in. If the kitchen is warm from a marathon of weekend cooking, it’s not so hard to find a cozy 76°F corner for the bacteria to do their thing, but otherwise I have to get creative. Some cooks have recommended placing jars on top of the fridge or on some other warm appliance or high shelf in the house. I found a kitchen cabinet that runs warmer than the rest of the room due to location and had good luck (if slower clabbering times) at about 70°F there.

The Verdict

I was already a buttermilk fan, not only for baking but also for exceptional homemade salad dressings, but I don’t use enough dairy to make purchasing large volumes of different types worth while. By culturing my own buttermilk, I can have a small yet steady (and additive-free) supply to meet my needs, and use the rest of my weekly whole milk purchase to make yogurt, cheese, or just to lighten my coffee. You can make larger (or smaller) volumes as needed. I use a ratio of one tablespoon starter for every cup milk with reliable results. Unless your culture was not designed to be perpetuated (some freeze-dried options fall into this category), you can reserve a bit of each batch to culture the next. Some recipes indicate that you should pasteurize your milk first or at least warm it to 76°F. I added my starter directly to the cold milk and didn’t have any issues (or extra dishes to do).

DIY Cultured Buttermilk

2 tablespoons buttermilk (store-bought or activated dried starter)
2 cups milk (whole, 2%, or skim, depending on your nutritional needs and preferences)

In a mason jar or other glass container, thoroughly mix the starter and milk. Cover with a coffee filter or piece of cheese cloth (do not seal tightly with a lid) and leave to culture out of drafts at a warm room temperature (between 70-78°F is recommended) until milk has clabbered (10-24 hours).

To test if the milk has thickened, tip the jar slightly. It should move away from the wall of the jar as a single mass. Just as with yogurt making, once the milk sets, it will get more tart the longer you allow the culturing to continue.

Refrigerate to halt culturing for at least six hours. Stir before using.

*

This recipe and post was created for my “DIY vs. Buy” column on Serious Eats.

DIY Jellied Cranberry Sauce (Ridges Optional)

cranberry_top

I grew up in a household of “normal” American cuisine: our mac and cheese was boxed, our casserole was tuna, and our cranberry sauce? Our cranberry sauce had ridges running along the side–the mark of the can it came from. Since traveling out in the world, I have of course since been introduced to homemade, gourmet, and small-batch artisan versions of a lot of foods, but some attachments die hard. And sometimes, well, sometimes on balance boxed is just best.

This brings me around to how I decided that DIY canned cranberry sauce would be my “heart healthy” project for Cathy’s annual Thanksgiving round-up. Granted, cranberry sauce is always going to have a bit of sweetener in it to balance the tartness of the berries, but I figured if I could get the high fructose corn syrup and the plain old regular corn syrup out of the equation, we were still making strides toward a product that did the body a little better if not entirely good.

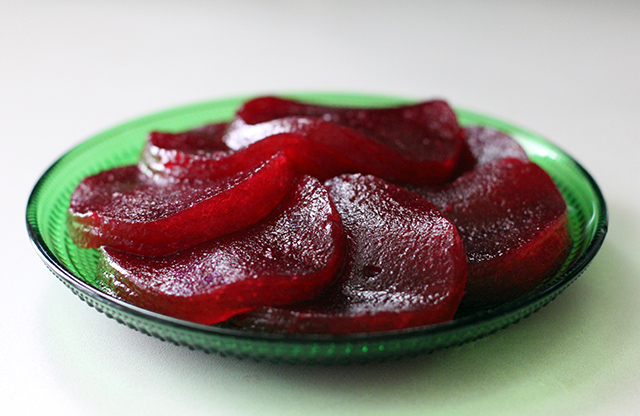
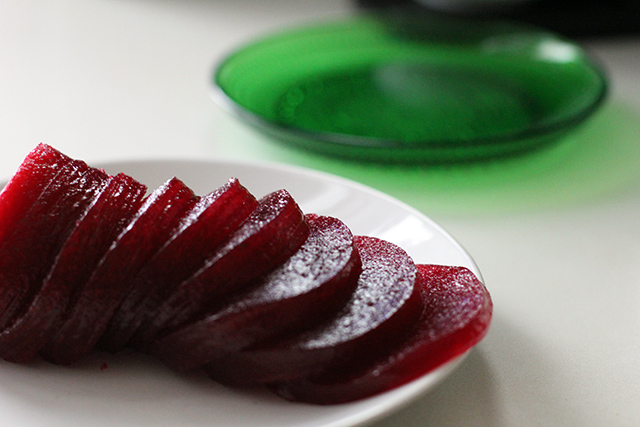
DIY Jellied Cranberry Sauce: Sliced

For my recipe, I decided to use fruit juice and honey as my sweeteners. Though research had told me that using white sugar would require no additional pectin to get a good set, by using honey, I also needed to add this step. This finished jelly does differ from the commercial version in that you can definitely detect that honey was used. I like this–the sauce isn’t muddled with extra spices or exotic flavorings, but it is just a little more complex. White sugar would likely get you closer to the commercial taste, however, if that’s what you’re going for.
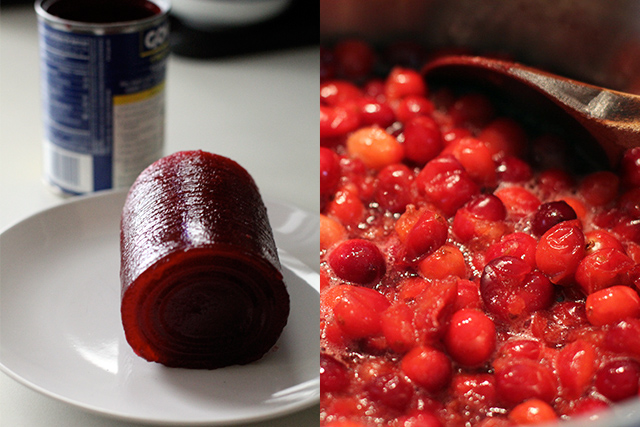
Jellied Cranberry Sauce: Commercial Variety

Jellied Cranberry Sauce: Commercial variety-check that gel!

Since I had already purchased a can of jellied cranberry sauce for comparison’s sake–for a $1, mind you, so add that into your considerations–I also had the bright idea that I would use the can as my mold, thereby silencing any readers or relatives who just could not deal with a cranberry sauce unmarked by rings along the edge. I thought I was being incredibly clever until I found out a couple of minutes ago that Marisa over at Food in Jars totally did that last year. BPA-free to boot.

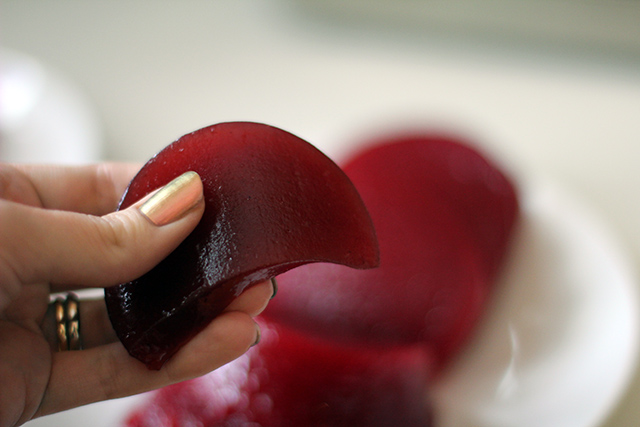
What I discovered about my DIY cranberry sauce, however, is that while it is firm enough to be sliced and handled, it doesn’t come close to the commercial jelly in the can. Truly, that product has an almost terrifyingly firm yet not chewy in the mouth consistency. I’m not sure how they manage it! I did get my jelly out of the can without incident, but as a frazzled holiday host, make sure to take a deep breath and steady your hands before you cut and plate your sauce in those perfect circular slices–otherwise it could quickly turn into a fool’s game laced with profanities.

DIY Jellied Cranberry Sauce: Process

DIY Jellied Cranberry Sauce (Ridges Optional)

12 ounces whole cranberries, washed and picked over, mushy berries removed
3/4 cup water or juice (I used a tart grape juice I had on hand to good effect. I suspect apple or orange would be nice compliments as well.)
3/4 cup honey
Pectin–I used Pomona’s (2 teaspoons calcium water and 2 teaspoons pectin powder)

Put the juice in a heavy-bottomed soup pot and bring to a boil. Add berries and cook, stirring occasionally, just until most of the berries have popped and begun to soften (about five minutes). Remove from heat.

Using a food mill (recommended) or a sieve and the back of a ladle, mash the softened fruit through the strainer leaving the peels behind. Discard the peels and return the strained fruit to a clean pot. Add the calcium water to the fruit.

Stir the pectin powder into the measured honey, mixing well to evenly combine, then add this mixure to the fruit in the pot. Bring to a boil and cook, stirring constantly, for one minute.

Pour the sauce into the mold of your choice and allow to cool undisturbed until set. Turn out onto the serving dish of your choice just before serving.